What Steve Eats

  • Recipe Index
  • Spring
  • Drinks
  • Vegetarian
  • Work With Me
  • About
menu icon
go to homepage
  • Recipe Index
  • Spring
  • Drinks
  • Vegetarian
  • Work With Me
  • About
subscribe
search icon
Homepage link
  • Recipe Index
  • Spring
  • Drinks
  • Vegetarian
  • Work With Me
  • About
×
Home

Baked Scotch Eggs (Gluten Free and Keto)

a plate with sliced scotch eggs

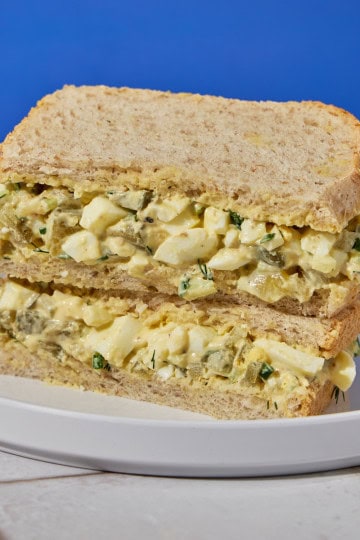
These gluten free Scotch eggs consist of hard-boiled eggs wrapped in sausage and coated in a crispy breading. This recipe bakes the eggs instead of frying them, and the breading is both gluten-free and keto-friendly, offering a twist on the English classic.

plate of scotch eggs sliced in half

Scotch eggs are hard or soft-boiled eggs that are wrapped in sausage meat, rolled in breadcrumbs, and either baked or fried. The outside is crisp and crunchy, while the inside is soft and savory.

Despite the name, the Scotch egg is a popular English dish, not Scottish. You can find them everywhere in England, from pubs to convenience stores to upscale markets.

Why are they called Scotch, then? That's unclear. The actual origins are debatable. Possible sources include a Yorkshire eatery, Indian and African dishes, and a high-end London department store. At least everyone seems to agree that the Scotch egg is not Scottish, so at least there's that.

[feast_advanced_jump_to]

😋What makes this recipe so good?

They can be enjoyed with a tangy, slightly spicy sauce made from mayo, chopped pickles, and sriracha, and served over salad greens for a balanced meal.

  1. Convenient and portable: Scotch eggs are convenient and versatile, perfect for packed lunches or picnics. They're easy to eat with your hands and taste good either warm or at room temperature.
  2. Baking makes them less greasy: Baking the Scotch eggs makes them less greasy than frying, and using quality ingredients enhances their freshness and flavor. That said, these are by no means healthy food, but enjoyable every once in a while-sure thing.
  3. Versatile and Tasty: They're great for brunch, as an appetizer, or even a dinner. Basically, there's never a bad time for a Scotch egg.

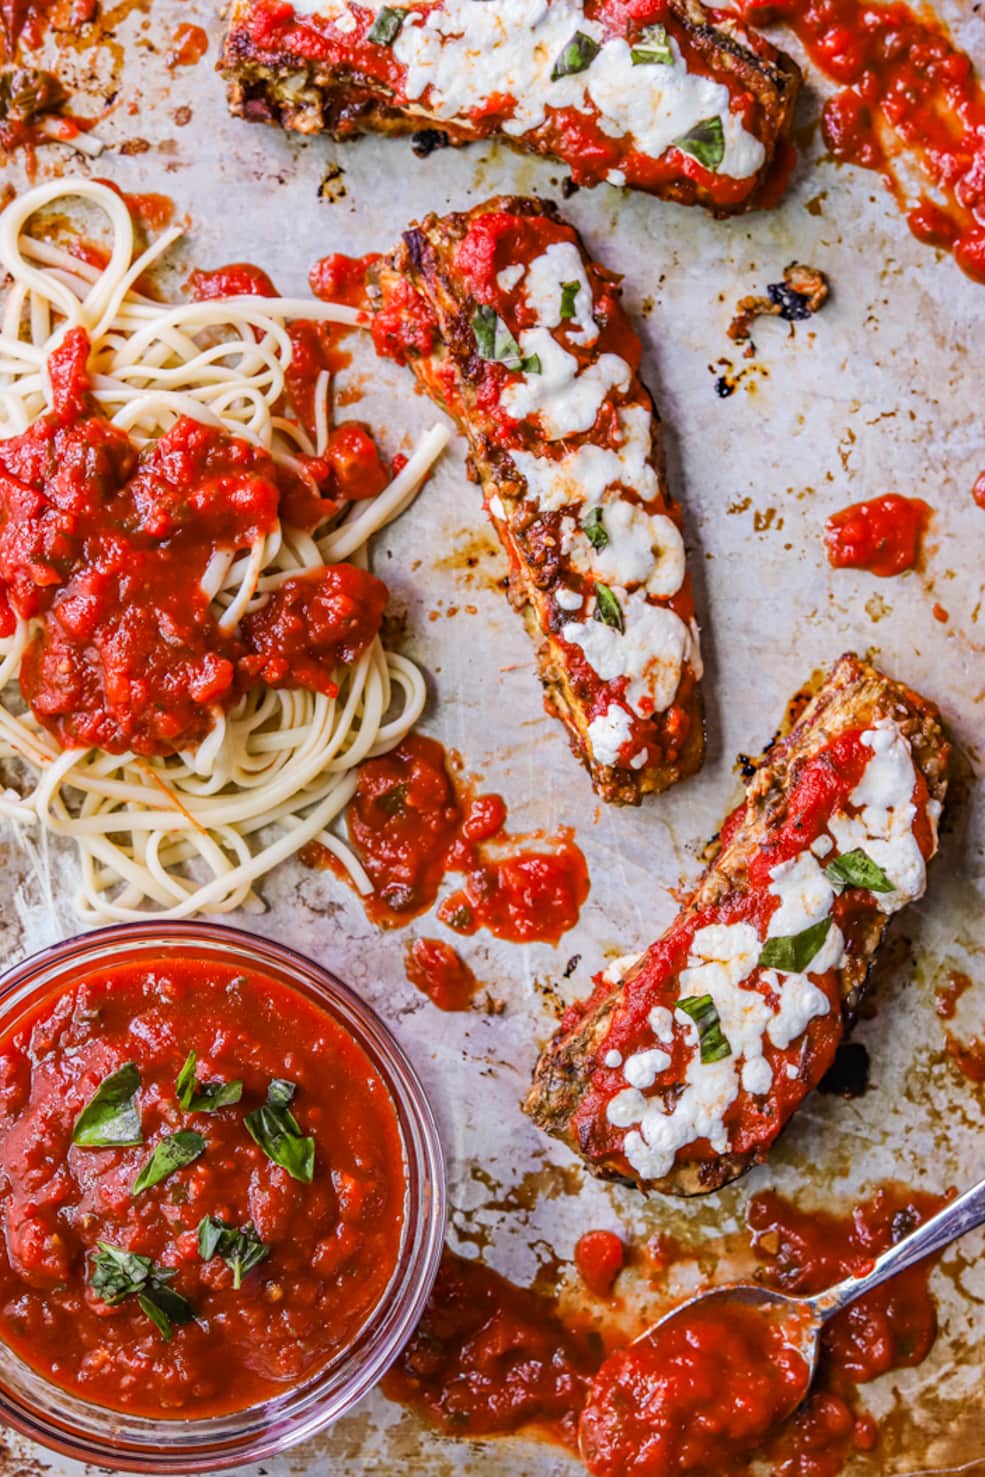
If you like this recipe, you may also like my Grilled Spaghetti Squash with Meat Sauce, Stuffed Yorkshire Pudding, and Gloucestershire Pie.
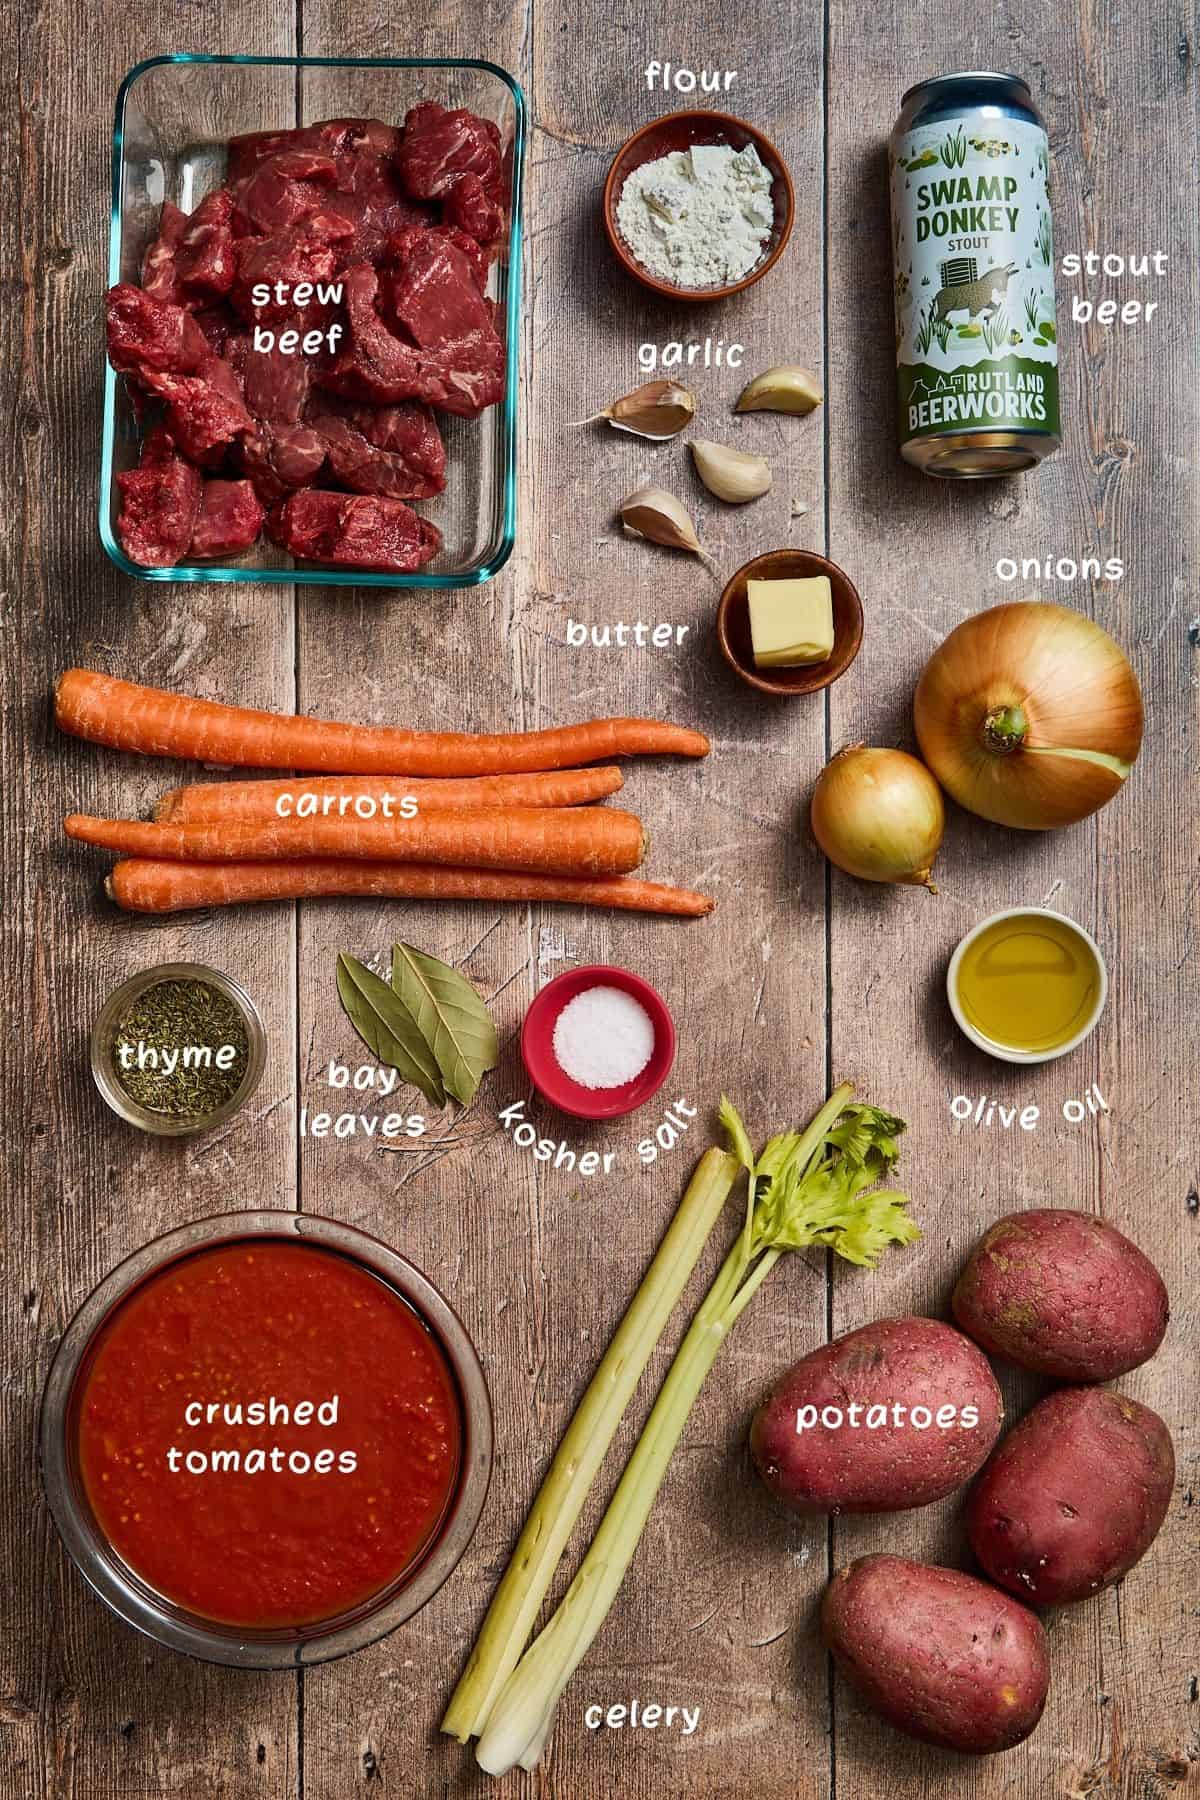
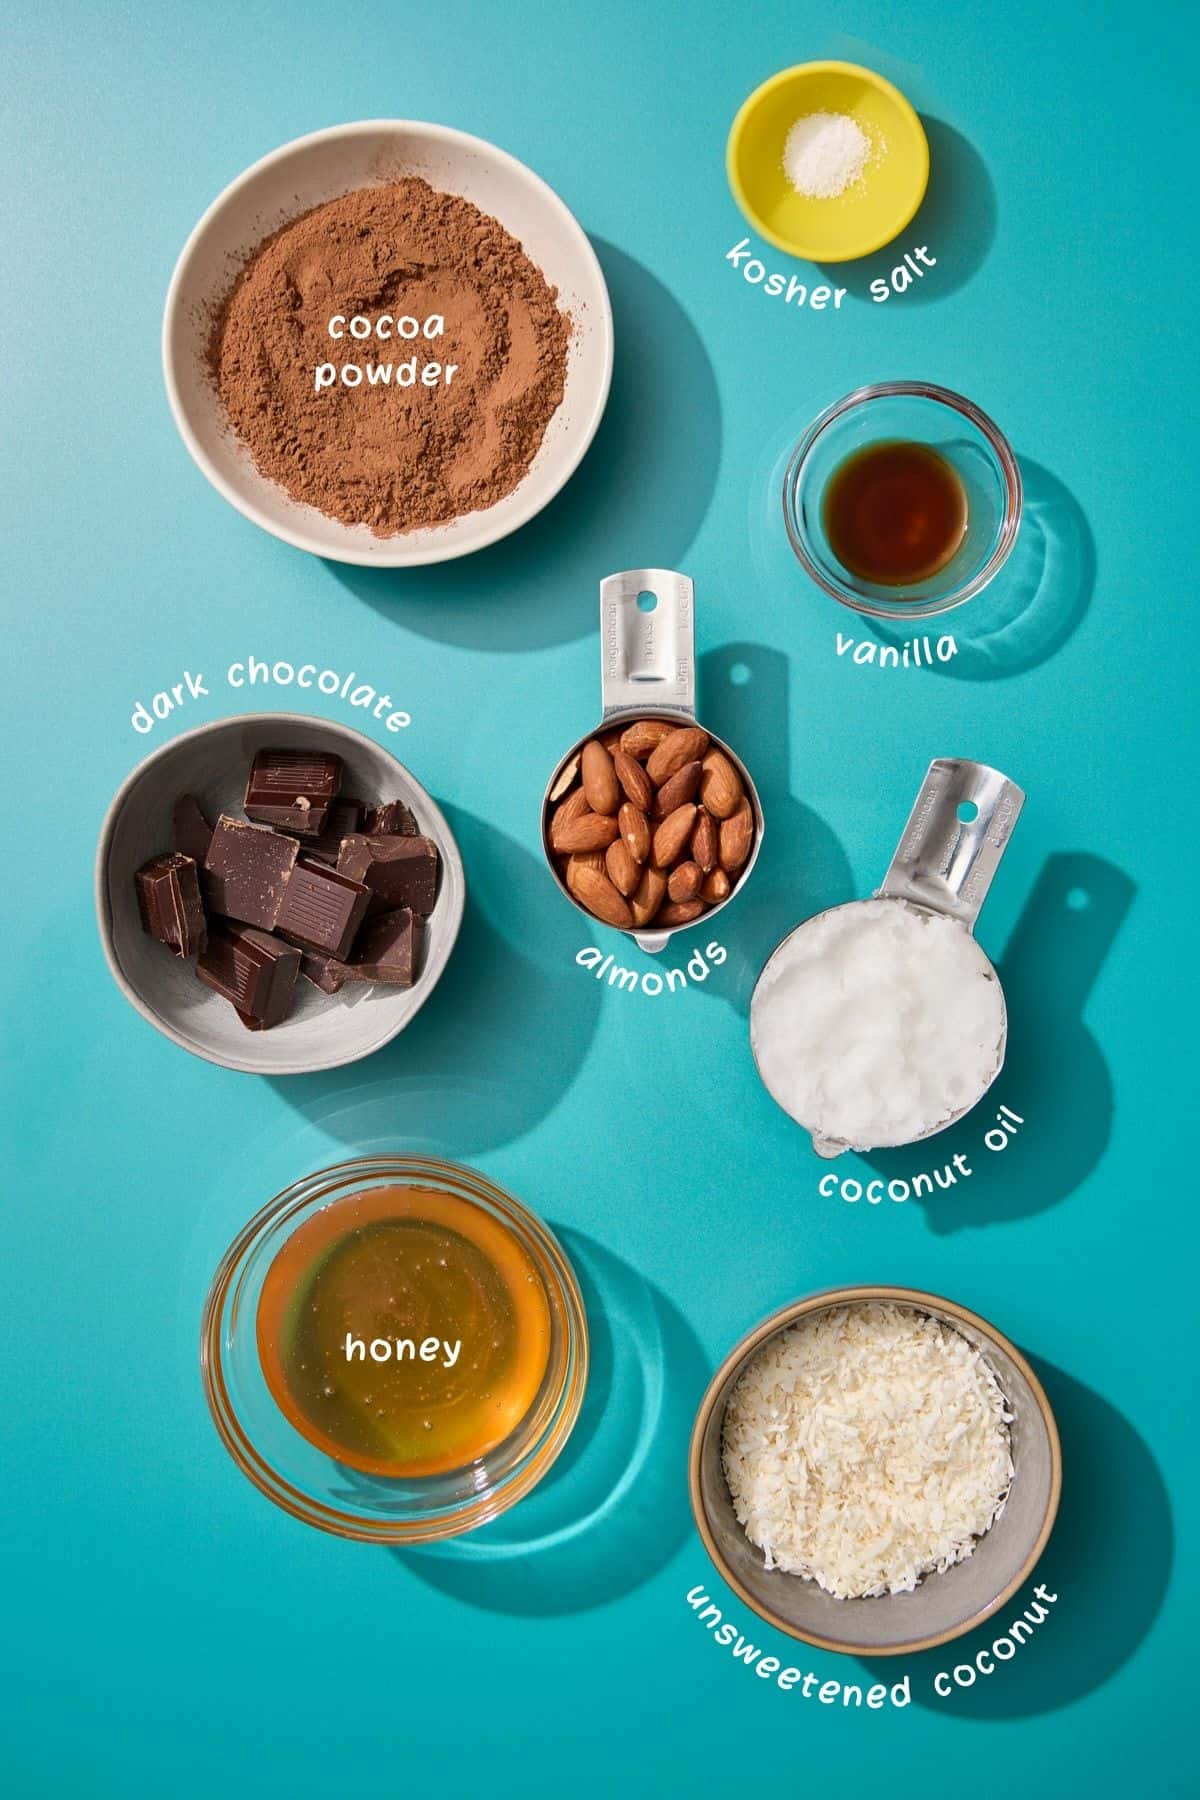
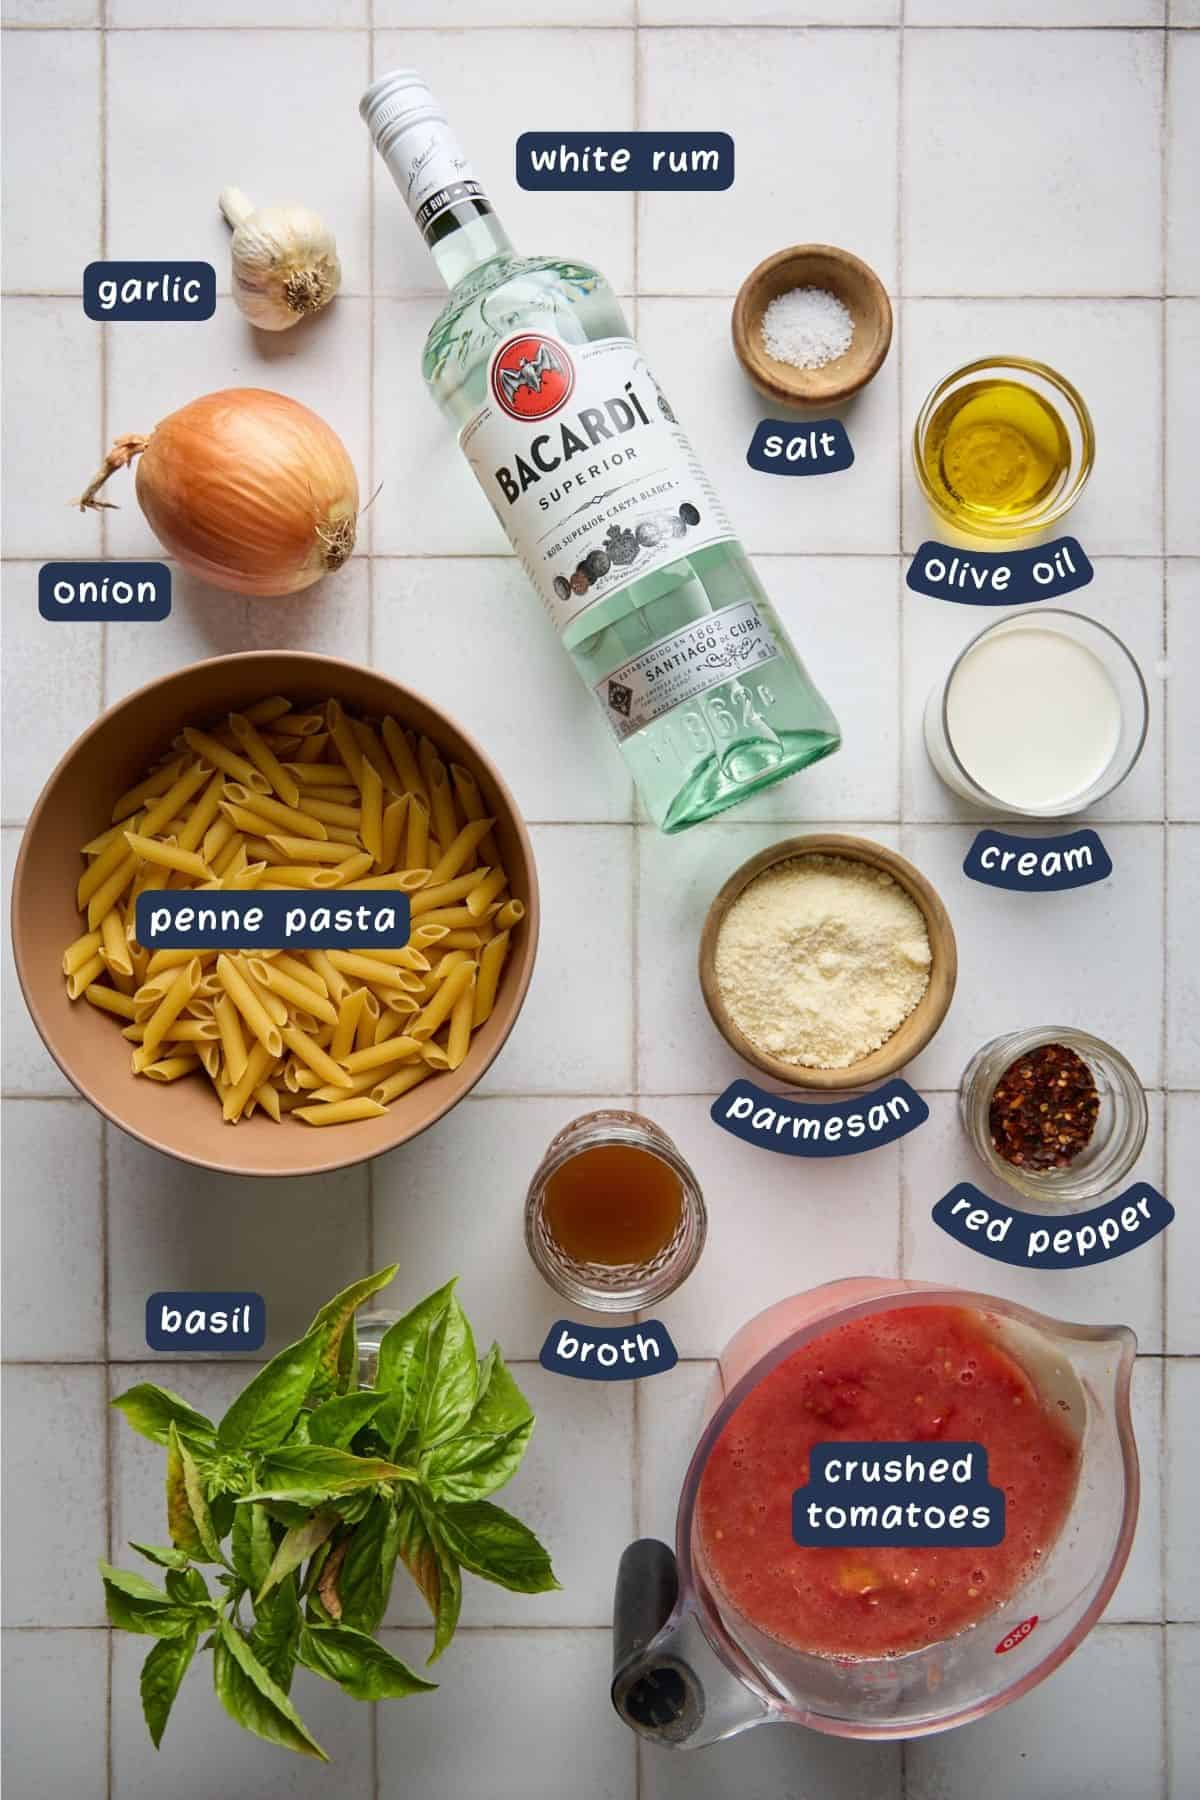
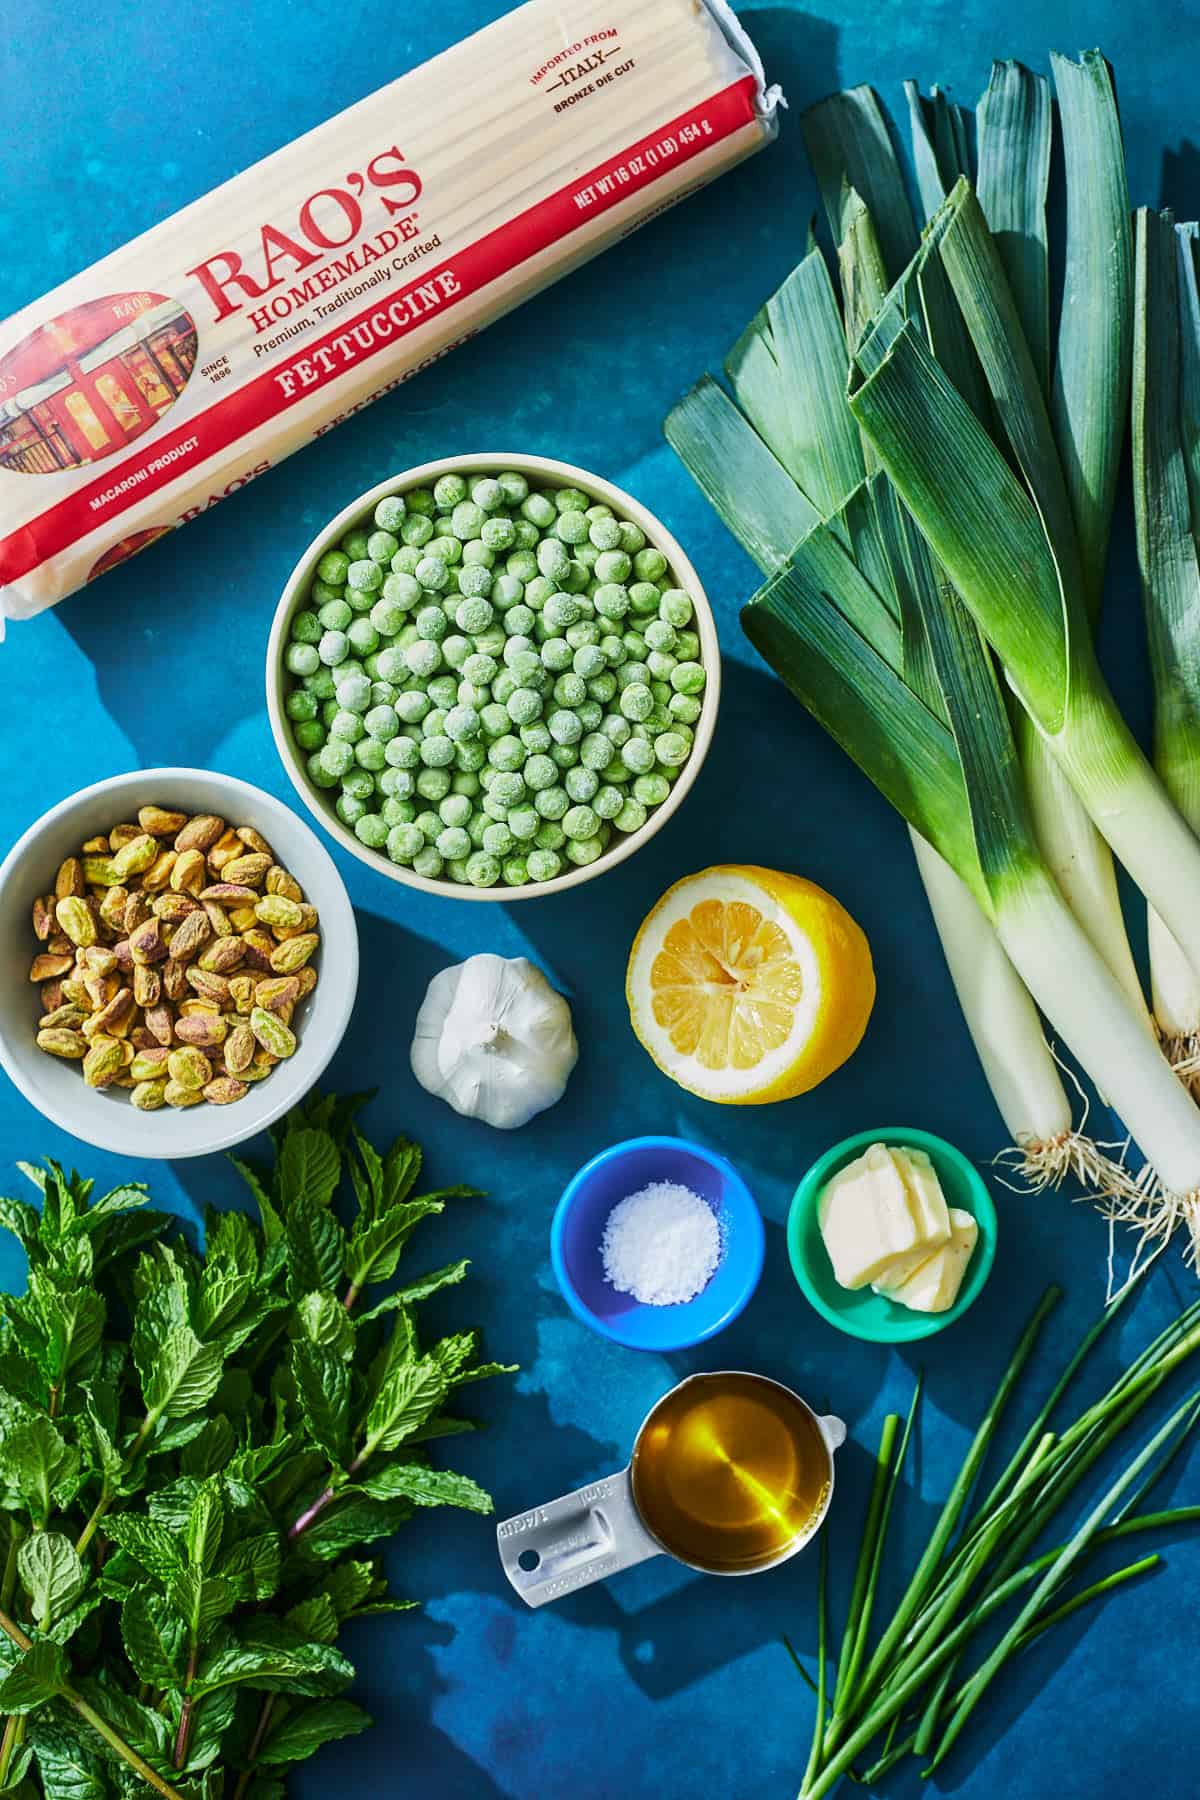
🥚Ingredients

Here's everything you'll need to make these baked, gluten-free Scotch eggs.

ingredients for making the gluten free scotch eggs

Key Ingredients

  • Ground sausage - Any ground sausage you prefer will work for this recipe. I like to use sweet Italian turkey sausage from Stonewood Farm, which is local to me in Vermont. Pork sausage is the most common and traditional sausage, however.
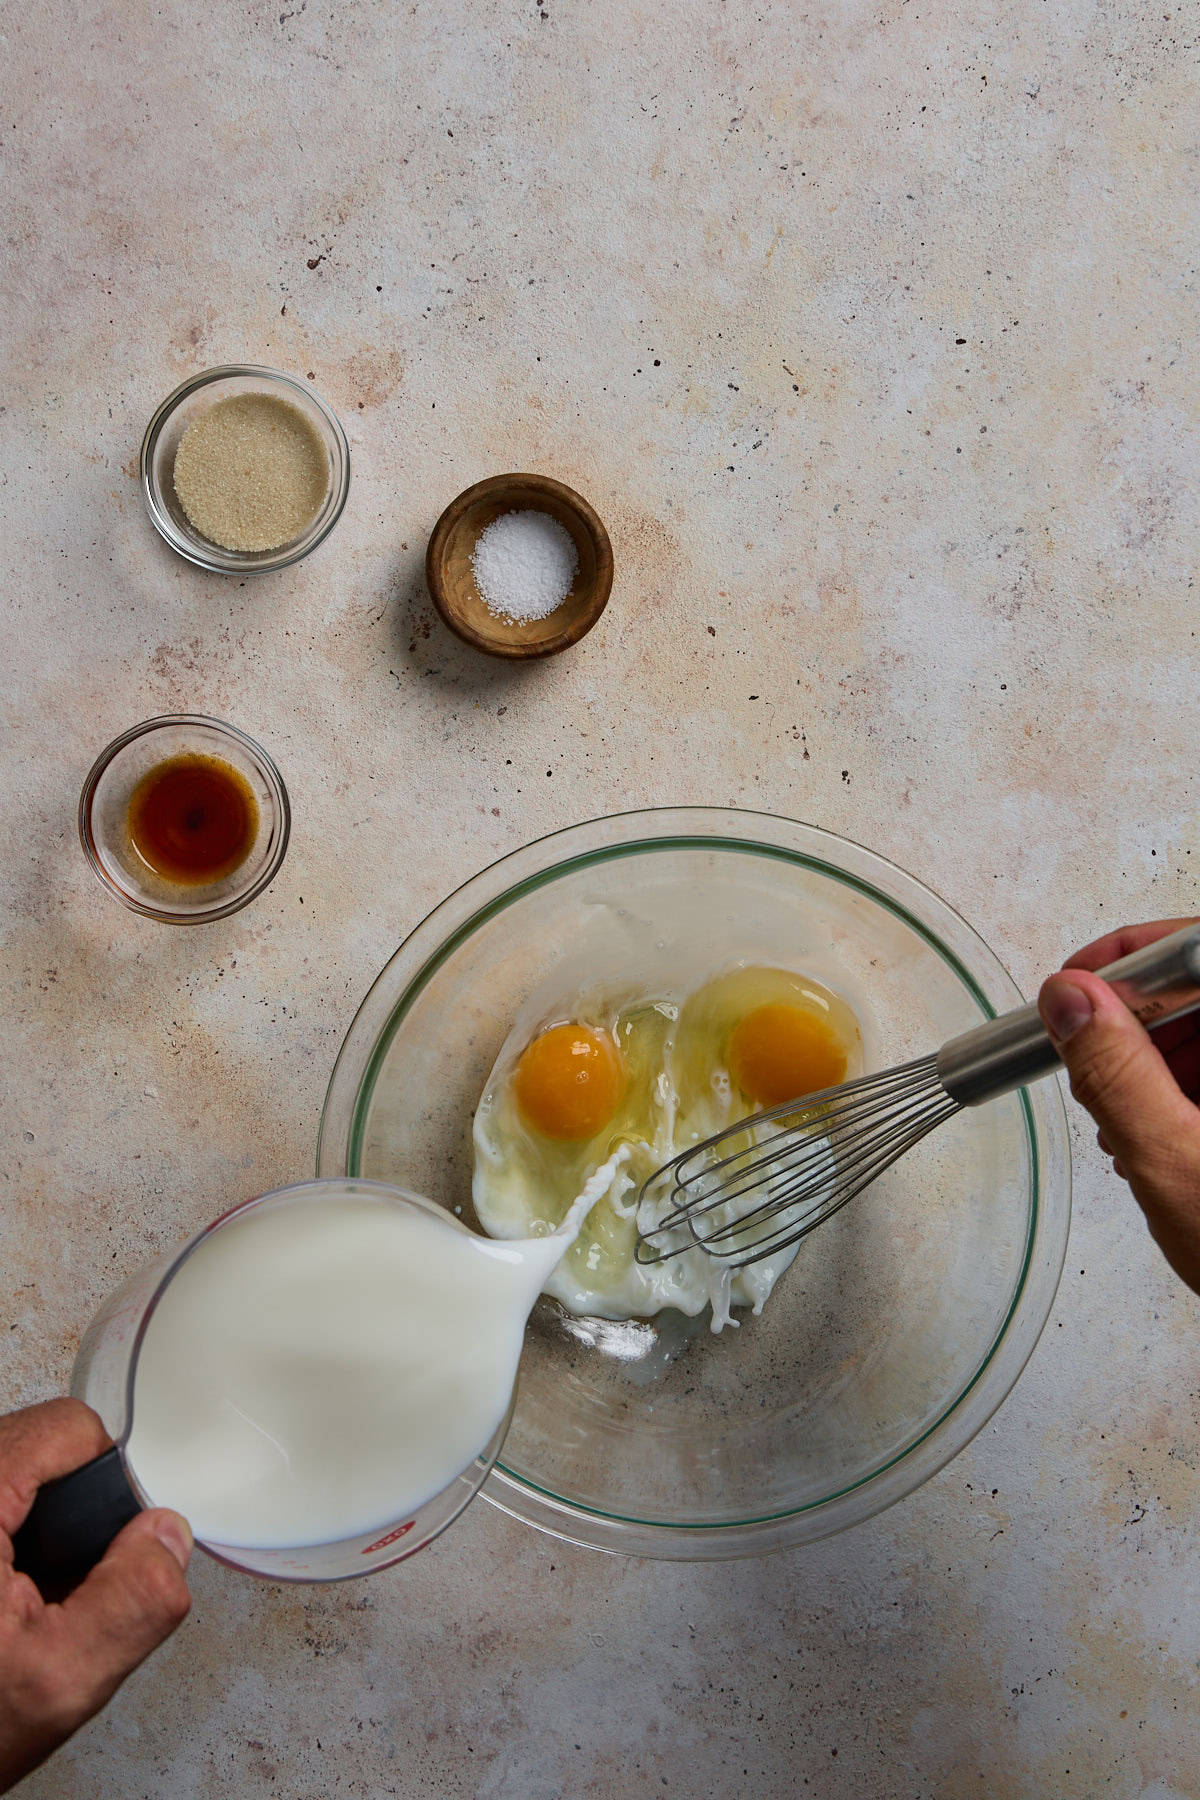
  • Eggs - You can't have Scotch eggs without the eggs. I always buy large eggs from local farms. Smaller or larger eggs are fine, too, but you'll want to adjust how long you steam them depending on the size.
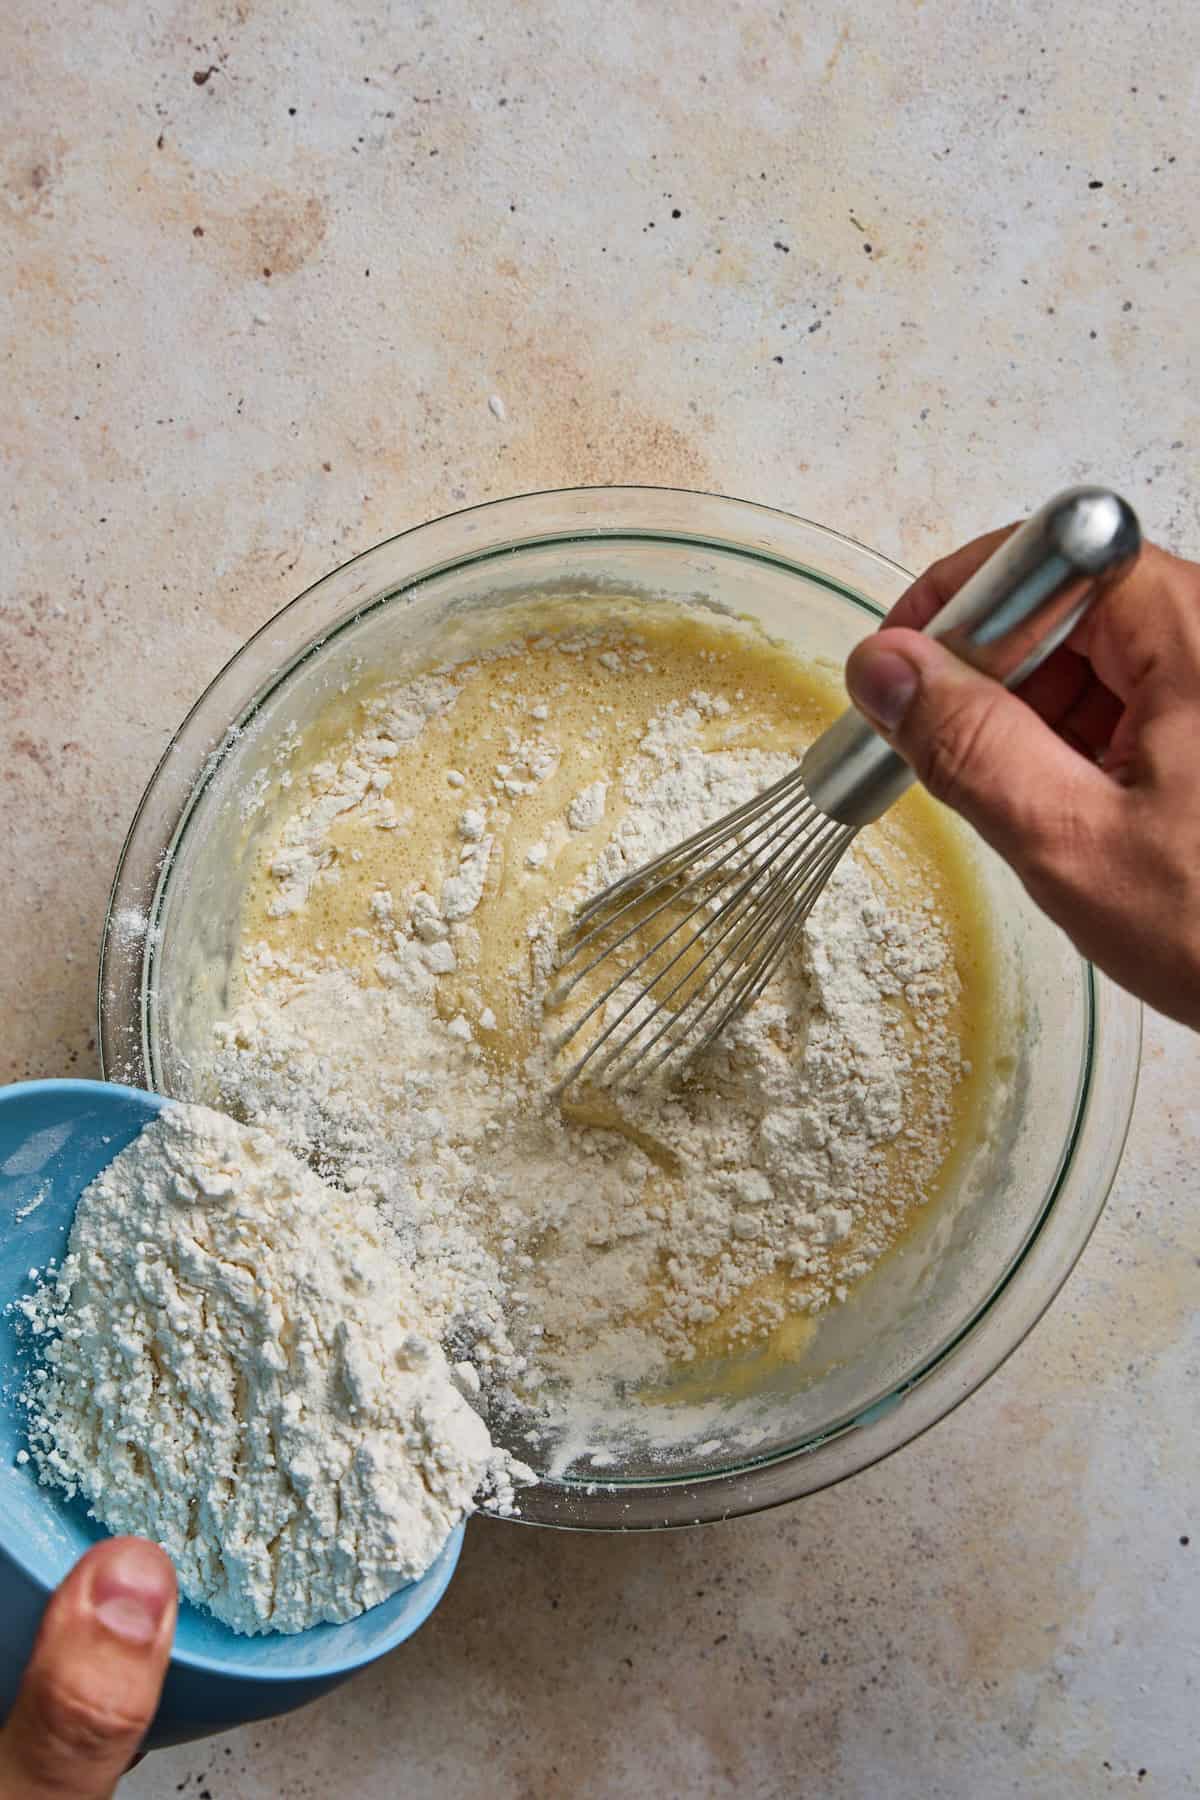
  • Almond flour/almond meal - We're using almond flour as the main breading ingredient to keep this recipe gluten-free and keto. You can use either almond flour or almond meal. As Bob's Red Mill explains, there isn't too much of a difference.
  • Parmesan cheese - (Not pictured, sorry) Adds flavor and texture to the breading.
  • Sesame seeds - For added crunch to the sausage coating.
  • Mayo - To make a dipping sauce for the Scotch eggs.

See the recipe card below for the full list of ingredients and quantities.

🌶️Substitutions & Variations

  • Cook the eggs how you prefer - If you already have a tried and true method for hard-boiled eggs, then you should feel free to use that and skip the steps for steaming the eggs. It's simply the method that works well for me and makes the eggs easier to peel, but it's certainly not the only one.
  • A Non-gluten-free and keto version - If you're not following a specialized diet, and don't want to buy almond flour just for this recipe, replace it with all-purpose flour.
  • Alternate seasonings - I like to use garlic powder, dried thyme, and dried chives to add an earthy flavor to the sausage. But you can change these seasonings or use a sausage with extra flavoring. Try making it spicy with some cayenne or smoky with smoked paprika or ground chipotle.
  • Change up the sauce - The dipping sauce here is simple and quick to assemble. But you can change this and make other kinds of sauces or use a favorite prepared condiment. Something with acidity will cut the richness of the meat and eggs.
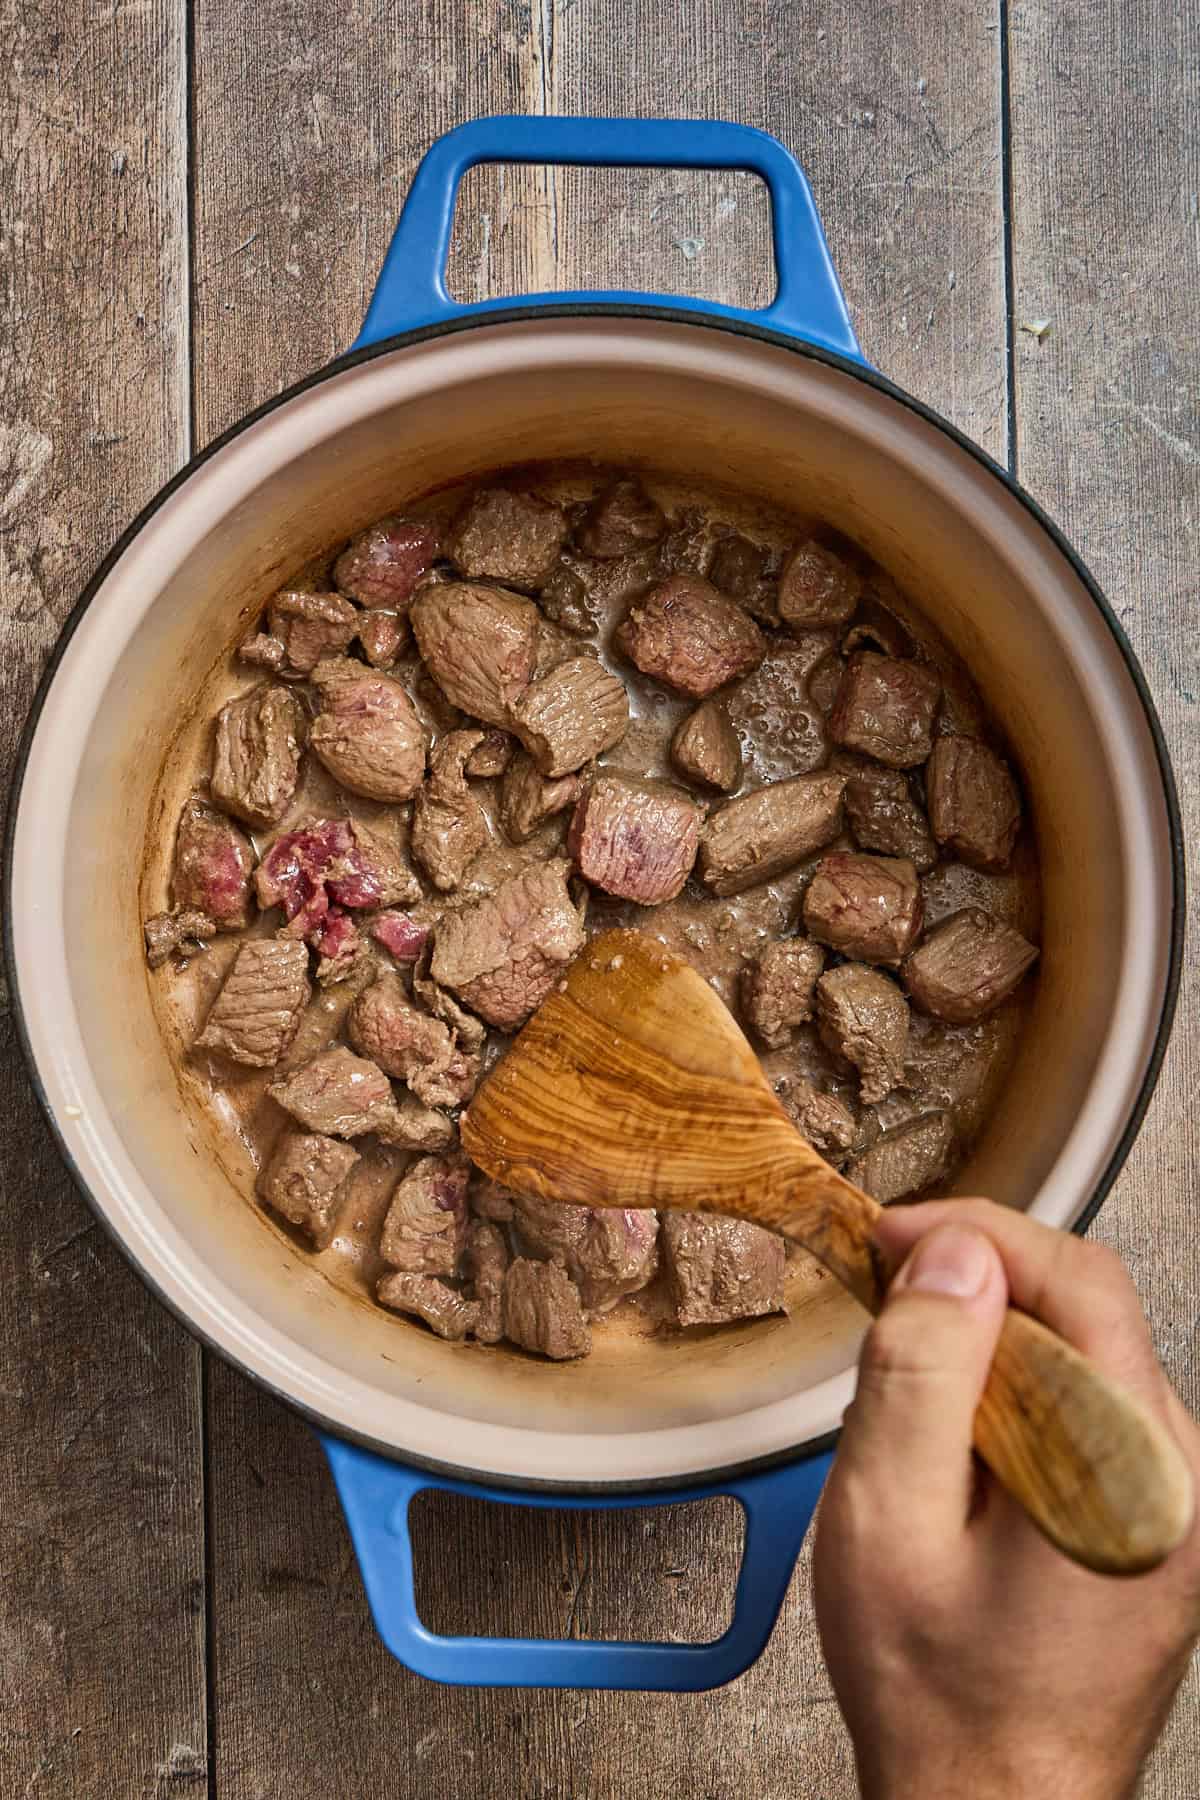
♨️Instructions

Here's how to make these Scotch eggs.

whole eggs in a pan with a steaming basket
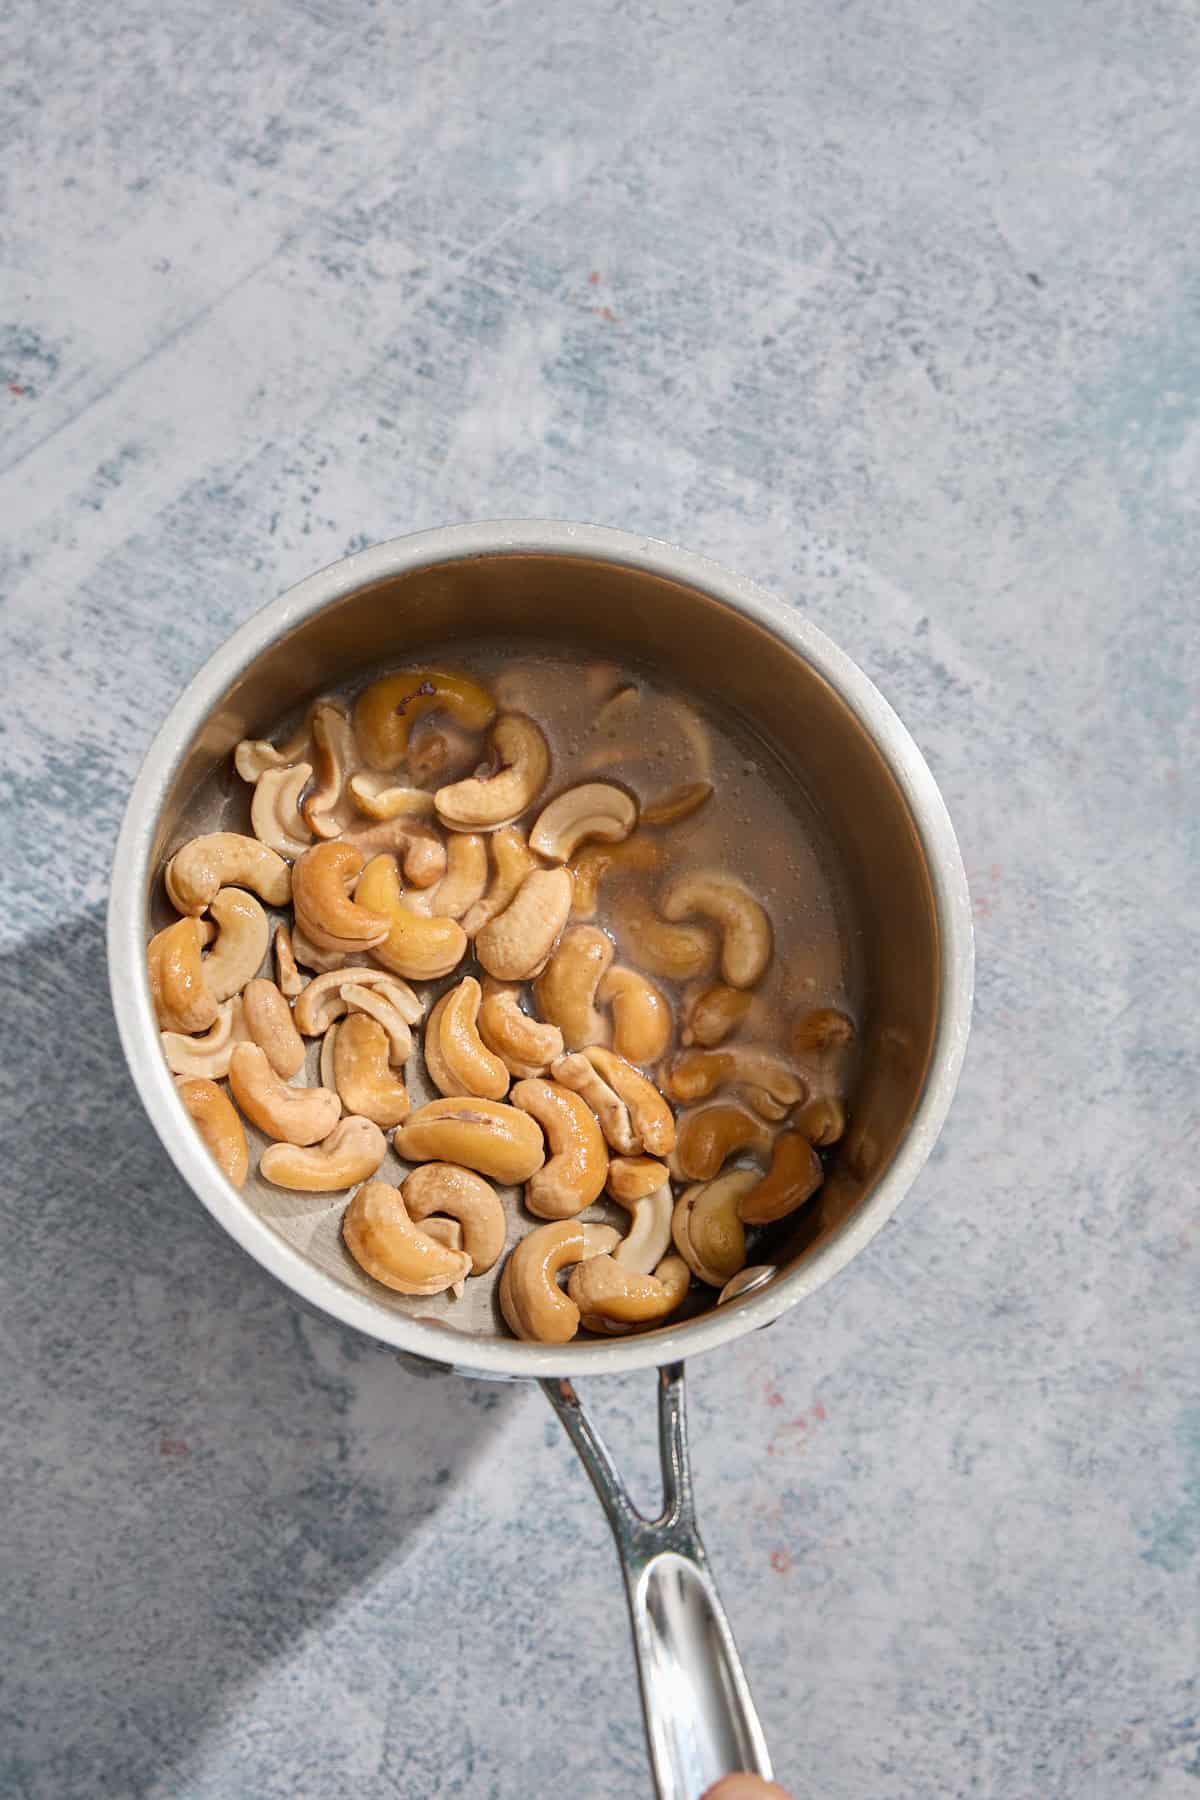
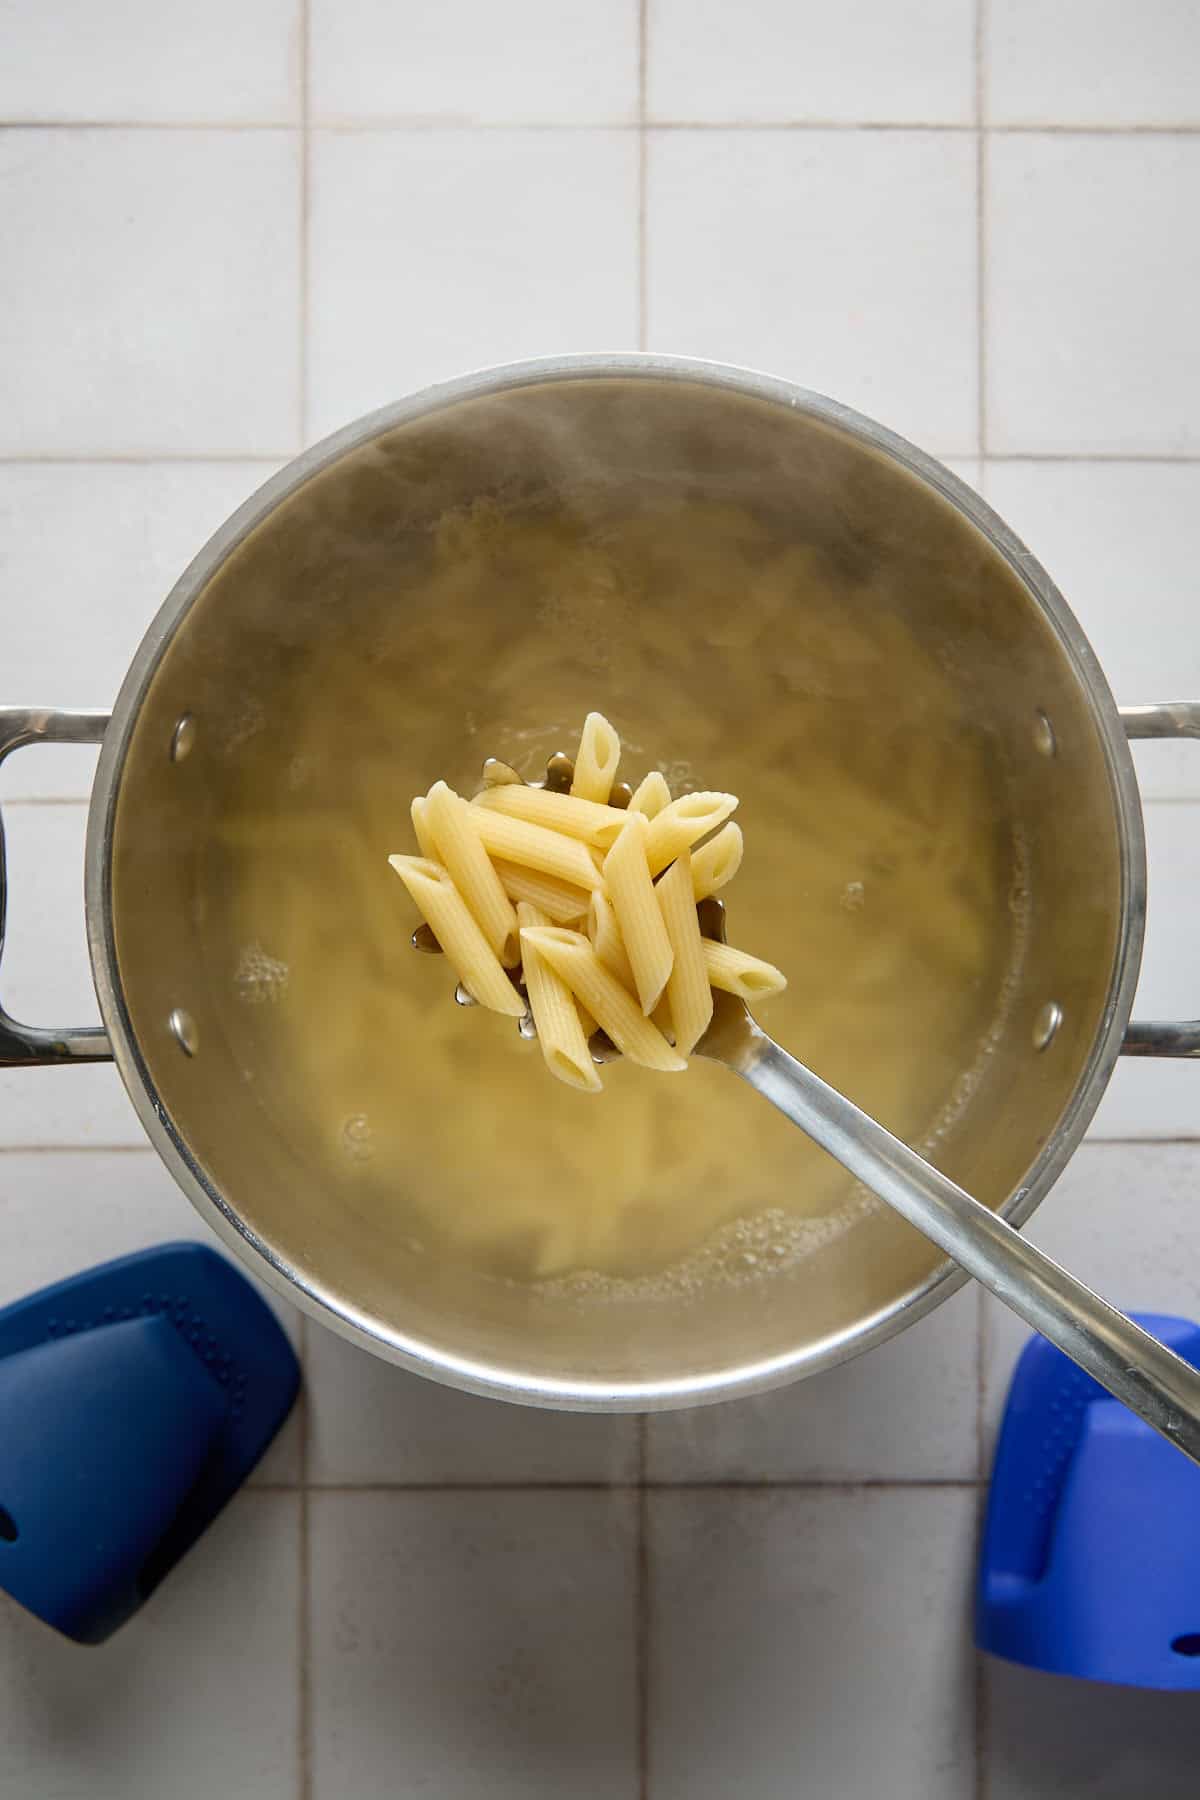
  1. Step 1: Place water in the bottom of a small pan. Add a steaming basket and four eggs. Bring the water to a simmer, cover, and steam for 10-12 minutes. Remove and cool in a bowl of iced water.
bowl with meat and smaller bowls with the seasonings
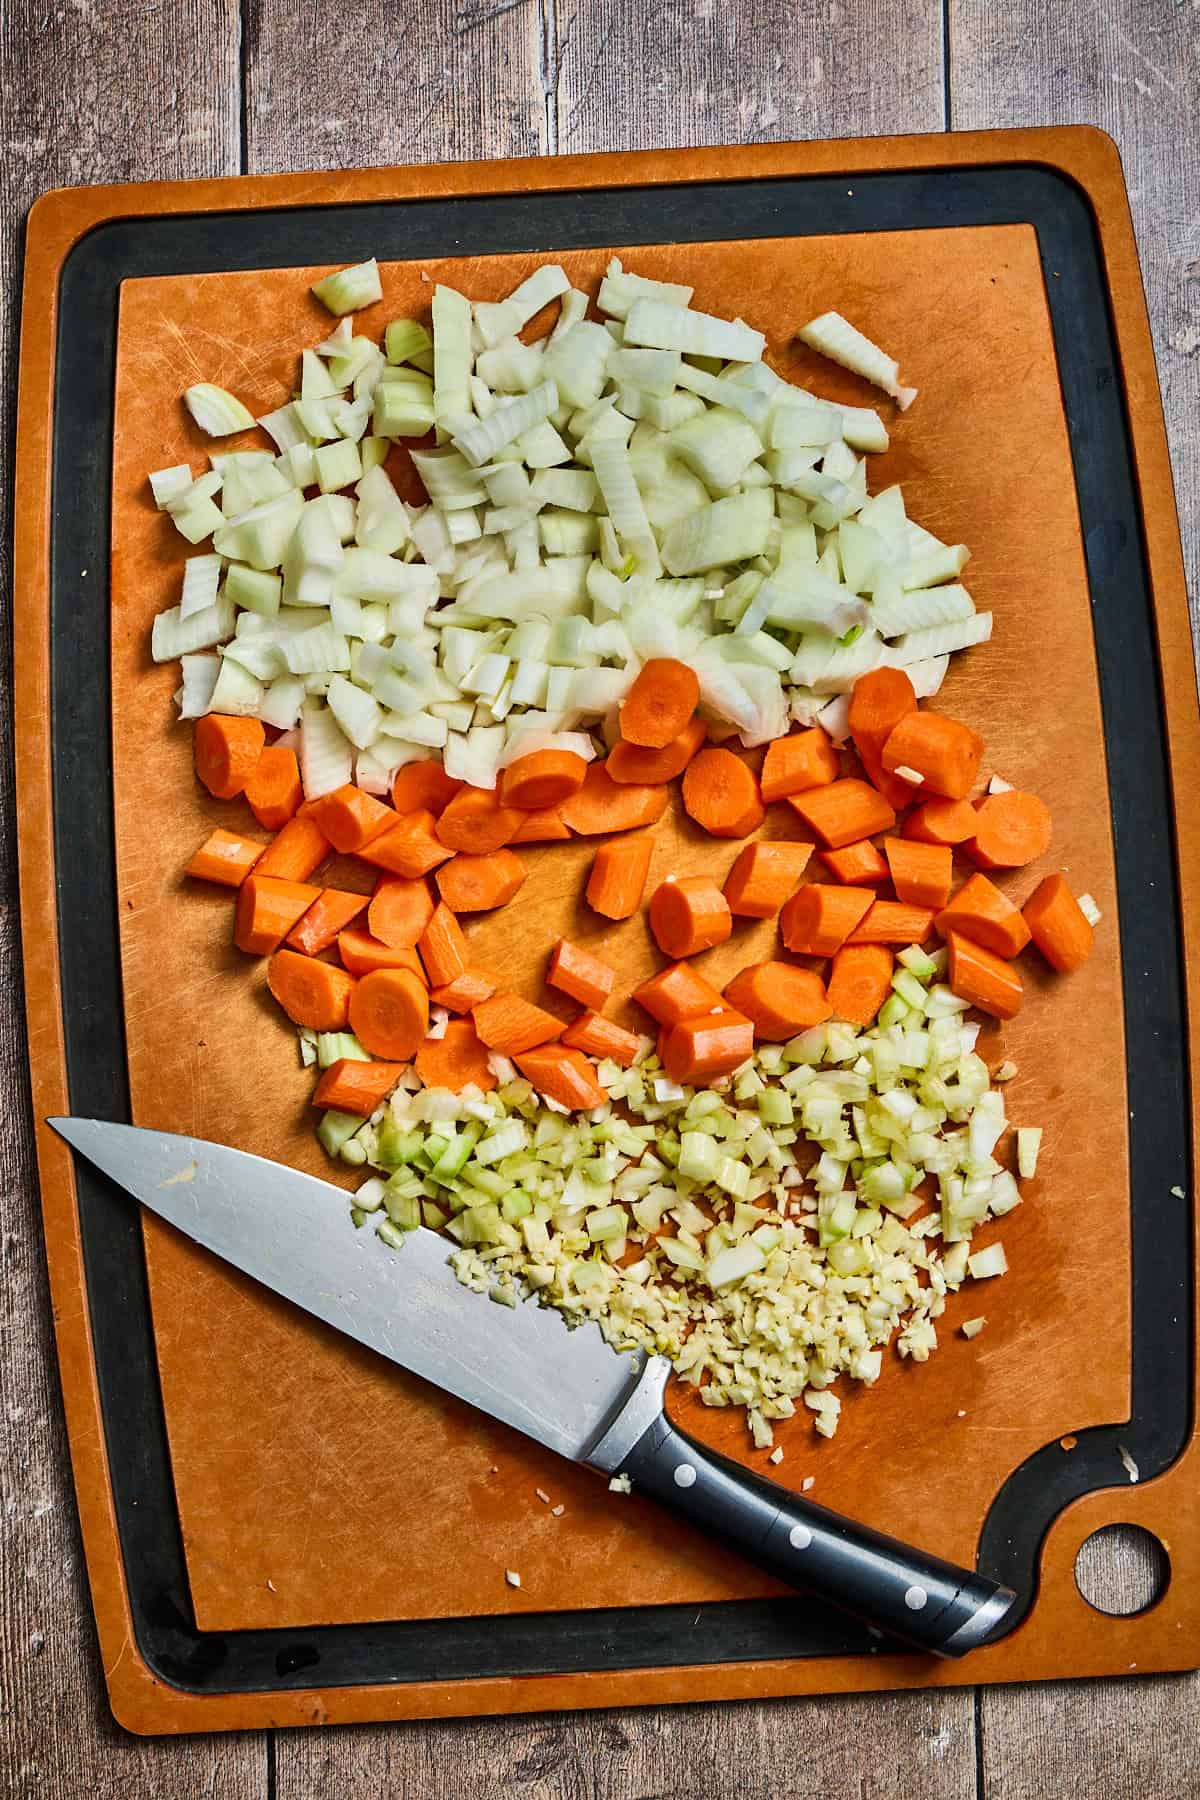
  1. Step 2: Combine the ground sausage meat with the spices and mustard.
four sausage patties on a baking sheet
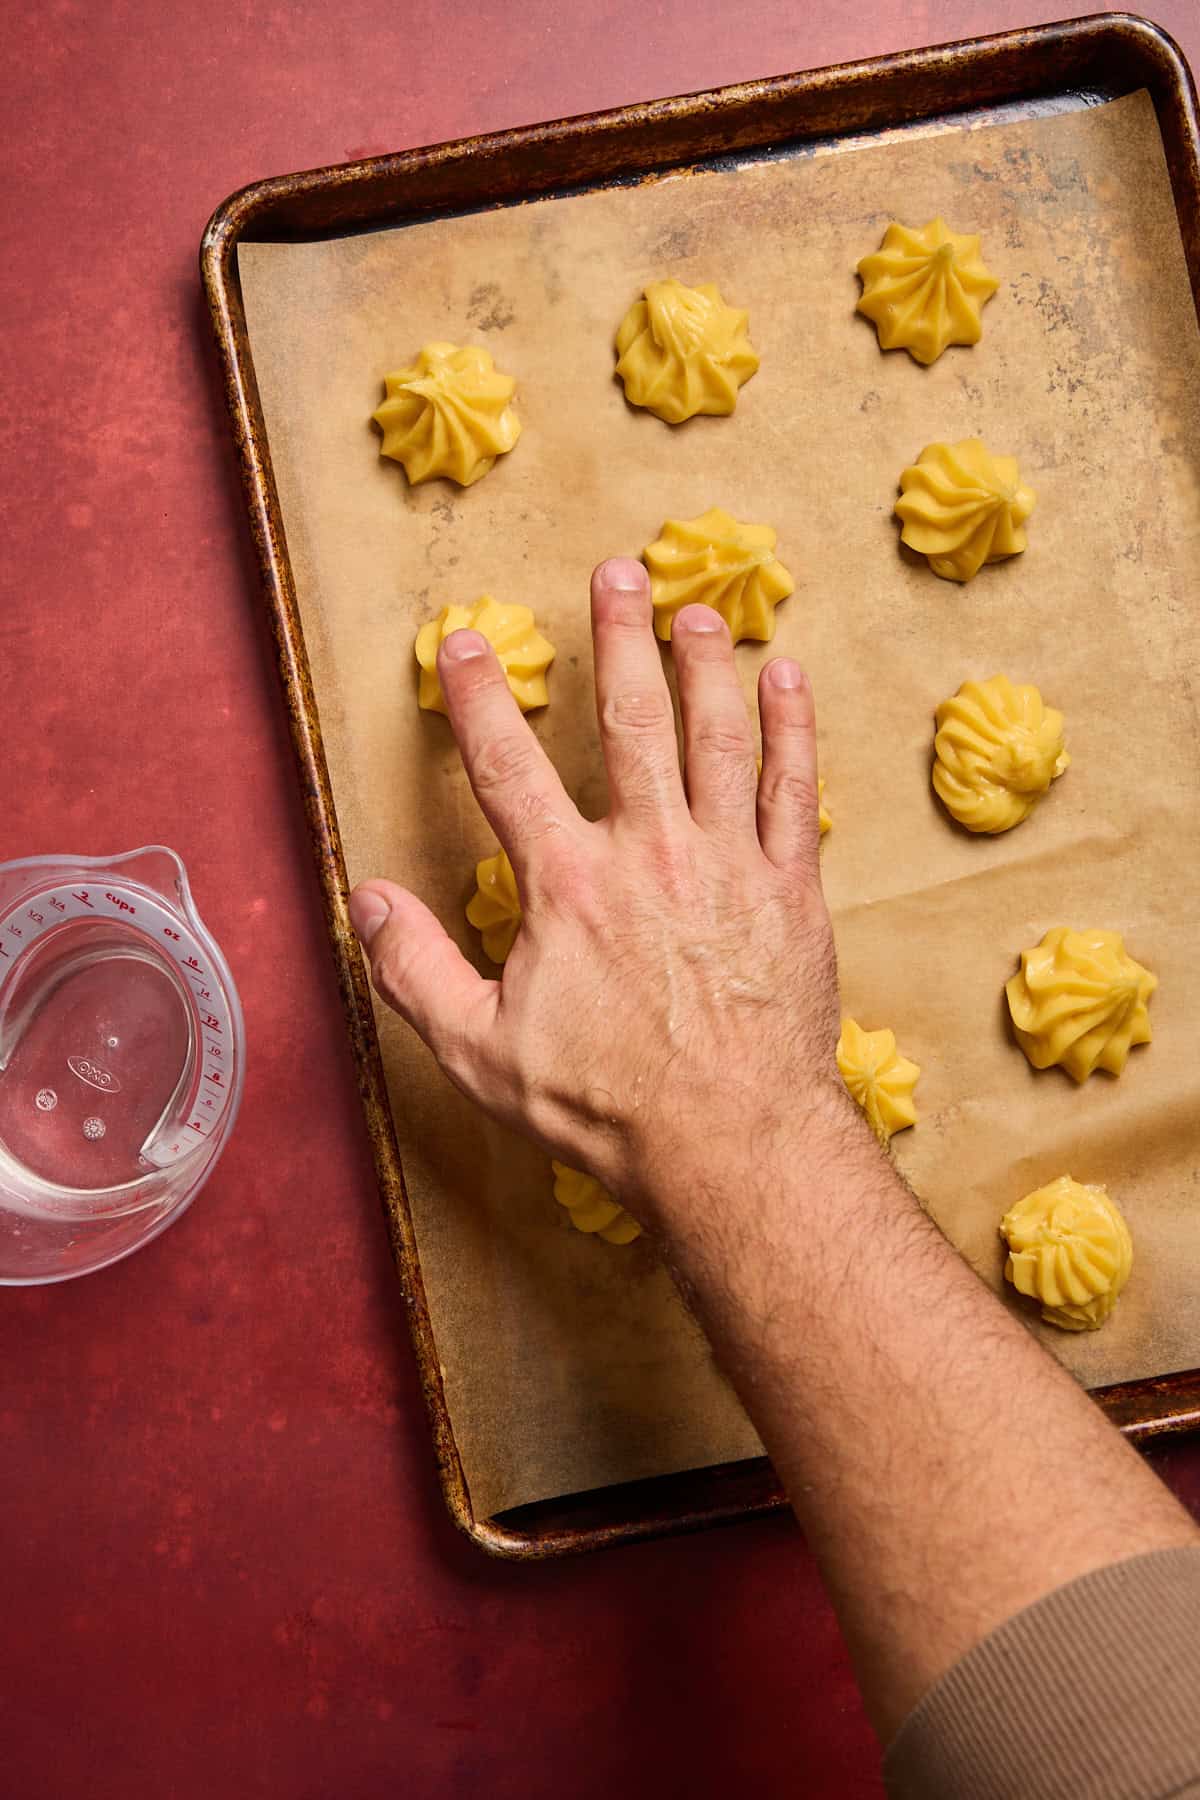
  1. Step 3: Divide the meat into four equal pieces and press into patties and preheat the oven to 400 degrees F.
three plates with ingredients for breading the scotch eggs
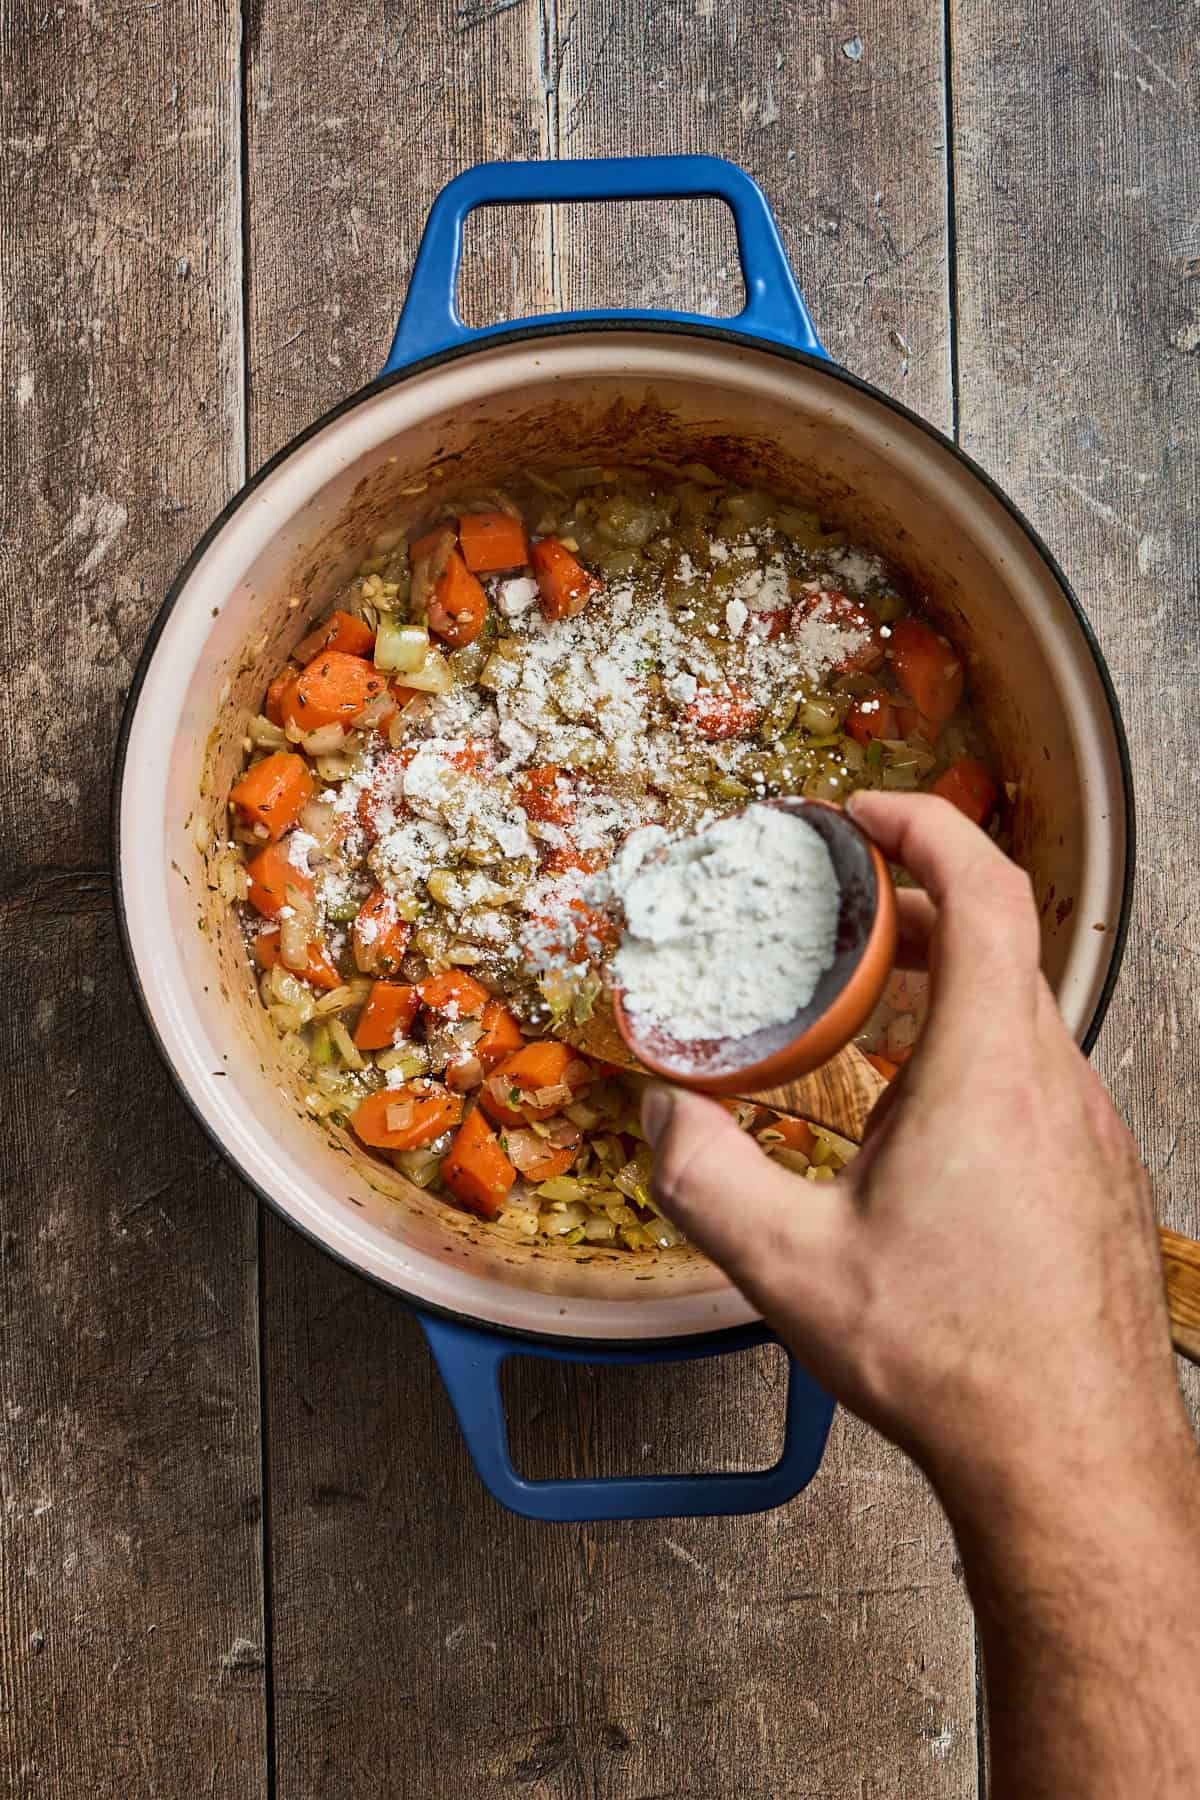
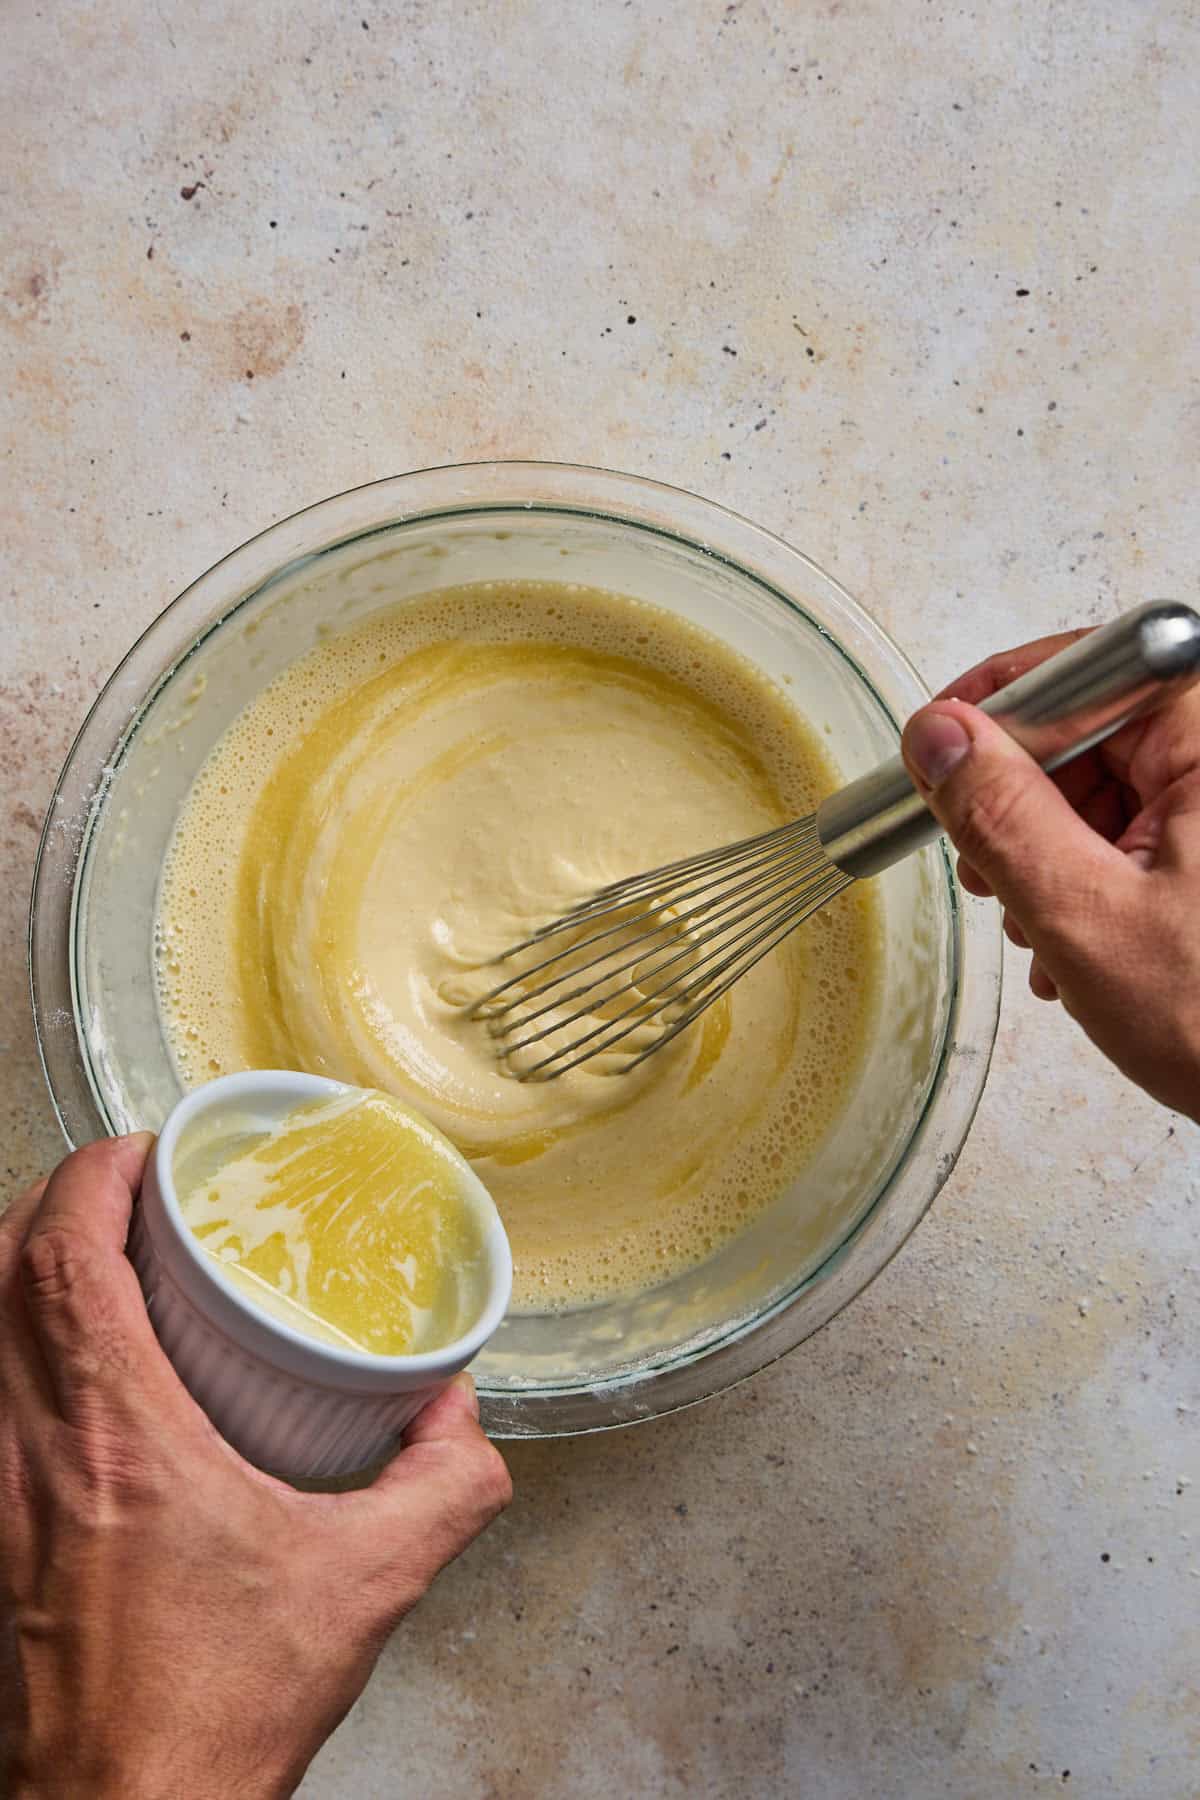
  1. Step 4: Set up three plates. In the first, add the remaining egg beaten with some water. In the second, add ¼ cup almond flour. In the third, combine Parmesan cheese, remaining almond flour, and the sesame seeds.
hard boiled eggs in a bowl with peels
  1. Step 5: Peel the cooked eggs.
wrapping meat around a hard boiled egg
  1. Step 6: Dip each egg in the plain almond flour, then wrap each in one of the meat patties. Press the meat around the egg to fully wrap around.
coating the sausage and eggs in the breading
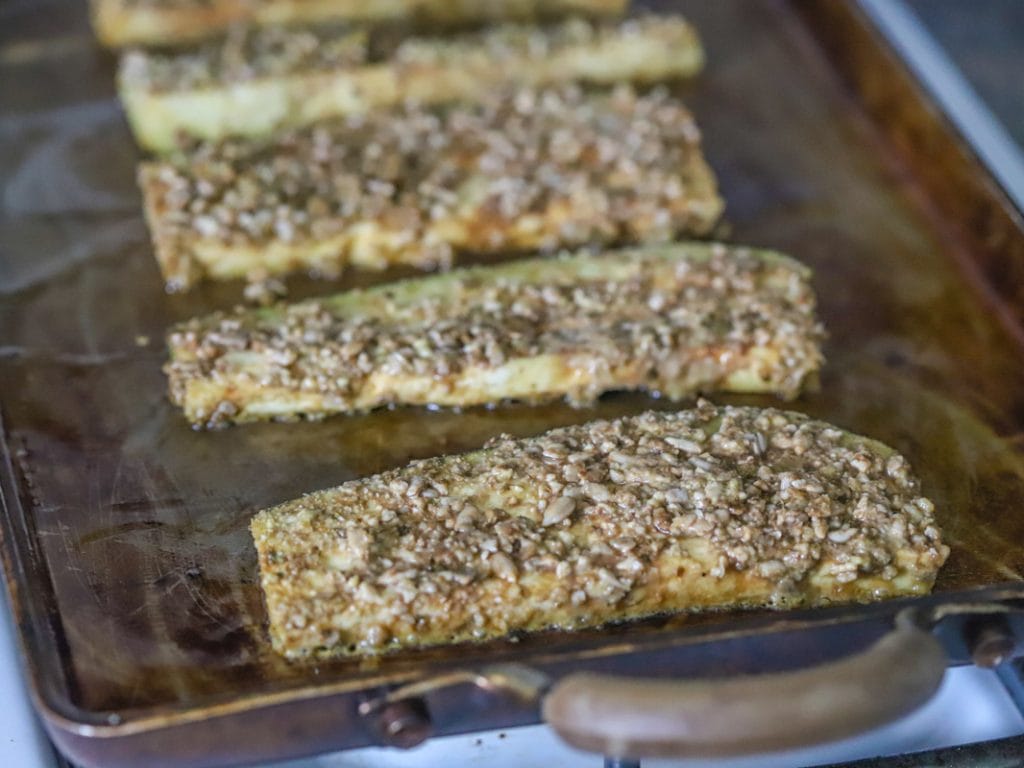
  1. Step 7: Dip each in the egg mixture and then the breading mix. Place on a baking rack set on a baking sheet and bake at 400 degrees F for about 20-25 minutes, or until the sausage is cooked through.
stirring the dipping sauce for the scotch eggs
  1. Step 8: While the Scotch eggs bake, make the dipping sauce. Combine the mayo with the chopped pickles and sriracha. Taste and add more sriracha or pickles to your liking. Serve the Scotch eggs with the sauce.

📋Top Tips

A lot of tips here. Take what's useful to you.

  1. Don't overcook the eggs. In the recipe, I mention how I steam my eggs to get reliable, easier-to-peel, hard-boiled (hard-steamed?) eggs. Because the eggs are also going in a hot oven, you may want to cook them a little less than you prefer.
  2. Consider cooking an extra egg. Sometimes, a hard-boiled egg can take some beating during peeling, so I like to cook an extra egg just in case. I'll save it for breakfast another day if it's not needed. It's easier to cook an extra egg upfront instead of cooking more later.
  3. Let the eggs cool completely before peeling. This is why I always use an ice bath after boiling eggs to cool them down and quickly stop cooking. But it also makes the eggs easier to peel and handle with the sausage.
  4. Coating the eggs in the almond flour before wrapping them in the meat helps the meat stick to the eggs. Don't skip this!
  5. Don't be afraid to press the sausage firmly around the egg using your hands. Rolling it around on your cutting board also works. It may take a little playing around with, but you want the eggs completely covered.

🥡Storage

Cooked Scotch eggs can be stored in the fridge in an airtight container for 3-4 days. However, they are best enjoyed immediately. Reheating will dry them out and likely cause them to lose their crispness.

💭FAQ

Do Scotch eggs have to be fried?

No. Although Scotch eggs are typically deep-fried when served in pubs and restaurants, they may also be baked, as described in this recipe.

Are Scotch eggs English or Scottish?

They're English. The true origin story remains debatable, but Scotch eggs are certainly English and not Scottish.

What to serve with Scotch eggs?

Scotch eggs are often served with dipping sauces, mustard, pickles, and/or a salad. A sauce with a little acidity will help cut the richness of the meat and egg, while some greens or vegetables will contribute freshness and crunch.

Should Scotch eggs be eaten hot or cold?

Either works. It's up to personal preference. They make a good picnic item, so you'd enjoy them cold.

🥗Pairing

These recipes would make a great pairing for serving with these Scotch eggs.

  • a plate of colorful roasted leeks and potatoes
    Roasted Potatoes and Leeks
  • a small plate of glazed carrots with parsley
    Maple Glazed Carrots
  • a plate of crostini topped with butternut squash, sage, and ricotta
    Butternut Squash Crostini Appetizer
  • plate of salad with beets and sweet potatoes
    Sweet Potato and Beet Salad

🥟Related

Looking for other recipes like this? Try these:

  • potato knishes baked on baking sheet
    Potato, Leek, and Broccoli Knishes
  • bowls and a pot of beef hot pot with stout beer
    Beef and Stout Hot Pot
  • a tray of sausage stuffed yorkshire puddings
    Stuffed Yorkshire Pudding
  • a dish of rutabaga pie with spoon and dishes
    Rutabaga Pie

Maple Glazed Carrots

a small plate of glazed carrots with parsley

These glazed carrots make a quick stovetop side dish using Vermont maple syrup and hard cider. Try them with orange juice, white wine, or beer, too!

a plate of glazed carrots

Carrots are one of my favorite vegetables to grow in the garden. That's mostly because they're reliable and easy. I'm just about finished with the first draft of my garden plan for the year, and you can bet there are plenty of carrots involved.

That's right; I make drafts of my garden way before we get out there and start planting. Partly because it keeps me sane in the winter, but it also helps us decide what seeds to start indoors and what starter plants to order ahead. If you're looking to plan out your garden, you should really give the planner on GrowVeg.com a try. Trust me, I've used it for years and love it!

Some carrots take just a couple of months, or less, to grow, while others might take most of the growing season. There are so many kinds of carrots that range in color, size, and taste. It's fun to grow different kinds that you won't find in the grocery store.

Carrots remind me of spring, even though they're not necessarily a spring vegetable. Maybe it's the association with the Easter Bunny? The good thing is that carrots keep well and are available year-round. They happen to pair really well with maple syrup, which is in high production these spring days in Vermont. Together, you have yourself a quick and tasty vegetable side dish.

These glazed carrots would pair nicely with this chicken dish, or this one, or maybe these meatballs. And if you love carrots as much as I do, you'll want to try this carrot cocktail

ingredients

  • carrots, of course
  • butter
  • your favorite hard cider
  • raisins
  • maple syrup
  • fresh parsley
carrots cooking in a pan

steps

Give the carrots a rinse and peel them, if you like. I don't tend to peel my homegrown carrots, especially if they're freshly picked. But that's just me.

Slice the carrots into coins or matchsticks. It doesn't really make a difference. Just keep the pieces on the thin side, so they don't take too long to cook.

Melt the butter in a small pan. Add the carrots, cider, raisins, and some salt to the pan. Bring to a boil, then lower to a simmer. Cover and cook, about 12-15 minutes or until almost tender. Remove the cover, add the maple syrup and cook another minute or two until a nice shiny glaze has formed on the carrots.

Top the carrots with some chopped fresh parsley and serve hot or room temperature.

substitutions

  • Cider - If you're not a fan of hard cider or just don't have any handy, you can also use whiskey, beer, or white wine. If you're not interested in using alcohol, no problem. Try orange or apple juice, broth, or simply water.
  • Parsley - Thyme or rosemary are good alternatives that go well with carrots.

storage

These carrots will keep for three days in the fridge, though they fresher the better.

top tip

Don't overcook the carrots. They're best when they still have a little bite to them.


Beef and Stout Hot Pot

bowls and a pot of beef hot pot with stout beer

This British-style beef hot pot recipe uses dark stout beer to deepen the flavor of the Lancashire-inspired beef hot pot. It's finished off with a layer of sliced potatoes, making it a hearty, comforting winter meal.

bowls and pot of lancashire beef hot pot stew

This dish is essentially a beef stew made with stout instead of broth, finished with a layer of sliced potatoes. That potato topping is what makes it a hot pot, a nod to the classic Lancashire hot pot from northern England.

I first had hot pot while studying in Lancashire during college. Not long after arriving, I was invited to a community dinner nearby, where it wasbeing served. I had never heard of hot pot before, but I was very happy to be fed while settling into a new place for the semester. It was simple, hearty, and exactly the kind of comfort food that made me feel welcome and at home.

[feast_advanced_jump_to]

Traditional Lancashire hot pot is usually made with lamb and cooked with broth. This version takes a few liberties. I use beef instead of lamb and stout and crushed tomatoes in place of stock. But the structure stays the same: meat and vegetables topped with sliced potatoes and baked in the oven. The result is still firmly in hot pot territory if you ask me.

In a slow-cooked stew like this, stout turns something familiar into something just a bit more interesting - which is exactly what I want from cold-weather cooking. Stout is a wonderful ingredient for winter cooking because as it simmers, the alcohol reduces and the roasted, earthy flavors deepen, adding complexity without overpowering the dish.

Why You'll Love This Recipe

  1. It's cold weather comfort food. This is the kind of oven-baked, one-pot meal that makes sense on a cold winter day.
  2. The potato topping sets it apart. Finishing the stew with sliced potatoes turns it into a hot pot, not just another beef stew.
  3. Stout adds depth without sweetness. As it cooks, the beer mellows and becomes earthy and savory, adding richness rather than beer flavor.

For more British-inspired dishes, check out my recipes for Stuffed Yorkshire Pudding, Baked Scotch Eggs, Coronation Chicken Salad, and Plum Fool.

🍺 Ingredients

Here's everything you need to make this beef hot pot recipe.

beef, vegetables, tomatoes, and other ingredients for the hot pot

Key Ingredients

  • Chuck or other stew beef: I like to use beef chuck for this, since it holds up well and becomes tender as it cooks.
  • Stout beer: A dry stout works best. Avoid milk stouts or flavored stouts, which can make the dish overly sweet. A locally brewed stout is a great choice and that's why I used Swamp Donkey Stout from Rutland Beer Works located right here in my town in Vermont.
  • Crushed tomatoes: One large tin of crushed tomatoes combines with the beer for the liquid component of this stew. You can use diced or whole tomatoes and crush them yourself before adding to the pot.
  • Potatoes: You'll need one pound of any kind of white or yellow fleshed potato.

Check out the recipe card below for the complete list of ingredients and quantities.

Variations

  • Short on time? Skip browning the beef and add it to the pot with the tomatoes and broth.
  • Mushrooms: Sliced mushrooms would make a nice addition. Add them when sauteeing the other vegetables.

🔪 Instructions

stew beef browning in a dutch oven
  1. Step 1: Brown the cubed beef in a heavy pot in two batches. Remove and set aside.
vegetables being chopped on a cutting board for the stew
  1. Step 2: Chop the onions, carrots, celery, rosemary, and garlic.
vegetables sauteeing in a pan
  1. Step 3: Saute the vegetables in butter until tender.
flour being sprinkled over cooked vegetables in a pan
  1. Step 4: Coat the vegetables with flour and salt. Cook another minute.
stout being poured into the pot of stew
  1. Step 5: Pour in the stout.
crushed tomatoes being stirred into the pot of stew
  1. Step 6: Stir in the tomatoes.
browned beef being added to the pot of stew
  1. Step 7: Return the beef to the pot.
beef stew being cooked and stirred
  1. Step 8: Simmer for 25-30 minutes, stirring occassionally.
thinly sliced potatoes on a cutting board with a knife
  1. Step 9: Meanwhile, peel and slice the potatoes.
sliced potatoes being layered over the lancashire hotpot
  1. Step 10: Arrange the potatoes over the stew. Sprinkle with thyme, salt, and a little olive oil. Transfer the hot pot to a 425 degree oven and cook for 35-40 minutes.

✨ Top Tips

  • When it comes to cooking with alcohol, whether beer, wine, or liquor, the most essential rule is only using what you want to drink. You want to like the flavor because the flavor intensifies as it cooks and reduces.

🍳 Equipment

Dutch oven or another heavy-bottomed oven-safe pot. This allows you to cook the hot pot on the stove top and in the oven.

🥡 Storage

Store leftover beef hot pot in an airtight container in the fridge for up to five days.

🙋🏻‍♂️ FAQ

What's in Lancashire hot pot?

Traditionally, the stew or casserole is made with lamb, onions, and a top layer of sliced potatoes that is slowly cooked in the oven. But there are variations. This dish is inspired by the original and is not traditional.

What's the difference between a stew and a hotpot?

A hotpot is a type of stew with a potato topping that's cooked slowly in the oven. The potatoes are not mixed into the dish like typical stews.

What's the difference between British hot pot and other hot pots?

British hot pot refers to an oven-baked stew topped with sliced potatoes, most often associated with Lancashire, a county in Northwest England. This is different from Chinese or other Asian hot pots, which are broth-based meals cooked at the table with raw ingredients added as you eat.

What kind of stout beer is best for this recipe?

A drier stout is best. Avoid sweet or milk stouts.

Can I leave out the beer in this recipe?

The stout provides key flavor to the hot pot and omitting it will significantly alter the dish. That said, you could reduce the amount of beer and use one cup stout and one cup beef broth.

🍞 Pairing

A few ideas for pairing with this beef and stout stew:

  • cheese scones on plate with chives
    Easy Cheese and Chive Scones
  • a glass with a foamy pink cocktail topped with cherries and limes
    Cherry Whiskey Sour
  • a plate of crostini topped with butternut squash, sage, and ricotta
    Butternut Squash Crostini Appetizer
  • rosemary parmesan bread sliced on a cutting board
    Rosemary Parmesan Bread

🍲 Related Recipes

Looking for other soups and stews like this one? Try these next:

  • bowls of seafood soup
    Creamy Seafood Newburg Soup
  • bowls of borscht with eggs and sour cream
    Easy Vegetarian Borscht (Beet Soup)
  • bowl of butternut chicken soup
    Butternut Squash Chicken Soup
  • a bowl of soup with celery and leeks, and potatoes
    Creamy Celery Leek Soup with Croutons

Spiced Red Wine Cupcakes

plate of cupcakes with orange zest, cinnamon, and bottle of wine

Take comfort in the cozy flavors of red wine cupcakes inspired by European Christmas markets. With warm spices and a hint of orange, these cupcakes are perfect for winter and festive occasions.

cupcakes with a bottle of red wine

If you're a red velvet cake and holiday spice fan, you'll enjoy these red wine-infused cupcakes made without any added food coloring. The wine lends the deep red color and melds with the warming flavors of cinnamon, clove, and allspice, plus a hint of orange zest, to create a rich and moist cake.

😍 Why you'll love these cupcakes

  1. They're reminiscent of European Christmas markets, where you can enjoy warm, spiced red wine by the mug.
  2. Red wine adds depth and richness when many cupcakes are boring, flat, and lacking flavor. Seriously, why are there so many vanilla cupcakes in the world? Instead, these are tasty and unique.
  3. They are perfect for Christmas and the winter season. Their warm, cozy quality is sure to bring cheer to any occasion.

For more cake inspirations, check out my recipes for:

  • No Bake Eggnog Cheesecake
  • Caramel Pear and Cardamom Cake
  • Orange Parsnip Cake
  • Lemon Rosemary Olive Oil Cake
[feast_advanced_jump_to]

🍷 Ingredients & Substitutions

Here's everything you need to make red wine cupcakes.

ingredients for making red wine cupcakes on a counter

Key Ingredients for wine cupcakes

  • Flour: Standard all-purpose flour is fine.
  • Red wine: Any variety you enjoy and have on hand. There's no need to use anything expensive. If you don't want to use wine or are avoiding alcohol, you could try an equal amount of non-alcoholic apple cider, though I haven't tried that myself.
  • Granulated sugar and brown sugar: These are used to sweeten the cake. They are dissolved into a pot of warmed wine.
  • Butter: I prefer Unsalted butter. If using salted butter, reduce the salt in the cake by half.
  • Sour cream: The extra fat makes the cake moist and rich. You could also use an equal amount of full-fat yogurt.
  • Cream cheese: For the tangy, sweet frosting.
  • Orange: We'll use zest to flavor the cake and juice in the frosting.
  • Powdered sugar: This is used to make the cream cheese frosting. If you don't have powdered sugar, here's a quick tip for making your own using granulated sugar.
  • Cinnamon, cloves, and allspice: These are the classic mulled wine flavoring ingredients. You could also add a bit of ground ginger and/or if you want.

See the recipe card below for the full list of ingredients and quantities.

🍫 Variations

  • Chocolate red wine cupcakes: Replace ¼ cup of the flour with cocoa powder.
  • Make red wine frosting: Use red wine instead of orange juice when making the frosting.
  • Non-alcoholic cupcakes: Try apple cider in place of the wine.

🥣 How to make wine cupcakes

How to make these spiced red wine cupcakes.

dry ingredients being whisked in a mixing bowl
  1. Step 1: Whisk together the dry ingredients in a bowl.
sour cream and eggs mixed in a bowl
  1. Step 2: Then mix the sour cream and eggs in a second bowl.
red wine heating in a pan with sugar and orange zest
  1. Step 3: Gently the wine until hot, then stir in the butter, sugars, and zest until combined.
sour cream mixture being added to the pan of red wine
  1. Step 4: Allow the wine to cool briefly, then whisk in the sour cream and egg mixture.
red wine mixture being added to flour
  1. Step 5: Pour the wet ingredients into the dry and fold the two until incorporated. If the batter is lumpy, let it rest for a few minutes, then stir again.
cupcake batter being scooped into a muffin tray
  1. Step 6: Line a 12-cup muffin tin with liners and evenly ladle in the batter amongst them.
cream cheese frosting on a whisk over a bowl
  1. Step 7: Beat the remaining butter and cream cheese with the orange juice until smooth. Add the powdered sugar a little at a time until a thick frosting has formed.
cream cheese frosting being piped onto a wine cupcake
  1. Step 8: Pipe the frosting onto the cupcakes, garnish with orange peel and cinnamon, and serve.

🌟 Top Tips

  • The cake batter may be a bit lumpy at first. Let it sit for a couple of minutes, then continue to stir gently. A few lumps are fine as long as the dry ingredients are incorporated.
  • Want to make a fun orange garnish? Here are some ideas on how to make some.

🥄 Equipment

Mixer - An electric hand or stand mixer will make beating the cream cheese frosting easier.

🧁 Storage

Fridge - Store frosted cupcakes in an airtight container in the fridge for up to 3-4 days. Both the cake and frosting dry out over time. Because the frosting contains cream cheese, it's best that the cupcakes not be left out at room temperature. Alternatively, unfrosted cupcakes can be stored in a container at room temperature for up to 5 days while the frosting is stored in the fridge.

Freezer: I recommend individually wrapping unfrosted cupcakes and storing them in a freezer bag while keeping the frosting in its own container. Both can be frozen for up to two months.

🤔 FAQ

What kind of red wine should I use?

Use a red wine you like to drink or already have on hand. The flavor of the wine in the cupcakes is mild, so the variety of wine isn't important. You won't need an entire bottle, and you will want to buy a bottle you won't mind drinking. You also don't need anything expensive, so if you already have a bottle of red on hand, that's perfect.

Does alcohol evaporate when baked in a cake?

Some of the alcohol will evaporate during baking, but not all. That said, if you're concerned about alcohol consumption or serving a baked good like these red wine cupcakes to kids, you should consider the amount of alcohol relative to the number of servings. In this recipe, for instance, 8 ounces of wine is used to make 12 cupcakes. That amounts to just over half an ounce of wine per cupcake. With baking, maybe that rounds down to half an ounce. But wine isn't 100% alcohol. Red wine averages 12% alcohol content, so it's 12% of half an ounce of alcohol per cupcake.

Can kids eat food cooked with wine?

Consider the amount of wine used, how long the food is cooked (the longer the food is cooked, the more the alcohol will evaporate), and the number of servings in the recipe. Then, make your own decision about whether that feels okay to you.

What does red wine add to a dish?

Red wine can add fruity, peppery, and savory notes to a dish. The flavor of the wine you use will determine this. Expect that flavor to intensify as it is concentrated during cooking. However, the flavor tends to mellow out more during baking and instead will often add richness and depth.

🍹 Pairing

Any of these drink recipes would pair well with these cupcakes.

  • glasses of mocktail with gingerbread
    Gingerbread Mocktail
  • a glass of eggnog cocktail with a cinnamon stick
    Baileys Eggnog
  • cocktail with pomegranate and rosemary
    Pomegranate Rosemary Cocktail
  • a hand serving a cider cocktail
    Apple Cider Whiskey Cocktail

🍰 Related Recipes

Looking for other cake recipes? Try these:

  • pear cake on a cake stand with caramel
    Caramel Pear and Cardamom Cake
  • cranberry ginger bread sliced on cutting board
    Cranberry Gingerbread Loaf
  • parsnip cake with oranges and pistachios
    Orange Parsnip Cake with Cream Cheese Frosting
  • plates of cake with lemon and rosemary
    Lemon Rosemary Olive Oil Cake

Christmas Cream Puffs (With Orange & Pine)

a plate of cream puffs with orange pastry cream

These Christmas cream puffs are filled with a pine and orange-infused pastry cream, making them an easy, impressive holiday and winter dessert. 

a plate of cream puffs with oranges and pine needles

One of the things I like best about the holidays is the smell of a fresh Christmas tree in the house. Since I'm usually thinking about food, that eventually led to a reasonable-sounding question: can you eat a Christmas tree?

In short, yes - some of them. Pine, fir, and spruce needles are edible and have a fresh, citrusy aroma when used carefully.

For these cream puffs, I steep a small amount of pine needles in warm milk along with orange zest, then strain it all out before making the pastry cream. The result is subtle and fragrant, not strong and woodsy, and it certainly doesn't taste artificial or like a candle.

The cream puffs themselves are classic: light, crisp shells made from choux pastry and filled with a smooth, infused custard. They're easier than they look, make a great holiday dessert, and they'll most definitely give you something to talk about when you bring them to a family get-together.

But there are a few things you should know before you start chopping up and eating your tree. Please read through the ingredient notes below.

😍 Why You'll Love These cream puffs

  1. They're unique. Pine and orange are not a common pairing, yet they make a wonderful holiday and winter flavor that everyone will want to know more about.
  2. They're impressive. Cream puffs are more impressive than cookies (in case you're looking to show off a bit). But they're not as tricky to make as they may seem.
  3. They capture the flavor of the season. While I try to achieve that in all my recipes, I think this one does it exceptionally well. Evergreen and citrus are true winter flavors.

If you're looking for more unique flavored desserts and drinks, you'll want to check out my recipes for Lemon Rosemary Olive Oil Cake, Chamomile Cookies, Pomegranate Rosemary Cocktail, Spiced Red Wine Cupcakes, and Blueberry Lavender Lemonade.

And if you're bringing these puffs to a party, why not pair them with some Crunchy Honeycomb Candy?

[feast_advanced_jump_to]

🍊 Ingredients

Here's everything you need to make these holiday cream puffs.

eggs, butter, oranges, pine, and other ingredients for the recipe

Key Ingredients

  • Pine branches: Use only untreated pine, spruce, or fir branches from a tree you know hasn't been sprayed. Avoid trees from big-box stores or any branches treated with pesticides or flame retardants. If you purchase your Christmas tree from a local tree farm, which is always the best option for freshness and quality anyway, you can ask whether they spray their trees. Branches from a tree in your yard or one foraged in the woods are good options. You only need a few small pieces, anyway. For more information on using confers in cooking, check out "How to Eat a Pine Tree" over at Practical Self Reliance.
  • Oranges: Either 1 large or 2-3 small oranges are needed to zest and flavor the pastry cream. If you can use organic, that's the best option, as we're using the fruit skin. The orange flesh is not needed, so save it for a snack.
  • Flour: All-purpose flour is fine here-no need for a special pastry flour. I have not tested this recipe with gluten-free options.
  • Eggs: Whole eggs are in the choux pastry, while egg yolks are used in the pastry cream. For the pastry dough, make sure the whole eggs are at room temperature. You can leave them on the counter for about 30 minutes.
  • Butter: I almost always use unsalted local Cabot butter. I like to control the salt myself.
  • Milk: For the pastry cream, I use whole milk. The extra fat offers the best flavor and texture, in my opinion. However, you can also use a lower-fat milk or a milk alternative.
  • Cornstarch: Used to thicken the pastry cream into a pudding-like texture.

Check out the recipe card below for the complete list of ingredients and quantities.

🌿 Substitutions & Variations

  • Cream puff tower: For a show-stopping cream puff presentation that would impress even Prue and Paul, stack the filled puffs into a tower and drizzle with caramel to keep it all in place. This is known as a croquembouche. I made this once, and it was a lot of fun, but a bit of a project. Learn more about making croquembouche.
  • Without pine: If you don't have access to fresh pine or spruce, that's ok. A good alternative is rosemary. You'll still get a similar earthy flavor. Use 2-3 fresh rosemary sprigs.
  • Vanilla pastry cream: You can never go wrong with vanilla. Instead of pine needles, use one vanilla bean, halved and slit open to release the seeds.

🔪 Instructions

pine needles and orange zest infusing pastry cream
  1. Step 1: Heat the milk with the pine needles and orange zest for about 5 minutes. Stir often. Then turn off the heat and let it infuse for at least 1 hour.
flour being added to a pan of melted butter
  1. Step 2: Melt the butter with the sugar, water, and salt in a saucepan over low heat. Then stir in the flour until combined.
choux pastry dough in a pan
  1. Step 3: Add one egg at a time, stirring vigorously until fully incorporated. Continue adding eggs, mixing each one in before adding the next.
choux pastry cooking in pan
  1. Step 4: Stir well to form a cohesive dough. It should be smooth and glossy.
choux pastry dough in a piping bag
  1. Step 5: Transfer the dough to a pastry bag fitted with a wide tip. (I used one with pointy edges, hence the star shape of my puffs.) Or use a large storage bag witht he corner cut off.
choux pastry being piped onto a baking sheet
  1. Step 6: Pipe the choux pastry into one-inch rounds on a baking sheet.
top of pastry being smoothed out
  1. Step 7: Use a wet finger to smooth out the top of each piece of dough. This helps to get a smooth top during baking and prevents burning.
baked cream puffs on a baking sheet
  1. Step 8: Bake at 400°F for 25 minutes, or until completely golden brown. Let cool.
whisking the pine infused pastry cream
  1. Step 9: Strain the infused milk, return it to the pan over low heat, and whisk in the sugar, cornstarch, and salt. Add the egg yolks and butter. Continue cooking over medium-low heat until thickened like pudding, about 5 or so minutes. Let cool.
pastry cream being scooped onto a cream puff
  1. Step 10: Either slice the cream puffs in half, as shown, or make a small hole in the bottom for filling with a piping bag. Spoon or pipe the filling into the cream puffs. Dust with powdered sugar and serve.

✨ Top Tips

  • When making the puffs, vigorously stir the eggs one at a time into the dough. Adding more than one egg will cause the choux pastry dough to cool too quickly and the butter will separate out of them. (Speaking from experience.)
  • Instead of piping the filling into the cream puff shells, you can simply slice them in half and spoon the filling in. It's an easier approach that tastes and looks just as good.
  • The longer you let the pine needles infuse the milk, the stronger flavor you will have. Aim for at least an hour, but if you can leave it for a few hours or even overnight, that will be even better.
  • If you're prepping your cream puffs ahead of time, you can recrisp the shells before filling by putting them in a 300-degree F oven for 10-15 minutes.

🍳 Equipment

Pastry bag and piping tip: Help to pipe the pastry dough onto the baking sheet neatly, then pipe the filling onto the cream puff. Not entirely essential, however! A spoon and a careful hand can do the job, or you can improvise a pastry bag by cutting the corner off a heavy-duty plastic bag.

🫙 Storage

Fridge: These cream puffs are best served the day you fill them. Store leftover cream puffs in the refrigerator for up to 24 hours.
Freezer: Freeze filled cream puffs on a baking sheet in a single layer. Once frozen, transfer to a zip-top storage bag and store for up to three months. Defrost in the fridge for a couple of hours before serving.
Make ahead: This is the best option. Prepare the cream puff shells and the filling separately up to two days in advance, then fill them the day you plan to serve.

🙋🏻‍♂️ FAQ

Will these cream puffs taste like a Christmas tree?

They won't. The pine flavor is lighter than you'd expect and is balanced by the orange zest. The flavor is closer to rosemary and not a Christmas candle.

Can I make these cream puffs ahead of time?

You can prepare the filling and the cream puff shells up to two days in advance, but it is best to fill them on the day you plan to serve them. Otherwise, the puffs will go soft and a little mushy on you rather than the preferred light and crisp texture of a good cream puff.

Is it actually safe to cook with pine needles?

Yes, pine and several other evergreen types of trees, such as spruce, are edible and are used for making a variety of edible goods from syrups to teas. However, it's important to identify and confirm variety before using it and to use tree branches that have not been sprayed with chemicals.

What does pine taste like?

In this recipe, I've found that the pine adds a light, woody note that has a hint of citrus. It is not a deep, overwhelming flavor you may expect.

☕ Pairing

Any of these recipes would go great with these holiday cream puffs:

  • a mug of hot buttered rum with a cinnamon stick
    Hot Buttered Rum Recipe
  • mug of amaretto latte with almonds and whipped cream
    Amaretto Latte
  • a glass mug of citrus tea being poured from a tea pot
    Honey Citrus Mint Tea
  • a glass of negroni with smoke
    Smoked Negroni

🧁 Related Recipes

Looking for other recipes like this one? Try these next:

  • plates of tiramisu topped with cherries
    Cherry Tiramisu
  • glasses of plum fool with whipped cream and cookies
    Plum Fool
  • a plate of pancake balls topped with powdered sugar
    Danish Aebleskiver Pancake Balls
  • cake with icing on a cutting board
    Date Carrot Cake

Ginger Cookies With Fresh Ginger

cookies on a blue and green background

With crisp edges, chewy centers, and bursts of spicy-sweet ginger in every bite, these ginger cookies with fresh ginger balance comforting nostalgia with bold flavor.

ginger cookies with milk and sugar

These cookies exist somewhere between a ginger snap and a molasses cookie. They have a little crunch, a slight chew, and no shortage of ginger flavor.

🥰 Why You'll Love These Cookies

  1. They're super gingery. With fresh, ground, and candied ginger, these cookies pack of punch of flavor. There's even a little pepper and cinnamon in them, too.
  2. The edges are crispy, while the centers are chewy. It's the best of both cookie worlds.
  3. They'll remind you of childhood. If, like me, you ate molasses cookies as a kid, these ginger cookies will take you back.

Love cookies? Me too. You'll want to try these ones next:

  • Raspberry Rugelach
  • Chamomile Cookies
  • Homemade Fig Bars (not quite a cookie, but close enough)
  • Limoncello Biscotti
  • Salted Maple Oatmeal Chocolate Chip Cookies

And what goes better with cookies than milk? Pair these with a glass of my easy maple milk.

[feast_advanced_jump_to]

🫚 Ingredients

Here's everything you need to make fresh ginger cookies.

ingredients for making the cookies with fresh ginger

Key Ingredients

  • Fresh ginger, candied ginger, and ground ginger: Why three gingers? I say, why not? Three kinds of ginger add multiple layers of flavor and create a more encompassing experience. Fresh ginger brings brightness and adds aromatic notes, ground ginger infuses warmth and makes your typical ginger cookie base, and candied ginger adds small bursts of intensity and chewiness when you bite into a piece.
  • Molasses: For creating a deep, rich, and warm cookie.
  • Cinnamon and pepper: These add some more spice and warmth to the cookies.
  • Sparkling sugar: Adds that classic crunchy sugar topping. My favorite is from King Arthur Flour.

See the recipe card below for the complete list of ingredients and quantities.

✨ Substitutions

  • Ginger: These cookies certainly need some ginger; otherwise, you're not making ginger cookies. But if you don't have one of the three kinds used (such as the candied ginger), just use more of the others to compensate.
  • Fresh ginger: If fresh ginger isn't handy or isn't easy to find in your local store, try keeping a jar of The Ginger People's minced ginger in your fridge. It keeps for a reasonable amount of time, has excellent flavor, and can be used equally to replace fresh ginger in a recipe like these cookies.
  • Sparkling sugar: In place of the sparkling sugar, use any kind of cookie decorating sugar.

🔪 How to make ginger cookies with fresh ginger

butter, sugar, and molasses, creaming in mixer
  1. Step 1: Cream the butter, sugars, and molasses. When light and fluffy, add the egg and fresh grated ginger.
whisking dry cookie ingredients
  1. Step 2: Whisk together the flour, baking soda, salt, and spices.
candied ginger being chopped
  1. Step 3: Finely chop the candied ginger.
dry ingredients being poured into wet
  1. Step 4: Mix the candied ginger and flour mixture, a little at a time, into the wet ingredients until incorporated.
two pieces of cookie dough on a baking sheet
  1. Step 5: Dump the dough onto a lightly floured surface and shape it into two eight-inc pieces. Pop them in the fridge to chill and firm up for at least 30 minutes or up to three days.
rolling out ginger cookie dough
  1. Step 6: Take the dough out of the fridge. Let it sit for a couple of minutes, then roll both pieces of dough into a round log.
cookie dough being sliced
  1. Step 7: Slice the cookies into ¾ inch pieces (or thinner for smaller cookies).
cookies being coated with sparkling sugar
  1. Step 8: Press the top of each piece of cookie dough in the sparkling sugar and then place them a baking sheet lined with parchment.
a tray full of ginger cookies ready for baking
  1. Step 9: Bake the cookies at 350 degrees F for 14-15 minutes.
a baked cookie being held above a cooling rack
  1. Step 10: Let the cookies cool for 5 minutes on the pan before transferring to a cooling rack to cool completely.

🥣 Helpful Tips

  • Letting the cookie dough rest in the fridge before shaping into cookies is essential. The dough will be too soft otherwise.
  • As written, the recipe will make about 18 large cookies that are about 3-4 inches wide. To make smaller cookies and more of them, slice the dough into ½-inch pieces.
  • For the full crunchy sugar experience, save some of the sparkling sugar and sprinkle it over the cookies when you take them out of the oven.

🔪 Equipment

Cookie or baking sheet: For baking the cookies.
Parchment paper: For lining your baking sheet and preventing the cookies from sticking.
Bench scraper: Helps move and cut the cookie dough around your surface.

🫙 Storage

Baked: Store cooled cookies in an airtight container for up to a week.
Unbaked (freezer): Freeze the log of unbaked cookie dough (before slicing) by wrapping it with plastic wrap or foil, then placing it in a freezer bag and freeze for up to three months. Cookies may be sliced off from the frozen log and baked, adding 2-3 extra minutes to the total baking time.
Unabaked (fridge): Logs of unbaked cookie dough may be stored in the refrigerator for 3-5 days before baking.

🤔 FAQ

How do you make ginger cookies with fresh ginger?

The best way to incorporate fresh ginger into cookies is to add it to the wet ingredients, such as the butter, sugar, and eggs.

How can I make a really gingery cookie?

Use multiple kinds of ginger in your cookies, such as fresh, ground, and candied ginger.

Can you use fresh ginger instead of ground ginger in cookies?

Yes, you can use fresh ginger instead of ground ginger in cookies. The flavor may be a little different, but it'll still taste of ginger. Use a tablespoon of fresh grated ginger and add it when combining the wet ingredients.

Is fresh ginger better than frozen?

Both fresh and frozen ginger are good for cooking and baking. One isn't necessarily better than the other as long as the frozen ginger isn't too old, as it will lose flavor over time. Use an equal amount of frozen ginger for fresh in your recipes.

🍵 Pairing

Try serving the cookies with any of these drinks:

  • two coupe glasses with cold brew martinis
    Cold Brew Martinis
  • glasses of mocktail with gingerbread
    Gingerbread Mocktail
  • cranberry mocktail in a coupe glass
    Cranberry Orange Mocktail
  • mug of amaretto latte with almonds and whipped cream
    Amaretto Latte

🍪 Related Recipes

Looking for more cookie recipes? Try these:

  • biscotti on a plate with lemons and icing
    Limoncello Biscotti
  • a plate of chamomile cookies with flowers on side
    Chamomile Cookies
  • three fig bars with crumbs and figs
    Homemade Fig Bars Recipe
  • raspberry jam with rugelach cookies
    Raspberry Rugelach

Cranberry Sauce with Mandarin Orange

bowl of cranberry sauce with orange

Perfectly balanced, this homemade cranberry sauce with mandarin orange is ideal for holidays, baking, and as a tangy fruit condiment to enjoy through the winter season.

a bowl of cranberry sauce with oranges

Cranberry sauce is one of my favorite parts of Thanksgiving. When done right, it should balance tart and sweet with a bit of spice. More importantly, the cranberry sauce should complement the other components of the dinner.

Chances are that something on your holiday dinner needs a boost of flavor. Hint: it's probably the dry and often bland turkey. Cranberry sauce can also help cut through the fat in all the buttery, creamy, and dense foods on the table.

People have strong opinions about their cranberry sauce. And so do I. I'm sorry, but the jellied stuff that plops out of the can gives cranberry sauce nothing but a bad rap. It's not supposed to be jello, either. Nor should it be as sweet as a dessert.

I guess it should be something like this.

😍 Why You'll Love This Recipe

  1. Ideal Balance of Flavors: This recipe strikes the ideal balance of sweet, tart, citrus, and spice, making it the perfect companion for holiday dishes. With a touch of cinnamon, ginger, and plenty of mandarin orange, it elevates turkey, stuffing, and even green beans with a fresh and vibrant flavor.
  2. Fresh and Simple: Forget the overly sweet, jellied options or unnecessarily complicated recipes. This cranberry sauce is quick to prepare, can be made ahead of time, and avoids the traps of being too sugary or having weird add-ins like celery.
  3. Versatile: With half the sugar of most cranberry sauce recipes, maple syrup and brown sugar create a complex sweetness. Dried fruit enhances its texture, making it as versatile for post-Thanksgiving leftovers as it is on the holiday table.
[feast_advanced_jump_to]

🍊 Ingredients

Here's everything you need to make this cranberry orange sauce.

all of the ingredients for the recipe

Key Ingredients

  • Cranberries: This cranberry sauce recipe calls for fresh whole cranberries. They offer the best flavor and are easy to cook into sauces and jams because of their naturally high level of pectin. I like to use cranberries from The Vermont Cranberry Company. They're Vermont's only commercial cranberry farm.
  • Mandarin oranges work well here because they're easy to peel and have small segments. All you need to do is give them a quick chop. I like that they have a stronger flavor than your basic navel orange.
  • Dried cranberries: For some added texture. You could certainly leave them out.
  • Fresh ginger: I like a fair amount of spice in my cranberry sauce, and fresh ginger is a good way to get it here, as it melds so well into the berries as they cook.

See the recipe card below for the complete list of ingredients and quantities.

🍇 Substitutions & Variations

  • Dried fruit: In place of dried cranberries, other dried fruits such as raisins, currants, or cherries may be used. You can also leave it out altogether, as it's not essential.
  • Other oranges: Mandarins make this recipe unique, but you may peel and chop any other orange if mandarins are not handy. You want about 1 to 1 ½ cups of orange.
  • Spicier: Add black pepper and increase the ground cloves for more flavor.
  • More robust: Toss in some chopped apples and toasted walnuts.

How to make cranberry sauce with mandarin orange.

🔪 Instructions

How to make this fresh cranberry orange sauce.

cranberries in a pot with dried cranberries being added
  1. Step 1: Add the fresh and dried cranberries to a saucepan with 1 cup of water. Bring to a simmer.
brown sugar being added to a pot of cranberries
  1. Step 2: After the cranberries start popping, stir in everything else but the mandarins.
cranberry sauce cooking in a pot
  1. Step 3: Simmer for several minutes (up to 10) until the sauce has thickened.
mandarin oranges being chopped on a cutting board
  1. Step 4: While it cooks, peel and roughly chop the oranges.
mandarins being stirred into cranberry sauce
  1. Step 5: Stir the oranges into the sauce and cook for another couple of minutes until they've softened and melded into the cranberries.
a bowl of cranberry sauce on a counter
  1. Step 6: Taste the cranberry sauce. If it's too tart, stir in some additional maple syrup to your liking. Then, serve at room temperature or after chilling in the fridge.

🥄 Helpful Tips

  • To prevent burning, adjust the heat if the simmering becomes too strong. If the pan dries out at any point, add a splash of water.
  • Stir the sauce on a regular basis as it cooks.

🫙 Storage

This mandarin orange cranberry sauce will keep in an airtight container in the fridge for up to a couple of weeks. It may also be frozen for 3-4 months.

🍰 How can leftover cranberry sauce be used after Thanksgiving?

There are many ways to use cranberry sauce outside of a holiday dinner.

  • Stir it into this cranberry gingerbread cake
  • Stir some into your overnight oats
  • Mix with mayo or mustard and spread on a sandwich, such as a Monte Cristo
  • Use it as a filling for rugelach cookies instead of jam
  • Swirl into muffin batter or as a filling for these Danish pancakes

🙋🏻‍♀️ FAQ

How do you enhance cranberry sauce?

Brighten up cranberry sauce with fresh oranges, chopped apple, and with spices such as cinnamon, ginger, and cloves. A small pinch of salt also helps to balance the flavor.

What can be a substitute for cranberry sauce on Thanksgiving

It's hard to find a good substitute for the tanginess of cranberry sauce that will also fit it on Thanksgiving. However, try a fruit based chutney or relish. Consider something with seasonal fruits such as apples, pears, or pomegranate.

Why do people eat cranberry sauce with turkey?

Cranberry is such a good compliment to turkey and rich meals like that on Thanksgiving or Christmas because it has a bright, fresh, and acidic flavor that can cut through the fat and carb heavy foods we tend to eat at the holidays. It also helps to freshen up foods like turkey that can often be dry or a bit bland.

How do you get the bitterness out of cranberry sauce?

If you find your cranberry sauce is a little bitter, try adding some maple syrup and a pinch of salt. The rich, deep sweetness of maple syrup counters the sharp, acidity of the cranberries while the hint of salt will help to bring out the other flavors of the sauce.

🫖 Pairing

These are my favorite dishes to serve with [this recipe]:

  • a bowl of asparagus soup with crackers on the side and bowls of chives and bacon
    Asparagus Potato Soup
  • slices of rhubarb quick bread with butter
    Rhubarb Banana Bread
  • a glass of mint juley mocktail with fresh mint and a straw
    Mint Julep Mocktail
  • plates of sliced blackcurrant cake with fresh berries and whipped cream
    Blackcurrant Cake

🫐 Related Recipes

Looking for more cranberry recipes? Try these:

  • stuffing in muffin tin
    Cranberry Walnut Stuffing
  • cranberry mocktail in a coupe glass
    Cranberry Orange Mocktail
  • cranberry ginger bread sliced on cutting board
    Cranberry Gingerbread Loaf
  • slices of cranberry tart
    Cranberry White Chocolate Tart

Eggplant Parm Steaks

An eggplant parm steak recipe where slices of crispy pan-fried eggplant are breaded in a healthier, gluten-free coating and stacked together to make steaks.

baked eggplant with sauce and pasta

Eggplant­ is a love or hate kind of vegetable. For me, it's love. I think we have these strong feelings about the vegetable because of its unique texture. Eggplant's best - or worst depending on your point of view - attribute is its sponge-like nature. I think this is a good thing because just like a sponge, eggplant absorbs the flavors you put on it.

why you should give eggplant another chance

fresh eggplant

In some ways, it reminds me a lot of tofu. I'll be the first to admit that neither eggplant nor tofu is great without flavoring and proper cooking. Luckily, they are easy to impart flavor, and there are many ways to prepare them. You absolutely can make them interesting, despite what people seem to think.

I believe people may not like eggplant because they once had it cooked poorly and blandly. Yet when done well, eggplant becomes tender and creamy. When you bite into it, it should almost melt in your mouth and meld into the other flavors you pair with it, such as a freshly made tomato sauce.

Eggplant is a perfect pairing for tomatoes and other summer vegetables. In the past, I've shared recipes for eggplant in ratatouille and eggplant pizza. But one of my favorites is eggplant parmesan.

how this eggplant parm stacks up

This recipe is essentially a rift on traditional Italian eggplant parm. You bread and fry eggplant slices in a similar method, but then stack them together with tomato sauce and cheese to make a steak of sorts. On the outside, the eggplant is crisp while the insides are soft, with both textures going beautifully with the depth of the quick tomato sauce.

plate of eggplant breading
frying slices of breaded eggplant

The coating is slightly different from the usual breadcrumbs and cheese, and I think it works well, especially if you're looking to make this a gluten-free dish. The sunflower seeds add crunch while the nutritional yeast boosts the cheesy flavor. It's also a healthier option that doesn't produce a greasy result. I winged this breading when I was out of breadcrumbs and used what I had in my pantry. It turns out it was delicious. I love it when that happens.

how to prevent soggy eggplant parm

crispy eggplant parm slices

The secret to keeping that coating as crisp as possible is to place the browned eggplant slices on a wire rack after cooking them in the pan. That way, there's airflow on both the top and the bottom of the slices, and any liquid can drip off to the pan below.

If you have fresh tomatoes and want to use them for the sauce, go for it. Just pulse roughly chopped tomatoes in the food processor to make your own crushed tomatoes. I pulled the last of my tomatoes out of the garden in anticipation of frost this week, so I had those ready to use up. Otherwise, a couple of large cans of crushed tomatoes work great.

quick fresh tomato sauce in pan

Serve these eggplant parm steaks with a side of the sauce and your favorite pasta.

Coconut Chocolates with Honey and Almonds

homemade chocolates with honey and coconut

Homemade coconut chocolates made with honey, cocoa, and dark chocolate. Fudgy, easy to make your own, and a great way to use local honey.

chocolate on a serving board with honey and coconut

There are so many specialty and niche chocolate bars available these days. With creative flavor combinations and unique textures, most of them are pretty good, too.

I made this recipe for honey and coconut chocolates after a friend introduced me to Honey Mama's years ago. They have all kinds of flavors these days, but the basic recipe is a combination of honey, coconut, and chocolate. I love their simplicity, but that also made me think maybe I could make something similar of my own.

[feast_advanced_jump_to]

Several experiments later, this isn't quite as good as Honey Mama, but it's still pretty damn delicious. It's somewhere in between a fudge and a chocolate bar. They're perfect when you want just a bite of something chocolately but don't want anything too sweet or rich. I find myself reaching for them with my afternoon coffee or evening cup of tea.

Why You'll Love This Recipe

  1. Minimal cooking required.
  2. A better quality chocolate made with quality ingredients.
  3. Easy to customize and they store for weeks.

For more homemade treats, try some of these other recipes next:

  • Crunchy Honeycomb Candy
  • Homemade Fig Bars
  • Brownies with Cherry Pie Filling
  • Limoncello Biscotti

🥥 Ingredients

Here's everything you need to make these honey chocolates.

ingredients for making honey chocolates

Key Ingredients

  • Cocoa powder: Unsweetened cocoa powder thickens the mixture while adding deep chocolate flavor. Any kind works here, but if you want a recommendation, I love the Triple Cocoa Blend from King Arthur, which is local to me here in Vermont.
  • Dark chocolate: Aim for something in the 60-75% range. A chocolate bar or even chocolate chips will work as long as they're not coated in anything that prevents melting. Don't use unsweetened baking chocolate.
  • Unsweetened coconut flakes: These add texture and more coconut flavor. Flakes or shreds are both fine since they'll be ground in the food processor-just make sure they're unsweetened.
  • Honey: Honey adds subtle sweetness and keeps the chocolates soft and slightly chewy, almost fudge-like. It also helps bind the coconut oil and cocoa together. Use local honey when possible and support your nearby beekeepers. I usually get mine in the bulk department of my co-op or from a roadside stand.
  • Coconut oil: It's key to the structure of these chocolates because it firms up when cold (below about 76°F). Refined or unrefined both work, though unrefined has more coconut flavor. Don't swap this out for other oils-they won't set the same way.
  • Roasted almonds: Roasted almonds add body and a nutty flavor. If you only have raw almonds, toast them in the oven at 350°F for 5-10 minutes, until lightly browned and fragrant.

Check out the recipe card below for the complete ingredient list and quantities.

Substitutions & Variations

  • Other flavors: Instead of vanilla extract, try almond or mint. Start with just a ½ teaspoon of either and taste before adding more.
  • Almonds: Try peanuts, sunflower seeds, or cashews instead.
  • Chocolate add-ins: You can really customize these chocolates however you like. Try different spices, such as cardamom or cinnamon, or finely chop up dried fruits and stir them into the chocolates after you pour them into molds.

🔪 Instructions

How to make homemade coconut chocolates.

almonds and coconut in a food processor with cocoa powder being added
  1. Step 1: Add almonds, coconut, and coconut powder to a food processor.
ground cocoa powder, coconut, and almonds on a spoon over a food processor
  1. Step 2: Process until you have a fine crumb consistency.
honey being whisked into coconut oil in a small pan
  1. Step 3: Melt the coconut oil in a small pan over low heat. Then whisk in the honey. Remove from the heat.
chocolate being whisked into honey and coconut oil in a pan
  1. Step 4: Whisk in the chopped chocolate until completely melted and smooth.
chocolate mixture being stirred in a pan
  1. Step 5: Add the ground almond and coconut mixture. Stir well to combine.
chocolate mixture being spread into an ice cube tray
  1. Step 6: Spread the chocolate into a mold, such as a silicone ice cube tray.
chocolates being popped out of the ice cube tray mold
  1. Step 7: Freeze until solid, about an hour, then pop out of the mold. Store in the fridge for 2-3 weeks, or freeze for several months.
chocolate on a serving board with honey and coconut
  1. Step 8: Enjoy coconut chocolates straight from the fridge or let them sit at room temperature for a few minutes to soften. Serve topped with flaky sea salt for an extra punch of flavor.

✨ Helpful Tips

  • When melting the coconut oil, just heat it enough so that it is hot. You don't need to simmer it or heat it to a certain temperature.
  • Allow the chocolates to get super cold in the freezer (at least 30 minutes) before removing from their molds and storing in the fridge.

🍳 Equipment

Food processor: The coconut and almonds need to be finely ground, so this is an essential tool for this recipe to succeed.

Ice cube tray or chocolate mold: Ice cube trays make easy chocolate molds, especially if you already own some. Even better, use a silicone tray so you can easily pop the chocolates right out after they're frozen. I've made these chocolates using a 16-cube ice tray and, more recently, on a 36-cube tray. I really liked the smaller molds better because they make a perfect bite-sized treat.

Of course, if you have chocolate molds or want to buy some, you can certainly use them instead of ice cube trays.

🥡 Storage

Once solid, you can store these chocolates in the freezer for several months or in the fridge for a couple of weeks or more. If storing in the freezer, let them sit at room temperature for a few minutes to soften up.

🙋🏻‍♂️ FAQ

Do honey and coconut go together?

Sure they do! The subtle and lightly floral sweetness of honey complements the cramy and slightly nutty flavors of coconut.

What's the best type of coconut oil for this recipe?

Use unrefined coconut oil for the most coconut flavor. Refined oil won't provide as much flavor.

Can I make these chocolates without almonds?

Yes, you can replace the almonds with sunflower seeds, walnuts, pecans or cashews.

Can I make these without a food processor?

You really need the coconut and almonds to be finely ground and a food processor is the best way to make that happen. You could chop by hand if you had to, but the texture of the chocolates will be a bit different.

🍸 Pairing

These are my favorite dishes to serve with [this recipe]:

  • plates of tiramisu topped with cherries
    Cherry Tiramisu
  • eggnog cheesecake on a wooden table
    No Bake Eggnog Cheesecake
  • large glass full of strawberry cream soda with straw
    Strawberry Cream Soda
  • a glass of eggnog cocktail with a cinnamon stick
    Baileys Eggnog

🍬 Related Recipes

Looking for other recipes like this one? Try these next:

  • a plate of honeycomb candy with chocolate
    Honeycomb Candy Recipe (Crunchy Honey Toffee)
  • a tray of chocolate chip oatmeal maple cookies
    Salted Maple Oatmeal Chocolate Chip Cookies
  • Chocolate Lavender Coconut Cream Eggs
  • brownies on parchment with knife and cherries
    Brownies with Cherry Pie Filling

Salmon with Pea Purée

salmon over peas and potatoes

Salmon with Pea Purée is a fresh spring meal featuring mustard oat-crusted salmon served over a smooth minty pea purée. Thinly sliced roasted potatoes, cooked at the same time as the salmon, round out the plate for a vibrant and satisfying dinner, easy enough for a weeknight.

a plate of salmon and potatoes with pea puree

It may look like baby food, but vegetable purée makes a delicious side dish. From peas to winter squash, countless vegetables can be turned into a creamy, smooth purée.

Peas are a good choice for a purée because they are quick to cook and simple to blend smooth. They take just a few minutes to prepare, and fresh herbs, like mint, allow the purée to add bright freshness wherever you pair them.

In this recipe, I've paired my pea purée with salmon coated in a crunchy oat crust. I love how the fresh minty peas offset the richness of the fish. I added some thinly sliced potatoes to round out the meal. It reminds me of one of my favorite English dishes-fish and chips with mushy peas.

[feast_advanced_jump_to]

😍 Why You'll Love This Recipe

  1. The minty pea purée perfectly balances the richness of the salmon.
  2. The mustard, maple, and oat combo makes a tasty and crunchy salmon coating.
  3. The potatoes are so simple yet so good. Even better, they cook on the same baking sheet as the salmon!

I love mint and peas, so I also paired them in this Pasta and Peas with Mint Pistachio Pesto recipe. But mint has so many great uses-and it's the easiest herb you'll ever grow. Find it in this Honey Citrus Mint Tea and Blackcurrant Mojito.

🫛 Ingredients

Here's everything you need to make salmon with pea purée.

ingredients for making the salmon and pea recipe

Key Ingredients

  • Salmon: Use four wild-caught salmon filets, about six ounces each. They're firm, flavorful, and will hold up well with the oat crust.
  • Peas: This recipe calls for either fresh or frozen peas. Either way, you'll need three cups.
  • Potatoes: Small, thin-skinned potatoes such as Yukon Gold or red potatoes work great.
  • Mint: Fresh mint helps flavor the pea purée.
  • Quick oats: A unique ingredient for making a crunchy coating for the salmon, but they work well. You can use quick oats or pulse whole rolled oats in the food processor a few times to break them into smaller pieces.
  • Mustard: You'll use mustard to coat the salmon and help the oat crust adhere. Dijon mustard is a good choice, as it's smooth and not too potent.
  • Lemon: We'll use zest, juice, and slices of lemon.

Check out the recipe card below for the complete list of ingredients and quantities.

🌿 Substitutions & Variations

  • Honey: In place of maple syrup, you can try honey.
  • Dill: Try dill in place of mint for a different flavor profile.
  • Pair the pea purée with other proteins: You can make the pea purée as a side dish for many different recipes, such as Grilled Pork Chops with Herbs, Baked Scotch Eggs, and Stuffed Yorkshire Pudding.

🔪 Instructions

How to make salmon and pea puree.

potatoes being thinly sliced on a cutting board
  1. Step 1: Thinly slice the potatoes. Toss them with olive oil, salt, and pepper.
sliced potatoes on half of a baking sheet
  1. Step 2: Place the potatoes on a baking sheet lined with parchment and bake at 400°F (200°C) for 10 minutes.
oats and mustard glaze for coating salmon
  1. Step 3: Whisk the mustard, maple syrup, and egg in a bowl. Combine the oats, cornstarch, lemon zest, salt, and pepper in a shallow dish.
salmon being brushed with mustard glaze
  1. Step 4: Brush the salmon with plenty of the mustard sauce.
oat topping being pressed on salmon
  1. Step 5: Pat the oat coating onto the salmon.
potatoes and salmon on baking sheet
  1. Step 6: Add the salmon to the tray of potatoes, drizzle it with oil, and continue cooking for another 12-14 minutes. Finish under the broiler for a couple of minutes to brown.
peas being poured into a pan
  1. Step 7: Meanwhile, cook the peas with butter and broth for 3-4 minutes or until tender.
peas being pureed in a pan
  1. Step 8: Add mint and lemon zest and purée until smooth. Add more liquid if needed.
roasted potatoes and salmon on a pan
  1. Step 9: Remove the potatoes and salmon from the oven when browned.
pea puree being spread on a plate
  1. Step 10: Spread some pea purée on your plates, top with the salmon and a side of potatoes, and garnish with lemon slices.

✨ Helpful Tips

  • Frozen peas may make the purée a little thicker. Add liquid as needed to smooth it out.
  • Slice the potatoes as thin as possible so they'll crisp up in the oven.
  • Popping the baking sheet under the broiler will help brown the potatoes and salmon. But if they're already browned to your liking after baking, feel free to skip this step.

🥡 Storage

Leftovers can be stored in an airtight container in the fridge for up to two days. As a seafood dish, it doesn't keep for long. Reheat gently in a pan on the stove, oven, or microwave.

🙋🏽‍♂️ FAQ

How do you make pea purée?

To make pea purée, all you need to do is give peas a brief simmer in a small amount of liquid, such as broth or water, until tender. Then blend them with seasonings until thick and smooth. If needed, add more liquid to help blend.

What is a good seasoning for peas?

Good seasonings for peas are mint or lemon. They can be used together or on their own. Both ingredients add a bright note that helps make the peas taste extra fresh. A little butter will also add creaminess and some salt will enhance the overall flavor of the vegetable.

Do peas go with salmon?

Peas pair beautifully with salmon. The bright, fresh, earthy flavor of peas helps to balance the rich and somewhat fatty nature of salmon.

What does pea purée go with?

Pea purée is a versatile side dish that can be paired with a variety of protein dishes from seafood to chicken to pork. Adjust the herbs to compliment the main item.

🍹 Pairing

These drinks would pair great with this salmon recipe:

  • mojito with blackcurrants, limes, and mint served
    Blackcurrant Mojito Cocktail
  • glasses of lavender lemonade with blueberries and lemon slices
    Blueberry Lavender Lemonade
  • glasses of lilac tea with ice, pitcher, and flowers
    Lilac Tea
  • glasses of lemon balm lemonade drink
    Lemon Balm Lemonade Recipe

🐟 Related Recipes

Looking for other recipes like this one? Try these:

  • two plates of pasta with peas and mint pesto with a side of peas and drink glasses
    Pasta and Peas with Mint Pistachio Pesto
  • cheese scones on plate with chives
    Easy Cheese and Chive Scones
  • salad with serving utensils and dressing
    Blackened Shrimp Salad
  • bowls of seafood soup
    Creamy Seafood Newburg Soup

Dairy Free Irish Cream

irish cream being poured into a glass with ice

This dairy free Irish cream recipe blends cashews, coconut sweetened condensed milk, espresso, and whiskey into a smooth homemade liqueur inspired by Baileys.

homemade irish cream being poured into a glass with ice

If you love the flavor of Baileys but want to skip the dairy, this homemade Irish cream hits the mark. It's made with cashews and coconut sweetened condensed milk for a silky texture that rivals the real thing, plus espresso, cocoa, and whiskey for that familiar flavor.

You can serve it chilled over ice, swirl it into coffee, or bottle it up for a homemade gift. It's also perfect in a Baileys Eggnog Cocktail.

[feast_advanced_jump_to]

😍 Why You'll Love This Recipe

  1. It has a rich and creamy texture even without dairy. Who knew cashews could make such a tasty beverage?
  2. Quick and easy to make at home. Simmer some cashews, then blend. It's ready in minutes.
  3. Great on its own or in cocktails. Honestly, I love it all on its own, served over ice. It's also perfect for the holiday season and St. Patrick's Day.

Want more homemade drinks for the holidays and winter season? Then give these a try:

  • Hot Buttered Rum
  • Peppermint Mocha Martini
  • Cranberry Orange Mocktail
  • Amaretto Latte

🥥 Ingredients

Here's everything you need to make homemade vegan Irish cream.

ingredients for making vegan irish cream
  • Cashews: Use roasted, unsalted cashews. I have experimented with both roasted and unroasted cashews, and I've noticed that roasted cashews blend and liquefy much more effectively. Many roasted nuts are also salted, so be sure to find ones that are unsalted. If you can't locate roasted cashews, you can always roast them yourself before using them in the recipe.
  • Irish whiskey: It wouldn't be Irish cream without the Irish whiskey. Use a quality, though not top-shelf, whiskey here. Jameson, Bushmills, and Tullamore Dew are all excellent and widely available options.
  • Sweetened condensed coconut milk: Essentially the same as regular sweetened condensed milk, except that it's made with coconut milk rather than cow's milk. It may be hard to find, though I did locate cans at my local food co-op and Walmart. Nature's Charm and Andre Prost are two brands I've come across.
  • Espresso: A single shot of espresso is sufficient to subtly flavor the Irish cream liqueur.
  • Cocoa powder and vanilla: A tablespoon of unsweetened cocoa powder and a teaspoon of vanilla add a touch of chocolate and vanilla flavors. Both of these are typically found in Irish creams like Baileys.

Check out the recipe card below for the complete list of ingredients and quantities.

☕ Substitutions & Variations

  • Espresso: Instead of brewed espresso, you can also use espresso powder or an equal amount of strongly brewed coffee.
  • Adjust flavors: You can use more, less, or none of the espresso, cocoa powder, and vanilla.
  • Alcohol-free version: Simply leave out the whiskey, though keep in mind you'll have fewer servings.
  • Sweeter: For more sweetness, blend in 2 tablespoons of maple syrup.

🔪 How to make dairy free Irish cream

cashews in a pan with water being poured over them
  1. Step 1: Cover the cashews in a small pot with water. Bring to a simmer and cook for 15 minutes.
cashews in a pan that have been simmered in water
  1. Step 2: Turn off the heat and let the cashews sit for another 15 minutes. Then, drain off any remaining water.
cashews being added to a pitcher
  1. Step 3: Add the cashews to a pitcher with 1 ½ cups of fresh water.
cashews being blended in a pitcher
  1. Step 4: Blend the cashews and water until smooth, about 30 seconds.
coconut condensed milk being poured into the pitcher
  1. Step 5: Add the sweetened condensed coconut milk.
espresso being added to a pitcher
  1. Step 6: And the shot of espresso.
cocoa being added to irish cream pitcher
  1. Step 7: And the cocoa powder and vanilla.
Irish cream being blended in a pitcher
  1. Step 8: Blend, then add the whiskey and blend until smooth.
homemade Irish cream being poured into a bottle
  1. Step 9: Store in a jar in the fridge for up to two weeks.
homemade dairy free irish cream being poured into a glass with ice
  1. Step 10: Serve cold over ice or add to coffee or other beverages.

📋 Notes from the kitchen

  • Be sure to use roasted, unsalted cashews in this recipe.
  • Allow the cashews to simmer for the full time and then sit afterward to properly soften and blend.
  • Give your bottle of Irish cream a shake before serving. There will be some separation after it sits.

🍳 Equipment

Blender: The high power of a blender, whether a stick blender (also known as an immersion blender) or a regular stand blender, is needed to properly blend the cashews with the other ingredients to create the Irish cream.

🥡 Storage

Store the liqueur in an airtight bottle in the fridge for up to two weeks. Give the bottle a shake before serving, as some separation will occur. I don't recommend freezing.

🙋🏻‍♂️ FAQ

What is sweetened condensed coconut milk?

Sweetened condensed coconut milk is a thick, reduced and sweetened coconut milk ingredient that is similar to the sweetenend condensed milk made with dairy. It's a common ingredient in baking, used to make items such as caramel and fudge. It's also used in drinks, like my Thai Iced Coffee.

Can I make this Irish cream with other dairy free milk?

I don't recommend it. In this recipe, we're essentially making a homemade cashew milk as the base of the Irish cream. Cashews make an extra creamy milk and not all alternatives will do the same.

Should you refrigerate Irish cream?

Whether homemade or store-bought and with or without dairy, you should keep Irish cream in the fridge as it is made with perishable ingredients.

🍰 Pairing

Any of these recipes would pair well with this homemade Irish cream:

  • cornmeal pudding dessert served at table
    Sweet Coconut Cornmeal Pudding
  • biscotti on a plate with lemons and icing
    Limoncello Biscotti
  • eggnog cheesecake on a wooden table
    No Bake Eggnog Cheesecake
  • a plate with stuffed apple cremes covered in caramel and powdered sugar
    Baked Apple Crepes with Ricotta

🍹 Related Recipes

Looking for more drink recipes like this one? Try these:

  • glasses of mocktail with gingerbread
    Gingerbread Mocktail
  • a glass of eggnog cocktail with a cinnamon stick
    Baileys Eggnog
  • a large glass of thai coffee with ice
    Thai Coffee
  • a mug of hot buttered rum with a cinnamon stick
    Hot Buttered Rum Recipe

Monte Cristo Sandwich Recipe

With both turkey and ham and flavored with jam and mustard, you'll want to put this Monte Cristo sandwich recipe on the menu for your next weekend brunch.

monte cristo sandwiches with mustard and jam

What is brunch? It's either a late breakfast, early lunch, or some hybrid of the two. If there was one dish that represented that hybrid, I can't think of a better manifestation than the Monte Cristo.

what is a Monte Cristo sandwich?

Simply put, the Monte Cristo is a ham sandwich. But it's not just another boring sandwich; it's one where the pieces of bread are crafted from slices of French toast. And when you take a bite, it melts in your mouth, resulting in one of the best sandwiches you'll ever make. Considering how much I love French toast - why have I never made this?

Right off the bat, it's a winner in my book, as my most common frustration with sandwiches is chewing through a rough chunk of dry, tasteless bread. And what's interesting is that the Monte Cristo often includes three slices of bread to help keep it all together, with two on the outsides and one in the middle. But even with three slices, the sandwich remains tender.

Meanwhile, the filling, typically ham and Swiss cheese, is warm and gooey after the assembled sandwich spends a few minutes warming in the oven. In my Monte Cristo sandwich recipe I threw in some sliced turkey as well, but that's totally your call. Use all ham if you like. Aside from that, the sandwich traditionally includes condiments such as mustard and mayo.

I don't often use mayo, and so instead, I combined Dijon mustard and black currant jam to add a little sweetness and complexity. Any jam will do. Raspberry or cranberry sounds good, but apple or apricot would pair nicely with the ham as well. Supposedly, people like to dip their Monte Cristo into jam, but I prefer to spread it throughout the sandwich and make sure every bite has a bit of the fruit and sweetness.

where does the Monte Cristo come from?

Although new to me, the Monte Cristo originated in Parisian cafes during the early 1900s, later becoming popular in America by the mid-20th century. It is a sort of variation on the Croque Monsieur, another ham and cheese sandwich that's toasted and coated in a bechamel (white) sauce.

monte cristo french toast

It's unclear what happened since then. I hardly ever see the Monte Cristo on menus, even though it wouldn't require anything special to be added to most breakfast menus. I think it's ready to make a comeback!

At home, it's easy to assemble several of these sandwiches at once and keep them warm in the oven until ready to serve. As I said, it's the perfect brunch food.

tips for the perfect Monte Cristo

After making the Monte Cristo using different techniques, I learned a few things.

You need to make the individual slices of French toast first. Some recipes instruct just dipping the assembled sandwich's outer sides in the egg batter, which doesn't produce nearly as light and tender a sandwich. Also, it's a pain to dip a whole sandwich in egg batter without everything falling out.

Second, my recipe suggests using two, not three, slices of bread per sandwich. But I think this depends on your bread. You could do three if you're using thin slices of ordinary sandwich bread. Increase the eggs to six and milk to ¾ cup, so you have enough batter.

On the other hand, if you're using a good quality artisan loaf from a local bakery, your slices will naturally be thicker and two slices should suffice.

Blackened Shrimp Salad

salad with serving utensils and dressing

In this vibrant Blackened Shrimp Salad, shrimp are seasoned with a flavorful blend of spices and quickly cooked under the broiler. They're nestled on a bed of fresh greens with tangy pickled onions, creamy avocado slices, juicy orange segments, and crumbled feta cheese, then finished with a refreshing lime and ginger vinaigrette.

shrimp salad with dressing, onions and cilantro

I often forget how satisfying a salad can be as a meal. That is, until I'm cutting greens from the garden by the bowl full and looking for any opportunity to enjoy them.

🥗 Why you'll want to make this salad

  1. You want a light and refreshing, yet completely satisfying meal.
  2. The cooking time is less than 10 minutes.
  3. It's easy. Much of the recipe is simply whisking ingredients and prepping items for the salad.

For more salad ideas, check out my recipes for Sweet Potato and Beet Salad, Arugula and Spinach Salad with Chicken, Kale Salad with Lentils, and Bok Choy with Tofu Salad.

[feast_advanced_jump_to]

🦐 Ingredients

Here's everything you need to make this blackened shrimp salad.

ingredients for the blackened shrimp salad

This may seem like a long list of ingredients, but that doesn't mean there's a lot of work to this recipe. Several ingredients are simply whisked together to make a dressing, while others are combined in a bowl to make the spice mix. Considering this is a salad, you can leave out ingredients as you see fit.

Key Ingredients

  • Shrimp - Any size shrimp will work in this recipe. Just remove the peels and, if desired, devein them before cooking. Leaving the tails on will allow for a more attractive presentation, though it will create a bit of work when you go to eat your salad. Either fresh or frozen and defrosted shrimp will work fine.
  • Salad greens - Use your favorite greens. I've made this with spinach, arugula, and lettuce, and they are all great.
  • Black beans - A can of black beans adds more protein and substance to the salad.
  • Oranges - I like to use Mandarin oranges for the small segments, though clementines and tangerines would also work well.
  • Avocado - Adds a creamy component to the salad.
  • Pickled red onion - Adds mild tanginess
  • Feta cheese - What's a salad without a bit of cheese? Feta is a nice crumbly cheese with a mild taste that pairs well with the other ingredients. (I forgot to include it in my ingredient photo, sorry!)
  • Cilantro - Cilantro adds another fresh layer to the salad, though you can skip it if you're the type that finds it tastes like soap.

See the recipe card below for the full list of ingredients and quantities.

🐔 Substitutions & Variations

  • Try other proteins, such as cubed chicken or tofu, which would both be good substitutes for the shrimp. Adjust the cooking time as necessary.
  • Add some crunch with toasted pepitas or sunflower seeds. I only left them off because I knew the ingredient list was already long. Fresh corn sliced off the cob would also be nice.
  • Make it spicier by increasing the cayenne pepper or adding a little sriracha to the dressing.
  • Customize the heck out of it because it's just a salad. Don't like black beans? Fine. Leave them off, or try chickpeas. You can't be bothered to pickle some onions? Skip them. Have another cheese you want to use instead of feta? Great. Go for it. Too often, people see an ingredient they don't like in a recipe, and decide they won't bother making it when it's so easy to swap it or leave something out.

🔪 Instructions

Here are the steps to make this blackened shrimp salad.

shrimp being brushed with oil
  1. Step 1: Spread the shrimp on a baking sheet lined with a rack. Remove the peels if you haven't already. (Tails can be left on if desired.) Pat the shrimp with paper towels to dry it, then brush one side of the shrimp with olive oil.
spices sprinkled over shrimp on a tray
  1. Step 2: Combine the spices and ½ teaspoon of salt in a bowl. Sprinkle half of this over the shrimp. Place the baking sheet under the broiler and cook for about 5 minutes. Flip the shrimp, brush with another tablespoon of oil and the remaining spices, then return to the broiler for another 3-4 minutes until lightly blackened.
mandarin oranges being peeled
  1. Step 3: Peel and separate the oranges into segments.
blackened shrimp salad dressing ingredients in bowls with whisk
  1. Step 4: Whisk the lime juice, vinegar, ginger, mustard, and honey in a small bowl.
salad dressing ingredients being whisked
  1. Step 5: Slowly stream in the olive oil as you whisk to combine.
the shrimp salad being assembled with prepped ingredients
  1. Step 6: Assemble the salad to your liking with the shrimp, oranges, onions, black beans, cilantro, feta, and dressing.

🌠 Top Tip

Broiling is a quick cooking method that uses high heat. That means food can easily burn if you're not paying attention, so don't wander far from your oven as the shrimp cooks. Keep in mind that broilers all cook a little differently, so please use the cook times as a suggestion. If your shrimp look like they're burning, certainly remove them from the broiler sooner.

🔥Equipment

Broiler - This is how we're cooking and blackening the shrimp. Broiling is a cooking method where high heat cooks food from above. Think of it like reverse grilling. Most ovens have a broiler setting, and all you need to do is move your oven rack to the top of the oven so that your food is in close proximity to the heat.

If you don't have a broiler, you can still get high heat and light charring on your shrimp using either a grill, a pan on top of your stove set over high heat, or turning your oven up to 500 degrees F and placing your baking sheet pan on the top most rack.

🥡 Storage

To store or prep this salad in advance, place the ingredients in individual airtight containers in the fridge for 3-4 days. I don't recommend assembling the salad more than a few hours in advance, and of course, you should wait to dress it until you're ready to serve.

🙋🏽 FAQ

Why is it called blackened shrimp?

Blackened shrimp are seasoned with a spice mix and cooked with high heat to achieve a darkened crust on the exterior. You can flavor and cook shrimp to blacken them in many ways, and it's a popular method in Creole and Cajun cooking.

How do you know when shrimp are fully cooked?

When cooked, shrimp turn opaque and curl into a loose "c" shape. They should also feel firm to the touch. When in doubt, cut one open to check. You can also use a thermometer to take the temperature of a couple of shrimp, which should be 145 degrees F.

What is the best way to thaw frozen shrimp?

You can thaw frozen shrimp by putting them in a colander and running cool water over them until defrosted.

🍹 Pairing

Here are a few drinks you could serve with this blackened shrimp salad:

  • glasses of lemon balm lemonade drink
    Lemon Balm Lemonade Recipe
  • glasses of rhubarb gin cocktail with a bottle of rhubarb juice
    Ginger Rhubarb Gin Cocktail
  • glass of elderflower gin tonic with gin bottle and flowers
    Elderflower Gin and Tonic
  • watermelon basil vodka cocktail in a martini glass with basil and watermelon garnish
    Watermelon Basil Cocktail

🥬 Related Recipes

Looking for other salad recipes like this one? Try these:

  • plate of salad with beets and sweet potatoes
    Sweet Potato and Beet Salad
  • large plate of arugula spinach salad with chicken and dressing on side
    Arugula and Spinach Salad with Grilled Chicken
  • a large plate of bok choy, tofu, and radishes with dressing
    Bok Choy with Tofu Salad
  • plates of chicken salad
    Coronation Chicken Salad

Red Wine Beef Stew

This red wine beef stew, called Beef Bourguinon, is a French classic that Julia Child considered "one of the most delicious beef dishes concocted by man."

red wine beef stew in plate over noodles with wine

We're getting into the depths of winter here in Vermont. The time of year when the snow starts to pile up and it becomes too cold and bitter to venture out for long. These are the days to make hearty meals that cook slowly through the course of a lazy weekend. Think stews that warm the air with gentle heat and meaty aromas. This kind of cooking brings a sense of comfort that helps me get through some of our longest winter days.

how do you spend your winter?

I admire those folks who make the most of this time of year and get out there to ski and run. Myself, I lose motivation after that first whack of cold air stings my face. If I'm going to exercise, it's going to be inside somewhere with heat. The brisk two-minute walk from my car to the office this morning was longer than I'd like to spend in negative temperatures.

While I'm keeping warm, I'll plan my garden, which is in need of a rebuild this year as the wood in my raised beds is starting to rot. Maybe I'll watch enough YouTube videos to learn how to construct a new patio and walkway for a faraway spring. I'll also sit down and finally complete those various online courses I've signed up for over the years, so I can learn how to use Lightroom like a pro, master the top 100 shortcuts to Excel, or re-learn Italian. Not to mention, I need to get going on my goal of reading 34 books in 2019.

No doubt, there is much to get done even on the dreariest of days. And if a stew can cook away at the same time, even better.

Beef stew is such a comforting classic, it's hard to go wrong. Just keep in mind that the slower the cook, the more tender the beef. A stew is a perfect way to take advantage of a cheaper cut of meat that in many other cases would prove tough and dry.

a red wine beef stew

Julia Child's Beef Bourguignon is one of my favorite stews. Yet, like many of the recipes in "Mastering the Art of French Cooking," it comes across as more complicated and time-consuming than necessary. Julia made French cooking accessible to American home cooks when her book was published in the 1960s, but it doesn't always feel practical for everyone these days.

I always try to approach cooking with integrity and practicality, especially if I expect anyone to recreate what I post in their own kitchens at home. So that's what I've done with Julia's recipe here. I certainly don't pretend to know any better. I've just found that most people I know don't like to bother with anything that appears fussy.

For the most part, the ingredients remain the same, with adjustments in the amounts and methods. What's most important to the dish is the red wine. I don't think you need to love wine to appreciate the flavor of this stew. However, you can't leave it out. The carrots, bacon, pearl onions, and mushrooms help balance out the wine and meat.

When I plan to make a stew like this, I like to head to The Vermont Butcher Shop. They have a small shop here in Rutland where I can get fresh, mostly local meats. And they're usually happy to cut up the beef for me, too.

Whether you make this for a quiet night in or while having friends over for dinner this winter, this is the stew that will remind you that the best part of the cold is the opportunity to warm up.

no time? make it in your Instant Pot

If you don't have all day to let this cook, that's ok! I tried this recipe out in my Instant Pot on a weeknight recently and it turned out great. I cooked the bacon, browned the meat, and sauteed the vegetables all in the one pot using the saute setting.

Instead of cooking it for 2 ½ hours in the oven, I cooked it for 50 minutes at high pressure. Other than that, I didn't change any of the ingredients. I just made sure not to go above the max fill line and kept the amount of broth at two cups.

I think this works well if you don't have the time for the longer cook. But if you do, the meat turns out a bit more tender when cooked low and slow.

Red Flannel Hash

Red flannel hash is a riff on corned beef hash and this recipe is a vegetarian version with beets, rutabaga, and tempeh crumbles.

tempeh hash in pan with eggs

I was waiting for the holidays to be over to share a classic beef stew recipe I've made a few times lately. But then I woke up this morning to find that the feeling of fullness and overindulgence remained. Instead, I wanted to do some light cooking with plenty of vegetables.

what is a red flannel hash?

I heard about a dish called red flannel hash while looking up ideas for cooking through my small stockpile of beets. Red flannel hash is considered a traditional New England dish, but it was the first I heard of it. Which is strange, because I've lived here my whole life. It turns out that red flannel hash is just a riff on corned beef hash, a dish I do know well. The difference between the two is the addition of beets.

People often make corned beef hash from the leftovers of a meal called the boiled dinner. Boiled dinners were on regular rotation at my grandparents' house growing up in Connecticut and today I often have it around Easter with my wife's family here in Vermont.

I never realized it was a traditional New England dish until I was older. The boiled dinner is so basic, it's surprising to hear that not everyone throws vegetables and a hunk of corned beef in a pot of water and boils the life out of it all. Don't get me wrong, I like a boiled dinner just fine every once in a while, but it is a blander meal than I typically enjoy. And saltier!

While red flannel hash is a riff on corned beef hash, I wanted to make a completely vegetable-based version to get over that post-holiday heaviness. So not only did I add in beets, I replaced the potatoes with rutabaga and the corned beef with crumbled tempeh. Then I added in some carrots.

roasted root vegetables on a tray

a good use for root vegetables

You could just use potatoes and beets if that's what you have. Turnips would also work well. Or use whatever combination you like, keeping the total amount of vegetables to about five cups.

In fall and winter, the produce drawers of my fridge are full of root vegetables. Beets, turnips, and carrots are the most common. They tend to grow well in my garden and they keep for weeks. You can find good deals from your local farmers, especially if you buy a few pounds worth at a time. If they get a little dried out and wrinkled, soak them in water for a few hours to help rehydrate.

Everything can be cooked ahead and formed into the hash, so it doesn't take long to put the actual dish together. Use leftover vegetables if you have them, or cook everything a day or two ahead.

When I don't have the leftovers, I like to cut the vegetables into half-inch dice and then roast them at 375 degrees for about thirty minutes. I cook them until just tender so that they still hold their shape. You could also cook up all of the vegetables in an instant pot and chop them after. You could do this up to a few days in advance to save yourself time when preparing the hash.

a plate of crumbled tempeh

A few words on tempeh

Alright, so the tempeh part. In this recipe, I use crumbled tempeh instead of corned beef. But what is it? It's a vegetarian protein that's worth a try. I cook with it on a regular basis, usually about once a week.

Tempeh has a savory, nutty flavor with a firm texture. Although it is made out of soybeans, unlike tofu, I think tempeh offers more versatility and flavor. If you haven't tried it, I recommend giving it a chance. It's quite affordable and can work well in a number of dishes.

The tempeh crumbles recipe below can be used wherever you like to use ground beef or turkey. Whenever I make this, I double the batch and freeze half to save for another meal.

I like the idea of enjoying this hash for breakfast, topped with a fried egg. But it works well for a light dinner just fine, too. For another tasty egg dish that works any time of day, try my broccoli and stilton quiche recipe.

Stuffed Yorkshire Pudding

a tray of sausage stuffed yorkshire puddings

This Stuffed Yorkshire Pudding offers a festive combination of warm, savory sausage with the tart burst of fresh cranberries, all baked into a light, golden batter. The cranberries' tang perfectly balances the sausage's richness, creating a dish that's hearty enough for a quick dinner with a green salad on the side.

a tray of stuffed yorkshire puddings

Somewhere between the British classics known as Yorkshire Pudding and Toad in the Hole, these mini Yorkshire puddings are stuffed with a delicious mix of savory sausage and tangy cranberries. Unlike other stuffed Yorkshire pudding recipes, the stuffing is baked into the pudding rather than filled after baking. Traditional? Perhaps not. Tasty? Absolutely.

🤤 Why you'll love this recipe

  1. The small puddings make a great appetizer, first course, or meal with a green salad or vegetable on the side.
  2. You'll enjoy a delightful range of flavors, including savory, salty, tart, earthy, and buttery. It's a seasonal and festive twist on classic Yorkshire pudding.
  3. It's a simple recipe that's ready in about 40 minutes. Great for weeknight cooking.

For more festive holiday recipes, check out these:

  • Baked Scotch Eggs
  • No Bake Eggnog Cheesecake
  • Cherry Limoncello Biscotti
  • Walnut Cranberry Stuffing
[feast_advanced_jump_to]

🐖 Ingredients & Substitutions

Here's everything you need to make this Stuffed Yorkshire Pudding.

sausage, cranberries, and other ingredients for making the recipe

Key Ingredients

  • Flour, eggs, milk - For making the batter
  • Sausage - Use your favorite sausage. Mine is the red wine and garlic pork sausage from Vermont Salumi. You could use sweet, spicy, or other flavored sausage.
  • Cranberries - Fresh cranberries add tartness and fruit flavor to the stuffed puddings. Stock up on cranberries when they are in season and available in late fall. They freeze well, keep for months, and there are so many good uses for them.
  • Cooking oil - You need a high-heat oil to withstand the temperatures of the hot oven. It should have a smoke point of at least 450 degrees.
  • Thyme - Fresh thyme adds fresh herby flavor. You can use ⅓ as much if using dried.
  • Jam, jelly, or marmalade - Use any variety with a complementary flavor to your sausage, such as apple jelly, fig jam, or orange marmalade.

See the recipe card below for the full list of ingredients and quantities.

🍎 Variations & Substitutions

  • Unstuffed Yorkshire pudding - Skip the sausage and cranberries for a more traditional Yorkshire pudding.
  • Other stuffing ideas - You can stuff Yorkshire pudding with just about anything you like, so you can use this recipe as a starting point and change it to your liking. Leftovers, such as those from a roast dinner, also make good stuffing.
  • Replace the cranberries with apples - If you don't want to use cranberries, try an equal amount of peeled and chopped tart apples.

🔪 Instructions

How to make Stuffed Yorkshire Pudding.

cooking oil being brushed in a muffin tin
  1. Step 1: Add 2 teaspoons of cooking oil to each of the 12 muffin cups. Brush the oil around the sides of each.
ingredients for making the yorkshire pudding batter
  1. Step 2: Whisk the flour, milk eggs, baking powder, salt, and thyme to make the Yorkshire pudding batter.
sausage being sauteed in a cast iron pan
  1. Step 3: Cut the sausage into pieces and brown in a pan on the stove.
cranberries and sausage cooking in a pan
  1. Step 4: Add the cranberries and jelly to the pan, toss to coat, and cook for another minute then remove from the heat.
filling being spooned into yorkshire pudding batter
  1. Step 5: Pour the batter evenly among the muffin tin cups, then scoop in the sausage filling.
a tray of stuffed yorkshire pudding with cranberries
  1. Step 6: Bake the Yorkshire puddings for 20 minutes or until browned and puffy. Serve immediately.

🌟 Top Tips

  • After adding the oil, preheat the muffin tin in the oven for at least 10 minutes. Place the muffin tin on a baking sheet in case there is any spillover.
  • Be careful when spooning the Yorkshire pudding batter into the hot oil in the muffin tins to avoid splashing and burning yourself. However, you want to fill the tin quickly so it doesn't cool down.
  • Don't open the oven door while the puddings bake, as this can cause them to deflate.
  • According to an incredibly detailed and helpful article about Yorkshire Pudding on Serious Eats, Kenji explains that batter that if you let your batter rest overnight in the fridge, you'll get a better rise and flavor on your puddings. So if you have the time or want to get a head start on this recipe, give that a try.

🍳 Equipment

Muffin tin: This recipe works well with a 12-cup muffin tin. However, you can also use a pan with fewer, larger-sized cups to make larger-sized Yorkshire puddings. Slightly increase the baking time to make up for the larger size.

🥡 Storage

Leftovers can be stored in an airtight container for up to three days. To restore some of the crispness, they should be reheated in a 350°F oven for about 10 minutes.

🤔 FAQ

What is Yorkshire pudding called in America?

We call them popovers. They're essentially the same recipe. The main difference is that Yorkshire pudding uses beef fat drippings instead of oil.

Can you eat Yorkshire pudding cold?

Yes, you can eat Yorkshire pudding cold. However, they're really at their best when they're hot and fresh out of the oven.

What is the trick to Yorkshire pudding?

The oven, pan, and oil should all be as hot as possible for the best rise on the Yorkshire puddings. Letting the batter rest before baking also helps.

🥗 Pairing

Try this recipe with one of these:

  • a dish of beet broccoli salad with yogurt dressing
    Beet Broccoli Salad
  • jars of quick pickle beans with garlic and dill
    Quick Green Bean Pickles
  • plate of salad with beets and sweet potatoes
    Sweet Potato and Beet Salad
  • plate of roasted pumpkin wedges
    Maple Roasted Pumpkin

🥚 Related Recipes

Looking for other recipes like this? How about one of these:

  • a plate with sliced scotch eggs
    Baked Scotch Eggs (Gluten Free and Keto)
  • cheese scones on plate with chives
    Easy Cheese and Chive Scones
  • the sun dried tomato quiche in a pan with plates and serving utensil
    Broccoli and Stilton Quiche
  • plate of poblano casserole with salsa
    Easy Chile Relleno Casserole

Potato, Leek, and Broccoli Knishes

potato knishes baked on baking sheet

A savory Jewish snack or side, these knishes are stuffed with broccoli, leeks, potatoes and cheddar cheese. Enjoy them at the holidays or any time of year.

leek and broccoli knishes

It's Hanukkah this week and a good time to appreciate Jewish food a bit more. There are many staples of the holiday. The fried potato cakes known as latkes are one of the most popular. Or maybe you've tried the delicious crescent-shaped pastries called rugelach. They are stuffed with ingredients such as cream cheese, nuts, raisins, preserves, cinnamon, and chocolate. Both are worth bringing to a holiday gathering, no matter what it is you celebrate.

what are knishes?

Looking for something new to try, I decided to makes knishes. A traditional knish is a pastry filled with mashed potatoes and caramelized onions. Carb heavy they may be, but the comfort they provide makes it all worth it. They may not be a top contender for the Hanukkah feast, but I don't think they'd be unwelcome, either.

where do knishes come from?

Originally from Eastern Europe, knishes gained popularity in New York City - the boardwalks of Brooklyn, to be exact - in the early 1900s thanks to Ashkenazi Jewish immigrants. At the time, you could find them for sale in pushcarts. Compact and already in self-contained pastry vessels, knishes are ideal street food. Knishes recently made a comeback, and you can now find shops in New York specifically dedicated to them.

You can find knishes filled with all kinds of foods and not just savory ones. The common theme is that knishes are small pockets of stuffed dough. If you think about it, they're not all that unlike several other foods found in cultures worldwide, such as the samosa, calzone, Cornish pasty, or empanada. All of which make great snacks, perfect party fare, or reasonable meals when served with a side salad, of course.

rolling out knish dough
rolling out the knish dough

leek and broccoli knishes

I replaced the onions in my knishes with leeks, added in a little cheese and some chopped broccoli to give the pretense of healthiness. I used a popular dough recipe with a couple of tweaks, such as using butter in place of oil, adding more flour, and reducing the water. But if your dough seems too dry, certainly add more water.

Don't let the length of this recipe intimidate you. It mostly describes how to cut and shape the dough. You can make things more time-friendly by preparing the dough up to a few days in advance and storing it in the fridge until you're ready. You may prepare the filling ahead, as well.

Roasted Pumpkin Pasta with Sage

dish of pumpkin pasta with sage

Roasted pumpkin pasta with sage is a sweet, savory, and earthy pasta dish that perfectly embodies the flavors of fall. This satisfying meal offers a lot to love and is made with fresh pumpkin and sage, sausage, spices, parmesan cheese, and cream.

dish of pasta topped with pumpkin sage sauce

I've been making variations on this pumpkin pasta dish for years. I keep returning to it each fall, and for good reason. Here's what I like about it:

  • There is so much flavor. Ground sausage adds richness, while plenty of fresh sage and pumpkin add earthiness. Fresh ginger and ground cinnamon add sweet spice, white wine adds depth, and Parmesan and half-and-half add creaminess.
  • It's a great savory use for pumpkin. This sauce proves that other vegetables, besides tomatoes, can make delicious sauces and that pumpkin isn't just for pies and other sweets.
  • You can select the degree of effort you want to put in. When you're short on time and don't want to roast pumpkin, you can open up a can of pumpkin puree. However, when you have more time or can plan ahead, consider roasting and pureeing your own pumpkin.

For more of my pasta dishes, check out these:

  • Creamy Garlic Parmesan Chicken Pasta
  • Zucchini Mushroom Pasta
  • Pumpkin Couscous Salad
  • Pasta and Peas with Mint Pistachio Pesto
  • Artichoke Pesto Pasta

Ingredients

Here's everything you need for making roasted pumpkin pasta with sage.

all of the ingredients needed for making pumpkin pasta with sage

Key Ingredients

  • Pumpkin - Since this is a roasted pumpkin pasta recipe, you'll need a pumpkin. A sugar pumpkin is a good option, as they're a manageable size, but feel free to use whatever variety you can find.
  • Sausage - I love using Vermont Salumi's red wine and garlic sausage in this recipe. You can use a sweet, spicy, Italian, or other flavored sausage that you think would complement the dish nicely. If the sausage is wrapped in casing, no problem, as you'll remove it before cooking.
  • Sage - Fresh sage's woody, earthy flavor is a key component of the pumpkin sage sauce. Dried sage isn't the same, but you can use it at about one-third the amount of fresh sage. And if you don't have either, fresh rosemary works as a backup, though it will noticeably change the flavor of the final dish.
  • Pasta - Any type of pasta works well in this recipe. I like one that will hold the pumpkin sausage sauce well. In the photos, I used Sfoglini's Cascatelli, a pasta shape developed by Dan Pashman of The Sporkful podcast.
  • White wine - To deglaze the pan and add flavor to the sauce.
  • Parmesan - Because what's pasta without cheese?
  • Ginger - Adds a little zing to the pumpkin sauce.

Substitutions and Variations

  • Canned pumpkin puree - If you're short on time or don't have a fresh pumpkin handy, you can substitute canned pumpkin puree. Ensure you use pure pumpkin puree, not a sweetened and spiced pie filling mix.
  • Butternut squash - Makes an acceptable replacement for pumpkin in this recipe.
  • White wine - Don't want to use wine? Replace with additional broth.
  • Make it spicy - To add some spice to the sauce, you could either use a spicy sausage variety or add ½ teaspoon of red pepper flakes to the pan when you add the onion.

Instructions

pumpkin cut into pieces on a baking sheet

Cut your pumpkin into pieces. Scoop out the seeds. Drizzle with oil, sage, and salt and roast for 45-55 minutes or until tender.

sausage browning in a pan

Remove the casings from the sausage and break the meat into pieces in a pan. Continue breaking it up with a spoon in the pan as it browns for 5-10 minutes. Meanwhile, bring a pot of water to a boil for your pasta.

sausage, onion, spices cooking in a pan

Add the onion, garlic, ginger, bay leaf, cinnamon, nutmeg, and remaining salt and sage. Cook for five or so minutes until the onion is cooked, then add the wine and simmer for another two minutes until it is mostly cooked off.

pumpkin being pureed in a food processor

When the pumpkin is cooked, let it cool until it is easy to handle. Scoop out the flesh and puree it in a food processor until it is smooth. Add a splash or two of water to help the process.

pumpkin and broth added to pan with sausage

Pour the pumpkin puree and broth into the pan with the sausage. Simmer for 10 minutes, or until the sauce has thickened. Meanwhile, salt your boiling pasta water and add the pasta. Cook until al dente.

cream and cheese being added to pumpkin sausage sauce

Add the half-and-half and parmesan cheese to the pan. Stir the sauce and simmer for an additional couple of minutes, until the ingredients are incorporated and the sauce is heated through. Serve the sauce over the pasta and top with additional cheese.

FAQ

Can I roast the pumpkin in advance?

Definitely. I'd suggest roasting the pumpkin, pureeing it all at once, and then storing the puree in the fridge up to 3 days in advance. I find it easier to remove the skin and puree when the pumpkin is still warm.

How would I make this vegetarian?

You can leave out the sausage. It adds flavor and substance to the dish, but it would still be tasty if you left it out.

Do you peel a pumpkin before roasting?

It's not necessary. The skin should come off fairly easily after roasting when the squash is still warm. Use a spoon or knife, if needed.

Storage

Store leftover pasta and sauce in separate, air-tight containers in the fridge for up to three days. Since the sauce contains cream, I don't recommend freezing it.

🫑 Pairing

These recipes would pair nicely with this pumpkin pasta.

  • glasses of elderberry cordial
    Elderberry Cordial Recipe
  • three stuffed peppers with cheese
    Stuffed Peppers with Tomato Sauce
  • cocktail with pomegranate and rosemary
    Pomegranate Rosemary Cocktail
  • pear cake on a cake stand with caramel
    Caramel Pear and Cardamom Cake

Related Recipes

Looking for more pumpkin and squash recipes? Try these:

  • a bowl or risotto with pumpkin and parmesan
    Pumpkin and Sage Risotto
  • a plate of spaghetti squash topped with a meat sauce, cheese, and basil
    Grilled Spaghetti Squash with Meat Sauce
  • plate of roasted pumpkin wedges
    Maple Roasted Pumpkin
  • bowl of butternut chicken soup
    Butternut Squash Chicken Soup

Penne alla Rum

yellow dishes with penne and rum sauce with parmesan cheese and basil

Penne alla rum takes the classic penne alla vodka and swaps in white rum for a smooth, subtly sweet sauce made with tomatoes, cream, and basil. If you've ever wondered what to substitute for vodka in pasta sauce, this recipe is the answer.

dishes of penne with rum sauce with cheese and wine

When I first made this recipe, I intended to make the classic penne alla vodka, but realized I was out of vodka, so I skeptically decided to use white rum instead. The result was surprisingly good - a creamy, tomato-based rum pasta sauce that's every bit as rich and flavorful as the original.

If you've only ever had penne alla vodka, this penne alla rum might surprise you. The rum adds a subtle sweetness and warmth that pairs beautifully with tomatoes, cream, and Parmesan.

[feast_advanced_jump_to]

The original vodka sauce itself has murky origins. Maybe Bologna, maybe Moscow, maybe New York. But wherever it came from, it caught on in the 1980s and never left. One thing's for sure: it doesn't need vodka to taste great. Learn more about the mysterious origins of penne alla vodka.

If you like the idea of pasta dishes with a twist, you'll also want to check out my Roasted Pumpkin Pasta with Sage and Sausage, Pasta and Peas with Pesto, or Creamy Corn and Bacon Pasta. They're definitely not your ordinary pasta and tomato sauce.

😍 Why You'll Love This recipe

  1. It's a quick and easy pasta dish.
  2. It's rich, creamy, and full of tomato flavor.
  3. It's a variation on a classic that's just as good as the original.

For even more satisfying pasta dishes, try my Zucchini Mushroom Pasta, Artichoke Pesto Pasta, and Garlic Parmesan Chicken Pasta.

🍅 Ingredients

ingredients for making the rum pasta recipe on a white tiled background

Key Ingredients

  • Penne: Penne is the pasta shape of choice for the classic recipe, and I didn't change that in my rum-based version. However, you certainly could use whatever pasta you prefer, and it will be just as good.
  • White rum: A mid-shelf white rum is perfect for this recipe. You don't use anything too expensive. Just make sure you're using white rum, not dark or spiced rum, as they have completely different flavors and won't work well in this recipe.
  • Crushed tomatoes: You'll need one large can of crushed tomatoes or four cups. Or if you have fresh tomatoes available, why not crush your own? Roughly chop about two pounds of tomatoes, then use an immersion blender to puree them.
  • Cream: A splash of light cream adds richness to the sauce. Half and half may be substituted for a slightly lighter result.
  • Basil: Roughly torn basil is added to the sauce and used as a garnish. It helps keep the dish tasting fresh.

Check out the recipe card below for the complete list of ingredients and quantities.

📖 Substitutions & Variations

  • Other pasta: You can easily swap out the penne for any other pasta you prefer.
  • Alcohol-free: If you'd rather skip the alcohol, you can replace the rum with vegetable broth and a splash of lemon juice. The flavor won't be quite as complex, but it'll still be tasty.
  • Smoother sauce: The onions add a bit of texture to the sauce. If you'd rather it be smooth, use an immersion blender on it before adding the cream to blend it right in the pan.
  • With fresh tomatoes: If you have fresh tomatoes handy, you can roughly chop them up (no need to peel) and puree or blend them until smooth.

🔪 How To Make Penne Alla Rum

penne in a spoon over a pot of boiling pasta
  1. Step 1: Bring a large pot of salted water to a boil. Add penne pasta and cook until al dente, about 11 minutes. Drain and set aside when done.
onion and garlic being chopped on a cutting board
  1. Step 2: Meanwhile, chop onion, garlic, and basil.
onion sauteeing in a pan
  1. Step 3: Sauté the onion in olive oil over medium-low heat, stirring often. Cook until the onion is softened and golden, about 7-8 minutes. Add the garlic and red pepper flakes about halfway through.
white rum being poured into pan with onions
  1. Step 4: Pour in one cup of white rum. Turn the heat up to a rapid simmer and cook until the rum has reduced by half, about 3-4 minutes.
crushed tomatoes being poured into pan with onions
  1. Step 5: Pour in the crushed tomatoes and salt.
rum tomato sauce being reduced in a pan
  1. Step 6: Simmer the sauce until it has reduced and thickened, about 10 minutes.
cream being poured into rum tomato sauce
  1. Step 7: Pour in the cream and stir until well combined.
rum pasta sauce simmering in a pan
  1. Step 8: Simmer for another 2-3 minutes over low heat.
chopped basil being added to pan of creamy rum pasta sauce
  1. Step 9: Add the basil. Taste, and add more salt, if needed.
a bowl of pasta with rum and tomatoes and cheese
  1. Step 10: Serve the penne with plenty of tomato rum sauce, grated Parmesan cheese, and more basil.

✨ Top Tip

Stick with white rum for this recipe. You don't need anything fancy, but skip dark or spiced rum, as their strong flavors will throw off the sauce.

🥡 Storage

Store the pasta and sauce separately in the fridge for up to four days. Gently reheat in the microwave or stovetop until warmed through.

Since the sauce contains cream, I don't recommend freezing it. However, you could always freeze it without the cream and add it upon reheating.

🙋🏻‍♂️ FAQ

How can I make penne alla vodka without vodka?

White rum is a great substitute for vodka in penne alla vodka. It adds a similar depth and warmth without making the sauce taste boozy. Both spirits help blend the cream and tomato flavors into a smooth, cohesive sauce. If you're looking for an alcohol free alternative, try a good quality broth with a splash of lemon juice.

Can you get drunk from penne alla vodka?

No, it's very unlikely. That said, not all of the alcohol burns off during cooking. That's a common misconception. According to USDA research on alcohol retention during cooking, about 40% of the alcohol can remain in a sauce after about 15 minutes of simmering.

In this recipe, that works out to less than ½ cup total in the entire pan. Split between four servings, that's less than 1 ounce of alcohol per serving - far too little to have any noticeable effect once mixed with the pasta and sauce.

What does adding alcohol to pasta do?

Alcohol in small amounts helps release and combine flavor compounds in the tomatoes, cream, and aromatics. It's what gives a dish like penne alla vodka (or penne alla rum) that extra depth. When used properly, you shouldn't actually taste the alcohol; it just enhances everything else in the sauce. If you notice a strong alcohol flavor, it usually means the sauce didn't simmer quite long enough. Keep simmering and it will mellow out.

🍞 Pairing

Try pairing any of these recipes with this rum pasta:

  • rosemary parmesan bread sliced on a cutting board
    Rosemary Parmesan Bread
  • plates of tiramisu topped with cherries
    Cherry Tiramisu
  • mojito with blackcurrants, limes, and mint served
    Blackcurrant Mojito Cocktail
  • watermelon basil vodka cocktail in a martini glass with basil and watermelon garnish
    Watermelon Basil Cocktail

🍝 Related

Looking for more pasta recipes like this one? Try these next:

  • eggplant florentine in dish with fork
    Eggplant Florentine
  • a plate of spaghetti squash topped with a meat sauce, cheese, and basil
    Grilled Spaghetti Squash with Meat Sauce
  • pan with pasta and parmesan, garlic, and basil
    Creamy Garlic Parmesan Chicken Pasta
  • Creamy Bacon Corn Pasta

Lemon Balm Lemonade Recipe

glasses of lemon balm lemonade drink

With lively lemon and herbal flavors, this lemon balm recipe for lemonade is the perfect way to put to use this fragrant citrusy garden herb. It's a refreshing beverage for a hot summer day, and the maple lemon balm syrup can also be used to sweeten and flavor a number of other summer foods.

glasses and pitcher of fresh lemonade

If you've ever grown lemon balm in your garden, you'll know how much this herb smells just like a fresh lemon. I couldn't believe it the first year I grew it. Although lemon balm has a stronger lemon scent than taste, I still love finding ways to use it in the kitchen. Making lemonade was one of my first experiments.

🍹Why You'll Want to Make This Lemonade

  1. Lemonade made with lemon balm offers a unique dimension of flavor, with hints of herbiness and earthiness. And adding a sprig as a garnish enhances the visual appeal and provides the refreshing aroma of citrus.
  2. Fresh herbs are a summer essential. Not only are they satisfying for those growing their own, but they also enhance the season's enjoyment. Adding herbs like lemon balm to your drinks makes them more special and worth celebrating.
  3. I'm not a doctor, but in traditional medicine, lemon balm is believed to have several beneficial qualities, including its ability to help with relaxation. So, if you want to relax while sipping a glass of lemonade, you'll want to give this recipe a try.

I'm always looking for ways to add more fresh herbs to my cooking. If you are too, check out my recipes for Pasta and Peas with Mint Pistachio Pesto, Blackberry Scones with Thyme, Lemon Rosemary Olive Oil Cake, and this Pomegranate Rosemary Cocktail.

For more great nonalcoholic drinks, check out my Blackcurrant Smoothie, Strawberry Cream Soda, and Blueberry Lavender Lemonade.

[feast_advanced_jump_to]

🍋Ingredients

Here's everything you need to make this lemon balm recipe. The good news is it's only three ingredients!

ingredients for making lemon balm recips

Key Ingredients

  • Lemon Balm - Lemon balm is a perennial herb that's part of the mint family. As the name implies, the green leafy plant smells and tastes like real lemons. If you have lemon balm growing in your garden, you're in luck. Otherwise, look for it at your summer farmers market or specialty grocery stores. It's easy to grow, so if you find you like it, you should definitely try planting some as well.
  • Lemons - Pick large, bright yellow lemons that are firm, but have a little give. Ones with thin skin that are heavy for their size will have the most juice.
  • Maple syrup - Serves as the sweetener for the lemonade. Only real maple syrup will do, of course.

See the recipe card below for the full list of ingredients and quantities.

🌿Substitutions & Variations

Here are a few ways to change up this recipe:

  • Make it minty. Add a few sprigs of mint leaves to the pot when making the lemon balm syrup.
  • Serve it hot. Instead of using cold water, combine the lemon juice, the zest, and the syrup with boiling water to make a soothing pot of hot lemon tea. Kind of like my honey citrus mint tea recipe.
  • Try it with both lemons and limes. For a fun lemon-lime alternative, replace half of the lemon juice with fresh lime juice.
  • Add some fizz. Instead of combining the lemon juice with water, use plain seltzer for plenty of bubbles.

🔪Instructions

Here's how to make this fresh lemon balm recipe:

maple syrup simple syrup with lemon balm leaves
  1. Step 1: Combine maple syrup and water in a pot.
lemon balm leaves in pot for making simpele syrup
  1. Step 2: Add lemon balm leaves and crush them with a spoon to release their flavor. Simmer for 10 minutes on low heat, then strain out the leaves.
lemons being juiced
  1. Step 3: Zest 2 of the lemons, then juice all of them for a total of 2 cups of lemon juice.
lemon juice being poured into a pitcher
  1. Step 4: Pour the lemon juice into 4 cups of cold water.
maple simple syrup being poured into a pitcher
  1. Step 5: Add half of the lemon balm syrup to the lemonade.
pitcher being stirred with wooden spoon
  1. Step 6: Stir to combine. Serve over ice with a sprig of lemon balm and a slice of lemon.

⭐Top Tip

Be sure to taste and adjust the lemonade to your preferences. Use more of the maple lemon balm syrup if you want it sweeter or add more water to the pitcher if you prefer a more mild flavor.

🧊Storage

The lemon balm drink can be stored in a sealed container in the fridge and will remain fresh for at least a week. If you have any leftover lemon balm syrup, you can keep it in a tightly sealed jar in the fridge, where it will stay fresh for a few weeks.

💭FAQ

Can you eat lemon balm leaves raw?

Yes. Lemon balm is an edible herb in the same plant family as mint. There's no need to cook them before eating or using.

How can I make this lemonade into a lemon balm cocktail?

Make this lemonade into a lemon balm cocktail by adding a shot of gin or vodka to your glass.

What's the difference between lemon balm vs lemon verbena?

When it comes to culinary usage, there isn't much difference between lemon balm and lemon verbena. You can use them interchangeably. Verbena is often used in sweet dishes, while lemon balm is found more in savory. Verbena also has a stronger flavor, while balm's is zestier. Learn more about lemon verbena.

🥘Pairing

Serve this lemon balm drink recipe with any of these dishes:

  • a plate of artichoke pasta
    Artichoke Pesto Pasta
  • chicken sloppy joes with pickles
    Ground Chicken Sloppy Joes
  • a serving plate full of muffins with apples
    Apple Rhubarb Muffins
  • plates of asparagus and tempeh
    Orange Pan Fried Tempeh with Asparagus

🍸Related

Looking for other recipes like this one? Try these drinks:

  • glasses of earl grey tea cocktail with a bottle of gin
    Earl Grey Cocktail
  • a tin of maple syrup and a glass of maple milk
    Easy Maple Milk Recipe
  • Easy and refreshing cucumber gin cocktail with fresh lime and thyme, perfect for summer entertaining.
    Cucumber Gin Cocktail
  • peppermint mocha martini with lights
    Peppermint Mocha Martini

Sautéed Radishes with Wild Rice and Feta

Combine buttery sautéed radishes with earthy wild rice, crunchy almonds, and salty feta for a satisfying side dish.

plate of wild rice and radishes

I'm not a picky eater, but the older I get, the more I find myself learning to appreciate foods I once didn't care much about. Most recently, it was radishes. I used to consider radishes a bitter and boring nuisance. They were an unwelcome addition to salads that I left to drown in the pool of dressing at the bottom of my bowl.

[feast_advanced_jump_to]

Well, I've come to find that radishes can do more than ruin a salad. At times, they can even improve a salad or side dish.

I first started thinking differently about radishes a couple of years ago when I tried roasting them. That's right; I cooked radishes - a concept that had never crossed my mind until I tried it in a recipe. I had thought people only ate them raw. But roasting radishes brought out the sweetness and depth I always thought was lacking.

radishes fresh from the garden
Radishes freshly picked from my garden

How to grow your own radishes

Then I grew radishes in my garden. The difference between fresh radishes and the limp, flavorless ones in the grocery store is crazy. They're definitely the kind of vegetable best enjoyed as close to picking as possible. You never know how fresh anything is in the grocery store, no matter what they try to convince you. Trust me.

If you can, you should try growing your own, too. Just get a pack of radish seeds and plant some in a small patch of dirt. They don't take up much room, aren't very needy, and the common variety takes only about a month until they're ready to eat.

Keep radish seedlings well watered and thin them out as they grow. If you already have a garden, there's no reason not to grow them. You can even grow radishes in containers. If I can't convince you to eat them, radishes help improve the soil nutrients as they grow. So if nothing else, grow them for your garden then give them away.

If you can't grow radishes, check your local farmers' market. Radishes are a cool-weather vegetable, and now is the time to find them before it gets too hot to grow them again until the fall. Heat turns radishes bitter and causes them to bolt.

You'll find several kinds of different radishes again when fall approaches, such as the surprisingly vibrant watermelon radish, the large daikon radish, and the mysterious black radish. Give them each a try and see which you like best.

How to use radish greens

However you acquire your radishes, you want to keep them crisp. No one likes a soft radish. Trim off the roots and greens before storing. If young, the greens can be added to salads, while older, larger greens can be sautéed in oil with garlic. There are plenty of radish greens recipes out there, such as this beautiful-looking pesto, for starters.

How to store radishes

You can put the radishes themselves in a jar of water in the fridge. The water will keep them from drying out. Or you can place the radishes in a bag lined with moist paper towels. Though the sooner you can eat them, the better.

While I may be coming around to the idea of radishes, you still won't find me snacking on them right out of the garden any time soon. It doesn't take long to cook radishes no matter what method you use. Grilled, braised, roasted, and sautéed radishes are all worth a try.

pan of sautéed radishes in butter
sautéing radishes in butter

How to roast, grill, and sauté radishes

To roast radishes: halve the radishes depending on their size, toss with a little oil and salt, and roast at 450 degrees for about 15-20 minutes.

To grill radishes: it's the same as roasting, but depending on how hot your grill gets - mine always gets hotter than necessary - it may take only 10 minutes. Use a grill basket to keep the radishes contained, and shake them around every few minutes.

To sautée radishes: I like to slice them rather thin and cook in butter over medium heat for just about 3-5 minutes, or until they start to turn golden brown.

Radishes and butter, the perfect pairing

One of the best friends of the radish is butter. I've heard that people even eat them raw with cold butter. Weird. But I get it. Butter helps mellow the strong bite that radishes often possess. I'd rather cook them with butter, as the process of cooking also helps tame the flavor. Or grow them before the heat of summer to limit their bitterness.

Once you've cooked radishes, how do you make them more than just a snack? They're not big enough to serve as a side dish on their own. Raw radishes are fine in salads, pickled or chopped, and thrown into tacos. When cooked, you can incorporate radishes into other dishes, such as rice, omelets, soups, or pair them up with other root vegetables.

In this recipe, I mix sautéed radishes into a wild rice blend, along with fresh herbs, feta, and almonds to make a simple side dish. I used enough radishes to make them a prominent component, but not an annoying addition I'd try to pick out. And I don't do that anymore, anyway. 😉

a blend of wild rice
a wild rice blend

What is wild rice?

Wild rice is a grain that grows in shallow waters, such as small lakes and streams. It was first grown commercially in the 1950s in Minnesota, where it remains the state grain today. However, Native Americans have harvested and eaten wild rice for many years, using it to make stews, stuffings, and puddings. Three out of the four kinds of wild rice are native to North America. The fourth is from China.

I like to use a wild rice blend rather than 100% wild rice. Why? For starters, pure wild rice is not cheap. But it also has a strong flavor and texture that I find to be too much on its own. I much prefer the mix of grains in the blends that offer a range of flavors and textures. Blends, such as this one from Lundberg I often buy, contain black, brown, red, and wild rice.

Make it a meal. Try pairing this side dish with my recipe for Rhubarb and Apple Chutney with Pork Chops.

What do you think? Will you try cooking radishes now?

Easy Rhubarb and Apple Chutney

bowl of rhubarb chutney with apple slices

If you've only used rhubarb in pies, this rhubarb and apple chutney might change your mind. Cooked with apples, raisins, onions, and warm spices, it turns into a sweet and tangy sauce that's perfect for spooning over grilled meats or anything that needs a flavorful boost.

a bowl of apple chutney with rhubarb and ingredients

Rhubarb pairs surprisingly well with warm spices like ginger, making it a natural fit for chutney. In this version, I added some apple I had on hand for contrast-while the rhubarb cooks down into a jammy sauce, the apple stays a bit firmer and adds texture.

[feast_advanced_jump_to]

Vinegar brings a bright sour note, and a pinch of red pepper flakes adds gentle heat. The result is a sweet, tart, and spiced condiment that pairs especially well with grilled meats, such as pork chops or chicken.

😍 Why You'll Love This Chutney

  1. Chutney is a great way to add flavor to a dish. You could use this on everything from sandwiches to grilled meats.
  2. It has the perfect balance of sweet and tart. Thanks to the rhubarb and apple combo.
  3. It's a unique way to use rhubarb. No strawberries or pie crust required.

🍎 Ingredients

Here's everything you need to make rhubarb apple chutney.

rhubarb, ginger, apples, and other ingredients for the chutney

Key Ingredients

  • Rhubarb: You'll need a few stalks of rhubarb for this recipe. It's ok if they're not at peak freshness, as they'll be cooked down into the chutney. If you have frozen chopped rhubarb, you can use that as well.
  • Apple: You can use any crisp, sweet apple for the chutney. The sweetness balances the rhubarb while the crispness helps the chutney maintain some texture.
  • Onion: A key chutney ingredient that adds a little bite and savoriness.
  • Ginger: Adds a little sharpness and freshness.
  • Raisins: For a touch more sweetness and a little added texture.
  • Maple syrup: Whether a dark or lighter grade, it doesn't matter. Just make sure you're using genuine maple syrup, not a corn syrup imitation.
  • Apple cider vinegar: The best vinegar to pair with apples.

Check out the recipe card below for the complete list of ingredients and quantities.

🌿 Substitutions & Variations

  • Apples: Instead of apples, try pears.
  • Raisins: Try using any other dried fruit, such as cranberries or currants.
  • For an earthy, herby flavor: Add a couple of teaspoons of fresh thyme leaves.

🔪 Instructions

Here's how to make apple and rhubarb chutney.

rhubarb being cut into pieces on a cutting board
  1. Step 1: Slice the rhubarb into ½ inch pieces. Peel and roughly chop the apple and onion.
fresh ginger root being chopped
  1. Step 2: Peel and finely chop the ginger. You want about a tablespoon. Then, zest the orange.
spices being poured into a pan
  1. Step 3: Add the cumin, cinnamon, cloves, and red pepper flakes to a pan and toast for a minute or two over low heat until fragrant.
ginger being added to the pan of spices
  1. Step 4: Add the ginger to the pan,
apple cider vinegar being poured into the pan
  1. Step 5: along with the apple cider vinegar,
maple syrup being poured into the pan
  1. Step 6: and the maple syrup.
ingredients simmering in pan
  1. Step 7: Simmer for a couple of minutes, increasing the heat to medium-low.
apples being added to pan
  1. Step 8: Add the apple to the pan,
rhubarb being added to the pan
  1. Step 9: as well as the rhubarb, onion, raisins, and orange zest.
chutney cooking in a pan
  1. Step 10: Cook, stirring occasionally, until everything is tender and a sauce-like consistency has formed, about 12-15 minutes.

✨ Top Tip

  • Cook the chutney to the point where the ingredients are softened and broken down, especially the rhubarb, but not to long that there is no longer any texture.
  • You can freeze chopped rhubarb to make this in the fall or winter when fresh rhubarb isn't available. Just put chopped rhubarb in freezer bags or an airtight container and add to the pan when cooking the chutney as described in the recipe. You may need to add a few extra minutes to the cooking time.

🥩 How to Use Apple and Rhubarb Chutney

This chutney is an excellent accompaniment to a variety of dishes. Here are a few ideas

  • You can skip the balsamic sauce in my Grilled Pork Chops with Herbs and top it with the chutney instead. The tangy apple flavor makes this a perfect condiment.
  • Add some over the top of these Stuffed Yorkshire Puddings.
  • Serve a spoonful of chutney with these Cheese and Chive Scones for a satisfying snack.
  • Or try it in place of the jam on this Halloumi Toast.
  • Try it in place of marmalade on this Goat Cheese Grilled Cheese.

🥡 Storage

Store the chutney in an airtight container in the fridge for up to two weeks. You may also freeze the chutney for up to three months.

🙋🏻‍♂️ FAQ

Do apple and rhubarb go well together?

Yes, the sourness of rhubarb pairs well with the sweetness of most apples. Look for a sweet and crisp apple for this recipe.

Is chutney only commonly used in the UK?

Chutney is a sweet and tangy condiment that originated in India. This jammy, cooked style is especially popular in the UK-often served with cheese, cold meats, or savory pies. It's less common in the U.S. but may be found around the holidays.

What ingredients are used in chutney?

Chutneys can include a wide variety of ingredients. They may includes fruits, vegetables, vinegar, spices, a sweetener, and herbs.

Is this chutney able to be canned?

No. This recipe hasn't been tested safe for water bath canning. But Food in Jars is one of my favorite sources for canning recipes and there are some good chutney recipes there.

🥖 Pairing

Try these recipes with this apple and rhubarb chutney:

  • slices of toast with halloumi, jam, and pears
    Halloumi Toast with Jam and Honey Butter
  • rosemary parmesan bread sliced on a cutting board
    Rosemary Parmesan Bread
  • cheese scones on plate with chives
    Easy Cheese and Chive Scones
  • plate of grilled herb pork chops
    Grilled Pork Chops with Herbs

🌿 Related Recipes

Looking for more rhubarb recipes? Try these:

  • a serving plate full of muffins with apples
    Apple Rhubarb Muffins
  • two pieces of cherry pie on plates with coffee cups
    Cherry Rhubarb Pie
  • glasses of rhubarb gin cocktail with a bottle of rhubarb juice
    Ginger Rhubarb Gin Cocktail
  • four plates with slices of cake and rhubarb on side
    Rhubarb Crumble Breakfast Cake

Apricot and Chicken Tagine

large pan of chicken thighs with apricots and barley

In this one pot apricot and chicken tagine recipe, tender chicken thighs are slowly simmered in a stew with flavorful spices and dried apricots. It's served with nutty barley and topped with crunchy almonds and fresh herbs.

a pot of chicken tagine with a bowl of dried apricots

A tagine is a popular Moroccan dish that consists of a stew or casserole in which meat or poultry is slowly simmered with vegetables and dried fruit. To make it a one-pot kind of meal, I include barley in this recipe. It's satisfying and filling, and it's not your ordinary boring chicken dish. Not only is it easy to prepare, but most of the cooking is unattended.

Interestingly, the term "tagine" also refers to a special cooking vessel designed for low-heat and slow cooking. In other words, you can cook a tagine in a tagine pot. However, you can cook a tagine in any good heavy-bottomed pot with a lid, such as a Dutch oven.

Feel free to experiment with different dried fruits or adjust the spices to change the flavors. Ultimately, its the balance of sweet and savory that make this apricot and chicken tagine recipe special.

😍 Why You'll Love This Recipe

  1. It's a one-pot meal. Who doesn't love fewer dishes to wash?
  2. It's the perfect balance of savory and sweet. Paprika, turmeric, and ginger are combined with dried apricots, cinnamon and honey to create a unique balance of flavors.
  3. Chicken thighs and apricots keep the dish moist and tender. This isn't one of those dry or bland chicken dishes. I won't say it's foolproof, but it's close.

🐔 For more easy chicken recipes, check out my Chicken Swedish Meatballs, Garlic Parmesan Chicken Pasta, and Chicken and Squash Curry.

[feast_advanced_jump_to]

🍗 Ingredients

Everything you need to make this tasty chicken tagine recipe.

ingredients for making chicken tagine with apricots and almonds

Key Ingredients

  • Chicken thighs: You want about two pounds of boneless and skinless chicken thighs for the most tender result. If you prefer to keep the skin on, that's fine. It's more of a personal preference.
  • Dried apricots: Although we're using dried fruit here, by the end of cooking the apricots plump up beautifully and make a soft and sweet counterpoint to the savory chicken and chewy barley. I've never tried the recipe with fresh fruit, but I think it might end up too mushy.
  • Pearled barley: While most barley in stores is the pearled variety-meaning it has had the hull and bran removed-just double-check. Pearled barley cooks quicker but still has a nice nutty chewiness to it after cooking. (Here's more on the dfiferences between hulled and pearled barley.) Since it cooks in the pot with the chicken, I don't have a good suggestion for an alternative that won't turn out mushy. However, if needed, you can cook a grain separately and reduce the broth you add to the pot in half.
  • Almonds: Chopped and added in the last minutes of cooking, almonds add a pleasant crunch to round out the meal.
  • Cilantro: The tagine is topped off with freshly chopped herbs, but cilantro is certainly not the only option in case that's not your thing. I've also used parsley and even some mint.
  • Broth: Your favorite chicken or vegetable broth will work great. I almost always use Better than Bouillon. Just keep in mind, especially if using unsalted homemade broth, you will need to add some additional salt to properly seasson the dish.

See the recipe card below for the complete list of ingredients and quantities.

Substitutions & Variations

  • Try other dried fruits such as prunes or figs.
  • Chicken breasts instead of thighs are fine to substitute in this recipe, but they won't be as tender and moist as thighs.
  • Change up the spices: I include cinnamon, paprika, and turmeric in addition to the fresh ginger and garlic, but other recipes add coriander, cumin, cardamom, and even cayenne. Adjust to your liking and what you have on hand to aim for a balance of earthy and warm.

🔪 Instructions

How to make apricot and chicken tagine.

ingredients chopped on a cutting board with a knife
  1. Step 1: Chop the onion, garlic, herbs, apricots, and almonds.
chicken browning in a pot
  1. Step 2: Brown the chicken in butter, about 2-3 minutes per side. Sprinkle with paprika, salt, and pepper. When brown, remove from the pan and set aside.
onions sauteeing in a pot with spices to side
  1. Step 3: Saute the onion in remaining butter until soft, about 5 minutes.
spices being stirred into cooked onions
  1. Step 4: Stir in the ginger, garlic, turmeric and cook for another minute.
barley being poured into pot of onions and spices
  1. Step 5: Add the barley and toss to coat.
apricots being added to the pot
  1. Step 6: Add the apricots.
chicken stock being poured into the pot
  1. Step 7: Pour in the broth, cinnamon stick, and honey.
browned chicken being added back to the pot
  1. Step 8: Set the browned chicken back into the pot.
pot being covered
  1. Step 9: Cover and cook at 375 for about 40 minutes. Remove the top, add the almonds, and cook for 10 more minutes uncovered.
lemon being squeezed over the cooked apricot and chicken tagine
  1. Step 10: Top with the chopped herbs, squeeze over some fresh lemon juice, and serve.

See the recipe card below for the complete instructions.

✨ Helpful Tips

  • You can try this recipe with chicken breasts, but thighs will be the most tender.
  • Use a pot or Dutch oven with a tight-fitting lid to keep the moisture in the pot and help the food steam.
  • If using a homemade broth or stock without added salt, you'll want to add about ½ teaspoon kosher salt when you add the broth.

🫕 Equipment

Dutch oven: A Dutch oven or a heavy casserole dish with a lid is the best choice for cooking this stew unless you happen to have a tagine handy.

🥡 Leftovers

Store any leftover chicken tagine in a sealed container in the fridge for up to four days.

🤔 FAQ

Do I need a tagine to make chicken tagine?

Instead of the traditional Morrocan clay tagine, you can use a Dutch oven, braiser, casserole dish with a lid, or any other oven-safe, heavy-bottomed cooking vessel with a lid.

Can you use a crock pot instead of a tagine?

A crock pot may work instead of a tagine, though the recipe will need to be adapted and the cooking time will vary depending on your model. For this recipe, brown the chicken and sautee the onions as described on top of the stove, then add everything to the crock pot as you would normally. My best guess would be to cook for about 6 hours on low or 3 hours on high, though I haven't tried it myself and can't guarantee success.

What's the difference between a tagine and a stew?

A tagine is cooked in the oven in a vessel that traps heat and allows for steaming, while a stew is most often simmered on top of the stove. Tagines have flavors from North Africa and Morocco with sweet and savory ingredients, while stews usually use woody herbs and are strictly savory.

🥕 Pairing

Here are some great side dishes to serve with this apricot and chicken tagine recipe:

  • a bowl of mashed beets with butter and thyme
    Mashed Beets
  • a dish of carrots on a blue plate with a side of honey
    Hot Honey Carrots
  • a dish of beet broccoli salad with yogurt dressing
    Beet Broccoli Salad
  • two napa cabbage halves with sesame seeds
    Roasted Napa Cabbage

🍲 Related Recipes

Looking for other recipes like this one? Try these:

  • bowl of butternut chicken soup
    Butternut Squash Chicken Soup
  • Zucchini Curry
  • bowls of lentil and rice soup
    Lentil and Rice Soup
  • bowls and a pot of chili with vegetables
    Chili sin Carne

Cranberry Gingerbread Loaf

cranberry ginger bread sliced on cutting board

This cranberry gingerbread loaf is a lightly sweetened yet highly flavorful gingerbread cake baked with a swirl of tart cranberry sauce. Baked in a loaf pan and topped off with chopped pecans, you can enjoy this cake at any time of the day.

a loaf of gingerbread cake sliced

I often find gingerbread cakes underflavored and oversweetened. I wanted a cake that was less sweet and more spiced. When I came across a bag of fresh cranberries in my fridge, I thought their tartness would be a great addition to the typical gingerbread.

I liked the sound of this New York Times recipe by Melissa Clark. You make cranberry sauce and then stir it into the gingerbread cake batter. During the holidays, I always make plenty of cranberry sauce and keep it on hand to add to oatmeal, yogurt, ice cream, sandwiches, and wherever else I can find a use, which now includes cake.

I played with Melissa's recipe a bit-I removed the granulated sugar, reduced the other sweeteners, and added nutmeg and cloves. I wanted to bake it in a loaf pan to slice like bread and figured chopped pecans would be a nice way to top it off. So, here we are.

[feast_advanced_jump_to]

🍰 Why you'll love this cranberry gingerbread loaf cake

  1. Pockets of cranberry sauce enhance the cakes' flavor and moisture, and it's a great way to use any sauce you have leftover in your fridge from holiday meals.
  2. It's not super sweet, so it could be eaten for breakfast, dessert, an afternoon snack, or at any time. There is never a bad time for cake.
  3. A crunchy pecan topping may be simple but is a nice complement to the fresh cranberries rather than a sugary icing or frosting.

Interested in more holiday baking recipes? Give these a try next:

  • Ginger Cookies with Fresh Ginger
  • Limoncello Biscotti
  • No Bake Eggnog Cheesecake
  • Caramel Pear and Cardamom Cake

🫚 Ingredients

Here's everything you need to make this cranberry loaf.

ingredients for making the cranberry loaf

Key Ingredients

  • Cranberry sauce: Homemade cranberry sauce is swirled into the gingerbread cake to create gooey cranberry pockets through each slice. You can use my cranberry sauce with mandarin orange recipe, your favorite recipe, or store-bought cranberry sauce-just not the jellied stuff here.
  • Pecans: Add a crunchy, nutty topping to the cake. You can substitute any other nut or even pumpkin or sunflower seeds.
  • Molasses: For the classic deep, sweet flavor of gingerbread. This is an essential ingredient.
  • Maple syrup and brown sugar: A balance of both sweeteners adds more complex sweetness along with the molasses.

See the recipe card below for the complete list of ingredients and quantities.

🎉 Variations

  • Spicier: Not everyone loves intense spice in their baked goods like I do. But if you want to spice this up more, add a tablespoon of freshly grated ginger and a half teaspoon of ground black pepper to the other spices.
  • With even more cranberries: Add ½ cup dried cranberries to the batter before swirling in the cranberry sauce.

🥣 Instructions

How to make this cranberry gingerbread loaf recipe.

whisking melted butter with sugars in a pan
  1. Step 1: Melt the butter in a saucepan and whisk in the maple syrup, molasses, and brown sugar. Let it cool briefly.
whisking dry ingredients in a bowl
  1. Step 2: In a bowl, whisk together the dry ingredients.
eggs being added to dry ingredients for the cranberry cake
  1. Step 3: Stir in the yogurt and eggs.
molasses being poured into cake batter
  1. Step 4: Along with the butter and molasses mixture.
mixing ginger bread loaf batter
  1. Step 5: Stir the cake batter until combined and the dry ingredients are all incorporated. Pour into a greased loaf pan.
spreading cranberry sauce over the cake
  1. Step 6: Pour the cranberry sauce over the batter and use a knife to swirl in.
pecans sprinkled over cake
  1. Step 7: Spread the chopped pecans over the top and then bake at 350 degrees F for 50-60 minutes or until a knife inserted into the cake comes clean.
cranberry loaf sliced
  1. Step 8: Let cool in the pan for 5 minutes before transferring to a cooling rack.

🔪 Helpful Tips

  • Just another reminder that you'll need cranberry sauce for this recipe. You can use leftover sauce you may already have, make a quick recipe like my Cranberry Sauce with Mandarin Orange, or use store bought (but not the jellied stuff). But for the absolute quickest way to make cranberry sauce without having to think or reference another recipe, simmer 1 cup fresh cranberries with ½ cup of water and ½ cup of sugar until the cranberries have broken down and thickened.
  • When testing the cake for doneness by sticking a knife or cake tester into the center, keep in mind that there are swirls of cranberry sauce that will remain soft. So you'll want to test it in a few spots to make sure you're actually reaching cake.
  • Let the melted butter and molasses mixture cool for a few minutes before stirring it into the dry ingredients. You don't want it to cook the eggs, which are added at the same time.

🍳 Equipment

Loaf pan: This cake is baked in a bread loaf pan about 8x4 inches. If you don't have a loaf pan, you can also bake it in a cake pan or a square baking dish. The baking time will likely be shorter, so start checking for doneness after about 35 minutes. Here's some helpful info on how to convert pan sizes.

🫙 Storage

Cover tightly and store this cake at room temperature for up to three days.

🤔 FAQ

What is the difference between a loaf cake and a cake?

The difference is really just the pan it is baked in. Loaf cakes are baked in a loaf pan while other cakes are baked in standard cake pans.

What flavor goes with gingerbread?

Pair gingerbread with apples, citrus, dried fruits, cranberries, nuts and seeds, chocolate, cream cheese, vanilla, bourbon, and coffee - to name just a few ideas.

Can I use a cake pan instead of a loaf pan?

Yes, you can use a cake pan instead of a loaf pan. Just keep in mind that the baking time will likely be less and the size and shape of your cake will vary depending on the size of your pan.

What makes gingerbread taste like gingerbread?

Molasses and spices such as ginger, cinnamon, cloves, and nutmeg all make gingerbread taste like gingerbread.

🫖 Pairing

Any of these drinks would go great with this cranberry gingerbread loaf.

  • two coupe glasses with cold brew martinis
    Cold Brew Martinis
  • glasses of mocktail with gingerbread
    Gingerbread Mocktail
  • a large glass of thai coffee with ice
    Thai Coffee
  • a glass mug of citrus tea being poured from a tea pot
    Honey Citrus Mint Tea

🫐 Related Recipes

Looking for more cranberry recipes? Try these next:

  • cranberry mocktail in a coupe glass
    Cranberry Orange Mocktail
  • slices of cranberry tart
    Cranberry White Chocolate Tart
  • bowl of cranberry sauce with orange
    Cranberry Sauce with Mandarin Orange
  • stuffing in muffin tin
    Cranberry Walnut Stuffing

Coronation Chicken Salad

plates of chicken salad

Sweet, crunchy, and gently spiced with curry, this easy coronation chicken salad is a fresh, flavorful version of the British classic.

plates of chicken salad with wine

Served at Queen Elizabeth II's coronation in 1953, coronation chicken salad combines cooked chicken with a creamy, curry-spiced sauce. Over the years, countless versions have popped up, but they all share the same sweet-and-savory spirit. My version stays true to the dish's flavor-forward roots while swapping out the mayo for tangy yogurt for a lighter finish.

This recipe combines tender chicken with diced bell peppers, dried apricots, chopped almonds, and fresh herbs. The sauce-made from sautéed red onion, tomato paste, curry powder, wine, and broth-is quick to assemble and deeply flavorful.

It's simple enough to throw together with leftover chicken, whether roasted, grilled, or pan-fried. I keep the pieces chunky for a more satisfying texture. Serve it over greens for dinner or pile it onto crusty bread for lunch the next day-after the flavors have had a chance to meld, it's even better. It also makes a nice appetizer when served in small portions on crackers or lettuce cups.

I think what I love most about this recipe is that while it was served at the Queen's coronation, it's simple enough for light weeknight cooking.

😍 Why You'll Love This Recipe

  1. With curry and dried fruit, it's a delicious take on chicken salad.
  2. It makes a great lunch or light dinner, and there are plenty of ways to serve it.
  3. It's a good way to use leftover chicken, and it's a good choice for hot days when you don't feel like cooking.

Salads are more than just a side dish! Just take my Blackened Shrimp Salad, Egg Salad with Dill Pickles, and Bok Choy and Tofu Salad. And for another chicken salad (though of a different variety), try my Arugula and Spinach Salad with Grilled Chicken.

[feast_advanced_jump_to]

🐔 Ingredients

Here's everything you need to make coronation chicken salad.

ingredients for making the chicken salad recipe

Key Ingredients

  • Cooked chicken: You need about a pound of cooked chicken. If you have leftovers, this is an excellent way to put them to use. You could also use a rotisserie chicken from the grocery store. Or quickly cook some chicken (I prefer using thighs), however you like. You can save yourself some time by cooking chicken in advance and using it for this salad.
  • Dried fruit: I often use dried apricots in this recipe, but I also use whatever I have in the pantry, such as dried cherries, cranberries, figs, or raisins.
  • Bell pepper: Chopped bell pepper adds a nice fresh crunch to the salad. Red or orange peppers pair well with the orange color of the sauce, but the color itself is not particularly important and won't impact the taste.
  • Almonds: For more crunch and texture.
  • Curry powder: I use a mild, yet flavorful, curry powder blend from Penzeys curry.
  • Yogurt: Plain Greek yogurt adds richness and creaminess to the curry sauce. Use whatever yogurt you prefer, just make sure it's not flavored.
  • Parsley: A small bunch of chopped fresh parsley adds a fresh flavor to the salad. You can use cilantro if you prefer. But don't skip the herbs, they're not a garnish here.

Check out the recipe card below for the complete list of ingredients and quantities.

Substitutions & Variations

  • Dried fruit: I mention dried apricots, as they're the traditional choice, yet really any dried fruit works.
  • Omit the wine: It's not essential. Replace it with additional broth.
  • Turkey salad: Try this with leftover turkey meat instead of chicken. It's a smart and easy recipe for using up leftover Thanksgiving turkey.
  • Additions: You can't go wrong customizing this salad to your liking. Try it with sliced grapes, chopped celery, scallions, and other nuts aside from almonds. Add or omit these kinds of additions to make it your own.

🔪 Instructions

Here's how to make this curry chicken salad from scratch.

onion and ingredients being chopped on a cutting board
  1. Step 1: Chop the onion, chicken, almonds, dried fruit, bell pepper, and herbs.
red onion sauteeing in a pan
  1. Step 2: Cook the onion in butter until soft.
sauteed onions with tomato paste and curry powder
  1. Step 3: Add the bay leaf, tomato paste, and curry powder.
onions and tomato cooking in a pan
  1. Step 4: Cook for a couple of minutes while stirring.
wine being poured into curry sauce pan
  1. Step 5: Pour in the wine and let it cook for a couple of minutes.
curry sauce cooking in a pan
  1. Step 6: Add the broth and dried fruit. Cook for an additional couple of minutes until the mixture has thickened.
surry sauce being stirred into yogurt
  1. Step 7: Let cool briefly, then stir in the yogurt, cream, and lemon juice.
chicken and parsley added to bowl of curry sauce
  1. Step 8: Finally, add the chicken and herbs.
a large bowl of coronation curry chicken
  1. Step 9: Toss the mixture well to combine all the ingredients.
plates of chicken salad with wine
  1. Step 10: Serve on greens, toast, with crackers, or however else you prefer.

✨ Top Tip

Chop the chicken, peppers, onion, dried fruit, and nuts to a similar size for a more cohesive salad with balanced bites.

🥡 Storage

Chicken salad will keep in the fridge for up to four days, stored in an airtight container. The flavor improves after a day, but for the best texture, enjoy it within the first two or three days. I don't recommend freezing this recipe.

🙋🏻‍♂️ FAQ

How far in advance can you make coronation chicken salad?

If the chicken is cooked the same day, you can make the chicken salad up to four days in advance.

What can you have with coronation chicken?

I would serve this salad with salad greens, in between slices of bread, in a pita, or over crackers. Consider serving is with a refreshing beverage, and other light foods, such as a soup or light appetizers.

What is a coronation salad?

Coronation salad refers to a curry chicken salad recipe that was created for Queen Elizabeth II's coronation lunch.

🍹 Pairing

Any of these recipes would go great with this chicken salad.

  • a glass of frozen matcha latte on a countertop with straw
    Frozen Matcha Latte
  • smoothie in glass topped with mint and blackcurrants
    Blackcurrant Smoothie
  • a bowl of soup with celery and leeks, and potatoes
    Creamy Celery Leek Soup with Croutons
  • jars of quick pickle beans with garlic and dill
    Quick Green Bean Pickles

🥗 Related Recipes

Looking for other recipes like this one? Try these:

  • an egg salad sandwich on a plate
    Egg Salad with Dill Pickles
  • large dish of pesto orzo salad
    Orzo Pesto Pasta Salad
  • chicken sloppy joes with pickles
    Ground Chicken Sloppy Joes
  • large plate of arugula spinach salad with chicken and dressing on side
    Arugula and Spinach Salad with Grilled Chicken

Pasta and Peas with Mint Pistachio Pesto

two plates of pasta with peas and mint pesto with a side of peas and drink glasses

This pasta and peas with mint pistachio pesto recipe is a unique twist on classic pasta and pesto. Fresh green peas, mint, garlic, and roasted pistachios are blended together to make a flavorful and vibrant pasta sauce for tossing with noodles, more peas and creamy sauteed leeks. It's a satisfying and refreshing dinner recipe great for weeknight cooking.

plates of green pea pasta with pesto, mint leaves and white wine glasses

Pesto is almost synonymous with basil, but it's not the only herb you can puree into a tasty sauce. Mint, for one, is a great alternative. It's the first herb to flourish in my yard each spring, and I always have more than I need.

[feast_advanced_jump_to]

This pasta dish is a great way to put a bunch of mint to use, and when blended with peas, makes a vibrant green sauce with a ton of flavor thanks to lemon juice, garlic, and pistachios. It's a pesto and puree hybrid that you're going to love.

For a tasty spring and summer mocktail full of fresh mint that would pair great with this pasta, check out my mint julep mocktail recipe.

If pesto is your jam, then you'll also want to check out my pesto pasta salad with sundried tomatoes recipe. If you're looking for other spring foods, try these easy cheese and chive scones. Or for another garden-inspired pasta dish, there's my zucchini mushroom pasta.

🍝Ingredients

Here's everything you need to make pasta and peas with mint pistachio pesto.

ingredients for green pea pasta with mint pistachio pesto on blue background
  • Pasta, a thicker noodle such as fettuccine or linguine
  • Green peas either fresh or frozen and defrosted
  • Fresh leeks to create a savory mild onion flavor
  • Pistachios, roasted for the most flavor
  • Fresh mint leaves for adding a fresh herby taste to the pea sauce
  • Garlic for a little bite in the sauce
  • Lemon zest and juice for adding a hint of bright citrus flavor
  • Unsalted butter for cooking the leeks
  • Extra virgin olive oil to make the pea pesto sauce
  • Chives (optional) for topping the pasta

See the recipe card below for the complete quantities.

close up of fettucine

If you're looking for quality pasta to use in this dish, check out Rao's Homemade Italian pasta. It's made in Italy and has more flavor than your typical grocery store pasta.

🔪Instructions

To make this pasta and peas with mint pistachio pesto, we're going to boil the pasta, saute chopped leeks, blend the pesto, and then toss it all together. It's so simple.

pasta cooking in a pot of water
  1. Step 1: Bring a large pot of salted water to a boil.
leeks sliced on cutting board with knife
  1. Step 2: Thinly slice the leeks and rinse well to remove any dirt or sand.
leeks cooking in a pot with butter
  1. Step 3: Sautee the leeks in the butter until soft and almost creamy, about 10 minutes.
ingredients for making pea pesto with food processor on blue background
  1. Step 4: Add the oil, lemon juice, pistachios, salt, garlic, mint, and peas in the food processor and blend.
pesto in food processor
  1. Step 5: Blend the sauce ingredients together until smooth.
pesto sauce being tossed with pasta in a pot
  1. Step 6: Toss the pea sauce with the pasta, leeks, additional peas, lemon zest, and pasta water, as needed. Top with pistachios and herbs and serve.

Tip!

Don't forget to save some of the pasta water and use it to thin out the sauce. This is a smart approach because the water is full of flavor and starch from the pasta. This works when making just about any pasta sauce.

Sometimes I'll even save some water in the fridge for when I reheat a pasta dish that has thickened up and needs thinning out. My high school Italian teacher first told me about this tip and I always think of her when I do it. Grazie, Senora!

🌿Substitutions & Variations

  • Instead of mint in the pesto, try basil, parsley, arugula, or a combination of herbs.
  • For a more traditional pesto, you could throw about a ¼ cup of Parmesan cheese into the food processor with the other ingredients. And/or top your dish with grated Parm.
  • If you don't have pistachios, try almonds, pine nuts, or walnuts instead.
close up shot of a plate of pasta and pea sauce with plates and glasses in background

🥡Storage

Store leftovers in the fridge for up to four days. Save some of the pasta water and use it to thin out the sauce when reheating.

💭FAQ

Should frozen peas be thawed before cooking?

Typically, no. But in this dish, we're not cooking the peas before they go into the pesto. So in this case, yes, you'll want to defrost the peas.

Is pasta with peas healthy?

Healthy is subjective. But, if you take a look at the recipe card you'll see this dish is a good source of protein, fiber, Vitamin C, and Vitamin A.

What nuts taste best in pesto?

I think it depends on the other flavors you're incorporating into your pesto. With this one, we're including peas and mint, which is definitely not the norm. Experiment and see what you like. I don't think you can go wrong with most nuts and seeds as long as they don't overwhelm the other flavors in the dish.

🥘Related Recipes

Looking for other recipes like this? Try these:

  • pan with pasta and parmesan, garlic, and basil
    Creamy Garlic Parmesan Chicken Pasta
  • a bowl or risotto with pumpkin and parmesan
    Pumpkin and Sage Risotto
  • large serving dish of zucchini mushroom pasta
    Zucchini Mushroom Pasta
  • dish of pumpkin pasta with sage
    Roasted Pumpkin Pasta with Sage

Honeycomb Candy Recipe (Crunchy Honey Toffee)

a plate of honeycomb candy with chocolate

This crunchy, homemade honeycomb candy is made with real honey, making it a sweet snack or gift. Dip or drizzle it in dark chocolate, then top it off with a sprinkle of fresh thyme leaves for a unique twist on this honey toffee recipe.

a plate of honeycomb candy with honey

Honeycomb candy is an old-school sweet that looks fancier than it actually is. Honeycomb, also known as honeycomb toffee, golden crushers, or cinder toffee, is, as these alternative names suggest, a lot like toffee.

But at the end of the day, it's just caramelized sugar that's aerated at the last second, forming a light, crunchy, honey-colored candy that snaps when you break it. If you've never made candy before, this is a great place to start.

[feast_advanced_jump_to]

I first tried it years ago while traveling in England. My wife and I bought a small bag of honeycomb, not knowing exactly what it was, and we demolished it before we made it back to the hotel. Ever since then, honeycomb candy has been one of my favorite quick homemade treats-fast, cheap, and perfect for breaking up to snack on or dipping in chocolate. It's great at holidays, and it makes a nice gift, too.

😍 Why You'll Love This Recipe

  1. The candy is unique and impressive.
  2. It only takes a few easy-to-find ingredients.
  3. Honeycomb makes a great gift or treat for sharing.

If you like sweet treats as much as me, you'll also want to try my recipes for Coconut Honey Chocolates, Homemade Fig Bars, and Fresh Ginger Cookies.

🍯 Ingredients

Here's everything you need to make your own honeycomb candy.

sugar, honey, and other ingredients for making the recipe
  • Sugar: At its core, this candy is made from caramelized granulated sugar. It may be called honeycomb, but it's largely sugar. Honey alone won't behave in the same way.
  • Honey: Use a strong, pleasant honey with a flavor that you enjoy. The purpose of the honey is to add flavor to the candy and give it its golden color. A very light honey may not add as much flavor. Learn about the different flavors of honey.
  • Corn Syrup: A little corn syrup helps ensure that the candy achieves the correct texture. It helps stabilize the sugar and prevent crystallization. I know people don't love using corn syrup, but this candy is mostly science and has only a few ingredients, so I don't suggest substituting it for anything else.
  • Baking soda: An essential ingredient in this candy recipe because it causes a reaction in the sugar mixture and produces tons of tiny bubbles that add air to the candy.
  • Dark chocolate: I like to balance out the candy with a drizzle of melted dark chocolate. This adds a little depth and visual interest to the honeycomb.
  • Thyme: Optional garnish for a hint of herbiness that helps balance the candy's sweetness. Thyme also complements the honey.

Check out the recipe card below for the complete list of ingredients and quantities.

🍫 Variations

  • White chocolate: Instead of dark chocolate, drizzle or dip the honeycomb pieces with melted white chocolate.
  • Caramel: Another topping idea instead of chocolate.

🔪 How To Make Honeycomb Candy

honey and sugar being added to a saucepan
  1. Step 1: Combine the sugar, water, honey, and corn syrup in a saucepan over medium-low heat.
sugar mixture being cooked and stirred in a pan
  1. Step 2: Stir just until the sugar has dissolved. Then let it cook for 10-15 minutes.
a thermometer taking the temperature of the sugar mixture
  1. Step 3: Cook until the temperature reaches 300 degrees F.
sugar mixture being whisked as it rises and bubbles in the pan
  1. Step 4: Whisk in the baking soda.
honeycomb mixture being spread into a baking dish
  1. Step 5: Quickly pour into a parchment-lined baking dish or pan.
a large block of honeycomb candy on a piece of parchment paper
  1. Step 6: Let it sit at room temperature until firm, at least 1 ½ hours. Then remove from the pan.
honeycomb broken into many pieces with a rolling pin
  1. Step 7: Roughly break into pieces.
chocolate being drizzled over a plate of honeycomb
  1. Step 8: If desired, drizzle with melted dark chocolate and some fresh thyme leaves.

✨ Top Tips

  • Have all of your ingredients and tools ready before you start. Like most candy-making processes, you need to move somewhat quickly and don't want to waste time looking for a spatula.
  • Pay attention to what you're doing. This isn't a recipe to walk away from or make while multitasking. Watch the temperature as the sugar mixture cooks, then move quickly after adding the baking soda to spread the candy out on the tray.
  • If you have a lot of smaller pieces leftover that you're not sure what to do with, try using them as a garnish on desserts like Plum Fool and Eggnog Cheesecake.

🍳 Equipment

Thermometer: It's important to cook the honey and sugar mixture to the right temperature to achieve the correct texture, so either a candy thermometer or an instant-read thermometer is required.

🫙 Storage

Store your honeycomb candy in an airtight jar at room temperature for up to two weeks (or longer, mine just never lasts that long). Make sure your container is actually air-tight because moisture will turn the candy from crispy and crunchy to soft and chewy. You could even add a couple of silica packets to the container to help absorb moisture.

🙋🏻‍♂️ FAQ

Can I make honeycomb candy with all honey?

Not in this recipe. The sugar, honey, and corn syrup may seem like a lot, but they all serve different purposes. The sugar creates the structure of the candy, the honey adds flavor, and the corn syrup helps prevent crustalization. If you used only honey, you would get a much different result.

What does honeycomb candy taste like?

It tastes like honey. The type of honey used in the recipe will determine the taste of the candy. Honey flavors can vary widely, so the candy's final flavor will as well.

Is honeycomb candy hard?

It's crunchy and semi-hard. It's not as hard as a traditional hard candy, and it has some lightness to it thanks to all of the bubbles in it. If you have sensitive teeth you may want to avoid it or suck on it rather than chew it.

Is honeycomb gluten free?

Yes. Honeycomb does not contain flour or other grains.

🍪 Pairing

Serve this honey toffee alongside any of these:

  • a tray of chocolate chip oatmeal maple cookies
    Salted Maple Oatmeal Chocolate Chip Cookies
  • a plate of cream puffs with orange pastry cream
    Christmas Cream Puffs (With Orange & Pine)
  • peppermint mocha martini with lights
    Peppermint Mocha Martini
  • glasses of plum fool with whipped cream and cookies
    Plum Fool

🫖 More Honey Recipes

Looking for other honey recipes? Try these next:

  • homemade chocolates with honey and coconut
    Coconut Chocolates with Honey and Almonds
  • a glass mug of citrus tea being poured from a tea pot
    Honey Citrus Mint Tea
  • a dish of carrots on a blue plate with a side of honey
    Hot Honey Carrots
  • roasted brussels sprouts in a dish
    Honey Sriracha Brussels Sprouts

Peanut Butter and Jelly Burger

Inspired by the classic sandwich, this peanut butter and jelly burger is sweet and savory in all the right ways with a peanut butter mayo and addicting bacon jam.

peanut butter burger on plate with bacon jam and bun

We think of the peanut butter and jelly sandwich as a simple kids' lunch. Yet this wasn't always the case. In the late 1800s, peanut butter was considered a high-end condiment for serving with celery, cheese, and crackers at tea time. The first mention of pairing peanut butter with jelly on bread wasn't until 1901 in the Boston Cooking School Magazine. However, the concept didn't catch on until sometime later.

[feast_advanced_jump_to]

As the 1900s progressed, three critical developments in the birth of the peanut butter and jelly sandwich occurred.

  1. The invention and use of an automatic bread slicing machine caused the sale of sliced bread to take off in stores.
  2. Peanut butter became commercialized in the 1920s by companies such as Skippy. Its low cost and widespread availability, along with sliced bread, made it a staple protein during the Great Depression.
  3. The final component, jelly, was certainly not new either. But Welch's concord grape jelly was. After it gained approval as a ration for soldiers in World War I, the US army added peanut butter and sliced bread by World War II. The creation of the famous sandwich was inevitable, and when soldiers returned home from war, they likely brought home with them a newfound demand.

While I don't eat as many peanut butter and jelly sandwiches, I still enjoy the combination (as long as it isn't grape jelly). I think it's the pairing of the creamy fat in the peanut butter and the sweetness of the jelly's fruit that makes the two work so well together.

That said, when I saw a peanut butter burger on a menu a few months ago, I skeptically gave it a try. Surprised to find how good the burger was, I couldn't resist the idea of making my own version at home. Just don't expect anything resembling the lunchbox sandwich.

🍔 Ingredients

The thing about this peanut butter and jelly burger is that it's not quite what it seems. For starters, there is no jelly. It's a sweet bacon jam made with:

  • bacon
  • onion
  • garlic
  • apple
  • chili powder
  • smoked paprika
  • maple syrup
  • bourbon (optional)
  • apple cider vinegar

And the peanut butter is actually a peanut butter flavored mayonnaise. It may sound odd, but it works. Trust me. For this, all you need is:

  • peanut butter (chunky or smooth)
  • mayo

Finally, there's the burger. That includes:

  • ground beef
  • Worcestershire sauce
  • kosher salt
  • hamburger buns
  • lettuce, red onion, cheese, and tomato, for topping

See the recipe card below for quantities.

🔪 Instructions

Let's talk about this bacon jam.

bacon jam cooking in a pan

You start by crisping up chopped bacon in a pan. When cooked, scoop out the bacon, leaving behind the fat, and cook the onions, garlic, apples, maple syrup, vinegar, and spices until everything is softened. Then stir the bacon back in. Almost forgot - there's a splash of bourbon thrown in, confirming this is definitely not your kid's pb&j.

Though the jam has some sweetness to it, it's not overpowering. Instead, between the caramelized onions and smoky bacon, there's a depth of flavor that condiments such as ketchup utterly lack. Though it comes out a bit chunky, a quick run through a blender will create an irresistibly smooth jam in seconds. Though I actually like it chunky, kind of like how I like my peanut butter.

Speaking of, while the jam cooks make the mayo. It couldn't be easier. Just whisk together equal parts peanut butter and mayonnaise. When I first wrote this recipe, I said to make your own mayonnaise, but it was too many steps and ingredients. And in this case, I don't think it's worth the effort anyway since it's mixed with peanut butter.

Finally, you shape and cook the burgers. When they're done, layer on your toppings, bacon jam, peanut butter mayo and you have yourself a one-of-a-kind peanut butter and jelly burger.

🦃 Substitutions

  • Turkey - I've made these burgers with ground turkey instead of beef and they're just as delicious. You may just want to add some breadcrumbs into the meat before shaping the patties to help them hold their shape. Ground turkey can be softer than beef.
  • Gluten Free- Use gluten free buns instead of regular buns to make this gluten free.

🍳 Equipment

  • Grill - You can cook the burgers on the grill or a pan, it's up to you.
  • Food processor - It's not necessary to puree the jam to make it smooth. So no worries if you don't have a processor handy.

🥡 Storage

If you're not eating all four burgers at the time of preparing, I suggest waiting to cook the burgers until you are ready to eat them. You can shape the patties ahead, but reheated burgers are always dried out. Meanwhile, store the bacon jam, mayo, and toppings separately until ready to use.

You should be able to store everything for up to three days, though it will depend on the freshness of your ground meat.

🥓 Top Tip

You know, while you're at it, you may want to consider doubling the bacon jam and having extra for other uses. What are some uses for bacon jam, you ask? Spread it onto a grilled cheese, serve it with cheese and crackers, stir it into potato salad, eat it with eggs and toast for breakfast. Or, let's be honest, you can just enjoy it on its own.

For another peanut butter flavored dish, try my Tofu Spring Rolls with Peanut Dipping Sauce. Or if you're looking for other beef recipes, try my Red Wine Beef Stew.

Rutabaga Pie

a dish of rutabaga pie with spoon and dishes

This savory Rutabaga Pie is a variation of the English dish Gloucestershire Pie and features turkey, apples, potatoes, and rutabaga for a comforting earthy meal. If you enjoy shepherd's pie, you'll likely also appreciate this variation on the classic.

a dish of shepherd's pie with rutabaga

I brought home several small regional cookbooks on a trip to England a few years back. I found a recipe for Gloucestershire Pie in the one featuring recipes from the Cotswold region. It's a beautiful rural area of England filled with grasslands, hills, and small medieval villages chock full of charm.

Gloucestershire Pie is from the southwestern county of Gloucester, England, where the Cotswolds are located. Today, the pie is typically made of lamb, apples, and boiled onions with a potato and rutabaga topping. Though interestingly, at one point, pigeons were a main ingredient.

[feast_advanced_jump_to]

Considering that few Americans are familiar with Gloucestershire or it's pie, I renamed my take on the recipe to rutabaga pie. The result is similar to what we know as shepherd's pie; however, ground turkey is used instead of lamb, rutabaga is boiled and mashed with the potatoes, and chopped apples are added to the meat.

😍 Why You'll Love This Recipe

  1. It's the embodiment of comfort food. I mean, it includes gravy and is covered in mashed root vegetables. Need I say more?
  2. It's a unique variation on classic shepherd's pie. With apples, rutabaga, and ground turkey, it's an unexpected combination that offers a blend of sweet and savory deliciousness. The apples soften and meld with the ground turkey while the rutabaga adds character and complexity to the potato layer.
  3. You can bake it in the same pan you prep it in. Because who doesn't love washing fewer dishes?

Want more comfort food? Try these:

  • Cauliflower Potato Leek Soup
  • Golumpki (Stuffed Cabbage)
  • Stuffed Peppers with Tomato Sauce
  • Potato, Leek, and Broccoli Knishes

🥔 Ingredients

Here's everything you need to make

ingredients for making the shepherd's pie

Key Ingredients

  • Rutabaga: Also known as a swede, rutabaga is an earthy, sweet, and slightly bitter root vegetable similar to a turnip, though less intense in flavor. It's in the same vegetable family as the cabbage and can be enjoyed roasted like other root vegetables or boiled and mashed like potatoes. Mashed and mixed with potatoes, as we'll do in this recipe, adds flavor and complexity. They're an underrated but wonderful vegetable that's worth giving a try. Here's a good overview of rutabaga and more cooking ideas.
  • Potatoes: These will be mashed and mixed with the rutabaga. Any potato variety is fine here.
  • Apples: Perhaps an unexpected ingredient in this recipe, the apples are chopped and mixed into the filling with the ground turkey and onions. Their sweetness balances the savory and herby flavors of the other ingredients, keeps things moist, and makes a welcome addition to the meal. Any crisp apple will work well.
  • Ground turkey: Serves as the base of the filling. Typically, this dish is prepared with leftover cooked meat, such as lamb. But the leanness of ground turkey and its mild flavor allow the vegetables, apples, and herbs to be the stars of the dish.

See the recipe card below for the complete list of ingredients and quantities.

🥩 Substitutions

  • Turnips are a fine substitute for the rutabaga, though the flavor will be more intense.
  • Ground chicken or pork may be used in place of the ground turkey. I'm not sure ground beef would work well with the apples.
  • You can use fresh or dried thyme and rosemary, depending on what you have on hand.

🍲 Instructions

How to make this shepherd's rutabaga pie.

rutabaga and ptoato chopped on a cutting board
  1. Step 1: Peel and chop the rutabaga and potatoes. Then, chop the onion.
rutabaga chopped in a pot with water
  1. Step 2: Add the rutabaga to a pot and cover with plenty of water. Boil for 10 minutes. Add the potatoes, and boil for ten more minutes.
whisking flour and butter in a pan
  1. Step 3: While the vegetables boil, melt 2 tablespoons of butter in a large pan. Add the flour and cook for a couple of minutes until browned.
whisking gravy in a pan
  1. Step 4: Slowly whisk in the broth until incorporated. Simmer over medium heat for 5 minutes until thickened and reduced.
stirring sauteed onions in a pan
  1. Step 5: Pour the gravy out of the pan, add the butter and the chopped onion. Cook 3-5 minutes until soft and golden.
browning turkey in a pan with onions
  1. Step 6: Add the ground turkey to the pan and use a spoon to break it up. Cook for 6-7 minutes, until cooked.
gravy being poured into a pan with turkey and apples
  1. Step 7: Stir in the chopped apples and cook for another 5 minutes until softened. Then add the gravy.
mashing rutabaga and potato in a pan
  1. Step 8: Drain the rutabaga and potatoes when tender. Mash them in the pan, then stir in cream and ½ teaspoon salt.
mashed rutabaga and potatoes being spread over pan
  1. Step 9: Spread the mashed rutabaga and potatoes over the turkey and apple mixture. (In the pan you cooked them in or another pan.)
descoring the mashed rutabaga with a fork
  1. Step 10: Use a fork to scrape the top to create texture. Bake in the oven for 20-25 minutes. If you want to brown it further, pop it under the broiler for a few minutes. Serve hot, topped with the chopped parsley.

🌟 Helpful Tips

  • Use plenty of water when you first boil the rutabaga so that there will be enough to cover the potatoes when you add them to the pot.
  • Placing your pie on a baking sheet when putting it in the oven will help to catch any drips and avoid burning in the bottom of your oven.

🍳 Equipment

Potato masher: For mashing up the rutabaga and potatoes.
Oven-safe pan: This makes it easy to transition from cooking on top of the stove to transferring the meal to the oven to finish it off. It's not essential, however.

🥧 Storage

Store the rutabaga pie, tightly covered, in the fridge for up to four days.

🙋🏾‍♂️ FAQ

Does rutabaga taste like potatoes?

Rutabaga is a root vegetable, like a potato, and it also mashes up nicely. But it doesn't taste quite the same. It is more earthy and has a mix of sweet and bitter flavors. It tastes closer to a turnip than a potato.

Is rutabaga healthier than potatoes?

Rutabaga is lower in calories and carbs compared to potatoes. It also is higher in fiber and has a lower glycemic index. However, potatoes are higher in potassium and Vitamin C.

Do you peel rutabaga before boiling?

Yes, you should peel rutabaga before boiling.

What flavors go with rutabaga?

Butter, garlic, earthy and woody herbs, cheese, bacon, apples, potatoes, and cream all go well with rutabaga.

🍮 Pairing

These desserts would pair beautifully with this rutabaga pie.

  • cornmeal pudding dessert served at table
    Sweet Coconut Cornmeal Pudding
  • glasses of plum fool with whipped cream and cookies
    Plum Fool
  • cranberry ginger bread sliced on cutting board
    Cranberry Gingerbread Loaf
  • two pieces of cherry pie on plates with coffee cups
    Cherry Rhubarb Pie

🍲 Related Recipes

Looking for more recipes like this one? Try these next:

  • Red Flannel Hash
  • leek potato cauliflower soup in bowl
    Cauliflower Potato Leek Soup
  • chicken meatball on a fork with noodles
    Chicken Swedish Meatballs
  • bowls of seafood soup
    Creamy Seafood Newburg Soup

Baked Apple Crepes with Ricotta

a plate with stuffed apple cremes covered in caramel and powdered sugar

These baked apple crepes with ricotta are an elegant fall brunch or dessert. Light, sweet, and cozy with tender crepes, apples, and creamy ricotta filling.

plate of crepes with apples and caramel

If you're seeking a fall-inspired brunch or dessert, these apple crepes with ricotta are the perfect choice. Delicate homemade crepes are filled with apples and ricotta, then baked until golden brown. They're a delightful combination of crepe and cannoli.

Enjoyed fresh out of the oven, the ricotta filling melts into the crepe, while the sweetened apples evoke the flavors of pie filling.

😍 Why You'll Love These Apple Crepes

  1. They melt in your mouth. Especially when fresh from the oven.
  2. They taste like cannoli. Thanks to the creamy ricotta filling.
  3. They're great for breakfast or dessert. There's no bad time to enjoy these sweet stuffed crepes.

For more apple recipes, try my Rhubarb and Apple Chutney, Cherry Apple Crisp, and Apple Rhubarb Muffins.

[feast_advanced_jump_to]

🍏 Ingredients

Here's everything you need to make these stuffed apple crepes.

ingredients for making the crepes recipe

Key Ingredients

  • Apple: Any apple will work fine for these crepes. They will be peeled, chopped, and cooked for the filling, so the variety doesn't matter much. You'll need two medium apples.
  • Flour: All-purpose flour is good for making the crepe batter.
  • Ricotta: A creamy ricotta cheese is spread over the crepes for a sweetened cheese filling. My favorite ricotta is from a local Vermont producer, Maplebrook Farm, located in North Bennington.
  • Maple syrup: To sweeten the apples and the ricotta filling.
  • Butter, milk, and eggs: All part of the crepe batter. I prefer unsalted butter, and while I use dairy milk, you can use any milk alternative you prefer.

Check out the recipe card below for the complete ingredient list and quantities.

🍐 Substitutions & Variations

  • Other fruits: Instead of apples, try pears or plums.
  • Ricotta: Substitute cream cheese, mascarpone, or cottage cheese for the ricotta.
  • Add jam: For a richer fruit flavor, spread your favorite jam over the ricotta before adding the chopped apple.
  • Gluten-free: Use gluten-free flour, such as Bob's Red Mill 1-to-1 Baking Flour.

🥞 How to make baked apple crepes

milk being whisked into eggs in a bowl
  1. Step 1: Beat the eggs and milk until combined. Add the vanilla, sugar, and salt.
flour being whisked into the crepe batter
  1. Step 2: Add the flour a little at a time, whisking it into the liquid as you go to incorporate it.
butter being whisked into crepe batter
  1. Step 3: Finally, whisk the melted butter into the batter. Then let it rest for at least 20 minutes.
apple being chopped on small cutting board
  1. Step 4: Meanwhile, peel, core, and roughly chop the apple.
apples sauteeing in a cast iron pan
  1. Step 5: Sauté the apple with butter and cinnamon until soft. Add in the maple syrup.
maple syrup being whisked into ricotta cheese
  1. Step 6: Whisk remaining maple syrup into the ricotta.
a crepe cooking in a nonstick skillet
  1. Step 7: Coat a nonstick skillet with a small amount of butter. Add about ⅓ cup of batter to the pan, spreading it evenly across the surface. Cook 1-2 minutes until firm. Flip the pan over onto a plate to remove the crepe, and repeat with the batter until you have 10 crepes in total.
ricotta and apples being spread on a crepe
  1. Step 8: Spread some ricotta around the center of the crepe, then top with a spoonful of the apples.
a crepe with filling being rolled on a cutting board
  1. Step 9: Roll the crepe. Then repeat the filling and rolling with the remaining crepes.
a baking dish full of stuffed crepes
  1. Step 10: Arrange the stuffed crepes in a baking dish and bake in a 400°F oven for 20-25 minutes until golden and the edges are crisp. Top as you like and serve warm.

✨ Top Tips

  • Don't skip letting the crepe batter rest. This creates more tender crepes.
  • Keep your pan hot and the heat steady so the crepes cook fast and even.
  • You don't need to flip and cook the crepes on the second side. They will finish cooking in the oven. Cooking only one side makes them easier to roll without tearing.

🥣 Make Ahead

There are a couple of points at which you can prep this recipe in advance. Here are two:

Crepe batter: Prep the batter up to two days in advance and store covered in the fridge.
Assembly: After making the crepes and filling them, you can store the baking pan in the fridge, covered, up to a day in advance of serving, and then bake when ready. Add about five to ten extra minutes to the baking time.

🍳 Equipment

Nonstick pan: Use a large nonstick skillet, approximately 9 inches across the bottom. Most "12-inch" pans are that size once you measure the bottom part of the pan. I like this ceramic pan from Valencia Pro.

🥡 Storage

Store leftover crepes in the fridge for up to three days. Reheat in a 350°F oven until warmed through, about 10 minutes.

🙋🏻‍♂️ FAQ

Are crepes meant to be eaten hot or cold?

Crepes may be served hot, cold, or warm. The filling may dictacte the best temperature, but there's no wrong temperature to enjoy a crepe.

What can you put inside sweet crepes?

There are limitless filling options for sweet crepes. Chopped fruits likes apples and pears, berries, ricotta, peanut butter, jam, jelly, whipped cream, and nutella are a few sweet filling ideas.

What is the best pan for crepes?

A quality non-stick pan, about 12 inches wide, (9 inches wide on the bottom), is a good option for making crepes at home.

☕ Pairing

Try serving these crepes as a dessert or brunch with any of these recipes:

  • a glass mug of citrus tea being poured from a tea pot
    Honey Citrus Mint Tea
  • the sun dried tomato quiche in a pan with plates and serving utensil
    Broccoli and Stilton Quiche
  • a glass of frozen matcha latte on a countertop with straw
    Frozen Matcha Latte
  • mug of amaretto latte with almonds and whipped cream
    Amaretto Latte

🍎 Related Recipes

Looking for more apple recipes like this one? Try these next:

  • small dishes of cherry crisp topped with whipped cream
    Apple Cherry Crisp
  • bowl of rhubarb chutney with apple slices
    Easy Rhubarb and Apple Chutney
  • a serving dish on a wooden table filled with cabbage, apples, and walnuts
    Instant Pot Red Cabbage with Apples
  • a serving plate full of muffins with apples
    Apple Rhubarb Muffins

Grilled Bourbon Chicken

plate of grilled chicken with bourbon BBQ sauce

Enjoy a summer barbecue with this Grilled Bourbon Chicken recipe. Chicken thighs and drumsticks are coated in a zesty, sweet, and boozy barbecue sauce to create a meal great for a backyard cookout or a simple weeknight dinner.

large plate of grilled bourbon chicken with sides and sauce

🐔 Why you'll love this grilled chicken

  1. It's packed with flavor. There's the richness of the bourbon, tanginess from fresh orange juice and zest, herbiness from rosemary, smokiness from smoked paprika, and a little heat from Sriracha.
  2. It's easy for a weeknight dinner but tasty enough for a backyard barbecue. The recipe makes four servings, but you can easily make more using the multiplier on the recipe card.
  3. You don't have to be a bourbon lover to enjoy this chicken. While the flavor is noticeable, it's not overpowering.

For more chicken dishes, check out my recipes for Ground Chicken Sloppy Joes, Arugula and Spinach Salad with Grilled Chicken, and Creamy Garlic Parmesan Chicken Pasta.

For another bourbon recipe that would pair beautifully with this grilled chicken at a summer meal, try my Cherry Whiskey Sour.

[feast_advanced_jump_to]

🍗 Ingredients

Here's everything you need to make grilled bourbon chicken.

ingredients for making the bourbon chicken

Key Ingredients

  • Chicken thighs and drumsticks - A mix of bone-in thighs and drumsticks offers a nice variety for grilling. I like to serve each person one of each.
  • Bourbon - You don't need anything fancy, but you do want to use a bourbon you would drink because you'll taste it in the sauce.
  • Oranges - The zest and juice will go into the bourbon BBQ sauce and offer sweet and citrusy notes.
  • Onion and garlic - A bit of chopped onion and garlic will help add aromatic flavor to the sauce.
  • Rosemary - A couple of sprigs of fresh rosemary add a complementary herbal flavor to the chicken.

See the recipe card below for the full list of ingredients and quantities.

🌶️ Substitutions & Variations

  • Wings instead of thighs and drumsticks would work well in this recipe. Just reduce the cooking time to compensate for their smaller size.
  • Try subbing lemons for the oranges for an equally enjoyable citrus flavor.
  • You can make a spicier sauce using more Sriracha and/or adding crushed red pepper when cooking the onion. With just a tablespoon of Sriracha in the recipe, the sauce is mild with just a hint of heat.
  • Use an equal amount of thyme in place of the rosemary for a slightly different herbal component.
  • After cooking, blend the sauce with an immersion blender to make it completely smooth (instead of slightly chunky).

🔥 Instructions

How to make Grilled Bourbon Chicken.

onions being sauteed in pan with ingredients to the side
  1. Step 1: Saute the onion in a small saucepan until soft.
spices being added a pan of sauteed onions
  1. Step 2: Add the tomato paste, paprika, salt, garlic, and rosemary.
bourbon sauce being stirred in a pan
  1. Step 3: Whisk in the bourbon, Worcestershire sauce, brown sugar, broth, and Sriracha.
a spoon full of bourbon bbq sauce above a pan
  1. Step 4: Simmer for 25-30 minutes on low heat until reduced and thickened.
chicken being brushed with oil on a pan
  1. Step 5: Brush the chicken with oil and sprinkle with salt.
chicken on a grill
  1. Step 6: Partially cook the chicken on the grill for 4 minutes per side.
chicken being brushed with bourbon bbq sauce on a pan
  1. Step 7: Brush the chicken with the barbecue sauce, then continue to grill the chicken until cooked through.
plate of grilled chicken with sauce, drinks, and sides
  1. Step 8: Serve the chicken with more sauce, orange slices, and your favorite side dishes.

🌟 Top Tip

It's tempting to coat the chicken in the bourbon sauce at the start of grilling, but this can cause it to burn. Instead, wait until the last few minutes to brush on the sauce. You can also coat the chicken with additional sauce before serving if you're the saucey type.

🌡️ Equipment

Grill - To cook the chicken. A grill pan would also work if you don't have a grill.
Brush - To coat the chicken with the bourbon sauce
Thermometer - To check the temperature of the chicken and make sure it's cooked through.

🥡 Storage

Store the chicken in an airtight container in the fridge for up to four days.

💭 FAQ

Does the alcohol cook out of bourbon chicken?

No, not entirely. There is still some alcohol left in the sauce. It's not much, but if you're sensitive to alcohol or don't consume alcohol, you probably want to make another recipe. Several studies have shown that alcohol does not entirely evaporate or cook off during cooking. Here's a good explanation from America's Test Kitchen.

Can kids eat bourbon chicken?

That's up to you. Will someone get intoxicated from a serving size of this recipe? No. The final sauce probably contains less than a tablespoon of alcohol per serving. I wouldn't worry about it, but that's just me.

What does bourbon chicken taste like?

This grilled bourbon chicken is sweet, tangy, herby, a little smoky, and just a bit spicy. It's an excellent balance of flavors.

🍹 Pairing

These recipes would go great with this bourbon grilled bourbon chicken recipe.

  • plate of salad with beets and sweet potatoes
    Sweet Potato and Beet Salad
  • a plate of colorful roasted leeks and potatoes
    Roasted Potatoes and Leeks
  • large dish of pesto orzo salad
    Orzo Pesto Pasta Salad
  • mojito with blackcurrants, limes, and mint served
    Blackcurrant Mojito Cocktail

🍽️ Related Recipes

  • pan with pasta and parmesan, garlic, and basil
    Creamy Garlic Parmesan Chicken Pasta
  • a pan of chicken and rice with cardamom and parsley
    Cardamom Chicken and Rice
  • large plate of arugula spinach salad with chicken and dressing on side
    Arugula and Spinach Salad with Grilled Chicken
  • large pan of chicken thighs with apricots and barley
    Apricot and Chicken Tagine

Orange Ricotta Matzah Brei

A matzah brei recipe that transforms the unleavened Jewish flatbread into a light eggy dish flavored with orange zest, cardamom, and creamy ricotta.

matzah brei on plates

It's Passover, the most celebrated of the Jewish holidays. Passover is an eight-day observance that occurs each spring. It acknowledges the Israelites' freedom from the ancient Egyptians. Even most of us Gentiles know that with Passover comes specific dietary rituals. Yet I have to say that although I've enjoyed Passover dinners with friends, I didn't know the reasoning for the rituals or the big fuss about matzah.

As the story goes, the Israelites left Egypt in such a hurry that they didn't have time for their bread to rise. So they had to eat it unleavened. That's why starting at noon on the day before Passover, and for the next eight days, Jews are not to have any leavened or fermented grains.

Known as chametz, this includes wheat, barley, rye, oats, and spelt. Not only does this include cakes and cookies, but most alcoholic beverages as well. And to be safe - about all processed foods. More so, according to custom, a Jew must also remove any chametz from their home during this time. Most eat it before Passover or give it away, but there is also mention of burning one's supply.

WHAT'S MATZAH?

Luckily, they can eat matzah (also spelled "matzo" and "matza"), a type of unleavened bread, in place of chametz. It plays an important role in the first two nights of Passover when dinners called Seders occur. The Seder is a 15-step ritual dinner that involves bitter herbs, onion or potato dipped in saltwater, four cups of wine, and plenty of matzahs.

Matzah is commonly available in grocery stores. In fact, I discovered quite the selection when I took a look for myself. There was gluten-free, whole wheat, egg, thin, thick, everything (like the bagel), and a few others. Yet, it's the simple flour and water kind that's permitted for Seder. Egg matzah is sometimes allowed, as is the gluten-free version if you have an intolerance. For the traditional, the flour must come from wheat, barley, spelt, rye or oat.

WHAT DO YOU DO WITH MATZAH?

I took home a box of whole wheat and one of the thin tea styles. But I haven't read about anyone eating matzah while sipping tea. I wasn't expecting much. Both were crisp and tasted like a thin, unsalted cracker. I have to say they tasted better than I expected. Matzo Ball Soup, made with ground-up matzah, is well known, but I was curious about other ideas for using them.

Many people stock up on matzah this time of year, and after the holiday passes (pun intended), I've seen shelves full of the boxes - including what looks like lifetime supply packs - quickly go on sale. The good news is that in theory, a box of matzah can last forever. But why wait?

Making Matzah Brei

As a Jewish friend informed me, one of the favorite uses for matzah is in a dish known as Matzah Brei. It's matzah that is cooked and pan-fried with eggs. It's so simple to make and tastes kind of like French toast crossed with an omelet. You can go savory or sweet.

Of course, I went with a sweet option, adding orange zest and juice, creamy ricotta cheese, and cardamom. I think you'll appreciate how a boring cracker transforms into the beloved matzah brei, perfect for a sweet dessert or the star of a springtime brunch.

Chicken Swedish Meatballs

chicken meatball on a fork with noodles

With this simple recipe for baked Chicken Swedish Meatballs, you'll enjoy the flavors of the classic meatballs served with a creamy mushroom gravy. Serve them over egg noodles with a vegetable on the side for a complete dinner or make them smaller and serve as an appetizer.

plate of noodles with swedish meaballs on counter

When I was younger, I thought Swedish meatballs were actually an American food. I knew they were called Swedish meatballs, but I didn't believe that to be true for some reason. At the very least, they seemed to me like an Americanized version of a meatball-kind of like French fries. Even though they eat plenty of fries in France, you can't think of American fast food culture without thinking of fries. We seem to have claimed them as our own, as we unfortunately have a tendency to do.

Although I have yet to visit Sweden (though it's near the top of my list), I was happy to learn that they do eat these delicious nutmeg and allspice flavored meatballs. We didn't make them up. It wasn't just the Swedish Chef. In fact, they're kind of a big deal over there. That makes me appreciate them even more, and I look forward to a time when I can enjoy them in their home country.

Until then, I'll have to make my own.

😍 Why You'll Love These Meatballs

  1. There's just one step to cooking these meatballs. There's no need to brown them on the stove first. Just go ahead and bake them in one pan.
  2. Made with chicken, these Swedish meatballs are leaner and lighter than pork or beef meatballs. Some might even say they're a healthier version of the classic dish.
  3. Instead of commonly used breadcrumbs, fresh bread keeps the meatballs moist and tender.

For more comfort food recipes, try these:

  • Pumpkin and Sage Risotto
  • Zucchini Mushroom Pasta
  • Beef and Stout Hotpot
  • Creamy Garlic Parmesan Chicken Pasta
[feast_advanced_jump_to]

🐔 Ingredients

Here's everything you need to make

ingredients for chicken meatballs recipe

Key Ingredients

  • Ground chicken: Ground chicken may not be the most common meat for making Swedish meatballs, but it works surprisingly well. It's lighter (both in taste and fat) and milder in flavor compared to other options, allowing the seasonings and sauce to shine.
  • Bread: Using bread rather than breadcrumbs is a great way to keep the meatballs moist.
  • Mushrooms: Mushrooms flavor the cream sauce to serve over the meatballs.
  • Broth: You'll need 2 ½ cups chicken broth (or vegetable) for the base of the sauce to serve over the meatballs.
  • Nutmeg and allspice: Give the meatballs their distinctive Swedish meatball taste.
  • Cream: To add rich creaminess to the meatball gravy, you can use either heavy cream or half and half.
  • Worcestershire sauce: For a boost of umami in the meatballs and sauce.

See the recipe card below for the complete list of ingredients and quantities.

🐄 Substitutions & Variations

  • Make appetizer-sized Swedish meatballs: Use about half as much of the meat mixture per meatball, aiming for 24 small balls rather than 12 large ones.
  • Pork and/or beef meatballs: In place of the ground chicken, use pork, beef, or a combination of both meats.
  • Make the gravy sauce even creamier: Whisk in two tablespoons of sour cream when you add the cream. Or add a little tang with a tablespoon of Dijon mustard. Whisk this in after incorporating the broth.

🥣 Instructions

How to make Chicken Swedish Meatballs.

onions sauteeing in a pan
  1. Step 1: Saute the onions in butter over medium heat for 3 minutes or until golden. Remove from the pan and allow to cool.
milk being poured over bread cubes
  1. Step 2: Slice the bread into cubes, add them to a large bowl, then pour over the milk. Let sit a couple of minutes to absorb.
meatball ingredients being stirred in a bowl
  1. Step 3: Add the remaining meatball ingredients to the bowl and stir to combine.
scooping the chicken mixture onto a baking sheet
  1. Step 4: Scoop the meat mixture onto a parchment lined baking sheet. It will be a wet mixture and that's ok.
baked meatballs on a baking sheet
  1. Step 5: Bake on a rack in the lower third of the oven for 25 minutes or until browned on top and the meatballs reach 165 degrees F.
chopped mushrooms sauteeing in butter
  1. Step 6: While the meatballs bake, melt the butter in the pan, then add the chopped mushrooms. Cook until the mushrooms are soft and cooked down, about 4-5 minutes.
flour cooking with mushrooms for gravy
  1. Step 7: Stir in the flour and cook for a couple of minutes. The pan will be dry.
broth being whisked into the flour and mushrooms
  1. Step 8: Slowly pour in the broth and whisk to incorporate it with the flour and mushroom mixture. Simmer the sauce on medium-low for 5-6 minutes or until it has thickened slightly.
cream being whisked into the gravy
  1. Step 9: Whisk in the cream, Worcestershire, nutmeg, and parsley. Simmer for another couple of minutes.
a plate of chicken meatballs with noodles
  1. Step 10: Pour the sauce over the baked chicken meatballs and serve over egg noodles, potatoes, or your choice of starch. If you like, top with more parsley.

🥄 Helpful Tips

  • An ice cream scoop makes scooping out the meat mixture easy. It'll be too soft to do this part by hand.
  • The meatball mixture will be soft and that's fine (it's why they stay moist). Scoop it out on the baking sheet and use wet hands to help shape into a round balls.
  • If the meat mixture really is too soft you can pop it in the fridge for 15 minutes to firm up or stir in 2 tablespoons of breadcrumbs.

🥡 Storage

Store the meatballs in an airtight container in the fridge for up to four days.

🙋🏼‍♂️ FAQ

What is the best way to cook Swedish meatballs?

One of the easiest and best ways to cook Swedish meatballs is on a baking sheet in the oven. You can skip the common step of first browning them on the stove and instead brown and bake them all at once in the oven.

What's the difference between a Swedish meatball and an Italian meatball?

Both meatballs tend to use a mix of ground beef and pork. But as for the seasoning, one difference is the omission of grated cheese in Swedish meatballs, which is common in Italian ones. What makes the flavor of Swedish meatballs unique is the inclusion of allspice and nutmeg. The other differing component is the sauce. Italian meatballs are often served with a tomato sauce, while Swedish ones use a cream sauce.

What do you serve with Swedish meatballs?

You can serve Swedish meatballs with rice, egg noodles, mashed potatoes, or anything else that will absorb the sauce. Lingonberry jam is a common accompaniment to Swedish meatballs, but it's not commonly found in stores in the United States. So any tart jam, such as cherry or cranberry is good.

🥔 Pairing

Wondering what to serve with these baked chicken Swedish meatballs? Try these recipes:

  • a dish of carrots on a blue plate with a side of honey
    Hot Honey Carrots
  • a plate of colorful roasted leeks and potatoes
    Roasted Potatoes and Leeks
  • two napa cabbage halves with sesame seeds
    Roasted Napa Cabbage
  • a serving dish on a wooden table filled with cabbage, apples, and walnuts
    Instant Pot Red Cabbage with Apples

🍗 Related Recipes

Looking for more chicken recipes? Try these:

  • plate of grilled chicken with bourbon BBQ sauce
    Grilled Bourbon Chicken
  • bowl of butternut chicken soup
    Butternut Squash Chicken Soup
  • pan with pasta and parmesan, garlic, and basil
    Creamy Garlic Parmesan Chicken Pasta
  • large plate of arugula spinach salad with chicken and dressing on side
    Arugula and Spinach Salad with Grilled Chicken

Butternut Squash Crostini Appetizer

a plate of crostini topped with butternut squash, sage, and ricotta

A simple butternut squash appetizer made with roasted squash, creamy ricotta, and crispy sage on toasted baguette slices. A great fall and winter app with minimal work.

a tray of butternut squash, ricotta, and sage crostini with honey

When I'm looking for an easy butternut squash recipe to serve in the fall or winter, crostini are the perfect answer. This version layers roasted butternut squash over creamy ricotta and finishes with crispy fried sage for a simple, seasonal, unfussy recipe.

The squash is roasted with maple syrup and a touch of spice until tender and lightly caramelized, then spooned onto toasted baguette slices over a generous layer of ricotta. These crostini work just as well for a casual weeknight meal as they do for a holiday gathering, and most of the components can be prepared ahead of time.

Serve them warm or at room temperature whenever winter squash is in season, for a comforting, savory bite with minimal work.

[feast_advanced_jump_to]

😍 Why You'll Love This Crostini Recipe

  1. It's easy to assemble. Crostini is essentially just toast with toppings.
  2. It offers a range of textures with creamy ricotta, crunchy baguette toasts, and tender squash.
  3. You can serve it as an appetizer or make it a simple everyday meal with a salad or protein on the side.

For more tasty bites on bread and pastry, try my Beetroot and Feta Tartlets, Squash Tartlets, and Halloumi Toast.

🧀 Ingredients

Here's everything you need to make this butternut squash appetizer recipe.

ingredients for making the butternut recipe on a blue tiled background

Key Ingredients

  • Butternut squash: One of the most popular and easiest to prepare winter squashes. The tender orange flesh is sweet and versatile. However, you can also use any other winter squash (aside from spaghetti squash) in this recipe. Some may take longer to cook, but just be sure to cut them up into small cubes as described. You'll need about one pound of squash total.
  • Baguette: A simple sliced baguette makes the perfect-sized snack or appetizer. Your baguette doesn't need to be freshly baked. This is a good recipe for day-old (or even a few days old) bread.
  • Ricotta: Use creamy, fresh, and flavorful ricotta to spread over the toasted baguette slices. My favorite is from a local Vermont company called Maplebrook Farm. It's some of the best I've ever tasted.
  • Sage: Fresh sage leaves are lightly fried in olive oil until crisp, then crumbled over the crostini. They add a rich, earthy note that helps finish off the appetizer. Dried sage isn't an option here, but if fresh sage isn't handy, skip the frying and garnish the crostini with some chopped fresh parsley instead.
  • Maple syrup: Helps to caramelize the squash and add a deeper, richer flavor. But if you're watching your sugar intake, feel free to omit it.
  • Spices: I like to season the squash with a mix of garlic powder, dried rosemary powder, and chipotle for a hint of heat and smokiness. Smoked paprika is a good alternative, if chipotle isn't handy. Of course, you can change up these spices to whatever you prefer.
  • Honey (optional): A light drizzle of honey finishes off the crostini and adds a touch of light sweetness.

Check out the recipe card below for the complete list of ingredients and quantities.

Variations

  • With bacon: Add crumbled crispy bacon to the crostini along with the squash.
  • Balsamic vinegar: Instead of honey, top the crostini with a balsamic syrup. Just simmer some balsamic vinegar in a small pan until it thickens to a syrup-like consistency.
  • Other cheeses: Try subbing the ricotta for any creamy, spreadable cheese of your choice. A creamy goat cheese could work well here.

🔪 Instructions

chopped butternut squash on a cutting board
  1. Step 1: Peel the squash, then cut it into small cubes about ¼ to ½ inch.
a bowl of butternut squash with seasonings
  1. Step 2: In a bowl, toss the cubed squash with maple syrup, salt, garlic powder, rosemary, and chipotle powder.
a baking sheet of cubed butternut squash
  1. Step 3: Spread the squash out on a baking sheet lined with parchment paper.
cubes of roasted butternut squash
  1. Step 4: Roast in a 425°F oven for about 30 minutes, or until browned and tender.
slices of bread being brushed with olive oil
  1. Step 5: Slice your baguette and brush the top of each slice with olive oil. Place on a baking sheet and toast in the oven while the squash cooks.
slices of baguette being topped with ricotta cheese
  1. Step 6: Remove the toast slices from the oven, cool briefly, then top each with some ricotta.
sage leaves being fried in a pan with olive oil
  1. Step 7: In a pan over medium heat, lightly fry the sage leaves for about a minute, until crisp.
slices of baguette with ricotta being topped with roasted squash
  1. Step 8: Top the crostini with the cubed squash.
honey being drizzled over butternut squash crostini
  1. Step 9: Drizzle over some honey, if you like, and then crumble over the sage leaves
a tray of butternut squash, ricotta, and sage crostini with honey
  1. Step 10: You can serve immediately or at room temperature.

✨ Top Tips

  • Save yourself some time and chop and roast the butternut squash up to three days in advance. Gently reheat the squash, or let it reach room temperature, before assembling.
  • If your baguette goes stale and brick-hard, revive it by rinsing it under the tap, then heating it in a 350-degree F oven for about 10 minutes. It'll be easy to slice afterwards.
  • The number of crostini slices you end up with will depend on how thick you slice your bread. For about 18 crostini, slice the baguette into ½ inch slices. For more like 30, aim for ¼ inch slices. There is no right answer - it's up to you!

🥡 Storage

These crostini are best served the day they're assembled or at most, within 24 hours. More than that, and they'll go soft and soggy. Keep refrigerated if prepared ahead, but let them sit briefly at room temperature before serving.

However, you can roast the squash up to three days in advance and store it in an airtight container in the fridge until ready. Toast the bread, top with ricotta, and fry the sage leaves just before serving for the freshest taste and texture.

🙋🏻‍♂️ FAQ

Can I serve these crostini warm or at room temperature?

You can serve them either warm or at room temperature. I would just avoid serving them chilled, as the squash won't be as tasty. They can be briefly warmed at a low temperature in the oven if you prepared them in advance and want to warm them slightly.

Can I make this butternut squash appetizer ahead of time?

Yes. You can prepare and cook the squash up to three days in advance. But I reccomend frying the sage leaves and assembling the day of serving.

What kind of bread works best for butternut crostini?

A baguette is ideal because you get the perfect single serving portion when sliced.

🍲 Pairing

Try serving these crostini along with any of these recipes:

  • a glass of negroni with smoke
    Smoked Negroni
  • a bowl of soup with celery and leeks, and potatoes
    Creamy Celery Leek Soup with Croutons
  • Beetroot and Feta Tartlets
  • a hand serving a cider cocktail
    Apple Cider Whiskey Cocktail

🎃 Related Recipes

Looking for other squash recipes like this one? Try these next:

  • bowls of chicken curry with noodles and peanuts
    Chicken and Squash Curry
  • a plate of spaghetti squash topped with a meat sauce, cheese, and basil
    Grilled Spaghetti Squash with Meat Sauce
  • bowl of butternut chicken soup
    Butternut Squash Chicken Soup
  • a bowl of couscous with pumpking and cranberry
    Pumpkin Couscous Salad

Orange Pan Fried Tempeh with Asparagus

plates of asparagus and tempeh

Crispy pan fried tempeh with asparagus in a sweet and tangy orange sauce-this easy vegetarian stir-fry is everything you want in a weeknight dinner: quick, flavorful, and full of seasonal spring asparagus. The bold citrusy glaze is made with fresh orange juice and marmalade, giving the dish a bright, sunny flavor that pairs beautifully with the earthiness of tempeh and the tender snap of spring asparagus.

three blue plates with rice, asparagus, and orange tempeh

Orange chicken is one of my favorite Chinese take-out dishes. However, let's be honest: it is often too sweet, and the meat tends to be quite fatty, which is probably why it tastes so good. Plus, it usually doesn't come with any vegetables.

Inspired by a take-out dish, this version is vegetarian, featuring tempeh as the protein and plenty of fresh asparagus to balance it out. Serve it over rice or other grain to make it a complete meal.

😍 Why You'll Love This Recipe

  1. There's plenty of orange flavor with orange marmalade, juice, and segments. It's much fresher tasting than takeout.
  2. Tempeh is not only filling but also good for you. As a fermented food, this vegetarian protein offers a ton of nutritional value. The crispy exterior and chewy interior after pan frying is pretty dang tasty, too.
  3. It's a good choice for a weeknight meal. There's not a ton of prep, and it cooks in under 20 minutes. I cook some rice in the Instant Pot at the same time, and dinner is ready before I know it.
[feast_advanced_jump_to]

Looking for other orange flavored recipes? Try my Orange Bourbon Grilled Chicken, Blood Orange and Grapefruit Marmalade, or Cranberry Sauce with Mandarin Orange. My Orange Parsnip Cake is another orange recipe that's great for the spring season.

🍊 Ingredients

Here's everything you need to make this pan fried tempeh recipe.

ingredients for making the tempeh recipe

Key Ingredients

  • Tempeh: For this recipe, you'll need one pound of tempeh. If you're unfamiliar with tempeh, it's a firm, dense block of fermented soybeans. It's chewy and tastes a bit nutty and yeasty. It's a good source of protein, while being low in calories and fat. You can find it in the grocery store along with the tofu. There are many brands of tempeh, but I like to buy an organic variety from Rhapsody Natural Foods, located here in Vermont.
  • Asparagus: Look for bright green stalks and ones on the thinner side, if possible. Thick asparagus stalks can often be woody and less flavorful.
  • Oranges: Basic navel oranges are good for this dish. If using other oranges, you want about 1 cup of pieces and ⅓ - ½ cup of juice.
  • Marmalade: This dish gets some extra orange flavor by adding a bit of marmalade, which tends to have an intense citrus flavor.
  • Sesame seeds and scallions: For garnishing the dish.

Check out the recipe card below for the complete list of ingredients and quantities.

🍋 Substitutions & Variations

  • Lemon: To make lemon tempeh and asparagus, substitute lemons for oranges. Remove all the seeds before chopping and adding the lemon segments. You can also use lemon marmalade in place of the orange.
  • Other vegetables: Use snow peas, green beans, or broccoli florets instead of asparagus.
  • Tofu: Replace the tempeh with tofu. It may not need as long to brown in the pan as the tempeh.
  • Gluten-free: Tempeh is typically gluten-free, but check the label to confirm. Then, use tamari in place of soy sauce.

🔪 Instructions

How to make pan fried orange tempeh and asparagus.

tempeh being cut into cubes on a cutting board
  1. Step 1: Cut the tempeh into 1-inch cubes. Set aside in a bowl.
oranges and asparagus cut on a cutting board
  1. Step 2: Prepare the other ingredients. Juice half of an orange and slice the remaining half. Peel and separate the segments of the other orange, cutting them in half. Cut the asparagus into pieces, chop scallions, mince the garlic, and grate the ginger.
tempeh cubes in a bowl being coated with cornstarch
  1. Step 3: Toss the tempeh cubes with the cornstarch.
sauce being whisked in a small bowl
  1. Step 4: In another bowl, whisk together the orange juice, marmalade, soy sauce, vinegar, red pepper flakes, coriander, ginger, garlic, and ¼ cup of water.
pieces of pan frying tempeh
  1. Step 5: Heat the oil in a nonstick pan over medium-low heat. Add the tempeh and pan fry, stirring occasionally, until browned, about 8 minutes.
asparagus being added to a pan of tempeh
  1. Step 6: Add the asparagus and toss to combine.
sauce being poured into the pan of food
  1. Step 7: Pour in the sauce. Cook for 7-8 minutes or until the sauce has thickened and asparagus is cooked to your liking.
orange pieces being stirred into the pan
  1. Step 8: Stir in the orange segments and cook for another minute.
a pan of orange pan fried tempeh and asparagus
  1. Step 9: Taste and adjust any of the seasonings as you like.
plates of pan fried tempeh with orange and asparagus
  1. Step 10: Serve over rice topped with sesame seeds, scallion, and orange slices.

✨ Helpful Tips

  • The time it takes to cook the asparagus will vary depending on how thick your stalks are and how tender you like them. I like mine with a little crunch.
  • If the sauce thickens up too much and almost feels dry while the asparagus is cooking, add a splash or two of water to the pan.
  • Want even more orange flavor? Zest one of the oranges and add it to the sauce. Use an additional orange if you want to garnish the dish with fresh orange slices.

🥡 Storage

Store leftovers in an airtight container in the fridge for 3-4 days. Reheat in a pan with a splash of water or in the microwave until hot. I don't recommend freezing leftovers, as asparagus tends to get mushy.

🙋🏻‍♂️ FAQ

Can you freeze tempeh?

Yes, tempeh freezes well for up to a year. You can cut larger blocks of tempeh into smaller sizes, place in an airtight container or freezer bag, and pop int the freezer. Thaw before cooking.

How long does tempeh last?

Sealed packs of tempeh will last for several weeks in the fridge or frozen for up to a year. Cooked tempeh will last 3-4 days in the fridge.

Can you eat tempeh raw?

While tempeh can be eaten raw if pasteurized, cooking improves the flavor and texture, so I recommend giving it a quick sauté, steam, or bake.

🍹 Pairing

Why not try this pan-fried tempeh with one of these drinks or dessert recipes?

  • an ice cream cone with two scoops of black currant ice cream
    Blackcurrant Ice Cream
  • cranberry mocktail in a coupe glass
    Cranberry Orange Mocktail
  • mojito with blackcurrants, limes, and mint served
    Blackcurrant Mojito Cocktail
  • a tray of chocolate chip oatmeal maple cookies
    Salted Maple Oatmeal Chocolate Chip Cookies

🫛 Related Recipes

Looking for other vegetarian recipes like this one? Try these:

  • baked sweet potatoes with quinoa and black beans
    Quinoa Sweet Potatoes
  • large dish of pesto orzo salad
    Orzo Pesto Pasta Salad
  • Zucchini Curry
  • Vietnamese spring rolls on a cutting board
    Tofu Spring Rolls

Cardamom Chicken and Rice

a pan of chicken and rice with cardamom and parsley

This one-pan cardamom chicken and rice dish is full of Middle Eastern flavors. It features the bright notes of cardamom and the burst of fresh herbs, along with onions, carrots, and dried currants.

a pan of cooked chicken and rice meal

Middle Eastern cuisine is one of my favorite foods to cook. It took me a while to realize this, but in hindsight, it makes sense. With Lebanese family heritage, I've known some of these dishes since I was a kid. At family gatherings, my grandfather's siblings-my great aunts and uncles-would often bring items like kibbeh, stuffed grape leaves, tabbouleh, and pita bread.

Of course, as a kid, I never actually appreciated these foods. I'd opt for pizza at family parties, but today, I wish I had some of their old recipes and a chance to talk to them about the foods they ate at home growing up.

[feast_advanced_jump_to]

Middle Eastern cuisine is bright, fresh, and flavorful. It often focuses on seasonal fruits and vegetables, such as figs, pomegranates, and eggplants, as well as grains and beans like bulgur, lentils, and chickpeas, along with bold herbs like dill and mint. I've also come to love their warm, fragrant spice combinations, such as cumin, cardamom, cinnamon, caraway, and nutmeg.

Although I don't have my old family recipes, I do have a copy of Jerusalem by Yotam Ottolenghi and Sami Tamimi. This cookbook isn't just a compilation of wonderful recipes. It's also a fascinating look at the complex history and culture of Palestinians, Israelis, Greeks, Libyans, French, Moroccans, and others who have influenced the foods of Jerusalem.

I've enjoyed several recipes from the book, including one for cardamom chicken and rice. I simplified their recipe a little in my adaptation here to make it more accessible for everyday cooking, but the dish's spirit is the same. If you like this dish, you'll definitely want to get yourself a copy of the book as well.

😍 Why You'll Love This Cardamom Chicken

  1. The chicken stays tender. After browning, it finishes cooking in the pan with the rice, vegetables, and plenty of liquid.
  2. Warm spices and fresh herbs keep the dish flavorful. And that's what I love about Middle Eastern cooking. There is never a lack of flavor.
  3. It's a one-pan meal. I love how rice and chicken cook together on top of the stove. And I'm always a fan of fewer dishes to wash.

Another fantastic one-pan chicken meal is my Chicken Tagine with Apricots recipe. But if you're in the mood for pasta, try this Garlic Parmesan Chicken Pasta. Or for something different, how about Ground Chicken Sloppy Joes?

Need a tasty vegetable recipe to serve on the side? Try my One Pan Sweet Potatoes with Green Beans, Kale and Swiss Chard Galette, or Instant Pot Red Cabbage.

🐔 Ingredients

Here's everything you need to make this cardamom chicken recipe.

ingredients for making cardamom chicken recipe

Key Ingredients

  • Chicken thighs: Chicken thighs are my preferred cut because they won't dry out like chicken breasts. They're also easier for portion sizes. Use about two pounds of boneless, skinless chicken thighs for four servings.
  • Basmati rice: A nutty-tasting rice common in Middle Eastern cooking, it stays light and fluffy while absorbing the flavors of the spices and the chicken as it cooks.
  • Dried currants: These tiny dried grapes - they're actually a grape and not a currant - add a sweet and tart flavor. Their small size easily incorporates into the dish
  • Cardamom: Bright, floral, warm, and fresh, cardamom is the prominent flavor of this chicken dish and a staple in Middle Eastern and Indian cooking. I choose to use ground cardamom so that I don't have to fish out cardamom pods
  • Carrots: Not traditional, but I include carrots to make this a one-pan meal without having to cook another vegetable on the side.
  • Parsley and cilantro: Added after cooking to add plenty of fresh flavor and balance out the spices.

See the recipe card below for the full list of ingredients and quantities.

🍇 Substitutions & Variations

  • Dried currants: Instead of currants, you can use raisins or dried cranberries.
  • Basmati rice: You can substitute any long-grain white rice instead. Jasmine is another flavorful option.
  • Herbs: In addition to or in place of the parsley and cilantro, you could try mint and dill.

🔪 Instructions

How to make cardamom chicken and rice.

sliced carrots and onions on cutting boards
  1. Step 1: Slice the carrots and onions.
chicken thighs being sprinkled with spices
  1. Step 2: Season the chicken with cardamom, pepper, salt, and cloves.
chicken thighs browning in a pan
  1. Step 3: Heat olive oil in a large pan or Dutch oven. Brown chicken about 4-5 minutes per side. Then, remove and set aside.
onions and carrots cooking in a pan
  1. Step 4: Add the remaining oil to the pan along with the sliced carrots and onions. Cook, stirring occasionally, for about 8 minutes until softened and lightly browned.
rice and dried currants being stirring into pan
  1. Step 5: Add the rice and currants. Stir to combine well with the vegetables in an even layer.
chicken thighs being added back to the pan
  1. Step 6: Add the chicken back to the pan and set it over the rice.
cinnamon sticks being added to pan of chicken
  1. Step 7: Add the cinnamon sticks.
boiling water being poured into the pan
  1. Step 8: Pour over 2 ¼ cups of boiling water.
a cover being put on the pan
  1. Step 9: Cover and cook on top of the stove over low heat for 30 minutes.
plates of chicken and cardamom rice
  1. Step 10: Serve topped with the fresh herbs.

✨ Helpful Tips

  • The chicken only needs to brown at first. It will finish cooking with the rice.
  • Make sure the water you add to the pan is boiling, which helps speed up cooking.
  • If you don't have a cover for you pan, you can cover it with foil instead.

🍳 Equipment

  • A heavy pan, skillet, or Dutch oven. A thin pan may cause the rice to burn and stick to the bottom. A large cast-iron pan is a great option, and even better if it has a cover.

🥡 Leftovers

Store any leftover chicken and rice in an airtight container in the fridge for 3-4 days.

🙋🏻‍♂️ FAQ

Is cardamom a sweet or spicy food?

Cardamom is a spice with a bright, warm, and lightly sweet flavor with hints of orange. It's like a lighter, fresher cinnamon and works well for both sweet and savory dishes. Some people also describe cardamom as having a pine-like flavor.

What does cardamom go with?

Cardamom pairs well with other warm spices, such as cinnamon and nutmeg. So it's a good addition to a range of baked goods. It also lends a bright spice flavor to savory dishes and meats, like chicken.

What can I substitute cardamom with?

Cardamom has a distinct flavor, but the closest replacement is cinnamon or nutmeg. If you can also pair it with a little orange zest, even better.

Does cardamom go well with chicken?

Cardamom brings freshness and complexity to chicken, which is mild in flavor and often needs enhancing. It pairs well with other spices like cinnamon, cumin, and coriander, which may be used for seasoning chicken in Middle Eastern and Indian cooking.

🧅 Pairing

Any of these recipes would go great with this cardamom chicken:

  • a bowl of mashed beets with butter and thyme
    Mashed Beets
  • rosemary parmesan bread sliced on a cutting board
    Rosemary Parmesan Bread
  • dish of roasted onions with balsamic glaze
    Roasted Balsamic Onions
  • plates of tiramisu topped with cherries
    Cherry Tiramisu

🐔 Related Recipes

Looking for more chicken recipes? Try these next:

  • large pan of chicken thighs with apricots and barley
    Apricot and Chicken Tagine
  • plate of grilled chicken with bourbon BBQ sauce
    Grilled Bourbon Chicken
  • chicken sloppy joes with pickles
    Ground Chicken Sloppy Joes
  • pan with pasta and parmesan, garlic, and basil
    Creamy Garlic Parmesan Chicken Pasta

Easy Vegetarian Borscht (Beet Soup)

bowls of borscht with eggs and sour cream

This easy vegetarian borscht is a hearty Eastern European classic made with sweet beets, tender cabbage, and a bit of dill. It's a colorful beet soup that's comforting and simple. Top it with sour cream and chives-or a halved hard-boiled egg-for a lunch or light dinner.

bowls of beet soup

Vermont's winters are long, snowy, and cold, similar to those in Eastern Europe. During this season, hearty storage vegetables such as cabbage, potatoes, and beets are common staples, making soup an ideal way to use them.

Borscht, a beet soup, is often associated with Russian cuisine, but it is also popular among Ukrainians, Poles, and Lithuanians. In some cultures, borscht is served after funerals, while in others, it is enjoyed as part of a Christmas Eve dinner. Regardless of when it's served, there is something uniquely comforting about this dish.

[feast_advanced_jump_to]

😍 Why You'll Love This Hearty Beet Soup

  1. It's made with simple, straightforward ingredients.
  2. The balance of sweet and sour flavors makes it extra tasty.
  3. It is packed with vegetables, which makes it rich in vitamins and fiber.

I love beets and don't think they're appreciated as much as they should be. There are plenty of great ways to use them, such as a root vegetable-based Sweet Potato and Beet Salad, a simple Mashed Beet side dish, or as an appetizer like this Beet and Feta Tart.

🧅 Ingredients

Here's everything you need to make this borscht soup.

ingredients for making borscht soup

Key Ingredients

  • Beets: Common red beets are the main ingredient in this soup. You'll need 1 ½ pounds.
  • Cabbage: You can use either green or red cabbage in this recipe. Either way, you'll chop it up and it'll add some crunch and texture to the soup.
  • Potatoes: Any potato will work here. When cooked, they become tender and contrast nicely with the firmer pieces of beets. You'll need about a pound.
  • Broth: I keep it vegetarian using a good vegetable broth-either homemade with vegetable scraps or a reduced-sodium Better Than Bouillon vegetable base.
  • Dried dill: I used dried dill because I tend to make this soup in the colder months when I don't have fresh dill handy. But you can certainly use fresh dill if you have it (about 1 ½ tablespoons). You can also freeze fresh dill and use that as well.
  • Sour cream, scallions, and eggs: All for serving with the soup. The sour cream adds creaminess and tang, the scallions add freshness, and the eggs, an optional addition, add some protein.

Check out the recipe card below for the complete list of ingredients and quantities.

🍅 Substitutions & Variations

  • Vinegar: In place of red wine vinegar, you could use white wine vinegar, apple cider vinegar, or even plain white vinegar. Vinegar adds tang, which balances the sweetness of the beets, so I don't suggest leaving it out.
  • Carrot: I threw in a carrot for a little more crunch. You can leave it out if carrots aren't handy, as it's not essential.
  • Tomato paste adds some depth of flavor to the soup's base. To add more umami flavor, you could substitute miso paste. Stir it into the soup towards the end of cooking.
  • Toppings: Try chopped parsley or chives in place of scallions. Greek yogurt could also be used instead of sour cream.

🔪 Instructions

How to make vegetaian borscht soup.

ingredients being chopped on a cutting board
  1. Step 1: Peel and chop the vegetables.
chopepd vegetables on a tray
  1. Step 2: Arrange everything on a tray or large plate to add to the soup as needed. This step is optional if you don't find this helpful.
onion sauteeing in a pan
  1. Step 3: Saute the onion in butter over medium-low heat until softened, about 5 minutes.
vegetables being added to a pan
  1. Step 4: Add the beets, carrot, potatoes, and garlic. Saute for about 10 minutes.
broth being poured into pot of vegetables
  1. Step 5: Add the broth.
borscht simmering in a pot
  1. Step 6: Add the cabbage and tomato paste. Bring to a boil, reduce the heat, and simmer for about 20 minutes, or until the beets are tender.
vinegar being poured into a pot of soup
  1. Step 7: Stir in the vinegar. Taste and add salt if needed.
bowls of beet soup with hard boiled eggs and sour cream
  1. Step 8: Top with sour cream and scallions and serve with hard-boiled eggs, if you like.

✨ Top Tip

I believe this soup tastes better as it sits, allowing the flavors to meld. If possible, prepare it a few hours or even a day in advance.

🥡 Storage and Freezing

Leftover vegetarian borscht can be stored in the fridge for up to four days. Let it cool completely before transferring to an airtight container.

To freeze, transfer the cooled soup to freezer-safe jars or containers, without toppings, leaving about an inch of space in the container. Thaw overnight in the fridge or reheat gently on the stovetop from frozen. Before serving, taste and season the soup with a splash of lemon juice or a little salt.

🙋🏻‍♂️ FAQ

What vegetables are in borscht soup?

Beets are the main vegetable in borscht, but potatoes and cabbage are common. I've also included carrot and onion in this recipe.

Does traditional borscht contain meat?

Yes, many traditional Russian and Ukranian borscht recipes often contains meat such as beef or pork. However, it is also not uncommon to have borscht without meat.

What makes borscht borscht?

Borscht soup is known for its balance of sweet and sour flavors. Today, it is also known for its deep red color from the beets. The beets give the soup some natural sweetness while vinegar adds sourness.

🥖 Pairing

These recipes would go great with the soup:

  • rosemary parmesan bread sliced on a cutting board
    Rosemary Parmesan Bread
  • slices of toast with halloumi, jam, and pears
    Halloumi Toast with Jam and Honey Butter
  • a large plate of bok choy, tofu, and radishes with dressing
    Bok Choy with Tofu Salad
  • cheese scones on plate with chives
    Easy Cheese and Chive Scones

🍴 Related Recipes

Looking for more beet recipes like this one? Try these next:

  • a bowl of mashed beets with butter and thyme
    Mashed Beets
  • a dish of beet broccoli salad with yogurt dressing
    Beet Broccoli Salad
  • Beetroot and Feta Tartlets
  • plate of salad with beets and sweet potatoes
    Sweet Potato and Beet Salad
  • « Previous Page
  • 1
  • 2
  • 3
  • 4
man eating pizza in italy

Hey, I'm Steve

Here you'll discover delicious recipes featuring fresh, whole foods inspired by my garden and local New England farms and producers.

About Me

Spring Eats

  • slices of rhubarb quick bread with butter
    Rhubarb Banana Bread
  • a stack of grilled cheese sandwiches with goat cheese
    Goat Cheese Grilled Cheese
  • strawberry homemade pop tarts on tray
    Strawberry Puff Pastry Pop Tarts
  • a plate of artichoke pasta
    Artichoke Pesto Pasta
  • jars of date overnight oats
    Cinnamon Overnight Oats with Dates
  • cheese scones on plate with chives
    Easy Cheese and Chive Scones
  • a large plate of bok choy, tofu, and radishes with dressing
    Bok Choy with Tofu Salad
  • a plate of chamomile cookies with flowers on side
    Chamomile Cookies
  • a glass of frozen matcha latte on a countertop with straw
    Frozen Matcha Latte
  • a bowl of soup with celery and leeks, and potatoes
    Creamy Celery Leek Soup with Croutons
  • salmon over peas and potatoes
    Salmon with Pea Purée
  • two plates of pasta with peas and mint pesto with a side of peas and drink glasses
    Pasta and Peas with Mint Pistachio Pesto

Footer

  • About
  • Recipe Index
  • Privacy Policy
  • ↑ back to top

Copyright © 2026 What Steve Eats