What Steve Eats

  • Recipe Index
  • Spring
  • Drinks
  • Vegetarian
  • Work With Me
  • About
menu icon
go to homepage
  • Recipe Index
  • Spring
  • Drinks
  • Vegetarian
  • Work With Me
  • About
subscribe
search icon
Homepage link
  • Recipe Index
  • Spring
  • Drinks
  • Vegetarian
  • Work With Me
  • About
×
Home

Quick Green Bean Pickles

jars of quick pickle beans with garlic and dill

These quick green bean pickles are the simplest, fastest, and most foolproof way to turn your fresh green beans into tasty pickles in minutes. They're a crunchy and vinegary complement to burgers, sandwiches, grilled food, and more.

two jars of pickled green beans on cutting board

😍 Reasons to love this quick pickle recipe

  1. You don't have to cook the beans. All you do is pour hot brine over them.
  2. They're refrigerator pickles, so there's no canning process required, as you would for traditional dill pickles.
  3. They take minutes to make and are ready to enjoy the next day.

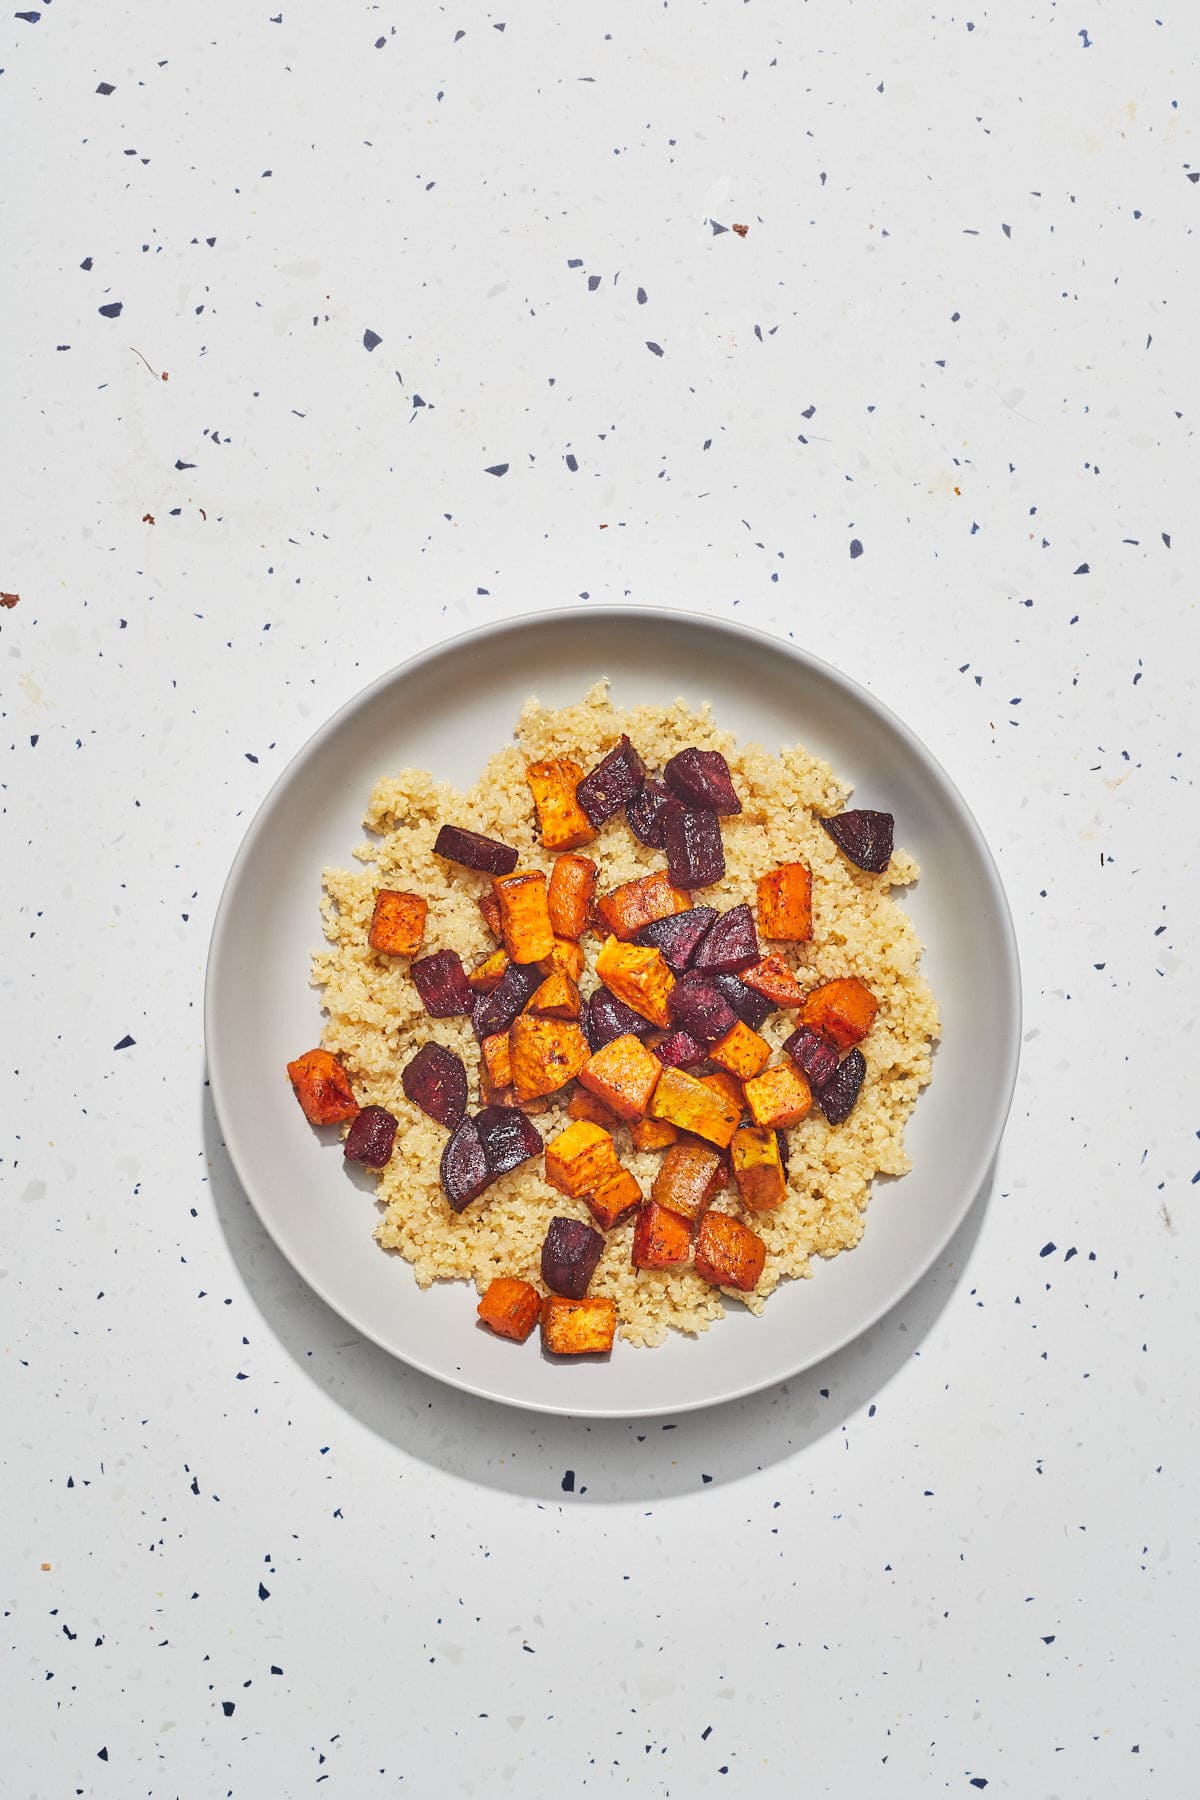
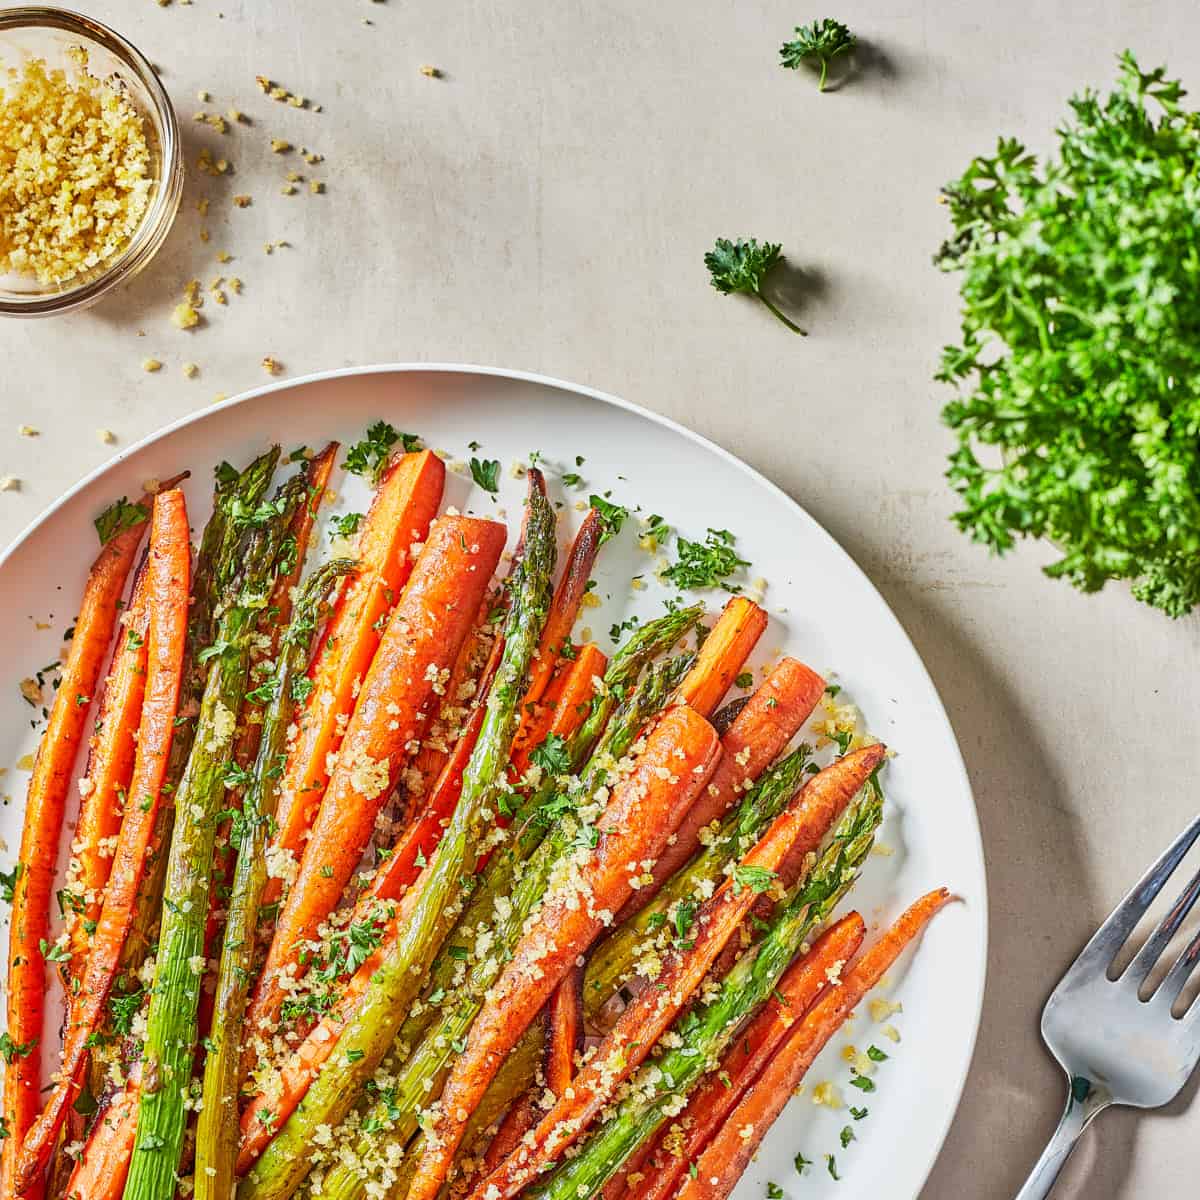
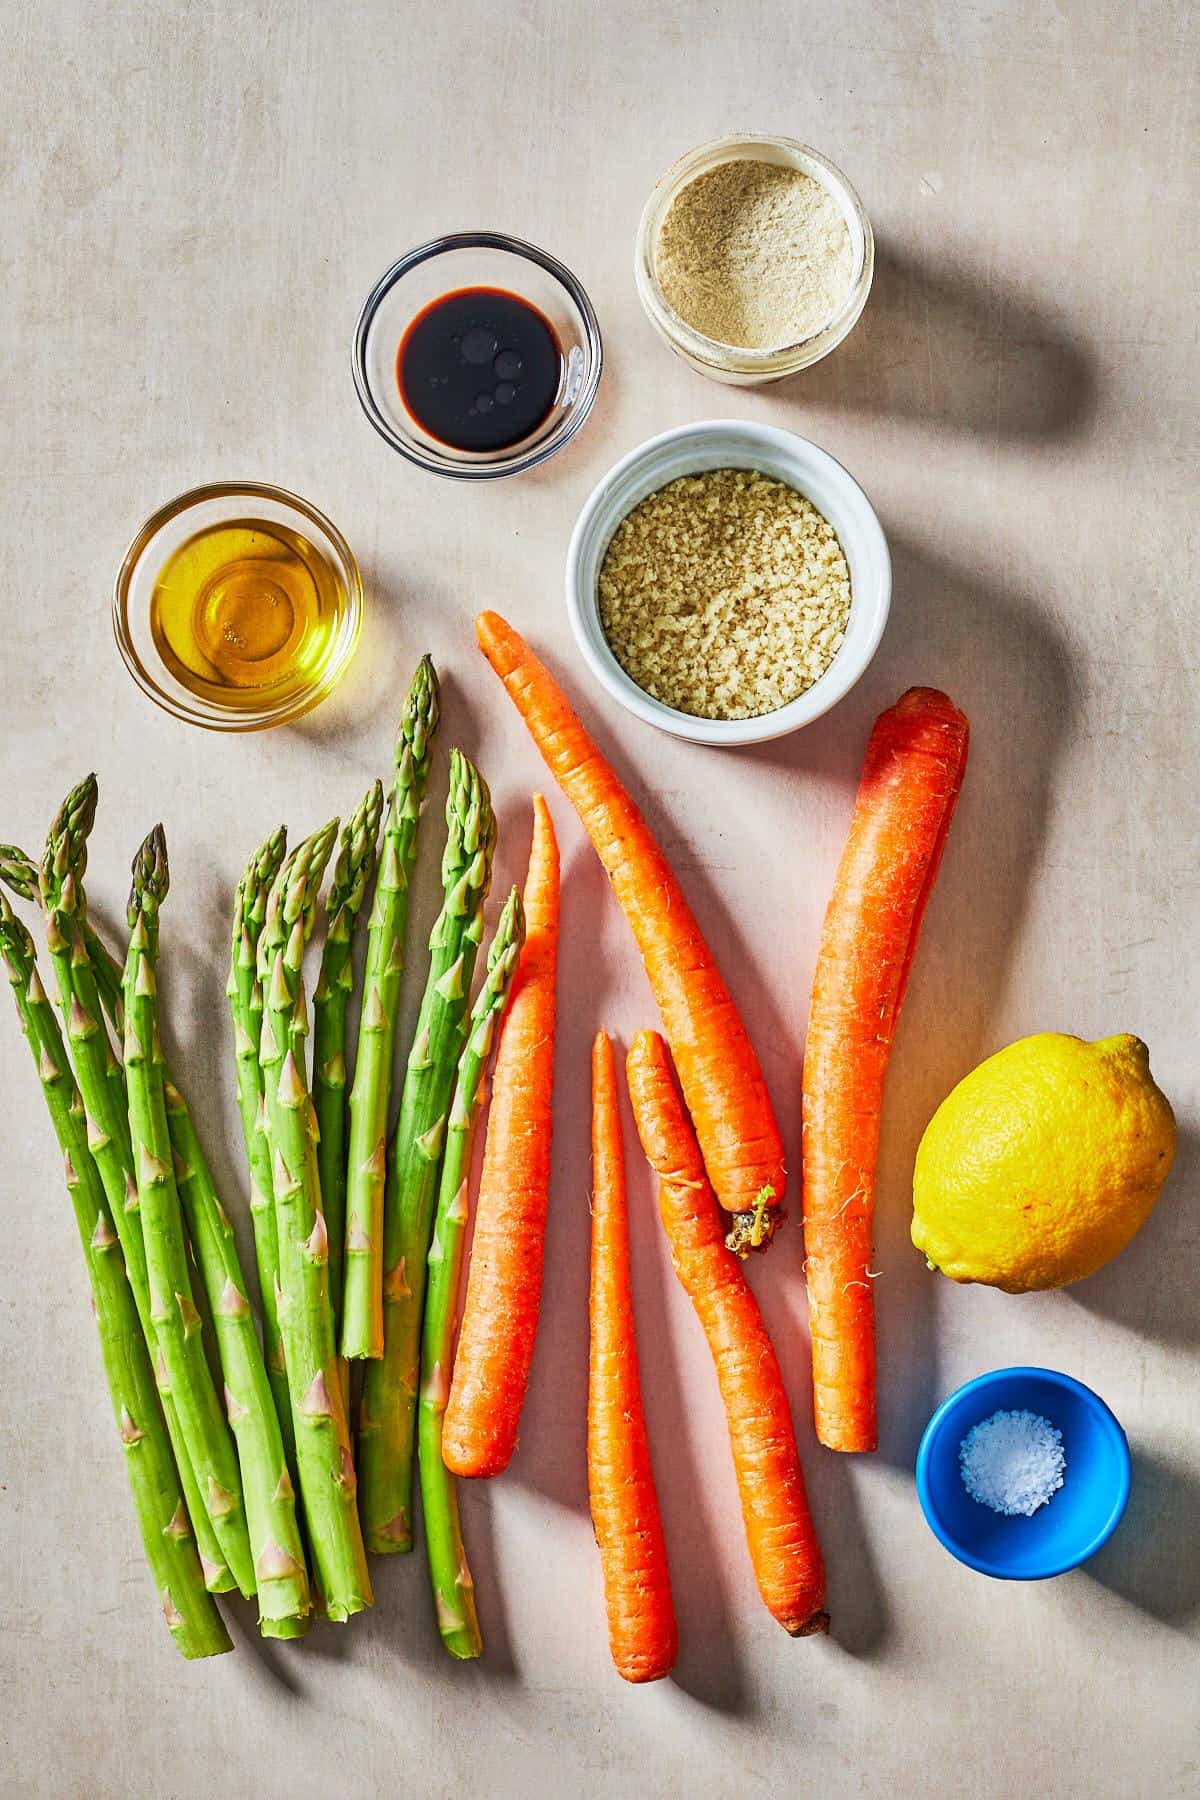
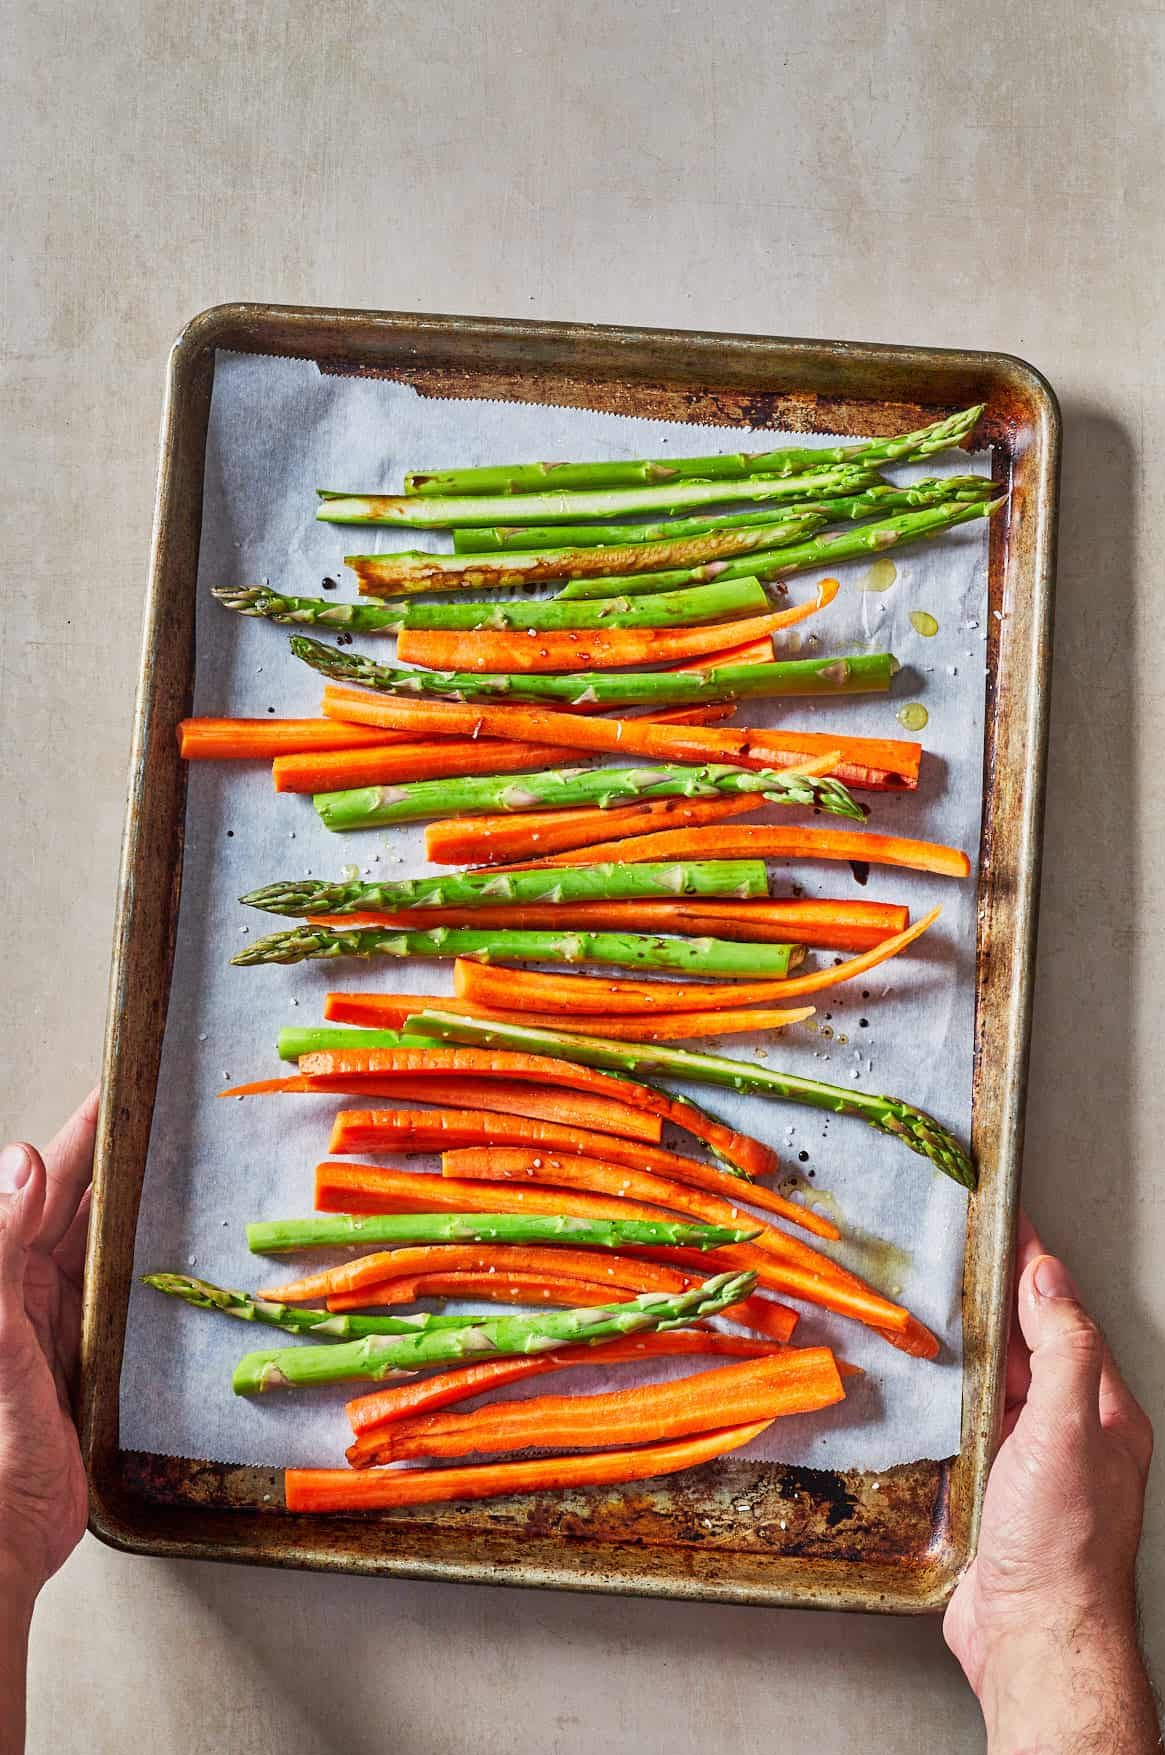
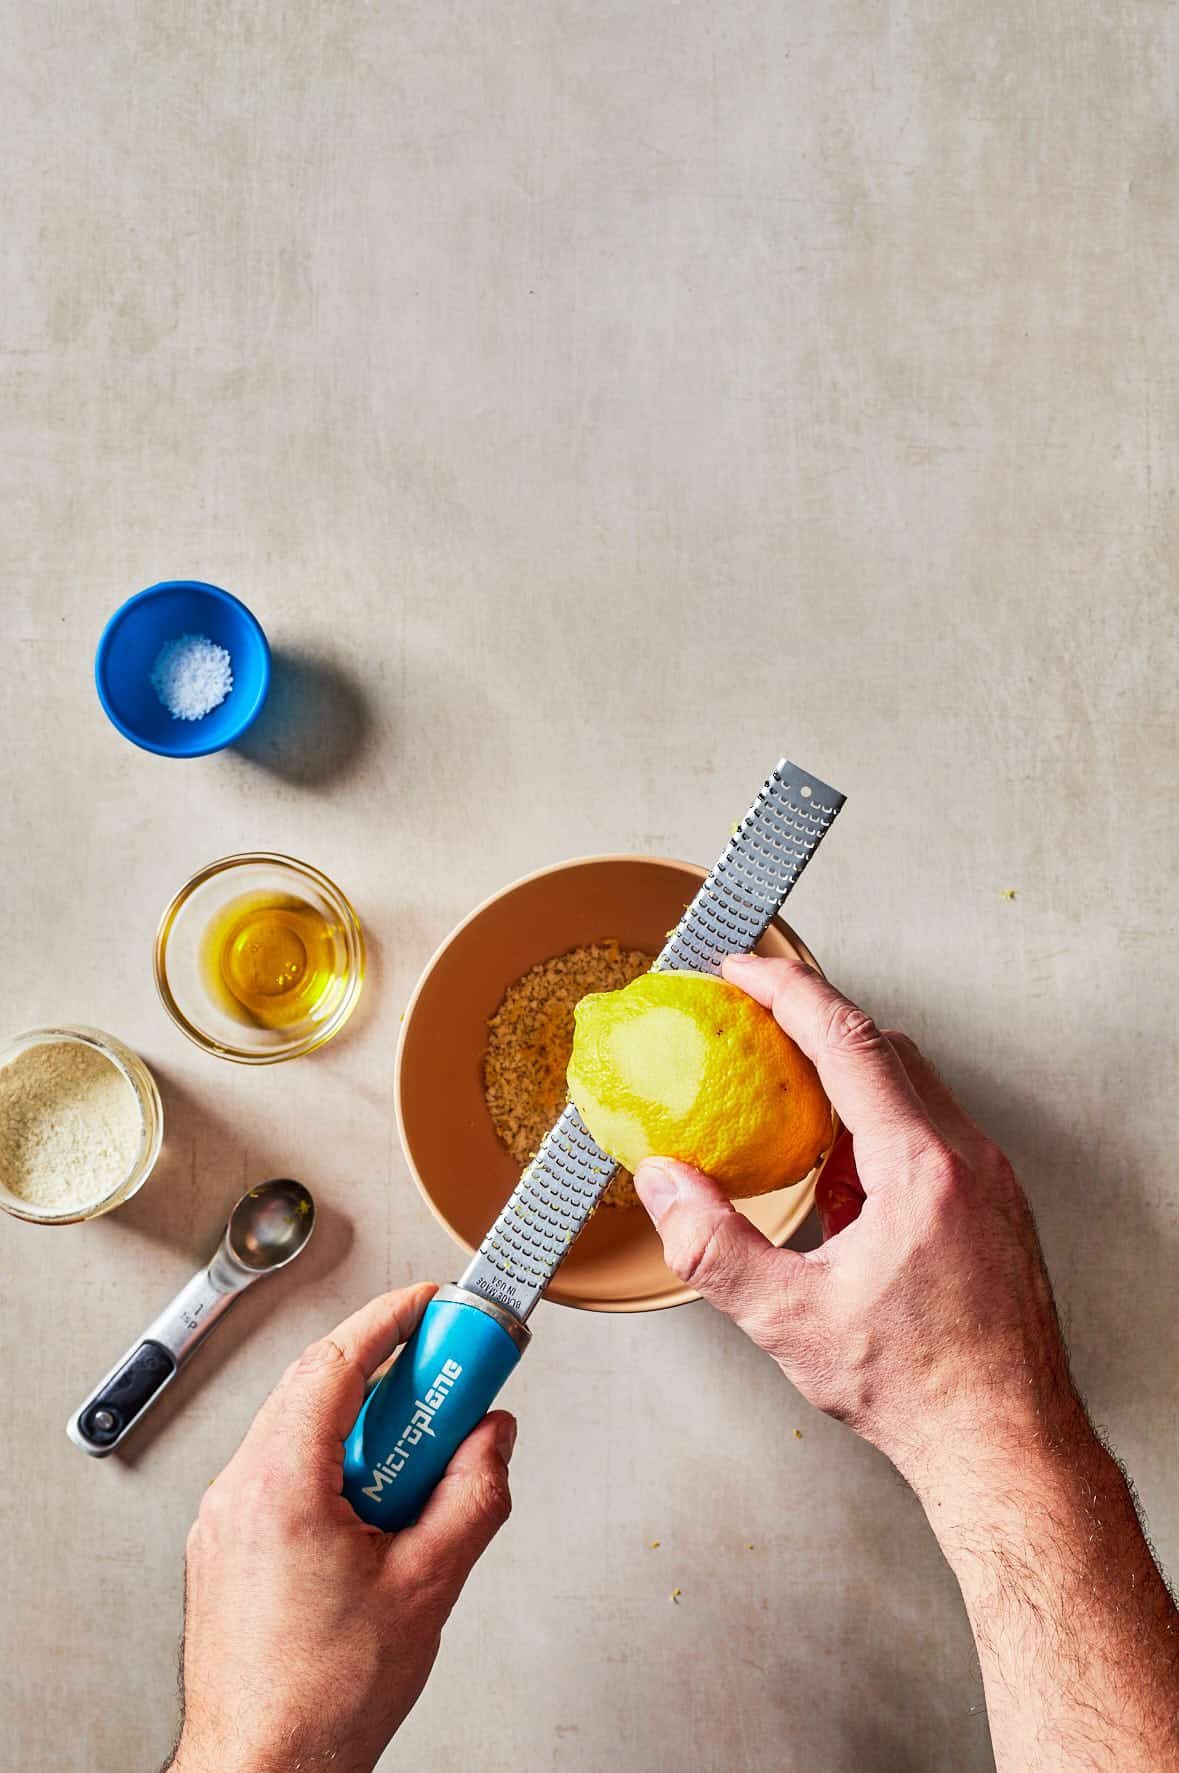
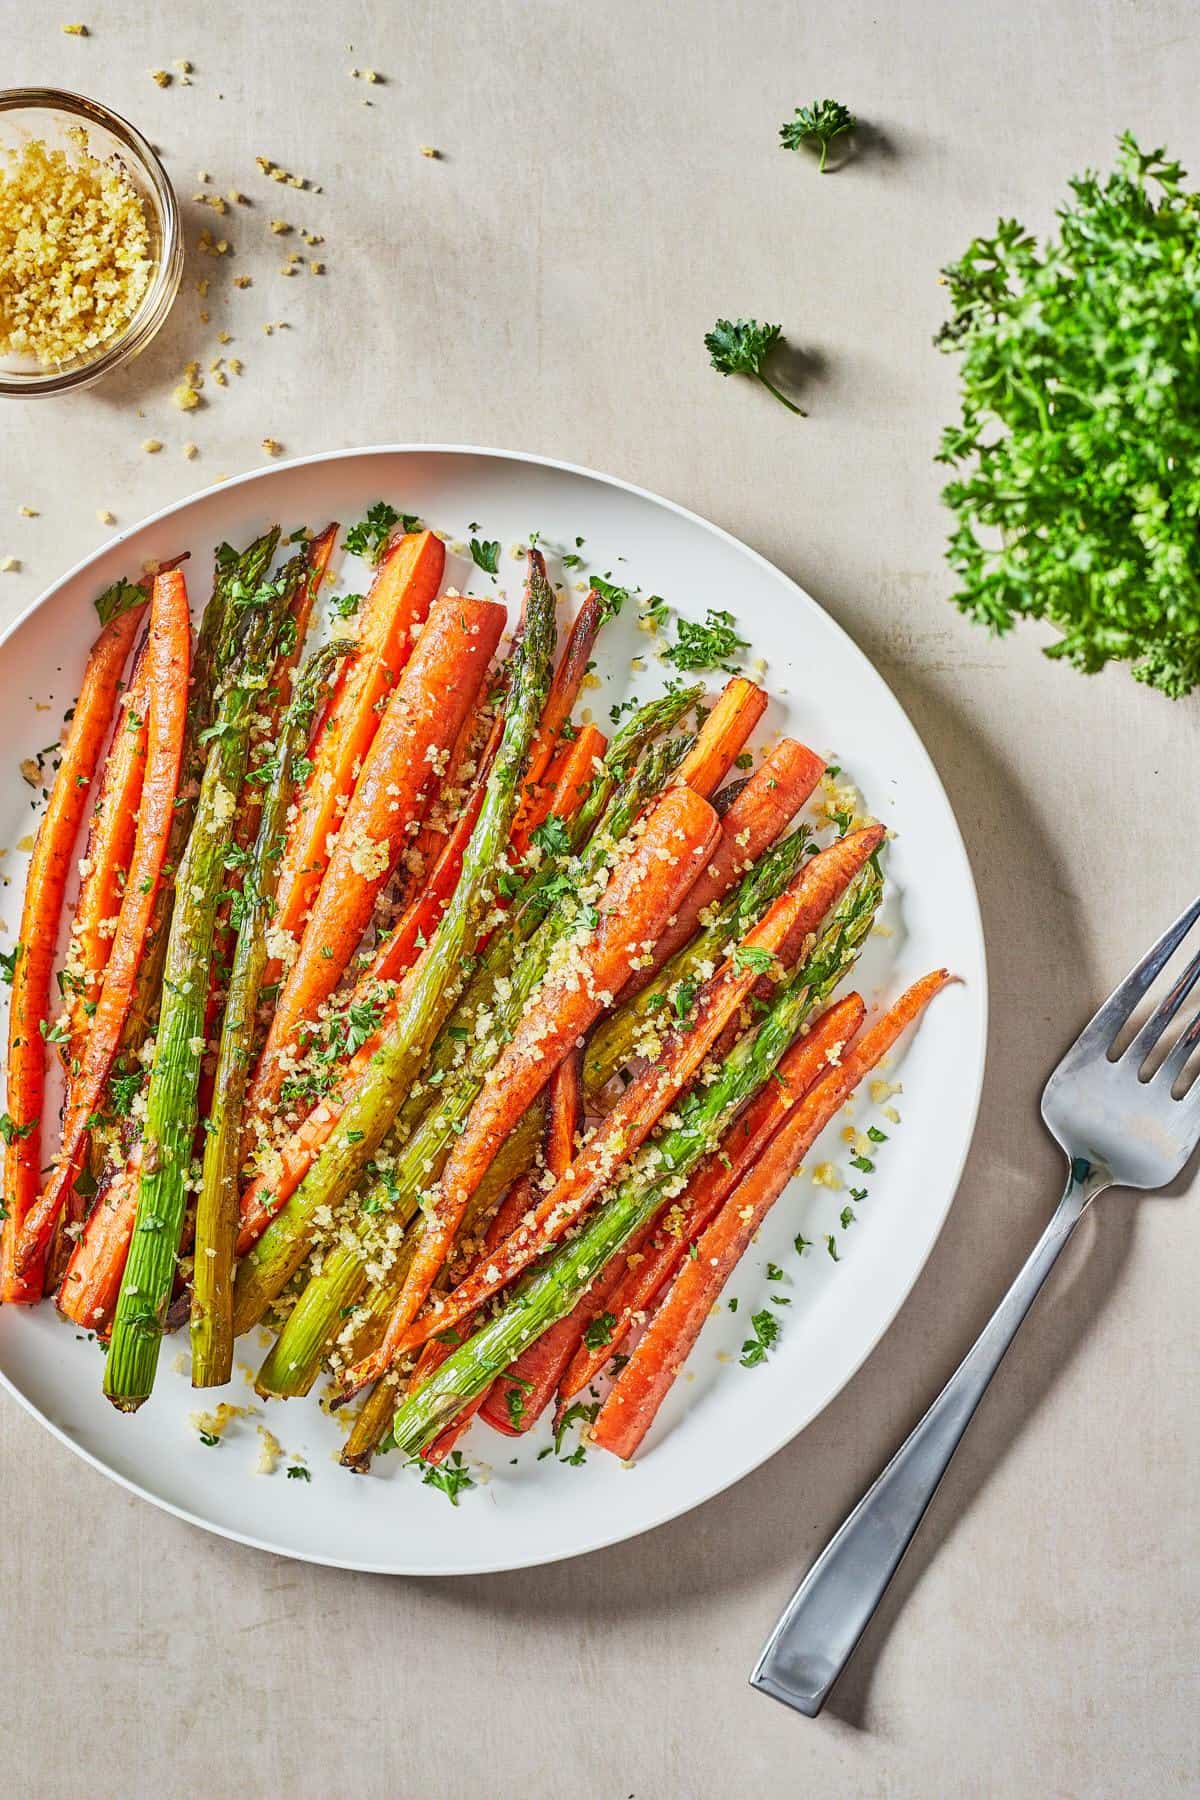
If you're looking for more quick ways to cook with fresh vegetables and herbs, check out my recipes for Dill Cream Cheese Spread, Roasted Carrots and Asparagus, Sweet Potato and Beet Salad, Oven Roasted Jalapenos, and Roasted Potatoes and Leeks.

[feast_advanced_jump_to]

🫘 Ingredients

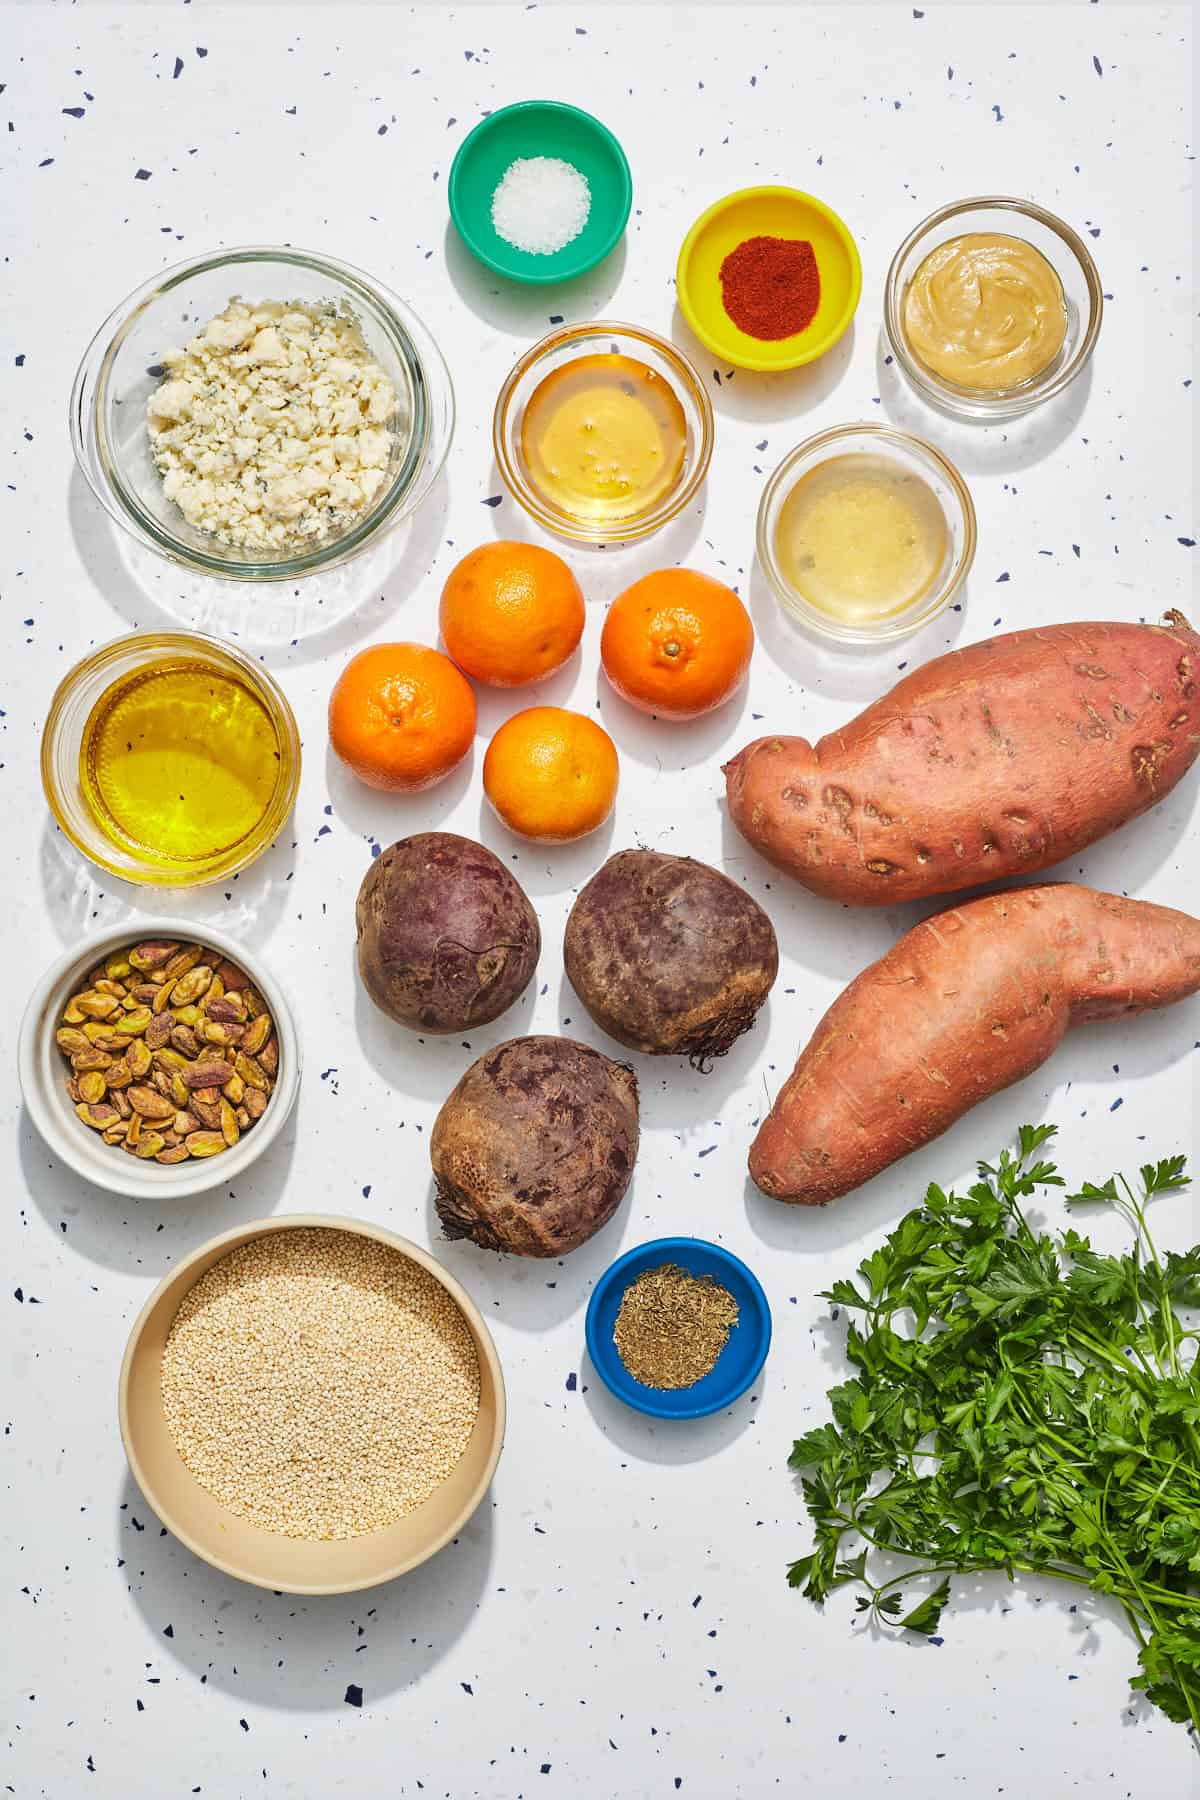
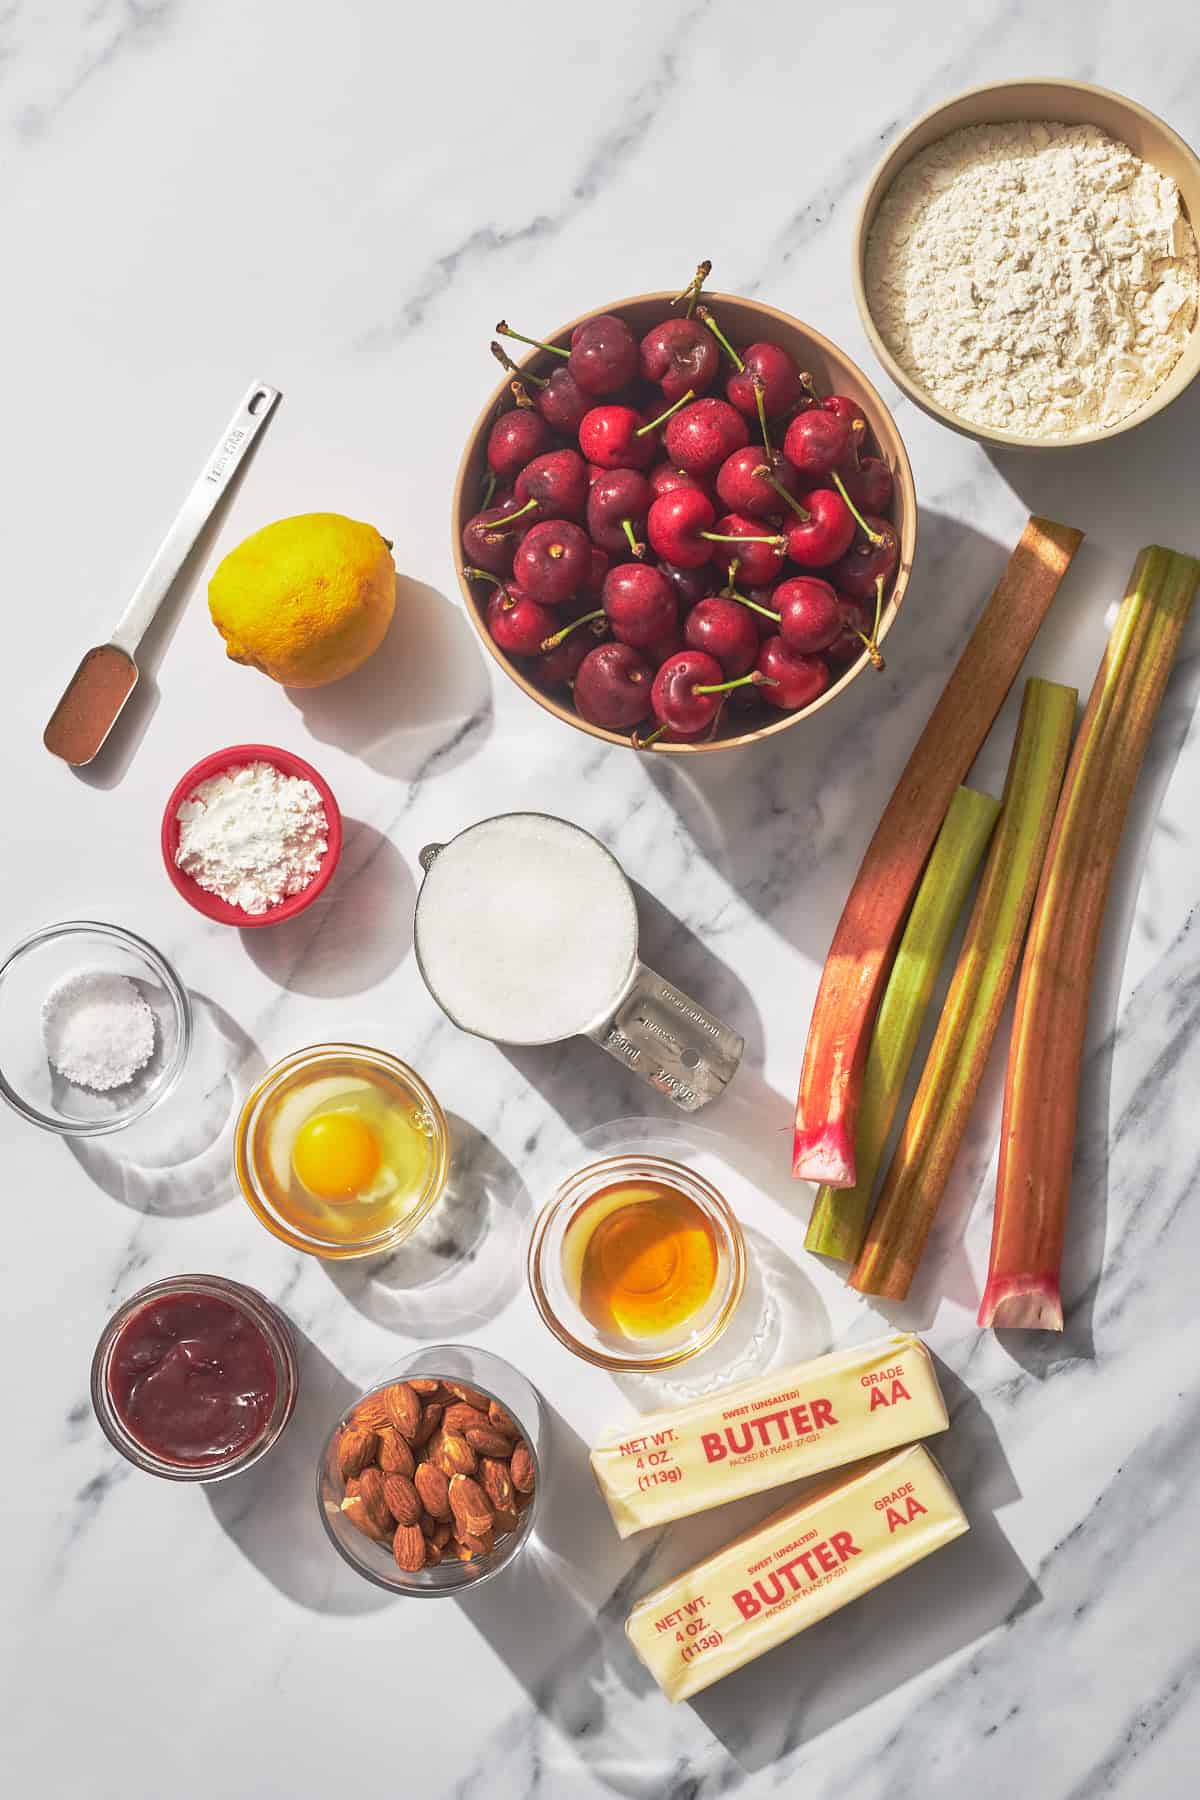
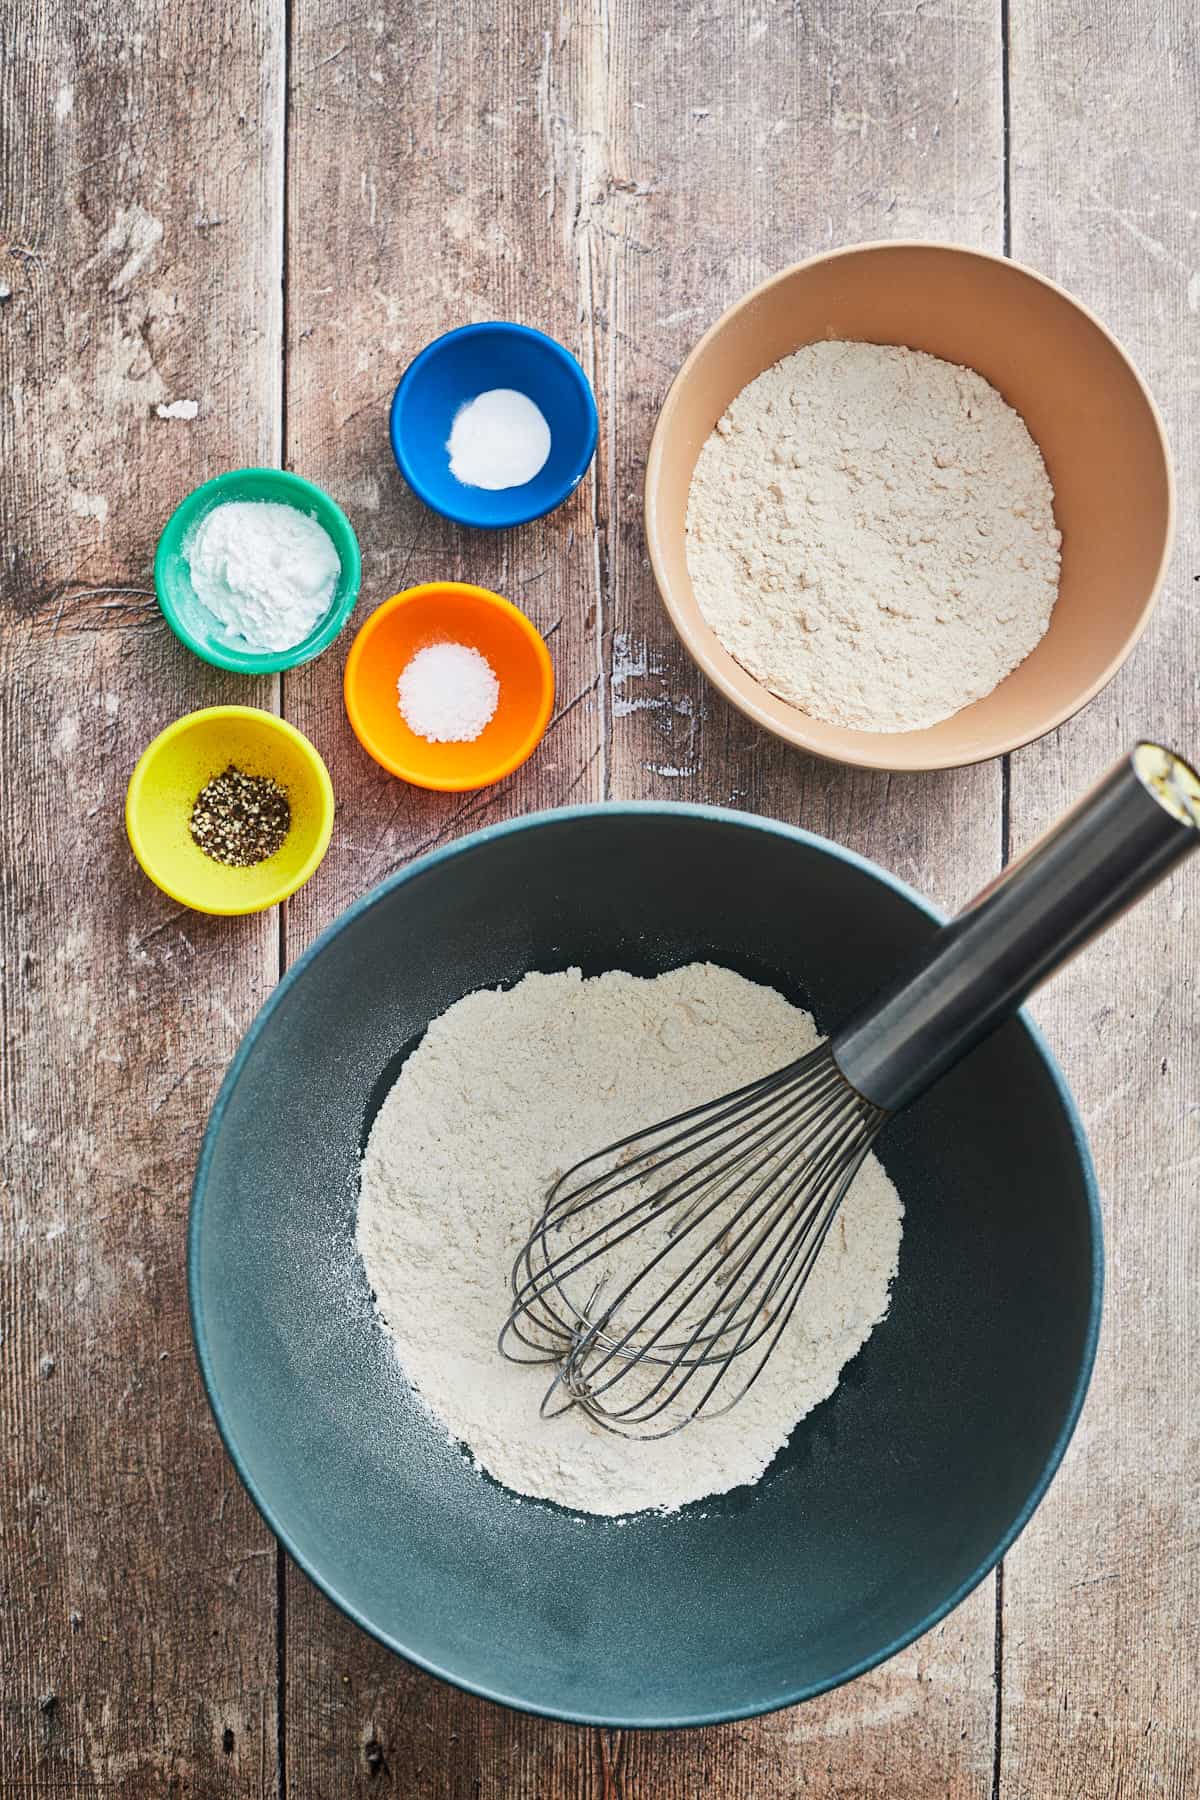
Here's what you need to make quick green bean pickles.

ingredients on a cutting board for making quick green bean pickles
  • Green beans - About ½ pound of fresh green beans will fit into a single pint jar, so you'll want one pound to make two pint jars. Use the freshest beans you can find, and avoid ones those that are overgrown with bulging seed pods, as they can be tough. You can also use yellow or purple beans (which turn green when heated).
  • Apple cider vinegar - Has a more mild and fruity flavor compared to regular white vinegar. It's not as harsh and produces more mellow pickles.
  • Kosher salt - A good pickle always needs salt in the brine. I use kosher, though pickling salt may be used in an equal amount.
  • Sugar - Just a little sugar for a touch of sweetness.
  • Mustard seeds - A staple pickling ingredient that adds a little spice to the brine. Look for mustard seeds with the spices in the grocery store.
  • Garlic - You'll need one small clove of garlic per jar of beans
  • Dill flowers or seeds - If you want your quick pickled beans to taste like dilly beans, you'll need some dill. While fresh dill is good, I prefer the seeds. I cut the flowering seed heads off of my plants in the garden. Dried dill seeds, about one teaspoon per jar, would work fine, too.

See the recipe card below for the full list of ingredients and quantities.

🌶️ Variations

  • Make spicy quick pickled beans with the addition of red pepper flakes.
  • For sweeter pickles, use more sugar.
  • Instead of dill, you could flavor the green beans with other herbs, such as basil or rosemary.
  • Because the beans are not cooked, they have a fresh crunch. For a more tender pickled bean, similar to a more common dilly bean, you could blanch your beans for 1 minute in boiling water, then chill them in a bowl of ice water to stop the cooking before using in the recipe.

🔪 Instructions

Here's how to make this quick pickled green beans recipe.

mustard seeds being poured into a jar
  1. Add mustard seed, dill, and garlic cloves to two pint jars.
green beans being trimmed on a cutting board
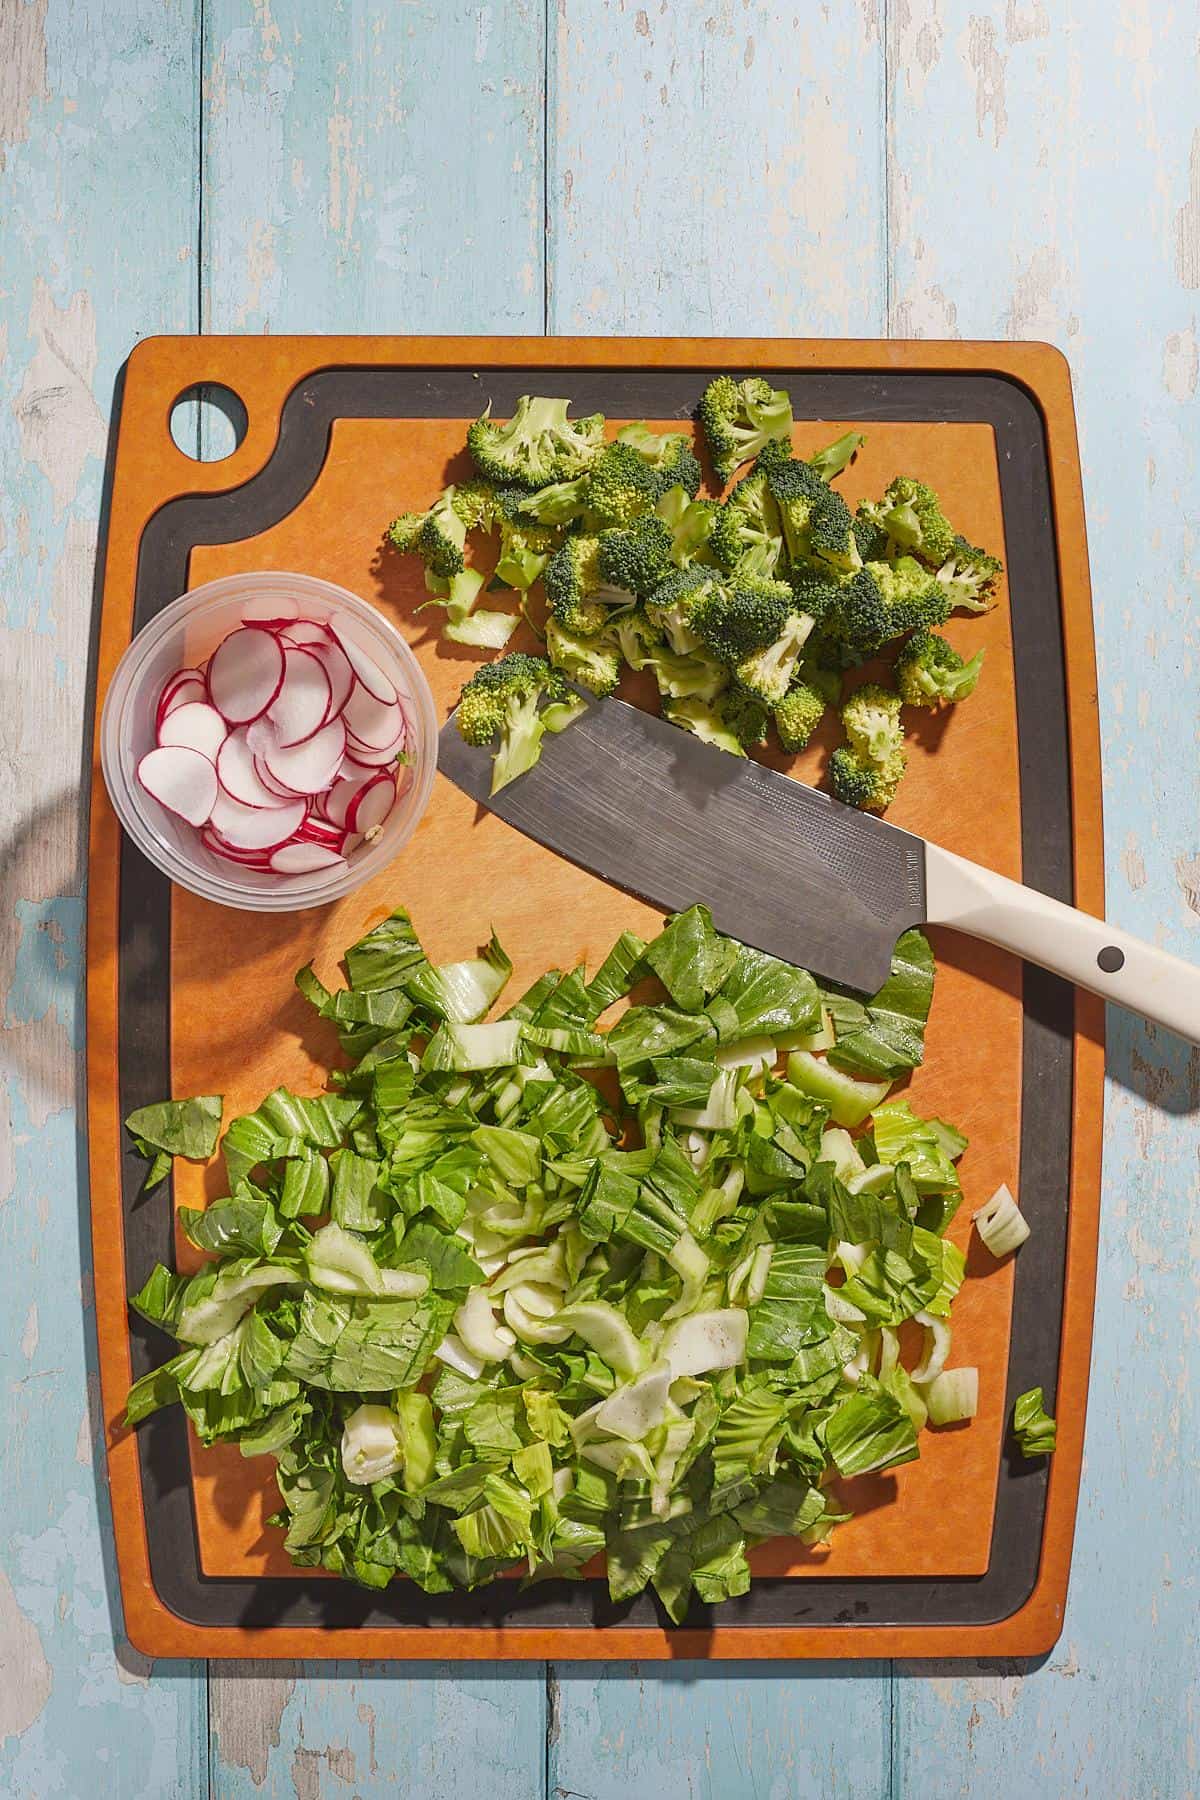
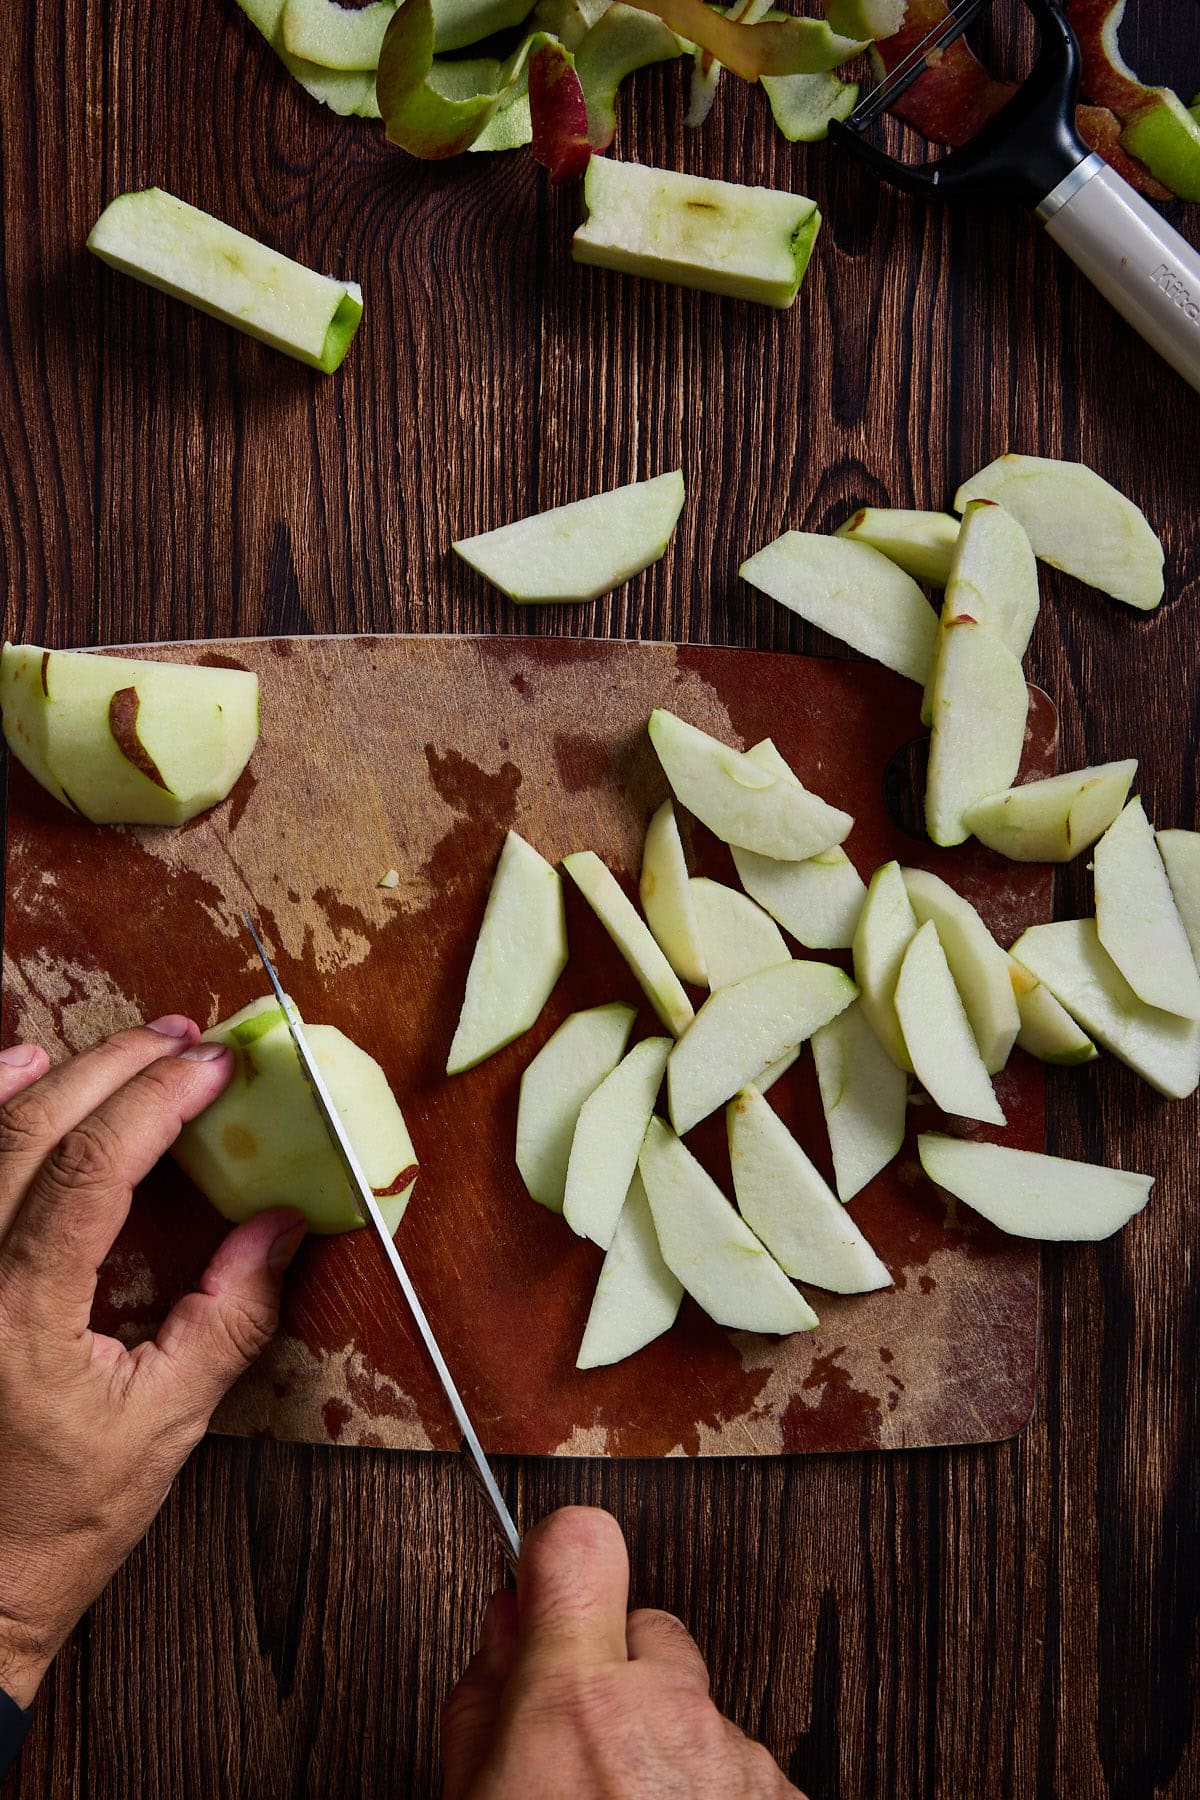
  1. Wash and trim the green beans.
beans being added to a canning jar
  1. Fill the jars with the beans. Cut any beans that may be too tall.
salt being poured into a pan of brine
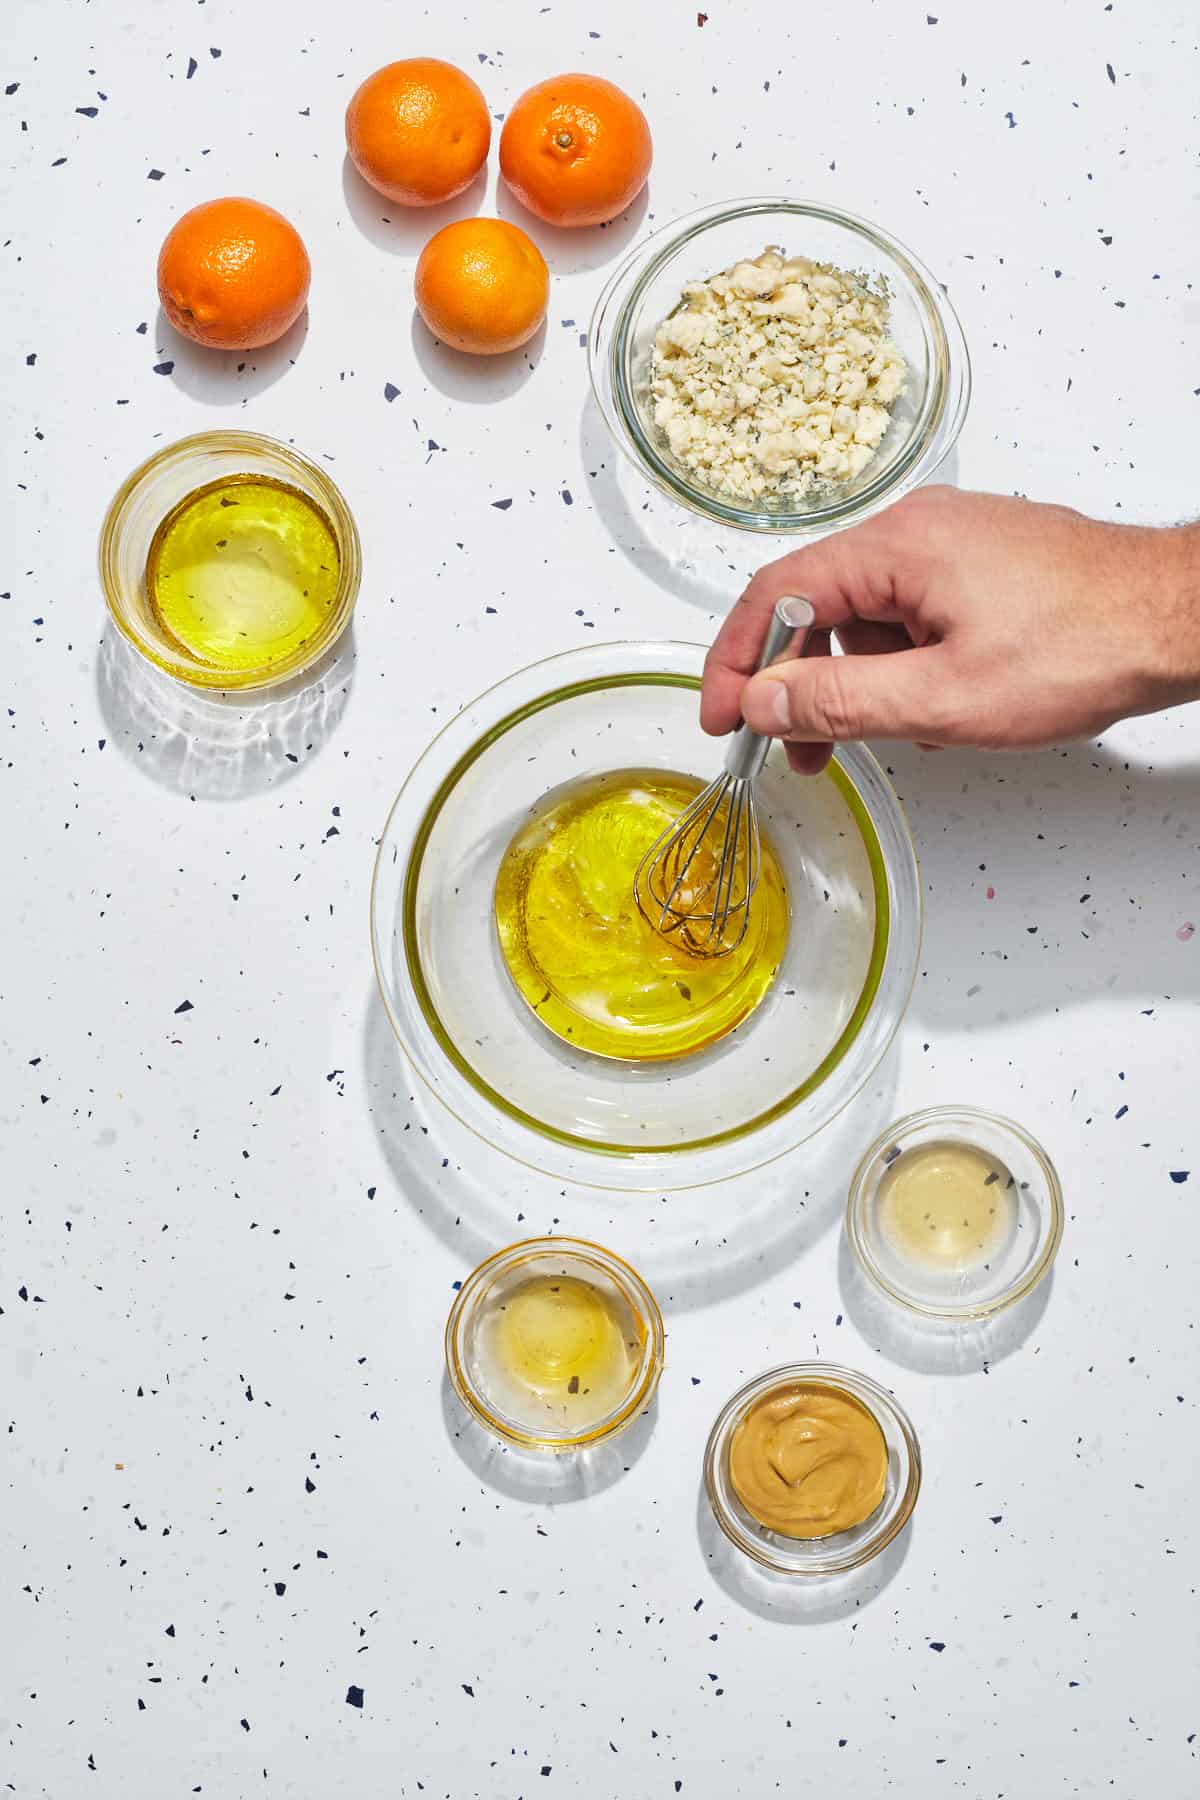
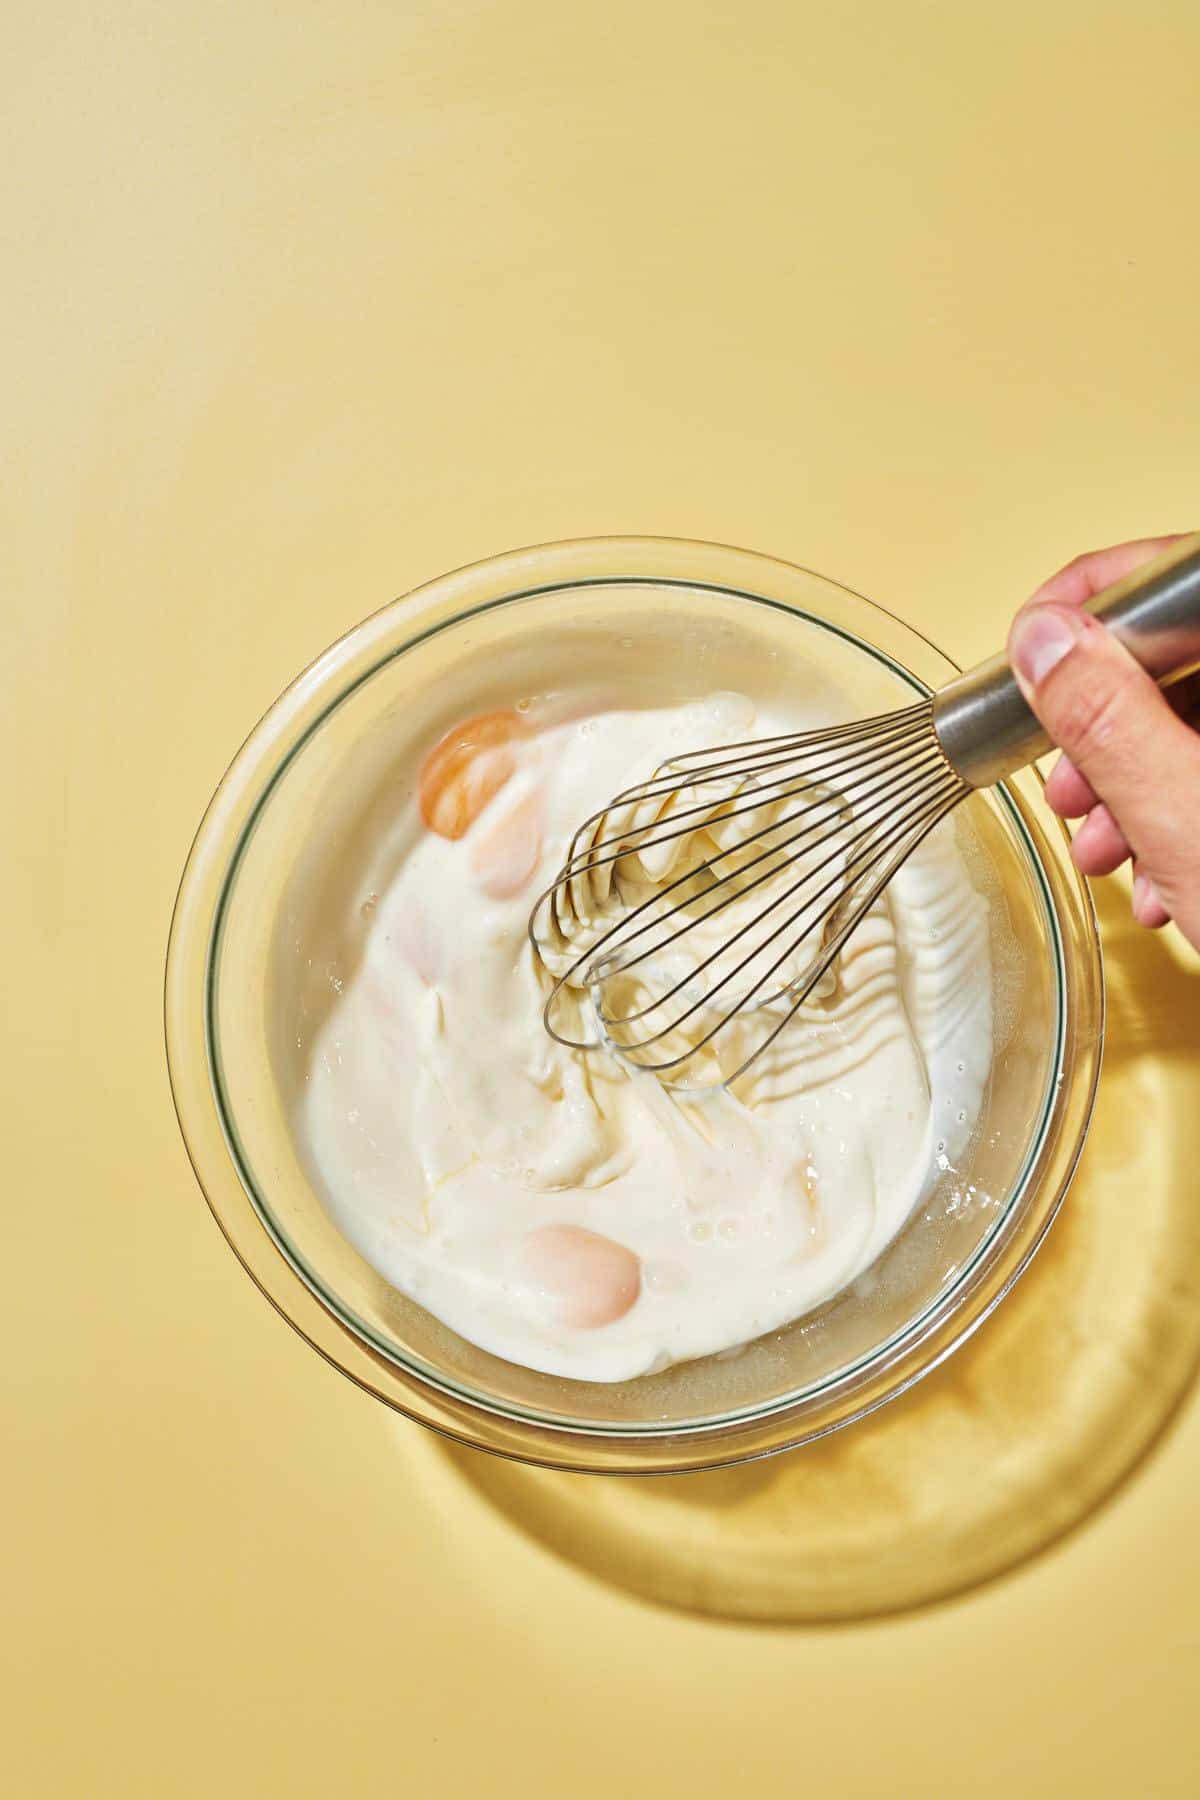
  1. Make the brine. Add the vinegar, salt, and sugar to a small saucepan along with water. Bring to a simmer and stir to dissolve.
pickle bring being poured into a jar of beans
  1. Pour the hot brine over the beans. If they're not completely submerged, top off with some more water and vinegar.
a hand pulling pickled green beans out of a jar
  1. Seal the jars and put them in the fridge for at least 24 hours for the flavors to meld before enjoying.

✨ Top tip

While making quick pickles doesn't require as much food safety concern as other food preservation methods, you still want to wash your produce and clean your jars and utensils thoroughly.

🫙 Storage

Store your quick green bean pickles in a sealed jar in the fridge for up to several weeks. I've had mine last for a couple of months and they kept great, though we usually eat them sooner than that.

Of course, you want to discard your pickles if, at any point, you find they're moldy or smelling bad. These pickles have not been processed in a water bath, so they are not shelf-stable and must be kept in the fridge. That's why quick pickles are often called refrigerator pickled.

🙋🏽‍♀️ FAQ

How long do pickled green beans last?

Quick green bean pickles will last for several weeks in a tightly sealed jar in the fridge.

Can you quick pickle green beans?

Absolutely. Quick pickling is an easy pickling method that works with a number of vegetables, including green beans, cucumbers, radishes, onions, carrots, zucchini, cabbage, beets, and others.

What is the easiest way to pickle vegetables?

Quick pickling. You don't need to bother with the water bath canning process and worry about as many best practices and food safety concerns.

How do you use quick pickled green beans?

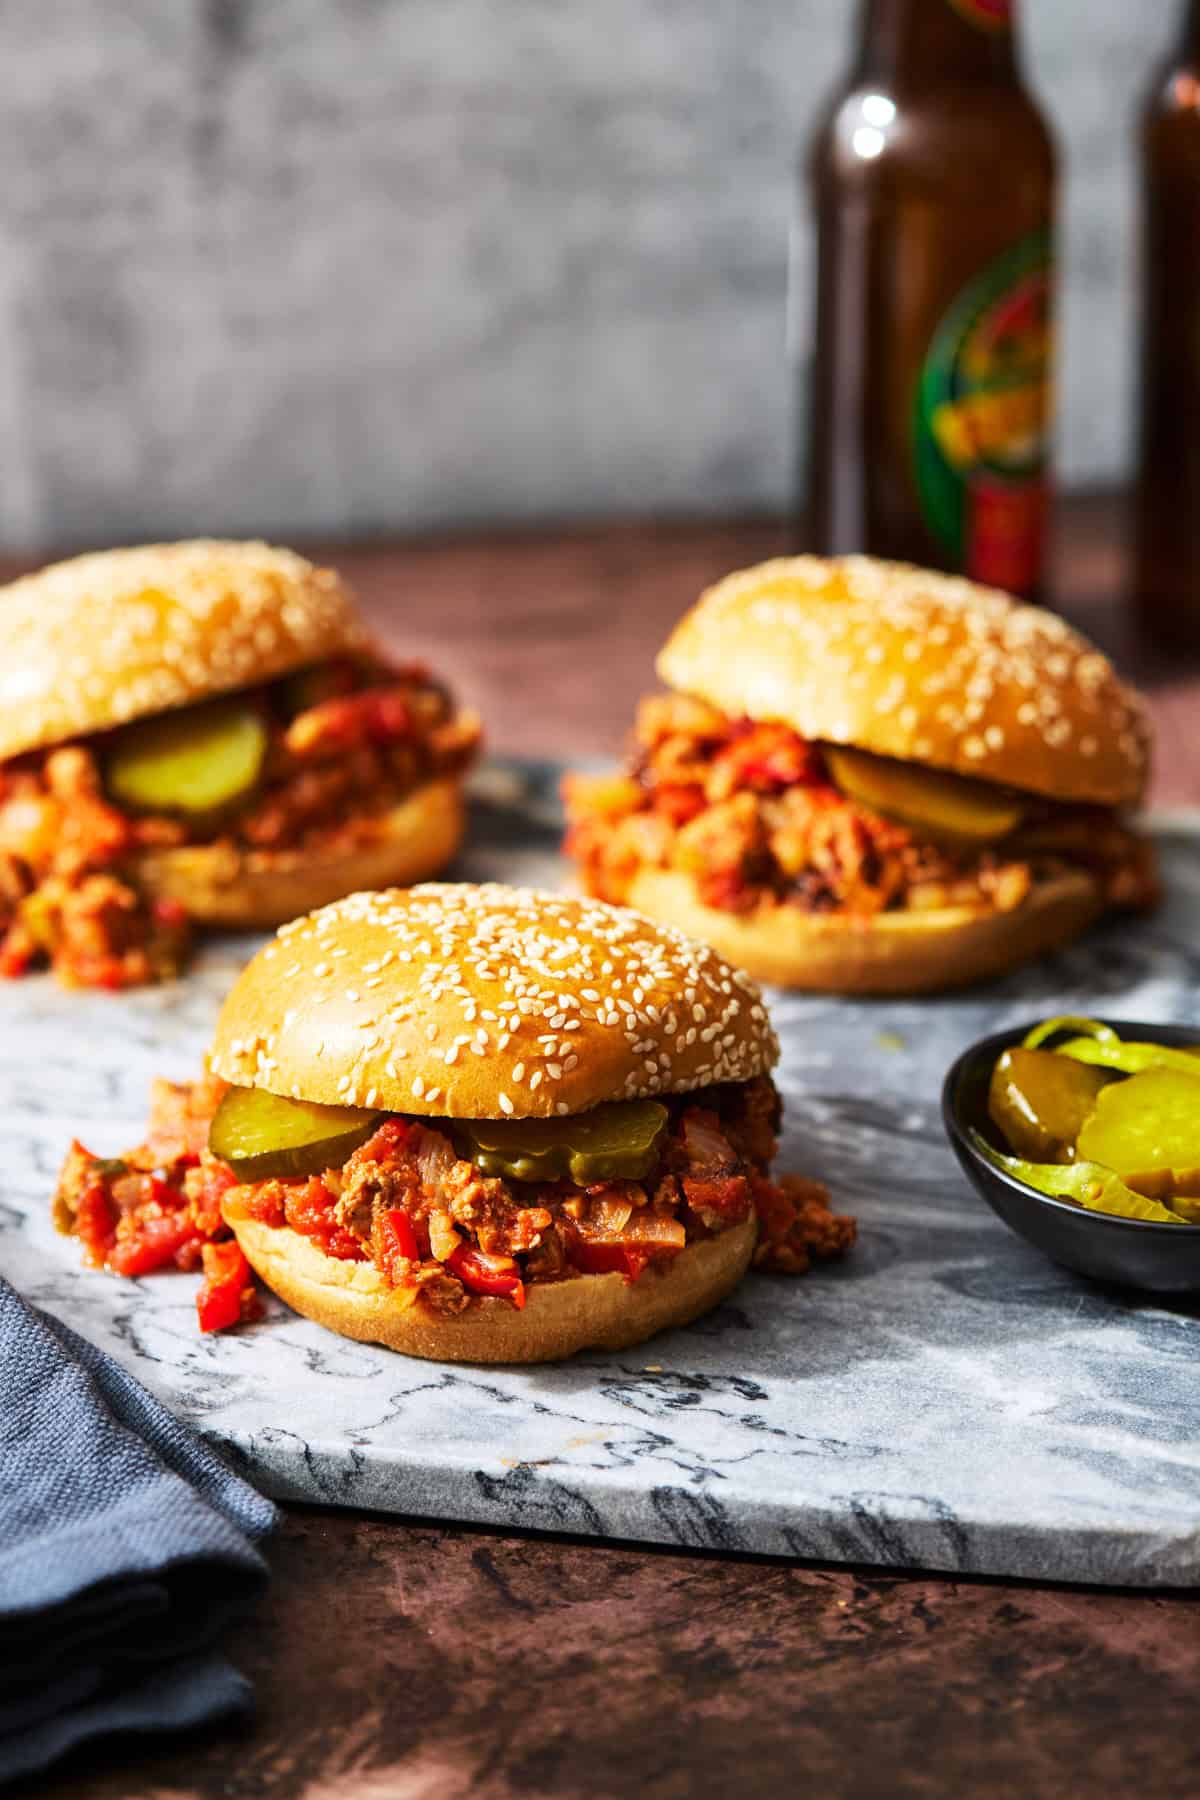
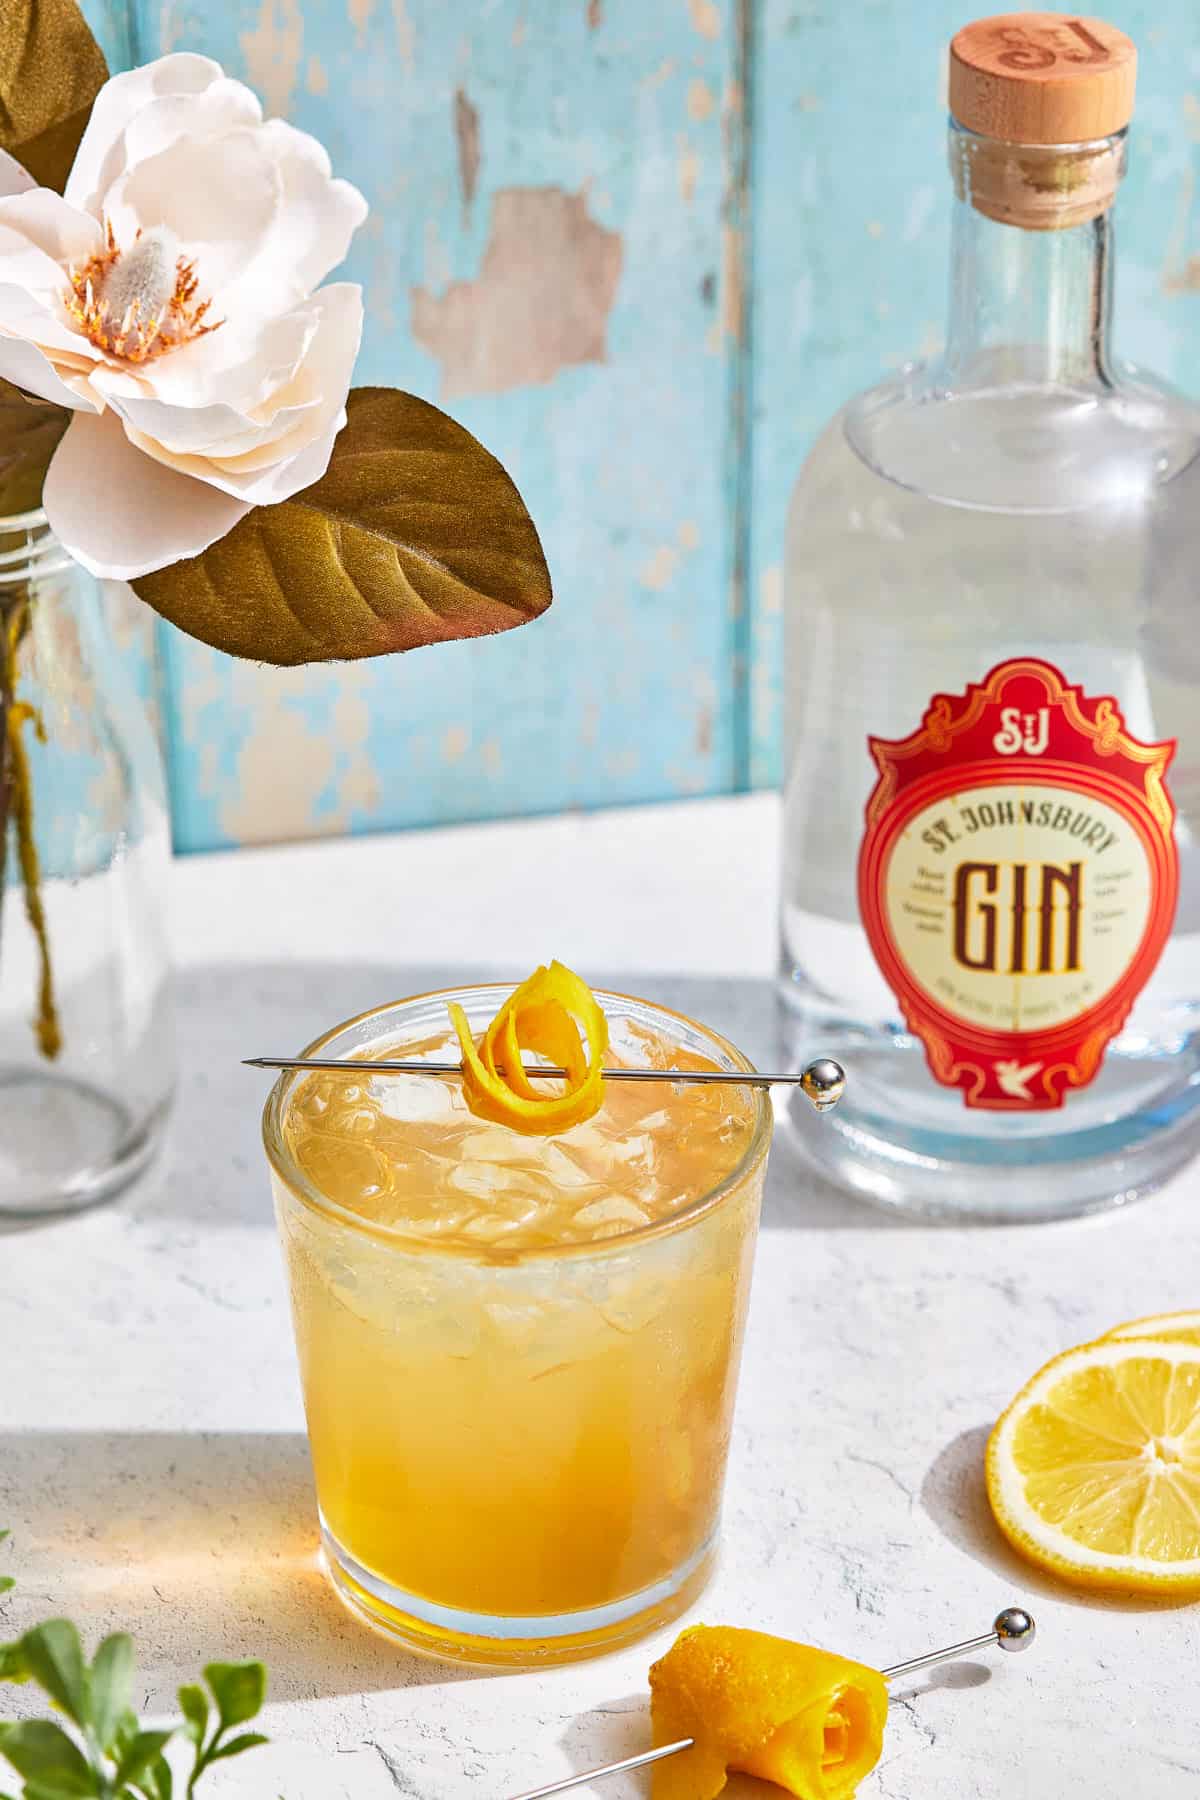
Enjoy them as you would other pickles, such as a side to a sandwich or burger, as a snack, at picnics, or even as a garnish to a bloody mary cocktail.

Do I have to make these pickles in pint jars?

No. Feel free to use whatever containers you have available that have a tight seal. You just want to make sure to submerge the beans in the brine.
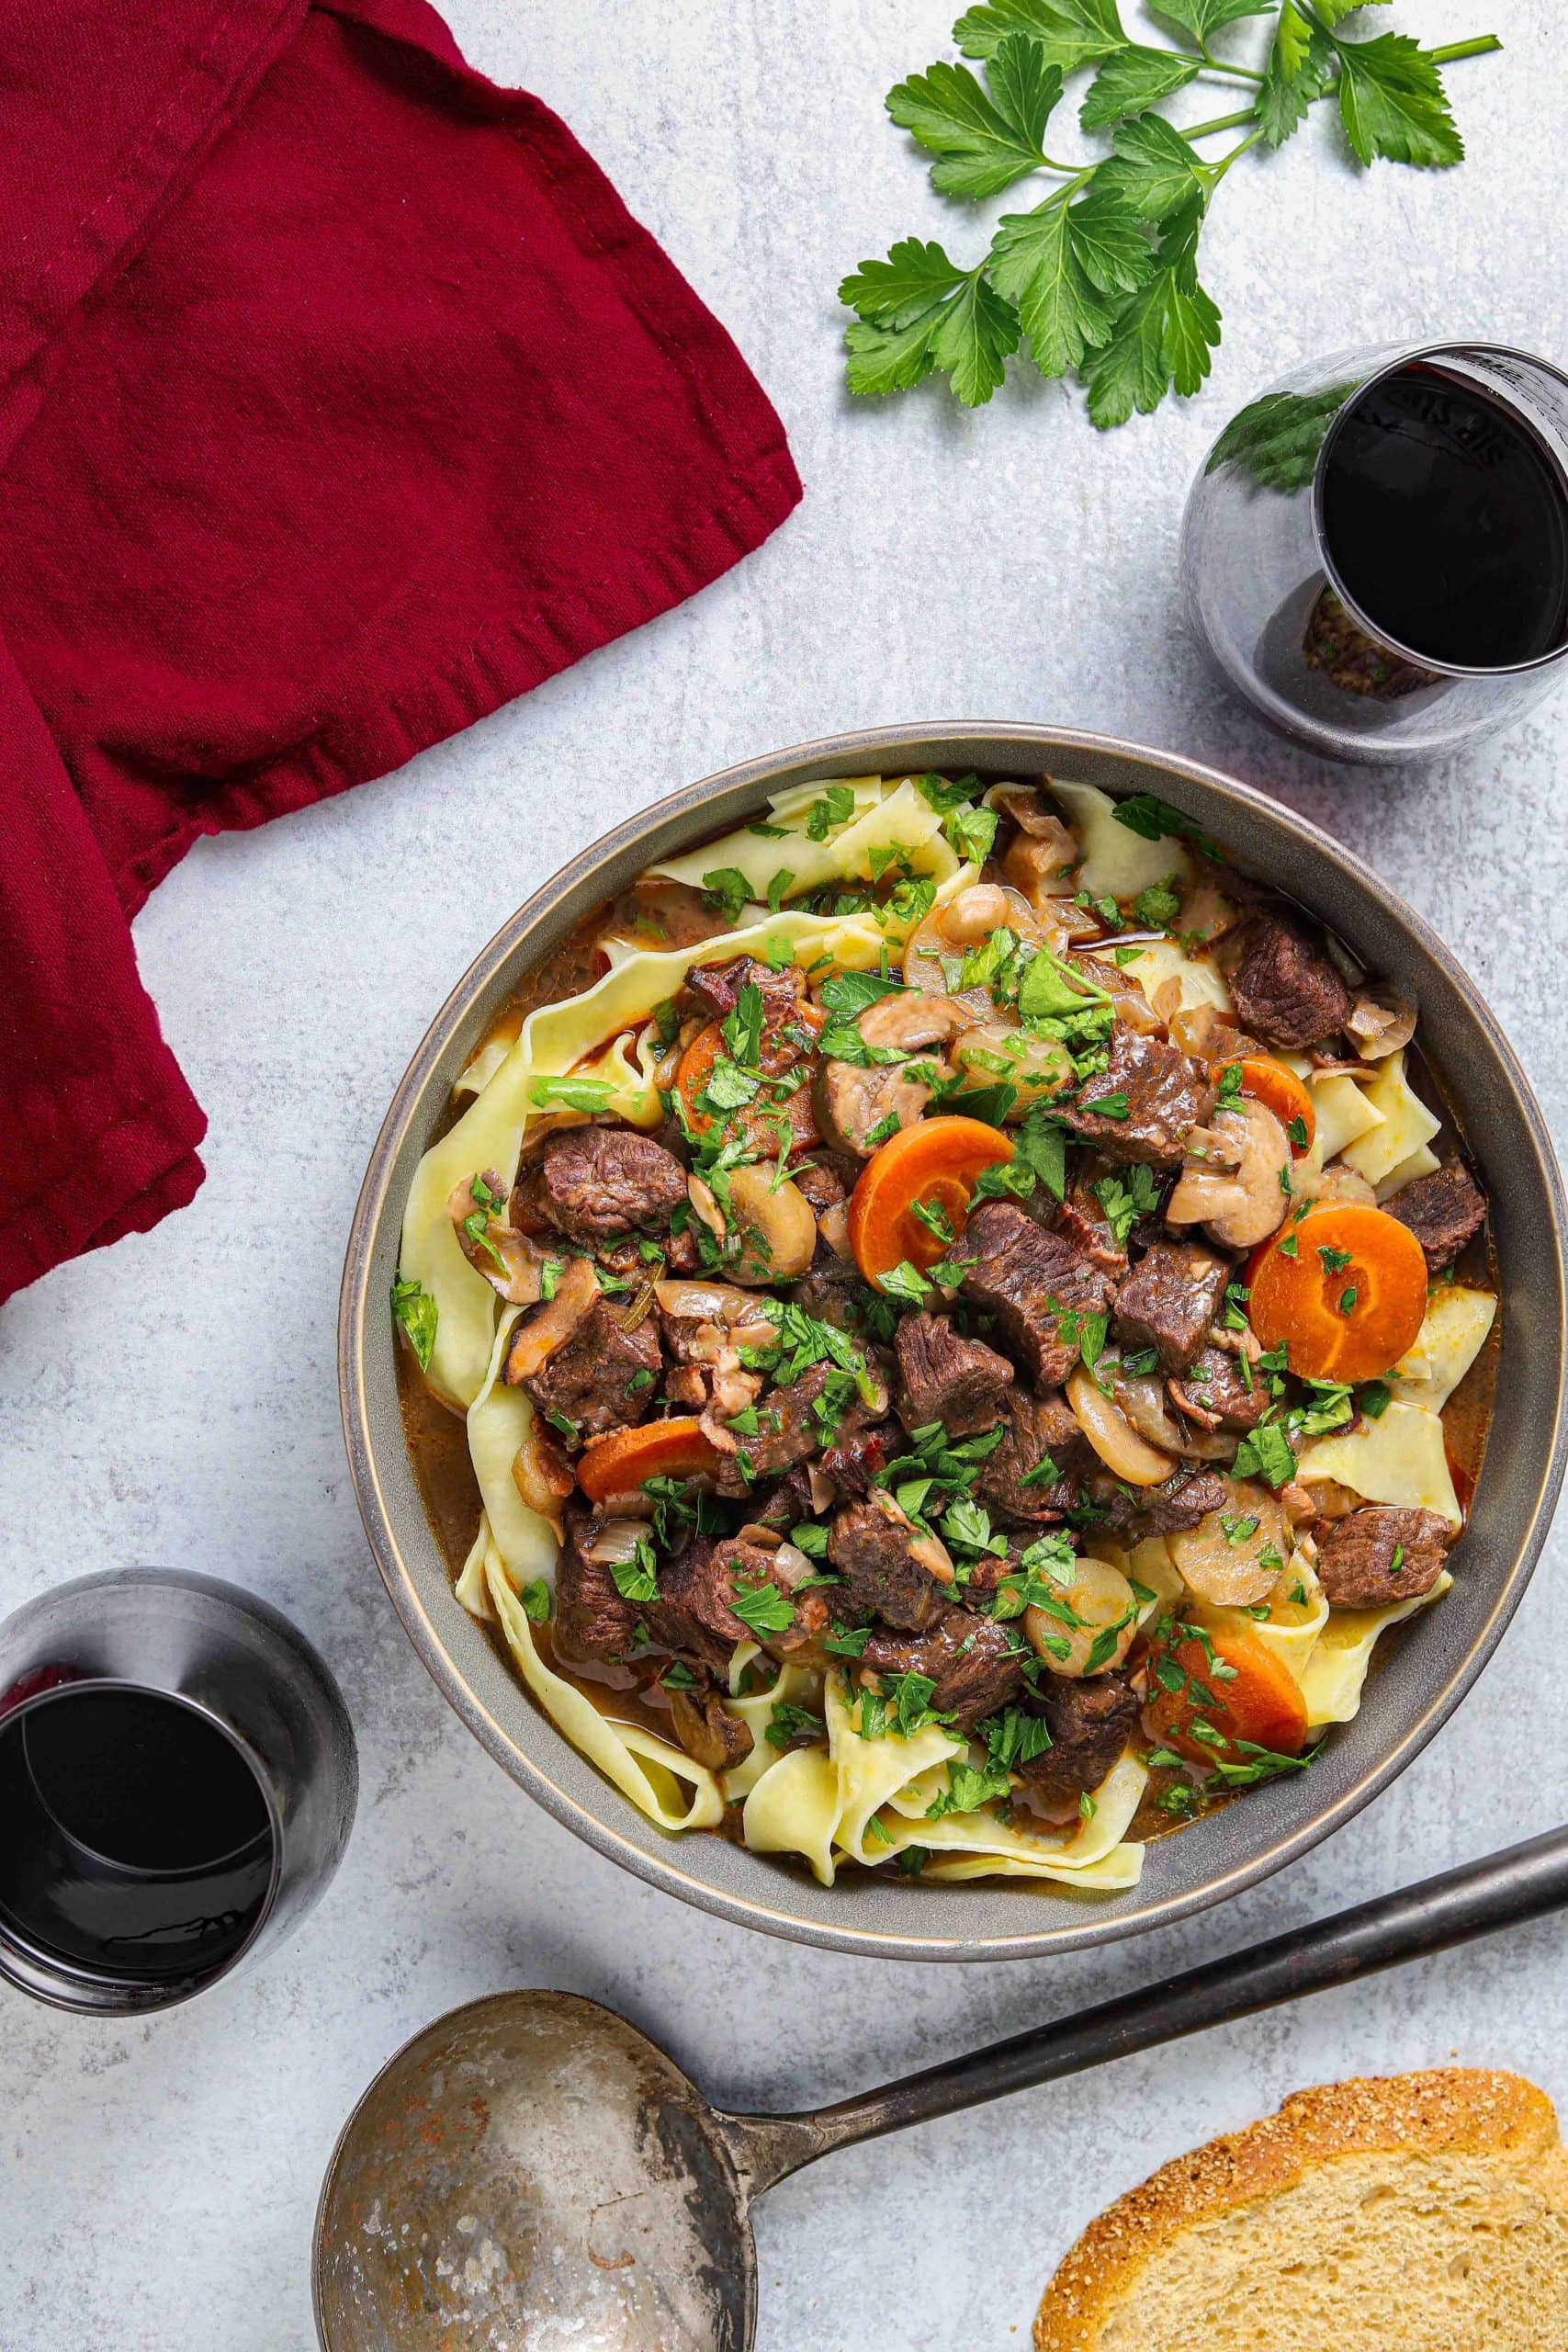
🥪 Pairing

Here are a few dishes that pair well with these green bean pickles.

  • chicken sloppy joes with pickles
    Ground Chicken Sloppy Joes
  • a plate with sliced scotch eggs
    Baked Scotch Eggs (Gluten Free and Keto)
  • plate of grilled chicken with bourbon BBQ sauce
    Grilled Bourbon Chicken
  • Monte Cristo Sandwich Recipe

🥒 Related Recipes

  • slices of rhubarb quick bread with butter
    Rhubarb Banana Bread
  • a tin of maple syrup and a glass of maple milk
    Easy Maple Milk Recipe
  • roasted jalapenos on a baking sheet
    Oven Roasted Jalapeños
  • an egg salad sandwich on a plate
    Egg Salad with Dill Pickles

Orzo Pesto Pasta Salad

large dish of pesto orzo salad

This Orzo Pesto Pasta Salad is a quick and healthy dish that's perfect for summer meals and get-togethers. Its balance of fresh vegetables, orzo pasta, and a flavorful pesto sauce makes it versatile and easy to customize to your taste. Enjoy it as a side dish or top it with a protein to make it a meal.

a large dish of orzo salad being served

🌿 Why make this pesto orzo salad?

  1. It's full of summer garden flavors, including kale, zucchini, red onion, and basil if you're making your own pesto.
  2. It's quick! The cooking consists of boiling some pasta and sautéing a little zucchini. Otherwise, you're just tossing ingredients together. Using a premade pesto (either your own or store-bought) helps keep this recipe quick and easy.
  3. It's versatile. Enjoy it as a side, a main dish, or for a summer BBQ. You can have this salad warm, cold, or at room temperature. It's surprisingly filling, so it can work as a side or add a protein on top and make it a meal. Plus, you can swap out vegetables to your liking.

If you like fresh summer salads, check out my recipes for Blackened Shrimp Salad, Arugula and Spinach Salad with Chicken, Pesto Pasta Salad with Sundried Tomatoes, and Bok Choy with Tofu Salad.

[feast_advanced_jump_to]

🥬 Ingredients

Here's everything you need to make pesto orzo pasta salad.

ingredients for orzo salad with kale

Key Ingredients

  • Pesto - You can make a quick homemade pesto (the mint pesto from this recipe would be great here, or here's a more traditional recipe), or buy some fresh from a local farmers market or produce department. When I have time, I like to make a batch of pesto and freeze it by the cup so I have it on hand for quick recipes like this.
  • Orzo - A small, rice-shaped pasta that serves as the base of this dish. I love orzo. It really is like large-grained rice. It's great in salads and soups.
  • Zucchini - Chopped zucchini is sauteed and then tossed in with the other salad ingredients, allowing it to blend in well without calling too much attention to itself. This works well if you're making this for those who aren't huge zucchini fans.
  • Kale - Any kind of kale is good here, though if your leaves are large, you'll want to remove the stems and ribs. Then, it'll be finely sliced and massaged with lemon juice until tender before tossing with the other ingredients.
  • Red onion - A bit of chopped red onion adds a little bite and crunch. Briefly soaking the chopped onion in water will help reduce the harshness.
  • Sundried tomatoes - The deep tomato flavor and chewy texture of sundried tomatoes contrast nicely with the other salad ingredients.
  • Sunflower seeds - For some added crunch.
  • Parmesan cheese - Parmesan adds saltiness and nuttiness to the orzo salad. A vegetable peeler makes it easy to make thin strips of cheese.
  • Lemon juice - For a bit of brightness and acidity as well as to help soften the kale.

See the recipe card below for the full list of ingredients and quantities.

🍽️ Substitutions & Variations

  • Make it a meal by topping the orzo kale salad with grilled shrimp, chicken, or tofu.
  • Try substituting other vegetables, such as chard or spinach instead of kale, yellow squash, peas, bell pepper, or green beans instead of zucchini. It's an easy recipe to customize, and it's hard to go wrong. The recipe, as it's written, calls for about 2 cups of kale and 2 cups of zucchini, so aim for similar amounts when substituting.
  • Swap orzo for couscous. Orzo is the star of the dish here, but you could swap it out for Israeli couscous for a similar taste since, technically, that's a type of pasta as well.

🍲 Instructions

How to make pesto orzo salad with kale.

spoon full of orzo over a pot
  1. Step 1: Cook the orzo pasta in salted boiling water until al dente, about 8 minutes.
kale being sliced on a cutting board
  1. Step 2: Meanwhile, roll the kale leaves together, then thinly slice them into strips.
kale being massaged in a bowl
  1. Step 3: Toss the kale strips with half of the lemon juice and massage with your hands until softened.
zucchini being sliced on a cutting board with knife
  1. Step 4: Quarter the zucchini lengthwise, then thinly slice into bite-sized pieces.
sunflower seeds in a cast iron pan
  1. Step 5: Toast the sunflower seeds in a pan over low heat until lightly browned, 2-3 minutes.
zucchini being sauteed in a cast iron pan
  1. Step 6: Remove the seeds from the pan, add some olive oil, and saute the zucchini for about 6-8 minutes.
orzo being strained over a pot
  1. Step 7: Drain the orzo and rinse in cold water to stop the cooking.
pesto being whisked in a bowl
  1. Step 8: Whisk the pesto with the remaining lemon juice.
prepared ingredients for making the salad
  1. Step 9: Gather all of your ingredients.
orzo salad being tossed in a bowl
  1. Step 10: Add everything to a bowl, gently toss with the pesto until coated, and top with cheese and sunflower seeds.

🌟 Top Tip

Don't overcook the orzo! Cooking it just to al dente will give the salad some good texture while overcooking will make it mushy. Rinsing with cold water after draining will also help.

🥡 Storage

Leftover pesto orzo pasta salad may be stored in an airtight container in the fridge for 3-4 days. I wouldn't recommend freezing this dish.

🙋🏼‍♂️ FAQ

How long does pesto pasta salad last?

This pasta salad will last for up to four days in an airtight container in the fridge.

How do you make a flavorful pasta salad?

A flavorful pasta salad should include fresh ingredients, such as vegetables and herbs, and a light dressing that can tie everything together. It should also include a mix of textures and a variety of flavors.

How do I cook pasta for a pasta salad?

Cook your pasta in salted boiling water until al dente, or until it still has a little bite. Avoid overcooking your pasta to prevent a mushy pasta salad.

Can you make pasta salad the night before?

You can certainly make pasta salad the night before and store it in the fridge. In fact, it will probably taste even better because the flavors have had time to meld.

🍗 Pairing

These recipes would go great with pesto orzo pasta salad:

  • eggplant florentine in dish with fork
    Eggplant Florentine
  • plate of grilled chicken with bourbon BBQ sauce
    Grilled Bourbon Chicken
  • chicken sloppy joes with pickles
    Ground Chicken Sloppy Joes
  • a plate of cabbage rolls sliced open with sauce
    Polish Golumpki Recipe (Stuffed Cabbage Rolls)

🥗 Related Recipes

Looking for other recipes like this? Try these:

  • large serving dish of zucchini mushroom pasta
    Zucchini Mushroom Pasta
  • a plate of artichoke pasta
    Artichoke Pesto Pasta
  • Creamy Bacon Corn Pasta

Blackcurrant Mojito Cocktail

mojito with blackcurrants, limes, and mint served

Enjoy the refreshing taste of a homemade blackcurrant mojito cocktail, a tangy variation on the classic summer cocktail. The vibrant flavor of blackcurrant syrup beautifully complements zesty lime juice and the herby punch of fresh mint.

glass with blackcurrant mojito with lime and mint

Overwhelmed with blackcurrants in the early days of July from one remarkably productive plant, I found myself once again seeking fresh inspiration for enjoying these tiny tart berries.

After picking the blackcurrants, I pruned a nearby patch of mint. Armed with blackcurrants and mint as I headed to the kitchen, the idea of creating a refreshing blackcurrant mojito hit me. So here we are.

[feast_advanced_jump_to]

However, you can make this cocktail with or without fresh blackcurrants.

If you have them, use the berries to make homemade blackcurrant syrup (also known as blackcurrant cordial to my UK friends). You'll end up with plenty of syrup that's great for other uses, from flavoring your seltzer to a bowl of morning oatmeal.

But if you don't have fresh blackcurrants or the time to make syrup, buy either blackcurrant concentrate or juice. The popular Ribena concentrate may be hard to find in the US. In that case, check the refrigerated juice section near the produce department for blackcurrant options. Or, if you have to, order some online. It's worth it!

🤩Reasons to love this cocktail

  1. This version is neither too sweet nor artificially tasting. Have you ever had a way-too-sweet mojito at a restaurant? Or worse, one that tasted like toothpaste because the restaurant used fake mint flavoring? This one is nothing like that.
  2. The fruity and earthy flavor of blackcurrants pairs beautifully with the mint and lime.
  3. Part of the fun of a good cocktail is the presentation. This mojito's red-and-green color combo makes it even more fun and appealing.

You can't beat a good beverage made with fresh ingredients. That's why you'll also like my recipes for Lemon Balm Lemonade, Ginger Rhubarb Gin Cocktail, Cucumber Gin Cocktail, Strawberry Cream Soda, and a Watermelon Basil Cocktail.

🍇 Ingredients

Here's everything you need to make your own blackcurrant cocktail.

ingredients for making a black currant mojito
  • Blackcurrants: (or black currants) are a small berry related to the gooseberry. There are red and white currants, but black currants are the most tart, which makes them good for use in combination with a sweetener to make juices, syrups, jams, liqueurs, and sauces. For more blackcurrant ideas, check out my Blackcurrant Smoothie, Blackcurrant Ice Cream, Blackcurrant Cake, and Sour Cherry Blackcurrant Granita recipes.
  • Sugar: Used to make the blackcurrant syrup that sweetens and flavors the mojito.
  • Fresh Mint Leaves: Because you can't have a mojito without mint. Fresh mint is easy to find at the supermarket, but if you always want to be ready to whip up a batch of mojitos, it's easier to get a mint plant once, plant it in a back corner of your yard, and have it come back every year.
  • Limes: Limes are another classic component of the mojito.
  • White rum: The common type of liquor used in a classic mojito. My default white rum of choice is Bacardi. But if you have other recommendations, please leave them in the comments!
  • Seltzer: To add some bubbles to the cocktail. Club soda or sparkling water also works. Use whatever is convenient.

See the recipe card below for the full list of ingredients and quantities.

📖  Substitutions & Variations

  • Blackcurrant juice, if you can find it, may be used in place of fresh blackcurrants and sugar to make the blackcurrant syrup. Add it to the cocktail as you would the syrup, using more or less, as you prefer.
  • Make it a virgin blackcurrant mojito by leaving out the rum and using more seltzer.
  • Try other fruits in place of the blackcurrants, such as raspberries or blackberries.
  • If you're short on time but still want to try the blackcurrant flavor, try making the syrup with a tablespoon or two of blackcurrant jam instead. I can almost always find blackcurrant jam at my local T.J. Maxx.

🥄 Instructions

How to make a black currant mojito.

blackcurrant fruit simmering in a pot
  1. Step 1: Add blackcurrants and water to a pot. Bring to a boil over medium-high heat, then reduce the heat to medium and simmer until the fruit is soft, about 5-10 minutes.
blackcurrant juice being strained in a sieve
  1. Step 2: Use a fine mesh strainer to strain the liquid from the solids. Compost the solids or save them for another use.
sugar being poured into a pot of blackcurrant juice
  1. Step 3: Add the sugar and return to a gentle simmer on the stove until dissolved and slightly thickened, about 5-10 more minutes.
blackcurrant syrup being poured into a jar
  1. Step 4: Pour the blackcurrant syrup into a jar and cool. Store in the fridge for up to a month until ready to use.
mint leaves being added to a glass
  1. Step 5: To make the blackcurrant mojito, add several mint leaves to a glass with the lime juice.
mint and lime juice being muddled in a glass
  1. Step 6: Gently muddle to release the mint's flavor.
muddling the mint, lime juice, and blackccurrant syrup
  1. Step 7: Add the blackcurrant syrup and muddle again.
rum being added to the glass
  1. Step 8: Fill your glass with ice, then pour the white rum.
seltzer being poured into the mojito
  1. Step 9: Top off with seltzer or sparkling water.
mint being added to the blackcurrant mojito
  1. Step 10: Garnish with a lime wedge and sprig of fresh mint.

🌿 Top Tip

You only need to gently muddle the mint leaves to release their flavor into the drink. There's no need to pulverize them into oblivion.

🍳 Equipment

Muddler - I love my wooden muddler, which is really a large pestle from a mortar and pestle set. It makes muddling the mint and lime juice easy and doesn't risk breaking the glass. But in a pinch, you can also use the bottom of a large wooden spoon.

Strainer: If you're making the blackcurrant syrup, a fine-mesh strainer is essential for removing the blackcurrant solids.

🧊 How to Store Blackcurrant Syrup

Fridge: The blackcurrant syrup used to make the mojito can be stored in a tightly sealed jar in the fridge for up to a month.
Freezer: For longer storage, freeze the syrup in ice cube trays and then transfer it to a bag or container once frozen solid.

💭FAQ

What alcohol goes well with blackcurrants?

Blackcurrants go well with several types of alcohol, including gin, vodka, tequila, brandy, champagne, and sparkling white wine.

Does blackcurrant go well with lime?

Blackcurrant and lime pair together very well. The deep, rich flavor of blackcurrants and the bright citrus notes of lime balance and enhance each other rather well.

What fruit is closest to blackcurrant?

There really isn't an exact substitute for black currants. Red and white currants are similar but are sweeter. Some say gooseberries are close. Sour cherries, blueberries, and blackberries each have some similarities.

How do you make a virgin mojito?

Simply leave out the white rum and use additional seltzer or sparkling water.

🥗Pairing

These food recipes would go great with a blackcurrant mojito:

  • salad with serving utensils and dressing
    Blackened Shrimp Salad
  • two plates of pasta with peas and mint pesto with a side of peas and drink glasses
    Pasta and Peas with Mint Pistachio Pesto
  • Peanut Butter and Jelly Burger
  • eggplant florentine in dish with fork
    Eggplant Florentine

🍹Related Recipes

Looking for other delicious drinks like this one? Try these next:

  • a glass of mint juley mocktail with fresh mint and a straw
    Mint Julep Mocktail
  • glasses of earl grey tea cocktail with a bottle of gin
    Earl Grey Cocktail
  • Easy and refreshing cucumber gin cocktail with fresh lime and thyme, perfect for summer entertaining.
    Cucumber Gin Cocktail
  • a glass with a foamy pink cocktail topped with cherries and limes
    Cherry Whiskey Sour

Dill Cream Cheese Spread

a bowl of cream cheese with dill, bagels, and crackers

A dill cream cheese spread made with cream cheese, fresh dill, and lemon. This versatile spread is perfect for bagels, sandwiches, or as a dip to add bright, herby flavor to any dish.

a large bowl of dill cream cheese spread with bagels and vegetables

Having fresh dill growing in your garden is wonderful. However, in the summer heat, it doesn't last for long. I needed a quick way to put it to use and mixing it into cream cheese was

Why You'll Want to Make This Spread

  1. You get the full flavor of fresh dill. If you're a fan of dill, you'll love this recipe.
  2. It takes less than 15 minutes to prepare.
  3. There are countless ways to use this spread-not just on bagels, sandwiches, and wraps, on crackers, as a dip for vegetables, tossed with hot pasta and a little pasta cooking water to make a sauce, or mixed with oil and vinegar to make a creamy salad dressing.

Try this dill cream cheese spread with my recipe for Cheese and Chive Scones, in place of ricotta on these Butternut Squash Crostini, tossed with Roasted Potatoes and Leeks, and as a garnish on Vegetarian Borscht Soup.

[feast_advanced_jump_to]

🧀Ingredients

Here's everything you need to make dill cream cheese spread.

fresh dill, cream cheese, and a lemon
  • Fresh dill is the star of this show. It's herby, lightly grassy, a bit sweet, and a natural pairing for tangy cream cheese.
  • Cream cheese - Creamy, full-fat cream cheese is the key to making a great cream cheese spread. Don't bother with the low-fat options here. Cabot Creamery makes a great cream cheese.
  • Lemon - The zest and juice add some extra brightness to the spread.

See the recipe card below for the full list of ingredients and quantities.

🌿Substitutions & Variations

  • If you don't have fresh dill, you can use dried, about ⅓ as much, but it won't taste quite the same. I find dried dill to be grassier. In this case, you'll want to give it time for the flavors to meld in the fridge.
  • Try adding other flavors, such as chopped garlic, freshly ground black pepper, or another herb, like chives or parsley.
  • Whip it up with a mixer for an extra smooth spread.
  • Thin it out with a splash or two of milk to use as a dip or sauce.
  • Make it spicy. Chop up some of these Oven Roasted Jalapenos and stir them in.

🥣Instructions

Here's how to make this incredibly easy dill cream cheese spread.

cream cheese being stirred in a bowl
  1. Step 1: Add the cream cheese to a large bowl and use a wooden spoon to stir until soft.
lemon being zested in a bowl of cream cheese
  1. Step 2: Zest ½ of a lemon and add this to the bowl.
lemon juice being poured into cream cheese
  1. Step 3: Add about 2 tablespoons of lemon juice to the bowl of cream cheese.
bowl of cream cheese with lemon juice
  1. Step 4: Stir again. The lemon juice will make it easier.
dill chopped on cutting board
  1. Step 5: Chop fresh dill leaves until you have 3-4 tablespoons worth.
fresh dill being stirred into cream cheese
  1. Step 6: Add the dill to the bowl of cream cheese. Stir to incorporate. Taste and add a pinch or two of salt, if needed.

✨Top Tips

  • Let your cream cheese get to room temperature by leaving it out, unwrapped, for about 30 minutes. Then, be sure to use a sturdy spoon when mixing up the spread, making the process easier because the cream cheese may still be a bit firm.
  • Refrigerating the cream cheese spread for at least 30 minutes after making it will allow the dill and lemon flavors to better infuse into the cheese.

🫙Storage

Fridge - This dill cream cheese spread will keep in the fridge, tightly wrapped, for up to two weeks. However, if you leave it sitting out for extended periods of time, this will reduce its longevity.
Freezer - Store in an airtight container in the freezer for up to two months. Defrost in the fridge to soften.

💭FAQ

What is good to spread cream cheese on?

Cream cheese is great on bagels, vegetable slices, crackers, sandwiches, tossed with hot pasta to make a creamy sauce, thinned out with milk to make a salad dressing, and used as a topping for baked potatoes.

How do you make cream cheese spread thicker?

Use less liquid, in this case lemon juice, when making the spread. You can add more cream cheese to thicken it back up if you've already thinned it too much. Make your spread with a block of cream cheese rather than the whipped variety.

Can you freeze cream cheese?

Yes, you can freeze cream cheese and this dill cream cheese spread for up to two months in an airtight container. After two months, the quality will not be as good.

Should I refrigerate cream cheese spread?

Yes, cream cheese spread needs to be kept refrigerated until ready to use.

Can you melt cream cheese spread?

You can soften cream cheese spread using low powered heat in the microwave for short bursts. Your microwave may even have a soften setting. You can also melt it by adding the spread to hot dishes, such as pasta, to make a sauce.

🥔Pairing

Here are a few recipes to pair with this dill cream cheese spread:

  • cheese scones on plate with chives
    Easy Cheese and Chive Scones
  • a plate of colorful roasted leeks and potatoes
    Roasted Potatoes and Leeks
  • the sun dried tomato quiche in a pan with plates and serving utensil
    Broccoli and Stilton Quiche
  • jars of quick pickle beans with garlic and dill
    Quick Green Bean Pickles

🧈Related Recipes

Looking for more cheesy recipes? Try these:

  • parsnip cake with oranges and pistachios
    Orange Parsnip Cake with Cream Cheese Frosting
  • eggnog cheesecake on a wooden table
    No Bake Eggnog Cheesecake
  • eggplant florentine in dish with fork
    Eggplant Florentine
  • Beetroot and Feta Tartlets

Blackcurrant Smoothie

smoothie in glass topped with mint and blackcurrants

Start your day with the refreshing tartness of this blackcurrant smoothie recipe. It's a great way to enjoy rich blackcurrant berries and kick-start your morning with a boost of Vitamin C and calcium.

a glass of smoothie topped with blackcurrants and mint

I learned about blackcurrants when I first traveled to England several years ago. In the UK, they're a commonly grown berry used for juice and flavoring baked goods and other dishes. You could think of them similar to how we have the prevalence of cranberries and cranberry flavored foods in the US.

I was sad to find blackcurrants less readily available in New England, but I wasted no time planting a blackcurrant bush when I had a garden of my own. If you're in the US and are unfamiliar with blackcurrants, they're worth seeking out. Look for them at local farmers markets, orchards, and food co-ops in the northern United States. They're tart, earthy, and rich, in a way I find totally unique.

[feast_advanced_jump_to]

Now, a few years after planting, that one bush provides several pounds of berries that I use to make jam, liquor, and desserts like my blackcurrant ice cream, blackcurrant cake, and sour cherry and blackcurrant granita. They also make a tasty syrup you can use to make a blackcurrant mojito.

😍Why you'll love this smoothie

  1. It makes a great breakfast. The punch of this smoothie's tartness and vibrancy is sure to wake you up. The protein and fiber will also help you to stay full until lunch.
  2. With plenty of Vitamin C and calcium, it's a good way to obtain some essential nutrients.
  3. If you want a quick and easy way to enjoy blackcurrants, it doesn't get much simpler than a smoothie.

🍌Ingredients

Here's everything you need to make a blackcurrant smoothie:

ingredients for making the smoothie

Key Ingredients

  • Blackcurrants - Tart with a rich, deep flavor, look for fresh blackcurrants at local farmers markets and food co-ops in June and July. If you have trouble finding them fresh, see the note below under substitutions and variations.
  • Banana - Adds creaminess and sweetness to the smoothie.
  • Milk - Helps blend everything together and provides calcium and protein.
  • Oats - Thickens the smoothie and adds fiber.
  • Honey - Provides sweetness to balance the tartness of the blackcurrants.
  • Mint - Adds a fresh, cooling flavor that pairs well with the currants.

See the recipe card below for the full list of ingredients and quantities.

📖Substitutions & Variations

  • If you can't easily find fresh blackcurrants, and that's understandable in America, there are two other options. Look for blackcurrant juice in grocery stores and adjust the smoothie recipe to use less milk and honey. You can also try blackcurrant jam, which I often see in specialty food stores. (I always see blackcurrant jam at TJMaxx.) Use about 4 tablespoons of jam for the fresh berries, and omit the honey as the jam will already be sweetened. If you find frozen blackcurrants in the store or have some that you've frozen yourself, they will also work great in the smoothie.
  • Add your favorite protein powder to the smoothie with a splash or two more of milk to help it blend in.
  • Instead of honey, try maple syrup. The smoothie absolutely needs a sweetener because of the incredible tartness of blackcurrants. You're welcome to try it without sweetener if you don't believe me.
  • Mix in some other fruits, such as blueberries or cherries, in place of or in addition to the blackcurrants.

🥤Instructions

It doesn't take much to make this blackcurrant smoothie.

blackcurrants on a plate
  1. Step 1: Rinse the blackcurrants and discard any that are unripe or overripe.
stems being removed from blackcurrants
  1. Step 2: Remove the tiny stems.
ingredients being added to the blender
  1. Step 3: Add blackcurrants, milk, oats, honey, banana, mint leaves, and ice to a blender.
smoothie being blended
  1. Step 4: Blend until smooth. Add more milk if it's too thick. Taste and add more honey, if not sweet enough to your liking.

🌟Top Tip

This smoothie is best when served ice cold. If it's not cold enough, add more ice and blend again.

🔪Equipment

Blender - You can't really make a smoothie without a blender. Either a stand or sticker blender will do the job. A food processor would work in a pinch, but they often don't puree ingredients as smoothly.

💬FAQ

What is the difference between currants and blackcurrants?

Blackcurrants are a type of currant, which are small tart berries. They can be red, white, or black (though they're really more purple in color than black). Learn more about currants.

Can I eat blackcurrants raw?

It's fine to eat blackcurrants raw. Unlike some berries, like elderberries, there is no need to cook them first.

What month are blackcurrants in season?

Blackcurrants are in season during the summer and are often ripe by late June and through July.

Where are blackcurrants grown in the US?

In the United States, blackcurrants are most commonly found in the Northeast and Pacific Northwest. Blackcurrants are generally not as common here because there was once a 50-year federal ban on growing them due to a plant disease they were helping to spread. That is no longer the case, and the ban was lifted, however some states still have limitations, and blackcurrants have remained less popular as a result.

🥞Pairing

These recipes would go great with this blackcurrant smoothie:

  • a stack of banana buckwheat pancakes topped with blueberries
    Banana Buckwheat Pancakes with Blueberries
  • a plate of pancake balls topped with powdered sugar
    Danish Aebleskiver Pancake Balls
  • a plate with stuffed apple cremes covered in caramel and powdered sugar
    Baked Apple Crepes with Ricotta
  • four plates with slices of cake and rhubarb on side
    Rhubarb Crumble Breakfast Cake

🍹Related

Looking for other drink recipes like this one? Try these:

  • a glass of negroni with smoke
    Smoked Negroni
  • peppermint mocha martini with lights
    Peppermint Mocha Martini
  • mug of amaretto latte with almonds and whipped cream
    Amaretto Latte
  • cranberry mocktail in a coupe glass
    Cranberry Orange Mocktail

Strawberry Cream Soda

large glass full of strawberry cream soda with straw

Beat the heat with a homemade strawberry cream soda. This nostalgic beverage combines fresh strawberries with creamy vanilla ice cream and seltzer for a satisfying and incredibly simple summer treat.

glass of strawberry cream soda with straw and strawberries

There's something special about a creamy, carbonated beverage, and it only gets better when you add fresh fruit syrup to the mix. The season for fresh strawberries is so short, and I wanted to create a drink that truly showcases the fruit.

😍 Here's why you'll love this recipe

  1. The strawberry syrup is not only simple to make but also great for other uses besides this cream soda. Pour it over ice cream, stir it into yogurt or oatmeal, and use it to flavor your seltzer.
  2. It's a great combination of dessert and beverage, making it a perfect summer treat. Since no alcohol is included, it's suitable for all ages, too.
  3. Make just one, or make many. You can easily make one drink and save the remaining syrup for later, or, with a little more effort, you can double or triple the syrup and have enough for a large batch of cream sodas. Just pre-scoop your ice cream, and you'll be good to go.
[feast_advanced_jump_to]

If you're looking for more inspiration for enjoying summer fruits, check out my Blackberry Scones with Thyme, Banana Buckwheat Pancakes with Blueberries, and Sour Cherry Blackcurrant Granita recipes.

If you enjoy creamy and fruity desserts, try this Cherry Tiramisu and Plum Fool. Or for a simpler creamy drink, try my Maple Milk.

🍓Ingredients

Here's everything you need to make your strawberry cream soda at home.

ingredients for making the cream soda recipe
  • Strawberries: Fresh strawberries are essential to this recipe because they have the richest flavor. You'll use them to make a quick fruit syrup. Ideally, you'll want to make it using fresh strawberries when they're in season in your area. You'll notice that these berries are deeper red in color, juicier, and so much tastier than bland, unripe, out-of-season berries from the grocery store. If you can't get fresh berries when they're in season, opt for frozen ones, which are usually frozen at peak ripeness. Or if you're lucky enough to pick your own berries, you can always freeze some to create treats like this throughout the year. Another strawberry recipe you'll want to check out is my Strawberry Puff Pastry Pop Tarts.
  • Sugar: For sweetening and thickening the strawberry syrup.
  • Lemon juice: A splash adds a slight tartness to the syrup.
  • Vanilla ice cream: You can't have a cream soda without ice cream. Vanilla ice cream complements the strawberries while serving as a relatively neutral base. Use high-quality ice cream from a local dairy producer. In Vermont, I often buy Wilcox ice cream made in Arlington, VT.
  • Seltzer: Gives the cream soda its fizz.

See the recipe card below for the full list of ingredients and quantities.

🫐Substitutions & Variations

  • Make it a raspberry cream soda - Use fresh raspberries instead of strawberries. Blueberries would also be delicious. In fact, probably any berry would be great.
  • Try flavored seltzers - Want to combine additional flavors with strawberry? How about orange, coconut, or lime? This is easy to experiment with by trying out different flavored seltzers.
  • Add Toppings - Feel free to make your cream soda extra special by topping it with whipped cream, extra strawberry pieces, chocolate shavings, sprinkles, or whatever else you prefer.
  • Make it boozy - Why not add a splash of vanilla vodka?

🥄Instructions

Here's how to make a strawberry cream soda:

strawberries being sliced on a cutting board
  1. Step 1: Wash your strawberries, trim and discard the green tops, then slice. Fancy folks can use a strawberry huller.
sugar being added to strawberries in a pan
  1. Step 2: Add the strawberries to a small saucepan with sugar, water, and lemon juice.
strawberries cooking in a pot while being stirred
  1. Step 3: Bring to a boil, then turn the heat to low and cook until soft, about 5 minutes.
strawberry puree in a pn
  1. Step 4: Use an immersion blender to puree the strawberries until smooth.
strawberry puree in a spoon
  1. Step 5: Simmer on low for another 5 minutes until slightly thickened. Keep stirring as it simmers to avoid bubbling over. Remove from the pan and cool. The syrup will continue to thicken as it cools.
strawberry puree being poured into a glass
  1. Step 6: Place some of the strawberry syrup into the bottom of a chilled glass.
scoop of ice cream being added to a glass
  1. Step 7: Add two scoops of vanilla ice cream.
seltzer being poured over the ice cream in a glass
  1. Step 8: Top the glass off with seltzer. Continue adding more seltzer as the ice cream fizzes.
straberry sauce being spooned over cream soda
  1. Step 9: Top the float with some more of the strawberry syrup.
a glass of strawberry cream soda ready for drinking
  1. Step 10: Garnish with a strawberry and a straw and enjoy.

🌟Top Tips

  • Using high-quality strawberries and vanilla ice cream in this strawberry cream soda recipe is key. There are only three ingredients here, so make sure they're fresh and flavorful.
  • To help keep everything cold, chill your glasses in the freezer for 15-20 minutes before making the cream soda.
  • If you don't want the ice cream to melt so fast, or if you're making several of these cream sodas at once, you can pre-scoop your ice cream, place the scoops on a baking sheet, and put the tray in the freezer until you're ready to assemble your beverages.
  • For more creative ideas on customizing and perfecting ice cream floats (this also applies to cream sodas), check out this article I wrote for Tasting Table.

🫧Equipment

Immersion blender - An immersion blender makes blending the cooked berries into strawberry syrup fast and easy. A traditional blender or food processor will work fine if you don't have one.
SodaStream - If you have one on hand, save yourself the money of buying seltzer and make your own. Otherwise, store-bought seltzer is just fine.

🫙Storage

The cream soda should be served immediately. However, the strawberry syrup may be stored in an airtight jar in the fridge for one to two weeks or frozen for up to three months.

💭FAQ

What is cream soda?

Cream soda is often considered a carbonated vanilla-flavored beverage. Although this recipe is probably closer to an ice cream float, I find that the combination of vanilla ice cream and plain seltzer creates a beautiful cream soda base without having to use additional flavorings and ingredients.

What does strawberry cream soda taste like?

It tastes like strawberries, vanilla, and cream with a pleasant punch of fizzy bubbles. The combination is sweet and refreshing.

What's the difference between ice cream soda and float?

Not that much. Ice cream sodas tend to include flavored syrups (like the strawberry syrup in this recipe) and cream, while floats are generally ice cream and soda.

🍪Pairing

These are my favorite recipes to serve with this cream soda:

  • a plate of chamomile cookies with flowers on side
    Chamomile Cookies
  • the sun dried tomato quiche in a pan with plates and serving utensil
    Broccoli and Stilton Quiche
  • a stack of banana buckwheat pancakes topped with blueberries
    Banana Buckwheat Pancakes with Blueberries
  • four plates with slices of cake and rhubarb on side
    Rhubarb Crumble Breakfast Cake

🥤Related

Looking for other drink recipes like this one? Try these:

  • a tin of maple syrup and a glass of maple milk
    Easy Maple Milk Recipe
  • mug of amaretto latte with almonds and whipped cream
    Amaretto Latte
  • smoothie in glass topped with mint and blackcurrants
    Blackcurrant Smoothie
  • glasses of lavender lemonade with blueberries and lemon slices
    Blueberry Lavender Lemonade

Cold Brew Martinis

two coupe glasses with cold brew martinis

Cold brew martinis offer a refreshingly smooth twist on the classic espresso martini, perfect for coffee lovers looking for a chilled and mellow cocktail. They're a perfect blend of rich coffee flavor, liqueur, and vodka without the need for fresh espresso.

two glasses of cold brew martinis with liqueur bottles

🥰Why you'll love these cold brew martinis:

  1. You don't need espresso. There's no need to brew fresh espresso at home or run out to a coffee shop to make this cocktail. All you need is homemade or store bought cold brew.
  2. It's easy to quickly make several martinis. The nice thing about cold brew coffee is that it's already cold. So if you're making a jug of cold brew or buying a bottle from the store, then you will have plenty of cold brew ready to go for multiple cocktails. You get to skip the part where you have to cool down the espresso, which makes this a much speedier process.
  3. Cold brew is smooth and easy to drink. Espresso can be strong and bitter and that's not how everyone likes it. But cold brew is smooth and mellow, which is why people enjoy it in the first place. It's easier to sip it as part of this cocktail or enjoy it on its own.

If you like refreshing, easy-to-sip cocktails, check out my recipes for an Elderflower Gin and Tonic, a Carrot Juice Cocktail, and an Apple Cider Bourbon Cocktail. For another delicious coffee beverage, try my Amaretto Latte. Or for something less sweet, how about a Smoked Negroni?

[feast_advanced_jump_to]

☕Ingredients

Here's everything you need to make yourself a cold brew martini.

bottles of cold brew coffee, codka, and espresso liqueur
  • Cold brew coffee - For these martinis, you can use your own homemade cold brew coffee or buy a bottle of cold brew from the store. There are many good bottled options available these days. While there may be several simple ways to make cold brew at home, I've found it's often more economical to buy cold brew by the bottle. It can take a lot of ground coffee to make cold brew since it's brewed at a stronger rate with more coffee grounds than the typical cup. One of my favorite bottled cold brews is from La Colombe, but Stok and Califia Farms are decent, too. Bon Appetit ranked several of the most popular options.
  • Vodka - A good quality vodka is important. With only three ingredients in these martinis, there isn't anywhere to hide cheap liquor. I love to make drinks with Vermont-made spirits, and for these cold brew martinis, I used vodka from the Village Garage Distillery in Bennington, Vermont. It's a smooth vodka, which with the smoothness of the cold brew, creates a very drinkable martini.
  • Espresso or coffee liqueur - Use your favorite coffee liqueur. While Kahlua is one of the most popular and easy-to-find options, it's certainly not the only one. Try different brands to see the differences in flavor and quality. I like Luxardo, which has a pleasant mix of chocolate and coffee flavors. It's great for desserts like my Cherry Tiramisu, too.
  • Coffee beans - For the classic espresso martini garnish.

See the recipe card below for the full list of ingredients and quantities.

🍊Substitutions & Variations

ingredients for flavoring cold brew martinis
  • Make it sweeter - Espresso martinis commonly include simple syrup. When testing this recipe, I found that including simple syrup created too sweet of a cocktail for my liking. Don't forget, the liqueur is sweetened as well. But if you're into extra-sweet drinks, add ½ ounce of simple syrup to your cocktail shaker.
  • Get creative with flavors - You can incorporate many additional flavors into cold brew martinis. If you're adding simple syrup to your cocktail, use a flavored syrup. Or add ½ to 1 teaspoon of extract, such as vanilla or almond. If you want stronger notes of chocolate, dust the cocktail with cocoa powder before serving and maybe top it off with chocolate covered espresso beans. For fresher flavors, a sprig of mint or a piece of orange rind used as a garnish can contribute to the flavor experience by adding appealing aromas.

🍸Instructions

Making a cold brew martini takes just a little pouring and shaking.

ice being poured into a cocktail shaker
  1. Step 1: Fill the cocktail shaker halfway with ice.
cold brew being poured into a cocktail shaker
  1. Step 2: Pour in 1.5 ounces of cold brew coffee.
vodka being poured into a cocktail shaker
  1. Step 3: Add 1.5 ounces of quality vodka.
coffee liqueur being poured into a cocktail shaker
  1. Step 4: Then add 1 ounce of coffee or espresso liqueur.
a cocktail shaker being shook with bottles in background
  1. Step 5: Pop on the top and shake well for at least 15 seconds. No, really, shake it well.
cold brew coffee martini being strained into a coup glass
  1. Step 6: Strain the cocktail into a chilled glass.
coffee beans being placed on top of the martini
  1. Step 7: Garnish with coffee beans.
cold brew martini with bowl of espresso beans
  1. Step 8: Enjoy. And maybe serve them along with my brownies with cherry pie filling.

⭐Top Tip

Shake, shake, shake. You need to shake this cocktail extra well in order to get that nice foamy quality. If you don't immediately see that as you strain the cocktail into your glass, pour it back into your shaker with fresh ice and try again.

🥄Equipment

Cocktail shaker and strainer - A cocktail shaker is a helpful tool to shake up a cocktail and get it cold. A strainer that fits inside the shaker is another helpful component so you can strain the cocktail and leave behind the ice. However, if you don't have a shaker handy, try using a mason jar with a lid.

Coupe or Martini Glass - Can you drink your cold brew martinis in whatever glass you want? Of course. But to enjoy the experience of a martini, try a martini or coupe glass. Check your local thrift stores to build a cocktail glass collection without having to spend much money. You also won't feel bad when you inevitably break one.

💭FAQ

Can I use cold brew instead of espresso for a martini?

Absolutely. Cold brew offers a smoother taste, is already cold, and makes it easier to prep a batch of cocktails quickly.

Does cold brew taste the same as espresso?

Cold brew is more mild and smooth than espresso. It's also not as strong and bitter. If you're not an avid coffee drinker, you may find cold brew easier to drink.

What is a cold brew martini?

A cold brew martini is quite similar to an espresso martini, except that you replace the espresso with cold brew coffee.

Can you use regular ground coffee for cold brew?

Yes, you can use regular coffee beans to make cold brew. However, a coarse ground coffee will extract the best flavor during the steeping process.

What alcohol goes in a coffee martini?

A classic espresso or coffee martini includes vodka and espresso liqueur.

🍪Pairing

These recipes would go nicely with cold brew martinis.

  • a plate of chamomile cookies with flowers on side
    Chamomile Cookies
  • a serving plate full of muffins with apples
    Apple Rhubarb Muffins
  • Monte Cristo Sandwich Recipe
  • eggnog cheesecake on a wooden table
    No Bake Eggnog Cheesecake

🍹Related

Looking for other cocktail recipes like this? Try these:

  • glasses of mocktail with gingerbread
    Gingerbread Mocktail
  • glasses of elderberry cordial
    Elderberry Cordial Recipe
  • mojito with blackcurrants, limes, and mint served
    Blackcurrant Mojito Cocktail
  • large glass full of strawberry cream soda with straw
    Strawberry Cream Soda

Artichoke Pesto Pasta

a plate of artichoke pasta

This artichoke pesto pasta recipe is a quick and fresh spring meal. It combines canned artichoke hearts, chickpeas, and a parsley and walnut pesto with your favorite pasta for a speedy weeknight dinner. Customize it to your liking with additional vegetables.

dish of artichoke pasta with wine and cheese

Here's why you'll love this artichoke pasta dish:

  1. This recipe uses canned artichoke hearts, which are quick and convenient for a weeknight pasta dish. (Though jarred and frozen artichoke hearts also work.)
  2. In this recipe, we'll create a pesto made with fresh parsley rather than the traditional basil. This is a more logical choice for spring when good quality basil has yet to appear in gardens and markets. Parsley is not only easier to find throughout the year, but it also tends to be a more economical herb, too.
  3. Speaking of being economical, this pesto uses walnuts instead of the traditional pine nuts. Walnuts are not only more affordable, but they taste great in a pesto. In fact, I don't often use pine nuts in my pesto. Walnuts, sunflower seeds, pistachios, and cashews are all good alternatives that I usually have on hand.
[feast_advanced_jump_to]

If pesto dishes are your jam, check out this pasta dish, where I made a pesto with mint and pistachios. This pesto pasta salad with sundried tomatoes includes a classic basil pesto paired with feta, bell peppers, and briney sundried tomatoes. And this Orzo Pasta Salad is full of fresh vegetables.

🧀Ingredients

Here's everything you need to make this artichoke pesto pasta.

pasta, parsley, chickpeas, artichokes, parmesan and other ingredients for making the recipe

Key Ingredients

  • Artichoke hearts - Canned artichoke hearts are inexpensive, easy to find, and available year-round, which makes them a great addition to this pasta dish. You can also use frozen or marinated artichoke hearts. Just keep in mind that the marinated ones are already flavored and packed in oil - which isn't a bad thing, but give them a taste first and make sure you like them before adding them to the recipe.
  • Parsley - Affordable and easy to find in the store while prolific in the garden from early spring, parsley is the base herb for the pesto in this recipe.
  • Chickpeas - For some extra protein.
  • Walnuts - The nutty component of the pesto
  • Pasta - I use spaghetti to make this dish, but any pasta will do just fine.
  • Grated parmesan - A key ingredient for the pesto.

See the recipe card below for the full list of ingredients and quantities.

🌿Wait, I thought this was artichoke pesto?

This dish tosses artichokes with pesto and pasta. It's not for artichoke pesto. If you're looking for that, see my note under variations below for how to go about it. I went in this direction because I prefer the artichokes in visible pieces with the pasta. Compared to pureeing them in the pesto, I think they add more substance and visual appeal in their whole form while still imparting the same overall flavor.

🥦Substitutions & Variations

With more veggies - Add 1 - 2 cups of chopped vegetables such as asparagus or broccoli. Add to the pan and cook until nearly tender before adding the artichoke hearts and chickpeas.
With artichokes as part of the pesto - If you want the artichokes to be part of the pesto rather than added to the pasta dish, you can include the drained and rinsed artichokes in the food processor when making the pesto and use just 1 cup of parsley. If the pesto is too thick, loosen it with more olive oil. If it comes out too thin, add more cheese and nuts. Depending on the brand and style (canned, jarred, frozen, etc.) of the artichokes you're using, this will vary a bit.
With other pesto ingredients - Pesto is so easy to customize. If you don't want to use parsley, try basil or cilantro. Not into walnuts? Use pine nuts, sunflower seeds, or cashews. Swap out the herbs and nuts as you like. Just use the same amount as the original.
Gluten-free - Simply use your favorite gluten-free pasta

🔪Instructions

How to make pesto pasta with artichokes.

chopped artichoke hearts on a cutting board
  1. Step 1: Drain and rinse the artichoke hearts and give them a rough chop.
walnuts being toasted in a pan
  1. Step 2: Toast the walnuts in a pan over low heat, tossing occasionally, for about 5 minutes or until lightly browned.
food processor with parsley and pesto ingredients
  1. Step 3: Add the parsley, garlic, grated parmesan, and walnuts to a food processor. Process until roughly chopped.
parsley pesto on spoon over food processor
  1. Step 4: Slowly stream in the olive oil and process until you have a smooth pesto sauce.
cooked spaghetti in a strainer
  1. Step 5: Cook the pasta al dente according to the package directions in a pot of well-salted boiling water. Drain, reserving a couple of cups of pasta water.
artichokes and chickpeas in a pan being heated
  1. Step 6: Heat the chopped artichokes and can of drained chickpeas in a pan with olive oil until warm.
pasta being added to pan with vegetables
  1. Step 7: Add the pasta to the pan, along with the pesto.
pasta with vegetables and pesto being tossed together in a pan
  1. Step 8: Use tongs to toss everything together, adding splashes of pasta water, as needed, to thin the pesto into a sauce that easily coats the pasta. Serve warm, topped with additional cheese and parsley.

🍲Top Tip

Save that pasta water! Using pasta water to create a sauce is a classic technique. It works so well because you get the starchy flavor infused in the water as the pasta is cooked, and because your water is generously salted, the saltiness also seasons your sauce. Adding pasta water does make a difference. If I know I'll have leftovers, I save some water in the fridge and add it to the pasta when reheating.

🍽Equipment

Food processor - This recipe calls for a food processor to make the pesto. My favorite processor is this one from Cuisinart. But a high-powered blender could also do the job. Or, if you don't mind a bit of work, pesto can also be made using a mortar and pestle, which is actually the traditional method. Here's more on that and some other interesting methods for making pesto.

🥡Storage

Store the pasta in an airtight container in the fridge for up to four days.

💭FAQ

What are good vegetables to put in pasta with pesto?

Vegetables, pasta, and pesto are a great match. You can include asparagus, broccoli, snow peas, artichokes, bell peppers, zucchini, mushrooms, cherry tomatoes, and sundried tomatoes.

Is pesto made from basil or parsley?

Traditional Italian pesto is made with basil. However, you can make pesto variations with other herbs, such as parsley (like in this recipe), cilantro, and mint. Similarly, you can use nuts other than pine nuts.

What goes well with artichokes?

Artichokes pair well with lemon, garlic, pasta, grains, chicken, shrimp, cheese, pizza, bell peppers, tomatoes, and herbs like parsley, basil, and oregano.

🍝Related Recipes

Looking for other pasta recipes like this? Try these:

  • two plates of pasta with peas and mint pesto with a side of peas and drink glasses
    Pasta and Peas with Mint Pistachio Pesto
  • large serving dish of zucchini mushroom pasta
    Zucchini Mushroom Pasta
  • pan with pasta and parmesan, garlic, and basil
    Creamy Garlic Parmesan Chicken Pasta

Apple Rhubarb Muffins

a serving plate full of muffins with apples

These tender apple rhubarb muffins combine tart rhubarb with sweet, crunchy apples. They're good for a quick breakfast or an afternoon pick-me-up and will keep fresh for days.

muffins on a plate and stand with coffee cups

These rhubarb and apple muffins are ideal for spring when rhubarb is fresh from the garden and readily available at your local farmers market.

Rhubarb pairs well with most other fruits (though technically, rhubarb is a vegetable). But when it comes to fresh, seasonal ingredients, foods like berries are not yet available to most of us this early in the season.

Luckily, apples, which store well through winter and spring, are an excellent fruit to pair with rhubarb.

😍 Why You'll Love This Recipe

  1. Combining rhubarb and apple creates a tasty balance of tart and sweet.
  2. With a decent amount of fruit, these muffins keep moist for days after baking.
  3. This recipe makes decent-sized muffins. While they're not jumbo, they're as big as you can get for a standard-sized muffin tin. Paired with some yogurt or fruit, they make a filling breakfast.

If you're into rhubarb, check out my other recipes for Cherry Rhubarb Pie, Rhubarb Breakfast Cake, and Ginger Rhubarb Gin Cocktail. Or for another springtime breakfast treat, try my Strawberry Puff Pastry Pop Tarts. And for another apple muffin, try these Apple Cranberry Muffins next. If you're looking for a bread rather than a muffin, my Rhubarb Banana Bread is worth trying.

For a full breakfast menu, try these muffins with a glass of maple milk or glasses of blackcurrant smoothie, slices of broccoli quiche, maybe some grapefruit and orange marmalade for toast, and maybe a plum fool for a sweet fruit treat.

[feast_advanced_jump_to]

🍎Ingredients

Here's everything you need to make these rhubarb apple muffins.

ingredients for baking rhubarb apple muffins

Key Ingredients

  • Rhubarb - You'll need 2 or 3 stalks of fresh rhubarb to get about 1 ¼ cups chopped, but it'll depend on the size of your stalks.
  • Apples - I recommend a sweet and crispy apple because the rhubarb already contributes the tart flavor. You'll need one large or two small apples.
  • Lemon - We'll add the lemon juice to the milk to make an easy buttermilk substitute and the lemon zest to flavor the batter.
  • Brown sugar - I like the deeper flavor of brown sugar, so we'll use a bit of brown and white granulated sugar. If brown sugar isn't handy, just replace it with additional granulated sugar.
  • Milk - I use regular or 2 percent milk in this recipe.
  • Butter - I know everyone loves salted butter these days, but I don't care. I always bake with unsalted butter and add my salt separately, so that's my recommendation to you.
  • Flour - All-purpose flour is all you need here.
  • Cinnamon and ginger - I enjoy the combination of ginger and rhubarb, which is why I created this cocktail recipe. And I like to add cinnamon wherever I can.

See the recipe card below for the full list of ingredients and quantities.

🍓Substitutions & Variations

  • Other fruits - in place of apples, try substituting pears or your favorite berries
  • Buttermilk instead of milk - if you already happen to have some buttermilk on hand, you can use that in place of the milk and lemon juice
  • Add a crumble topping - For a crunchy and sweet topping, combine ¼ cup flour, ¼ cup oats, ½ cup brown sugar, and ½ cup melted butter. Sprinkle evenly over the top of the muffin batter before baking.

⏲️Instructions

Here's how to make these rhubarb and apple muffins.

muffin tin with spray and milk with lemon
  1. Step 1: Add the lemon juice to the milk and let sit. Grease a 12-cup muffin tin with cooking spray or fill it with paper muffin liners.
rhubarb being chopped on a cutting board
  1. Step 2: Chop the rhubarb. Peel, core, and chop the apples. Preheat the oven to 425 degrees.
bowl with flour and small bowls with other ingredients
  1. Step 3: In a bowl, whisk together the flour, baking powder, baking soda, salt, cinnamon, and ginger until well mixed.
mixer and bowl with batter
  1. Step 4: In a stand mixer or electric mixer, beat the butter with the granulated and brown sugars. When combined, add the eggs one at a time until incorporated. Then, add the lemon zest.
dry and wet ingredients together in one bowl with a spatula
  1. Step 5: Gently fold the dry ingredients into the wet with a spatula. Mix just enough to incorporate everything and avoid overmixing.
rhubarb and apple being stirred into the batter
  1. Step 6: Stir the chopped rhubarb and chopped apple into the batter.
muffin batter being scooped into the tin
  1. Step 7: Divide the batter among the muffin tin. You want to fill the cups as close to the top as possible.
muffin tin full of rhubarb apple batter for baking
  1. Step 8: Top the muffins with reserved rhubarb pieces and coarse sugar. Bake in the 425-degree oven for 5 minutes. Lower the heat to 350 and continue baking for 10-15 minutes until cooked through.

🌡️Top Tip

Remember to lower the heat after the first five minutes of baking. The first minutes at the higher heat help the batter start to rise almost immediately, creating taller, fluffier muffins. But you don't want to bake them the whole time at 425, or they'll turn out too dry and overbaked.

📋Storage

Store the muffins in an airtight container at room temperature for up to five days. They may also be frozen, wrapped tightly in foil, and placed in a sealed bag for up to three months.

Whether fresh or frozen, leftover muffins often need a brief reheating. You can either pop them in the microwave and heat for 20-30 seconds or slice them in half and toast them in a pan with a little butter.

💭FAQ

Can I use frozen rhubarb instead of fresh?

You can use frozen rhubarb instead of fresh in these muffins and other baked goods. You do not need to defrost it first. However, you may need to increase the baking time by a few minutes.

Does rhubarb need to be peeled before baking?

You do not need to peel rhubarb before using it in baking recipes like these muffins.

How do you take the tartness out of rhubarb?

One of the best ways to tame rhubarb's tartness is to pair it with sweet fruits, such as apples and berries.

🍵Pairing

Here are a few other recipes that would go well with these apple rhubarb muffins:

  • the sun dried tomato quiche in a pan with plates and serving utensil
    Broccoli and Stilton Quiche
  • a glass mug of citrus tea being poured from a tea pot
    Honey Citrus Mint Tea
  • jars of date overnight oats
    Cinnamon Overnight Oats with Dates
  • a large glass of thai coffee with ice
    Thai Coffee

🥐 Related

Looking for other breakfast recipes like this one? Try these:

  • strawberry homemade pop tarts on tray
    Strawberry Puff Pastry Pop Tarts
  • a stack of banana buckwheat pancakes topped with blueberries
    Banana Buckwheat Pancakes with Blueberries
  • scones on a cooling rack with blackberries
    Blackberry Scones
  • four plates with slices of cake and rhubarb on side
    Rhubarb Crumble Breakfast Cake

Roasted Potatoes and Leeks

a plate of colorful roasted leeks and potatoes

In this roasted potatoes and leeks recipe, sliced leeks and new potatoes are coated with a light mustard, honey, and lemon sauce to create a simple and flavorful side dish perfect for busy weeknights.

a plate full of roasted leeks and potatoes

Potatoes and leeks are a classic combo. They're commonly found in soups, like my Cauliflower Potato Leek Soup, but you can't go wrong no matter where you pair the two, such as these Potato and Leek Knishes.

[feast_advanced_jump_to]

That's why I wanted to create this recipe. Potatoes and leeks are roasted together to make a low-effort, high-flavor side dish. The combination of the two classic ingredients is a timeless winner.

Why You'll Love This REcipe

  1. The leeks caramelize during roasting and develop a deep, yet mellow, onion flavor that's so good you'll want to eat them right off the pan. If you enjoy caramelized onions, wait until you try these leeks.
  2. Meanwhile, the potatoes form a satisfying crispy crust that nicely contrasts with the tender leeks.
  3. A quick sauce made with mustard, honey, and lemon keeps the potatoes and leeks tasting fresh and vibrant even after they've been roasted.

Serve these roasted vegetables with your favorite proteins, such as these herby pork chops, these boozy chicken thighs, or this lemon and chive salmon. For more potato recipes, check out my Potato and Mushroom Soup and Rutabaga Pie.

Want more vegetable side dishes? Try these:

  • Pumpkin Couscous Salad
  • Hot Honey Carrots
  • One Pan Sweet Potatoes and Green Beans

🥔Ingredients

Here's everything you need to make these roasted potatoes and leeks.

ingredients for making roasted leeks and potatoes

Key Ingredients

Leeks - Look for large, firm leeks with a substantial white and light green portion, as this is what we're using in the recipe.
Potatoes - For this dish, you want small, new potatoes. New potatoes are essentially baby potatoes harvested early in the season when they're small.
Honey - Adds a bit of sweetness to the sauce that coats the potatoes and leeks.
Grainy mustard - A flavorful grainy mustard is ideal.
Lemon - Lemonjuice and zest keep the dish bright and fresh.

See the recipe card below for the full list of ingredients and quantities.

🌿Substitutions & Variations

  • Speedier and simpler version - Omit the honey, lemon, garlic, and mustard, and simply toss the leeks and potatoes with the olive oil and salt. It couldn't be easier.
  • Add herbs - Toss about a tablespoon of fresh thyme leaves or chopped rosemary for even more flavor.
  • With larger potatoes - If you want to try making this with larger potatoes, that's fine. Just cut them up into pieces about one to one and a half inches wide.

🔪Instructions

Here's how to prep this potato and leek side dish.

potatoes being cut up on a cutting board

Preheat the oven to 400 degrees F. Slice the potatoes into halves or, if large, into quarters.

leeks being sliced

Slice the light green and white portion of the leeks about ½ inch in width. Compost the dark green portions or save them for making broth.

leeks being washed in a strainer

Rinse the leeks well to remove the dirt.

leeks and potatoes spread out on a baking sheet

Spread the potatoes and leeks on a baking sheet.

bowls of ingredients for the roasting sauce

Combine the lemon juice and zest, minced garlic, olive oil, mustard, and honey in a bowl.

whisking the lemon honey mustard sauce

Whisk until well combined.

sauce being spooned over the vegetables

Spread the mustard sauce over the potatoes and leeks. Toss to coat.

roasted leeks and potatoes on a baking sheet from the oven

Place the baking sheet in the oven and roast for 30-40 minutes or until the potatoes are completely tender and lightly crispy. Toss the vegetables once about halfway through cooking to prevent burning. Serve warm, topped with chopped scallions, if using, and an extra sprinkle of salt.

💡Top Tip

Remember to wash your leeks! Even if they look clean on the outside, dirt and sand can easily be hiding in the inner layers. Skipping this step may result in an unpleasantly gritty texture.

🥡Storage

Store any leftovers in an airtight container in the fridge for up to four days.

💭FAQ

Should you boil your potatoes before roasting?

Boiling potatoes before roasting helps them to cook quicker and more evenly in the oven. But in this recipe, it's not necessary since we're using small potatoes that we're cutting into pieces.

How do you cut leeks for roasting?

You can simply slice leeks into rounds about a ½ inch wide. Discard the root end and the tough dark green portions, or save them for making homemade broth.

Do leeks take longer to cook than onions?

No, leeks tend to cook quicker than onions. But it depends on the cooking method.

🍴Pairing

Here are a few ideas for serving with roasted potatoes and leeks:

  • chicken meatball on a fork with noodles
    Chicken Swedish Meatballs
  • plate of grilled chicken with bourbon BBQ sauce
    Grilled Bourbon Chicken
  • a plate with sliced scotch eggs
    Baked Scotch Eggs (Gluten Free and Keto)
  • plate of grilled herb pork chops
    Grilled Pork Chops with Herbs

🥕Related

Looking for other side dish recipes? Try these:

  • pieces of squash tartlets with apple
    Squash Tartlets
  • plate of roasted pumpkin wedges
    Maple Roasted Pumpkin
  • a dish of beet broccoli salad with yogurt dressing
    Beet Broccoli Salad
  • two napa cabbage halves with sesame seeds
    Roasted Napa Cabbage

Orange Parsnip Cake with Cream Cheese Frosting

parsnip cake with oranges and pistachios

Carrot cake fans will love this easy recipe for Orange Parsnip Cake. Topped with a tangy cream cheese frosting and finished with salted pistachios for added crunch, this cake is a flavor-packed treat for any occasion.

parsnip cake covered with oranges and pistachios

Parsnips are a lot like carrots. They're from the same plant family, have a similar shape and structure, and have a knack for working well in sweets like cake. Their nutty and earthy flavor helps balance to add depth and complexity that cake often lacks.

But if you're not convinced about putting parsnips in your cake, consider it an opportunity to eat your vegetables without actually having to eat vegetables-because it's cake.

[feast_advanced_jump_to]

If nothing else, you can serve your friends a slice of this cake and take it as an opportunity to educate them about the mostly unknown parsnip. I'm sure they would love to know how, in some cultures, parsnips symbolize luck, how parsnips become sweeter when left to grow in the ground during a frost, and that, at one point in Europe, parsnips were more common than potatoes and carrots.

If you like the sound of not-too-sweet, earthy-flavored cakes, you'll also want to check out my Rhubarb Breakfast Cake, Carrot Date Cake, and Lemon Rosemary Olive Oil Cake. And if you need a tasty beverage to serve with a slice of your cake, try a glass of Blueberry Lavender Lemonade, Honey Citrus Mint Tea, or Thai Iced Coffee.

🍊Ingredients

The ingredients in this parsnip cake offer a full spectrum of flavor. Sweet, salty, earthy and tangy.

baking ingredients for making parsnip cake

Key Ingredients

  • Parsnips are available year-round in most grocery stores, though they're most common from fall to winter and into early spring. Choose small to medium-sized parsnips that are firm and not shriveled or soft. If you don't use them immediately, don't worry; they can be stored in your fridge for up to a few weeks.
  • Cream cheese is used to make the cream cheese frosting. Full-fat cream cheese will give you a creamier and richer frosting, and letting it warm slightly to room temperature will help it blend smoother.
  • Pistachios coat the sides of the cake. Unless you have plenty of time, opt for shelled pistachios. For this cake, I like the salted and roasted kind you can find in the snacking nut section of the grocery store.
  • Olive oil is the source of fat in this cake and lends another level of earthiness. Opt for an everyday, mild-tasting olive oil. There is no need for anything fancy.
  • Raisins help keep the cake moist. They're plumped in hot water before being added to the cake batter.
  • Orange zest and juice flavor the cake and frosting, and sliced oranges decorate the top.

See the recipe card below for the full list of ingredients and quantities.

🍋 Substitutions and Variations

  • Lemon instead of orange - instead of an orange-flavored parsnip cake, make it lemon by using a fresh lemon in place of the orange
  • Icing - If you don't want to bother making frosting, try the easy maple cream cheese icing from my carrot date cake recipe. Or try topping it with orange and grapefruit marmalade.
  • Other nuts - Pecans or walnuts would work well in place of the pistachios
  • Carrots - Turn it into a carrot cake by subbing in an equal amount of shredded carrots. Or use half parsnips and half carrots.

🔪Instructions

prepping the fresh ingredients for the cake

Start by prepping the ingredients. Grate the parsnips, zest and juice the orange, cover the raisins with hot water, and roughly chop the pistachios.

combining wet and dry ingredients

In one bowl, stir together the wet ingredients - the olive oil, eggs, sugar, vanilla, and half of the zest. In a second bowl, whisk the dry - the flour, baking powder, baking soda, salt, and nutmeg.

folding the wet ingredients into the dry

Use a spatula to fold the wet ingredients into the dry until smooth. Then, stir in the grated parsnips and drained raisins.

cake batter being spread in a pan

Spread the batter across a greased 9x9-inch baking pan. Bake in a 350-degree oven for 35-40 minutes.

making the cream cheese frosting

While the cake bakes, make the frosting. In a bowl, add the room-temperature butter and cream cheese. Beat until smooth, then add the orange juice and zest. Add confectioner's sugar, a little at a time, while beating until you have a frosting consistency.

cutting the cake in half to make two layers

Cool the cake on a rack. Then, use a knife to thinly slice a layer across the top of the cake to level it out, then cut it in half.

frosting on the two layers of cake

Top each cake half with frosting, then stack one half on the other. Continue spreading frosting around the sides and top of the cake.

spatula pressing pistachios into cake frosting

Press the pistachios onto the sides of the cake using your hands or the help of a spatula. Top the cake with orange slices and additional pistachios.

🥄Equipment

9x9 inch baking pan - While not the only option for baking this cake, a 9x9 pan is the size I used to write this recipe. An 8x8-inch pan would also work; but you will likely need to bake the cake a bit longer. I've also made this in a loaf pan, which would work fine, too, as long as you extend the baking time and keep an early eye out for doneness.

Microplane or zester - For zesting the orange

Grater - Necessary for grating the parnsips. Chopped parsnips won't work. A food processor is another option if you don't mind some extra dishes to wash.

Mixer - Although you don't need a mixer for the cake, it will come in handy for creating smooth icing. Either a stand or hand mixer is fine.

sliced cake on a cutting board with pistachios and oranges

🍰Storage

I find this cake is best when served as soon as possible when the icing is still soft and creamy. But it can be stored, covered, in the fridge, and consumed within 3-5 days. This cake does tend to dry out with time, however. This is an instance where fresh is best.

Extra frosting may be stored in the fridge for up to 5 days or freezer for up to 3 months.

📋Top tip

The trickiest part of this cake is the frosting. So here are a few tips.

First, ensure the butter and cream cheese are softened by leaving them at room temperature for about 30 minutes while you make the cake.

Second, the amount of powdered sugar you need to achieve the right consistency can vary depending on several factors. That's why I list 3-4 cups. Add a little of it at a time to the mixing bowl, and stop when you're happy with the consistency. Keep in mind that if the frosting is too thick, it'll be hard to spread. Too thin, and it'll slide off the cake. Start with less, as you can always add more.

💭FAQ

Why are parsnips good for baked goods?

Parsnips are good for baked goods like cakes because, as a root vegetable, they have a high level of natural sugar. When grated, they blend well into baked goods and become barely noticeable, adding flavor but not a distracting texture.

Why are my parsnips bitter?

Although naturally sweet, parsnips can become bitter if overgrown or stored for too long. For the best taste, look for small to medium-sized parsnips that are firm and wrinkle-free.

What else can I do with too many parsnips?

Aside from grating them and baking them into cakes like this one, you could use them in place of carrots in carrot cake recipes, zucchini in zucchini bread recipes, or give them a rough chop and roast with other root vegetables like carrots, potatoes, and beets.

🍵Pairing

Serve a slice of parsnip cake with any of these refreshing beverages.

  • glasses of rhubarb gin cocktail with a bottle of rhubarb juice
    Ginger Rhubarb Gin Cocktail
  • a glass mug of citrus tea being poured from a tea pot
    Honey Citrus Mint Tea
  • glasses of lavender lemonade with blueberries and lemon slices
    Blueberry Lavender Lemonade
  • carrot drink in glass with straw
    Carrot Juice Cocktail

Banana Buckwheat Pancakes with Blueberries

a stack of banana buckwheat pancakes topped with blueberries

These banana buckwheat pancakes are a healthy, hearty breakfast made with whole grains and blueberries. If you want a more interesting and filling pancake that is also gluten-free, this easy recipe is for you.

stack of banana pancakes with blueberries

Buckwheat flour is an underappreciated grain that makes delicious pancakes. In French Canadian culture, it's used to make a specific type of pancake called ployes, which I often enjoyed as a kid at my grandparents' house. They often served them as a side to roast dinners, though I always liked them best topped with a little butter and sugar.

Those buckwheat pancakes were more like crepes, while this recipe, full of bananas and blueberries, is a traditional American breakfast pancake. They're not the light and fluffy kind you get from a mix. Instead, they're more rustic and fruity.

[feast_advanced_jump_to]

Here are three reasons to give this banana buckwheat pancake recipe a try:

  1. Buckwheat flour, which isn't actually flour but rather the ground seeds of the buckwheat plant, is more nutritious than white flour and includes more protein, fiber, magnesium, manganese, and phosphorus.
  2. These pancakes are naturally gluten-free, but they still have the satisfying taste of grains rather than the blandness of starch, as many gluten-free foods do.
  3. Bits of mashed banana are incorporated throughout the batter, along with blueberries, keeping the pancakes moist and tender.

If you like unique breakfast recipes, try my Orange Ricotta Matzah Brie, Broccoli and Stilton Quiche, or Danish Aebleskiver Pancakes. Berry lovers will also want to check out my Strawberry Cream Soda and Blackberry Scones with Thyme.

🍌Ingredients

blueberries, buckwheat flour, bananas, and other ingredients for the pancakes

Key Ingredients

  • Buckwheat flour - Available in most grocery stores, buckwheat flour is a naturally gluten-free flour made from ground buckwheat plant seeds called groats. Technically speaking, it's not even flour. It's considered a pseudocereal. Bouchard Family Farms is a popular brand I often see in stores in New England. However, you want the buckwheat flour and not their ployes mix. If you have trouble finding it, look in the aisle with the other flours, the pancake mixes, or in a dedicated gluten-free section.
  • Bananas: You'll want medium-sized, ripe bananas. Unripe bananas aren't sweet enough and don't break down well when mashed. The simplest way to mash them is with a fork. For another good recipe for ripe bananas, try my Rhubarb Banana Bread.
  • Blueberries: Either fresh or frozen are fine. But don't defrost the frozen blueberries unless you enjoy mushy pancakes.

See the recipe card below for the full list of ingredients and measurements.

📖Variations

Make them vegan: Use an equal amount of oil in place of butter, and your preferred milk alternative in place of dairy milk. For the eggs, use 3 tablespoons of ground flaxseed mixed with ½ cup of water. Let this sit for 5 minutes before adding to the batter.
Add cinnamon - A few pinches of cinnamon would make a nice flavor addition to the batter

⏲️Instructions

Here's how to make these banana buckwheat pancakes.

dry ingredients in a bowl being whisked

Whisk the buckwheat flour, salt, and baking powder together in a bowl.

butter being stirred into pancake batter

In a second bowl, stir together the milk, melted butter, mashed bananas, eggs, brown sugar, and vanilla.

wet ingredients being poured into dry

Pour the wet ingredients into the dry.

mixing the pancake batter in a bowl

Use a spatula to combine the two gently. Don't overmix. Lumps are fine. Let the batter sit for 10 minutes.

pancakes cooking on a griddle with blueberries

Heat your pan or skillet over medium-low heat. Lightly coat with oil, then ladle a ¼ cup of batter for each pancake. Add blueberries.

pancakes cooked on a griddle

When bubbles form in the center of the pancake, gently flip and cook for another couple of minutes. Repeat with the remaining batter.

🍳Equipment

Nonstick pan - Although not essential, a nonstick pan helps make the pancakes easier to flip. But if you use a nonstick pan, use a plastic spatula to prevent scraping the pan's surface. I've ruined a few pans because of metal spatulas.

✨ Top Tips

  • The first pancake or two is never perfect, and that's okay. As you cook more pancakes, keep an eye on the heat and adjust it as needed because the pan gets hotter over time. You'll also want to add more oil when the pan dries out.
  • Add the blueberries by hand after pouring the batter onto the skillet instead of tossing them in the bowl with the batter, where they will sink to the bottom.
closeup stack of buckwheat pancakes topped with blueberries and syrup

💭FAQ

What do buckwheat pancakes taste like?

They taste nutty and earthy compared to regular pancakes. Some also find buckwheat a little bitter. The addition of brown sugar helps balance out any bitterness.

Is it better to add pureed banana to pancake batter or just add sliced banana?

Pureed or mashed bananas will be more evenly distributed throughout the pancakes, while sliced bananas will remain intact where you place them. It's a matter of personal preference.

Can you make the pancake batter the night before?

Sure. Store it in a container in the fridge and gently stir the batter in the morning. If it has thickened, thin it back out with a splash or two of milk.

☕Pairing

Looking to round out your breakfast? Here are a few ideas:

  • a large glass of thai coffee with ice
    Thai Coffee
  • a plate with sliced scotch eggs
    Baked Scotch Eggs (Gluten Free and Keto)
  • Red Flannel Hash
  • a glass of frozen matcha latte on a countertop with straw
    Frozen Matcha Latte

🥞Related

  • slices of rhubarb quick bread with butter
    Rhubarb Banana Bread
  • a plate of pancake balls topped with powdered sugar
    Danish Aebleskiver Pancake Balls
  • scones on a cooling rack with blackberries
    Blackberry Scones
  • four plates with slices of cake and rhubarb on side
    Rhubarb Crumble Breakfast Cake

Cinnamon Overnight Oats with Dates

jars of date overnight oats

Cinnamon Overnight Oats with Dates is a simple, cozy breakfast that's naturally sweetened, pleasantly creamy, and rich in caramel and spice flavors.

jars of oats with dates and cinnamon

Overnight oats are one of the easiest ways to prepare a decent breakfast in advance. It doesn't get any more straightforward than throwing a few ingredients in a jar and giving it a shake.

This version of overnight oats combines oats with chopped Medjool dates, cinnamon, chia seeds, and honey for a filling and effortless way to start your day.

[feast_advanced_jump_to]

Native to the Middle East, though now grown in locations around the world, dates grow in clusters on large date palm trees. They look like big raisins and have a deep, caramel-like sweetness. Medjools are larger and softer than other varieties, and technically, they're not dried even though they may appear so. They're softer than you'd expect, making them easy to slice open, pop out the tiny pit, and chop up for oatmeal or other uses, ranging from sweet to savory.

Yeah, dates have sugar, and they're sweet. But they're not all that bad. Dates are a good source of fiber, potassium, and antioxidants. And I find that they help my jar of oats feel more substantial and filling.

Dates are also a feature ingredient in my date carrot cake. But I could also see them working well chopped up and added to this arugula and spinach salad, or pureed and used in place of some of the sugar in these fig bars.

📋Ingredients

Here's everything you need to make these cinnamon overnight oats with dates.

oats, milk, honey, dates, cinnamon for making overnight oats
  • Medjool dates are soft and chewy with a caramel-like flavor. They break down into the oatmeal as the oats sit overnight, creating a natural sweetener that's also a good source of fiber.
  • Rolled oats provide a good balance of texture and chewiness when left to soak overnight.
  • Honey complements the dates and adds a lighter note of sweetness.
  • Cinnamon adds a little spice and pairs well with the caramel-like flavor of the dates.
  • Chia seeds help thicken the oatmeal as it sits overnight, while adding more nutritional value and substance to keep you feeling full.
  • Milk serves as the liquid the oats will soak in overnight.

See the recipe card below for a full list of ingredients and measurements.

🍯Substitutions & Variations

  • Honey - Maple syrup would work instead of honey, or you can leave it out.
  • Chia seeds - Feel free to leave these out if you're not into chia. You may not need as much milk as a result.
  • Cinnamon - Try spices like ginger, nutmeg, or pumpkin pie spice in place or in addition to the cinnamon.
  • Add marmalade: For an extra pop of brightness, serve the oats with a spoonful of orange and grapefruit marmalade.

A note on what not to substitute. Although dates may look like any other dried fruit, and you may want to try using something else instead of the dates, don't. Dates are essential to this recipe. Other fruits won't contribute the same flavor, texture, or sweetness.

🔪Instructions

chopped dates on a cutting board with knife

Slice open the dates, remove the pits, and roughly chop into pieces.

oats being poured in a jar

Pour the oats into two jars.

chia seeds being poured into jar of oats

Add chia seeds to each jar.

dates being added to jar of oats

Add the chopped dates to each jar.

cinnamon sprinkled into oats

Sprinkle cinnamon into the jars.

milk being poured into overnight oats

Top the oats with milk.

honey drizzled over overnight oats with dates

Drizzle honey over the oats.

jar of cinnamon overnight oats being shook

Shake the jars, pop them in the fridge, and let them sit overnight before enjoying in the morning.

🥣Top tips

  • I find that overnight oats often need a good stirring on the morning you plan to eat them to help distribute the ingredients.
  • If you want to add fresh fruit to the mix, wait until you're ready to eat the oats. Fruit can turn mushy while sitting in liquid overnight.

🌾Storage

These overnight oats are best within a couple of days. I find the texture can get too soft after that, so I recommend making no more than two days' worth at a time. Of course, they should remain covered in the fridge until ready to serve.

💭FAQ

Should dates be refrigerated?

Yes. After opening a package, or if you're buying them loose in the grocery store's produce department, you should keep them in an airtight container in the fridge to prevent them from drying out.

What not to add in overnight oats?

The great thing about overnight oats is that they're so versatile. and nearly anything you can dream up can be added. However, there are two things you may want to avoid adding and wait to top your oats before serving. First, most fresh fruits are best added upon serving to prevent them from going mushy. Second, any ingredients you want to keep crunchy, such as coconut flakes or nuts, are better served as a topping so they stay crunchy. However, these are personal preferences and just suggestions.

What happens if you leave overnight oats for two nights?

Overnight oats are fine made a night or two in advance. After that, they may become too soft. However, this is also personal preference, and if you like your oats particularly soft, feel free to leave them overnight for more than two nights.

☕Pairing

Pair these date overnight oats with one of my other recipes:

  • mug of amaretto latte with almonds and whipped cream
    Amaretto Latte
  • marmalade with grapefruits and oranges, spread on toast
    Orange and Grapefruit Marmalade
  • a glass of frozen matcha latte on a countertop with straw
    Frozen Matcha Latte
  • a plate of pancake balls topped with powdered sugar
    Danish Aebleskiver Pancake Balls

☕Related Recipes

Looking for other breakfast ideas? Try these:

  • plates of sliced blackcurrant cake with fresh berries and whipped cream
    Blackcurrant Cake
  • several cranberry and apple muffins on a countertop with oats
    Apple Cranberry Muffins
  • a galette of swiss chard and kale leaves baked on a cutting board
    Kale and Swiss Chard Galette
  • slices of toast with halloumi, jam, and pears
    Halloumi Toast with Jam and Honey Butter

Sweet Potato and Beet Salad

plate of salad with beets and sweet potatoes

A roasted sweet potato and beet salad mixed with earthy quinoa, toasted pistachios, creamy gorgonzola, and tangy oranges tossed in a honey mustard dressing. It's a light yet filling meal that's big on flavor and freshness.

plate of beet and sweet potato salad with feta and pistachios

This salad isn't made with traditional leafy greens but roasted root vegetables. The dish's core ingredients are sweet potatoes and beets coated in smoked paprika and thyme and roasted at high heat to bring out their natural sweetness and create delicious caramelization.

🥗 Why You'll Want to Make This Salad

  1. There's minimal prep. Just whisk together a quick dressing, peel some oranges, and simmer some quinoa on the stove. This salad makes for a good weeknight meal when you want a satisfying dinner but are short on time. You could even prep everything in advance and put it together when you're ready to eat.
  2. You'll love this salad's smoky, sweet, and earthy flavors. It's great warm or at room temperature.
  3. It's a great dish for winter. While this beet and sweet potato salad would be delicious no matter the time of year, late fall and winter are when quality fresh greens aren't as prevalent, yet citrus and root vegetables are at their prime.

For more unique salad ideas, try my Blackened Shrimp Salad, Arugula and Spinach Salad, Kale Salad with Lentils, or Bok Choy with Tofu Salad. For more beet recipes, check out my Beet Broccoli Salad, Mashed Beets, and Beetroot and Feta Tartlets. And for another tasty sweet potato side, you may like my One Pan Sweet Potatoes and Green Beans.

[feast_advanced_jump_to]

🍠 Ingredients

Here's what you'll need for this beet and sweet potato salad:

ingredients for sweet potato beet salad
  • Beets - Your standard, everyday beet is perfect. But any kind will do. Yes, you will have to peel them, and yeah, they may stain your hands a little. It's worth it, though.
  • Sweet potatoes - I'm a fan of the ones from a local sweet potato farm, but use what you can find in your area. You'll need about two pounds.
  • Quinoa serves as the base for the salad and adds protein, making it a more filling meal.
  • Roasted pistachios - For a deep nutty flavor and crunch.
  • Mandarin oranges - The perfect bite-sized citrus for tossing in a salad.
  • Gorgonzola cheese - A good crumbly cheese that's not too overpowering yet still adds a bit of sharpness to offset the sweetness of the vegetables.
  • Parsley - Adds a little freshness and green to the top of the salad.
  • Dried thyme and smoked paprika - For seasoning the vegetables for a pleasantly earthy and smoky flavor.

See the recipe card below for a complete list of ingredients and measurements.

📋 Substitutions and Variations

You can swap out many of the ingredients in the salad to use what you may already have on hand or for flavors you prefer better. Like most recipes, consider this a starting point and make it your own.

  • Quinoa - Instead of quinoa, you could try barley, couscous, millet, or rice. Just keep in mind that not all of these may have as much nutritional value and unlike quinoa, they may contain gluten.
  • Gorgonzola - Other blue cheeses, feta cheese, and goat cheese are decent alternatives.
  • Beets - For the beet adverse, try carrots instead. Sweet potatoes are the more essential of the two vegetables to keep.
  • Honey - Make it a maple mustard dressing by swapping the honey for maple syrup.
  • For more protein - Add chickpeas. If you have a can handy, it wouldn't take any extra time to toss them into the mix.
  • Spices - You could certainly mix up the spice and herb selection to change flavors and keep the salad feeling fresh.
  • Pistachios - Good alternatives include sunflower seeds or pumpkin seeds.

🔪 Instructions

sweet potato and beet being peeled

Peel the sweet potatoes and beets and cut them into roughly half-inch cubes.

hands tossing sweet potato and beets with spices

Toss vegetables with salt and spices on a baking sheet. Bake in a 400°F oven for 30-35 minutes or until tender.

quinoa being stirred in a pot with water

Rinse the quinoa and add it to a small pot. Cover with water and a pinch of salt. Bring to a boil, then reduce the heat to low and simmer for 15 minutes or until the water is absorbed. Cover and let sit for 5 minutes.

dressing ingredients being whisked together in a bowl

In a small bowl, add the oil, vinegar, mustard, honey, and remaining salt. Whisk until well combined.

oranges being peeled

Peel the oranges, remove any remaining pith (white stuff), and separate them into segments.

cooked quinoa being fluffed in a pot

Fluff the quinoa with a fork after it has sat for 5 minutes.

tray of roasted sweet potatoes and beets

Remove the tray of vegetables from the oven when browned and tender.

a plate of quinoa with roasted vegetables

Assemble your salad, starting with quinoa, then the vegetables, then the remaining ingredients, and the dressing. Toss to combine.

Tip: Recipes often suggest roasting whole beets, then peeling and cutting them up afterward. But they'll cook quicker when you cut them into smaller pieces beforehand. I also find it easier to use a peeler and peel them raw rather than rub off the peels later.

🥡 Storage

You can store the prepared salad ingredients in separate containers, though the quinoa and roasted vegetables would be fine together. When ready to eat, assemble the salads on your plate. The quinoa and vegetables are at their best within three days of cooking.

💭 FAQ

Can sweet potatoes be eaten cold?

Cooked sweet potato is a good addition to a cold or room-temperature salad. There's no reason why you can't eat sweet potato cold.

Is it better to roast or boil beets for salad?

Roasting will bring out the sweetness of the beets and add caramelization. Boiled beets may be soggy in a salad and have lost nutrients in the water during boiling.

Why is honey mustard so good?

Good question! The sweetness of honey and the strong, sharp taste of Dijon mustard create a perfect, irresistible flavor balance. The result improves almost anything you put on, especially vegetables in a salad.

🥗 Related Recipes

Looking for other recipes like this? Try these:

  • a bowl of couscous with pumpking and cranberry
    Pumpkin Couscous Salad
  • plate of salad with beets and sweet potatoes
    Sweet Potato and Beet Salad
  • a plate of kale and lentil salad with barley and eggs
    Kale Salad with Lentils
  • a large plate of bok choy, tofu, and radishes with dressing
    Bok Choy with Tofu Salad

No Bake Eggnog Cheesecake

eggnog cheesecake on a wooden table

This no bake eggnog cheesecake is ideal for those who love sweet holiday desserts but don't enjoy baking. It's easy, effortless, and perfectly imperfect.

Piece of no bake eggnog cheesecake on plates

I haven't made a real cheesecake in years. That last time I did, it was a bit of a fail. But why bother when a no-bake cheesecake is almost just as good? It's nearly the full experience of a cheesecake but without the hassle.

This is the cheesecake for you if:

  • You love the flavor of eggnog.
  • You're not a fan of fussy baking projects.
  • You need a tasty and cheesy holiday treat.
  • You don't care if your dessert looks a little messy.

For more holiday desserts, check out Christmas cream puffs, cranberry white chocolate pie, rugelach cookies, and cranberry gingerbread cake.

[feast_advanced_jump_to]

📋Ingredients

Here's everything you need to make this no bake eggnog cheesecake.

ingredients for making an eggnog cheesecake
  • Cream cheese - It wouldn't be cheesecake without cream cheese. You'll want to use the block of cream cheese instead of the whipped variety. Just be sure to let it sit at room temperature to soften before using. I'm a fan of Cabot cream cheese.
  • Gingersnaps - For crumbling up and making into the crust. The light spice of the ginger makes for a good offset to the sweetness of the dairy-rich cheesecake. I'm a fan of Stauffer's gingersnaps. They have an excellent spice and flavor that many lack. If you want a good snacking cookie, they have a great crunch to them, too.
  • Eggnog - The star of the cheesecake and the main source of flavoring. A richly flavored eggnog is what you want to use here. Avoid eggnog-flavored beverages that aren't the real deal. If you can find some from a local dairy farm, even better. While there are non-dairy eggnog options available, I'm not sure how they would work in this recipe, so I can't reccomend them. I've used Organic Valley eggnog in this recipe.
  • Powdered sugar - Blends with the cream cheese and eggnog to make up the cheesecake.
  • Gelatin - A packet of gelatin helps this cake to set. Because it is a no bake type of cheesecake, this helps compensate for the setting that would occur during baking. I often use Knox brand.
  • Butter - Melted butter combines with the crumbled ginger snaps to form the crust.
  • Vanilla, brandy, salt - For flavor. The brandy is optional if you don't have some handy or don't want to include alcohol, though the small amount helps cut some of the sweetness and complements the flavor of the eggnog. I often add a splash of brandy to my eggnog.

See the recipe card below for a full list of ingredients and measurements.

🍪Substitutions

Gingersnaps - Instead of gingersnaps, you could try graham crackers for the crust. You just want to have an equal amount of crumbs.

Gelatin - I know not everyone wants to use gelatin and I get that. While I haven't tested this recipe with alternatives, here are some ideas for gelatin substitutes. I imagine some of them would work fine.

🥣Instructions

rolling pin crushing gingersnaps

Place the gingersnaps in a bag and crush them into fine crumbs with a rolling pin or heavy bottle.

butter being poured into gingersnap crumbs

Melt the butter and pour into a bowl with the cookie crumbs.

gingersnap crust being pressed into tin

Press the crumbs firmly into the bottom of a 9-inch springform pan.

mixer with cream cheese and sugar

Beat the softened cream cheese and powdered sugar until well blended.

gelatin being dissolved in bowl of water

In a bowl, whisk the gelatin with hot water to dissolve, then add to the mixer and mix to incorporate.

eggnog being poured into stand mixer

Pour the eggnog into the mixer and mix for about 2 minutes to incorporate. Stop and scrape down the sides of the bowl as needed. Add the vanilla and brandy.

cheesecake battering being poured into crust

Pour the cheesecake batter into the pan over the crust. Cover and place in the fridge for at least 4 hours, preferably overnight.

pecans being added to cheesecake

Remove the cheesecake from the pan and top with garnishes, as desired. Keep refrigerated until ready to serve. More on topping ideas below.

🍬Ideas for topping your eggnog cheesecake

There are a variety of ways you can decorate the top of your no bake eggnog cheesecake. use whatever appeals to you or that you have handy. I used a mix of candied pecans, shaved chocolate, and rosemary.

  • Candied pecans. Here's the super easy recipe I used.
  • Shaved or chopped chocolate
  • More crumbled gingersnaps
  • Rosemary leaves for some green color
  • Caramel or chocolate sauce

🍳Equipment

Mixer - Not completely essential, but it will make mixing the cheesecake batter much easier than whisking by hand.

Springform pan - Again, it's not entirely necessary, and you can make this cheesecake without a springform pan. But it if you hope to take it out of the pan to serve, it's your best bet. Here are some recommended springform pans from Food Network.

🧊Storage

Store the cheesecake covered with plastic wrap in the fridge for up to four days. It's best enjoyed within a day or two of baking, as the crust can become soggy.

💭Top tips

  • Don't try to shortchange the time the cheesecake needs in the fridge. This cheesecake has a softer consistency. Expect something along the lines of a thick pudding. Don't be concerned that your batter is runny when you pour it into the crust. But that's why you must give it ample time in the fridge to set up as much as possible. It can't be rushed.
  • If using a springform pan, you want to wait to release it (slowly) from the pan until ready to serve. It may lose it's shape after spending some time out of the pan.
  • Keep the cheesecake in the fridge until serving. It's not something that can sit out for any period of time.
  • If the cheesecake comes out a little messy after taking it out of the pan, don't worry. Just run a spatula around the edges to press it back into shape.

👋FAQ

Why did my no bake cheesecake not set?

First, don't expect this cheesecake to set like a traditional cheesecake. Second, did you skip the minimum six hours chilling in the fridge? If so, go put it back and wait. The chilling is what sets this cheesecake.

What is eggnog made of?

Eggnog is a mixture of eggs, milk, heavy cream, and flavorings such as vanilla. There are also cocktails called eggnog, and it is common to add alcohol to eggnog, however, the kind you can buy with dairy products in the grocery store does not contain alcohol.

Can I make this eggnog cheesecake gluten free?

Of course you can. Simply use a gluten free gingersnap.

Can I use another alcohol aside from brandy?

Definitely. Spiced rum, bourbon, or spiced liqueur would all go well with the eggnog flavor in this cheesecake.

🍰Related recipes

Looking for other dessert recipes like this? Try these:

  • a tray of chocolate chip oatmeal maple cookies
    Salted Maple Oatmeal Chocolate Chip Cookies
  • brownies on parchment with knife and cherries
    Brownies with Cherry Pie Filling
  • plates of tiramisu topped with cherries
    Cherry Tiramisu
  • pear cake on a cake stand with caramel
    Caramel Pear and Cardamom Cake

Eggplant Florentine

eggplant florentine in dish with fork

Eggplant Florentine is a delicious and comforting vegetarian dish that combines crisp slices of pan-fried eggplant with the creamy richness of a spinach and ricotta filling and a quick tomato sauce. It's perfect on its own or served with a side of pasta.

two dishes of eggplant florentine with basil

I love eggplant parmesan, but often, it's greasy and dense when I order it in restaurants. That's why I like to make my own. If you haven't already, check out my recipe for eggplant parm steaks with a unique crunchy coating that hits the spot.

But I wanted to change things a little in this recipe and make a hybrid dish that's part eggplant parm and part lasagna. I did this by layering pieces of crispy pan-fried eggplant with a lemony ricotta and spinach filling, and a super fast tomato sauce. It's fresh, cheesy, and satisfying without feeling heavy. I call this Eggplant Florentine, though other recipes I've found make the dish as more of a casserole.

If you're wondering what makes this Florentine or a dish in the style of Florence, that's a good question. Generally, this name refers to certain ingredients; often, as is the case here, it's spinach and creamy cheese. Will you find this dish when you visit Florence? No, probably not. But who knows? There is no shortage of good food in Italy.

If you enjoy cooking eggplant, you'll also want to check out my air fryer eggplant fries and ratatouille recipes. For more tasty vegetarian dishes, try my Orange Pan Fried Tempeh and Asparagus, Artichoke Pesto Pasta, and Pasta and Peas with Mint Pistachio Pesto.

[feast_advanced_jump_to]

🍆Ingredients

Here's everything you need to make grilled spaghetti squash with meat sauce.

ingredients for making eggplant florentine

INGREDIENT NOTES:

  • Eggplant - Medium-sized Italian eggplants are ideal. The Japanese variety won't work well here as they're too thin. Look for firm, fresh eggplant that will hold up well to slicing and frying.
  • Tomatoes - If you have fresh tomatoes to make the sauce, great. If not, use canned whole plum tomatoes that you can smash with a spoon.
  • Spinach - An essential ingredient that makes the dish Florentine. Baby spinach with small stems is ideal. Otherwise, remove any big stems from regular spinach before cooking.
  • Ricotta - A good quality, creamy ricotta cheese will make the best filling.

See the recipe card below for a full list of ingredients and measurements.

🔪Instructions

There are a few steps to making this Eggplant Florentine. But they're all easy enough and well worth your time and effort.

sliced eggplant and other ingredients being prepped on a cutting board

Prep the ingredients. Slice the eggplant into ½ inch pieces, thinly slice the mozzarella, zest the lemon, finely chop the garlic, and roughly tear the basil. Preheat the oven to 200 degrees F.

dipping eggplant slices in egg and breadcrumbs

Bread the eggplant. Beat the eggs with a splash of water in one dish. In another, add the flour. In a third, combine the breadcrumbs, ½ teaspoon of salt, a few grinds of pepper, and oregano. Using a fork, dip each piece of eggplant into the flour, the egg, and then the breading, shaking off any excess in between. Repeat with all of the eggplant slices.

slices of breaded eggplant frying in a pan

Fry the eggplant. Heat 2 tablespoons of olive oil in a pan over medium-low heat. When hot, place several pieces of eggplant, without crowding, and cook for 2-3 minutes until browned. Flip and cook another 2 minutes until browned on the second side.

slices of fried eggplant on a rack in a baking sheet

Place the fried eggplant slices on a rack set on a baking sheet. Repeat the frying process with the remaining slices, adding them to the tray as you go. Keep the tray in the oven to keep warm as you prep the other ingredients.

garlic and red pepper cooking in a small pan with olive oil

Make the sauce. Heat the remaining 2 tablespoons of olive oil in a small saucepan. Add the garlic and red pepper flakes and cook for 1 minute.

tomato sauce in a small pan with basil being added

Add the tomatoes, crushing them with your hands, and a half teaspoon of salt. Bring to a gentle simmer for 10 minutes before stirring in the basil. You can cook the spinach while you wait.

wilting spinach in a pan with tongs

Make the filling. Wipe out the pan you used to cook the eggplant. Add the spinach, along with a splash of water. Cook 3-4 minutes, stirring, until completely wilted down.

ricotta and spinach in a pan being stirred

Stir the ricotta, parmesan, and lemon zest into the spinach until combined.

tomato sauce being spooned onto fried eggplant slices

Assemble. Spoon sauce onto a third of the eggplant slices.

fried eggplant slices with cheese

Then, top the sauce with the ricotta mixture.

eggplant on tray with sauce

Top each of the cheese-covered slices with another piece of eggplant. Then, cover each with some more sauce.

ricotta being spooned on eggplant slices

Now, spoon the remainder of the ricotta over the sauce.

tray with eggplant florentine

Top with the remaining slices of eggplant and another spoonful of sauce.

mozzarella slices on eggplant

Place a thin slice of the mozzarella on top of each eggplant stack. Then place the tray under your oven's broiler to melt and lightly brown the cheese. Serve immediately.

🍅Substitutions and Variations

  • Gluten-free - Swap out gluten-free breadcrumbs for the panko and your preferred gluten-free flour instead of the all-purpose.
  • Crushed tomatoes - If you'd rather use pre-crushed tomatoes, that's fine. I like the chunky texture you get when crushing them yourself. Use about 2 cups worth of crushed in place of the whole tomatoes or a 14.5-ounce can.

🍳Equipment

Non-stick pan - A non-stick pan will make pan frying the eggplant easier. It'll prevent you from using a ton of oil and keep the eggplant from sticking. If you don't have a non-stick pan, no problem. Just expect to add more oil as the eggplant cooks. This is the non-stick pan I currently use and recommend.

Cooling rack - Placing the fried eggplant slices on a cooling rack after frying will help keep them crispy. It's helpful if you have one, but it's not essential.

🥡Storage

Store any leftovers in an air-tight container in the fridge for up to three days. No matter how you reheat the dish, the eggplant won't be as crisp as the day you make it.

🥘Top tip

I repeat myself, but my top tip for this Eggplant Florentine is to cook the eggplant in a non-stick skillet. It makes such a difference. Not only does the eggplant keep all of the coating on, but it also means you can use significantly less oil to cook the eggplant. It produces a lighter, tastier result that I can't recommend enough.

📜FAQ

Do I need to salt eggplant before cooking?

Salting eggplant and letting it before cooking draws out some of the eggplant's moisture, and some say, it's bitterness as well. But I never bother anymore. I don't think it makes that much of a difference for the 30+ extra minutes it takes for this step, and I've never found my eggplant dishes bitter. Most people seem to agree.

Should eggplant be peeled before cooking?

It's up to personal preference. In a dish like this Eggplant Florentine, each piece of eggplant has just a thin piece of skin. This softens during cooking and is easy to eat. But if you prefer not to have skin, or have older and tougher looking eggplant, go ahead and peel it first.

Is it okay to eat eggplant that is brown inside?

Like apples, eggplant flesh can brown quickly once sliced. If your eggplant is going to sit for a while after cutting, you can toss it with a little lemon juice to prevent the browning. But if your eggplant is soft, brown, and looks spoiled, that's a different story. It's gone bad on you. Prevent this by buying firm, fresh eggplants, storing them in the fridge, and using themw within a week.

🥗Pairing

Looking for other recipes to pair with this one? Try these:

  • rosemary parmesan bread sliced on a cutting board
    Rosemary Parmesan Bread
  • large plate of arugula spinach salad with chicken and dressing on side
    Arugula and Spinach Salad with Grilled Chicken
  • large dish of pesto orzo salad
    Orzo Pesto Pasta Salad
  • watermelon basil vodka cocktail in a martini glass with basil and watermelon garnish
    Watermelon Basil Cocktail

🥗Related

Looking for other recipes like this one? Try these:

  • Eggplant Parm Steaks
  • pan with pasta and parmesan, garlic, and basil
    Creamy Garlic Parmesan Chicken Pasta
  • a plate of cabbage rolls sliced open with sauce
    Polish Golumpki Recipe (Stuffed Cabbage Rolls)
  • roasted brussels sprouts in a dish
    Honey Sriracha Brussels Sprouts

Watermelon Basil Cocktail

watermelon basil vodka cocktail in a martini glass with basil and watermelon garnish

In this simple and tasty watermelon basil cocktail, watermelon and basil are blended into a puree and combined with vodka, honey, and lime juice for a fresh and herby beverage that tastes like a warm summer's day.

martini glasses with watermelon basil cocktail with watermelon pieces and basil leaves to the side

Do you ever find yourself with too much watermelon? I seem only to buy them for get-togethers and then forget to actually cut them up and serve them. Then I end up with more watermelon than I can possibly eat before the quality quickly goes downhill.

I've appreciated seeing smaller watermelons more widely available this summer, especially from local farmers. I feel like I can cut into them at any time, and I don't have to save them for a particular occasion. The smaller ones seem to have fewer seeds, too.

[feast_advanced_jump_to]

However, if you find yourself with more watermelon than you can use, try cutting it up and pureeing it in a blender to make popsicles and drinks, such as this watermelon basil cocktail. It's a good way to pair the fruit up with other flavors. Watermelon can be somewhat bland at times and benefits from some flavor enhancements.

If you like fresh drinks with unique flavor profiles, you'll also want to check out my recipes for Creamy Carrot Cocktail, Blueberry Lavender Lemonade, Ginger Rhubarb Gin Cocktail, Pomegranate Rosemary Cocktail, Cherry Whiskey Sour, and Lilac Tea.

🍉Ingredients

Here's everything you need for this five ingredient cocktail.

watermelon, a bottle of barr hill vodka, a bottle of lime juice, honey, and fresh basil in a glass
  • Watermelon - Fresh watermelon is the star of the show in this cocktail. Any variety of watermelon is fine, though a seedless one will make it easier. If possible, buy a whole watermelon for yourself. The precut options in grocery stores are much more expensive compared to the amount of watermelon you get. Pick a watermelon that's uniform in size and that is dark and dull in color. Avoid ones with white spots, that are shiny, or elongated. These are indications of watery, unripe, or less flavorful watermelons. If you have a watermelon with seeds, no problem. Just remove them before pureeing.
  • Basil leaves - Fresh basil leaves add the herby notes to the drink. Only fresh basil will work in this drink recipe. Please don't attempt it with dried basil.
  • Vodka - I love Bar Hill's vodka, which is distilled from raw honey. Not only is it tasty, it's made locally in Vermont. You can use your favorite vodka in this cocktail.
  • Lime juice - Fresh lime juice is always best, but if that's not handy (I swear I never have a lime when I need one), a high-quality bottled lime juice, such as Santa Cruz's organic lime juice, is a good choice.
  • Honey - Just a touch of honey for some sweetness, as watermelon juice tends not to be overly sweet on its own.
  • Sugar - Optional, but I find this cocktail even more enjoyable when the rim is lined with sugar.

See the recipe card below for a full list of ingredients and measurements.

🧂Substitutions & Variations

  • Basil - Instead of basil, this watermelon cocktail would also be good made with fresh mint. Mint and watermelon are a common pairing in summer salads.
  • Gin - I've also made this cocktail with gin instead of vodka and think the citrus and herbal notes of most gin work just as well here. It's why I also paired gin and thyme in my Cucumber Gin Cocktail.
  • Honey - If honey isn't handy, try using 1 ounce of simple syrup instead.
  • Salt rim - If you prefer a less sweet rim and still want to line the rim of your glass, use a salt with large crystals, such as kosher salt.
  • Mocktail version - Skip the vodka by replacing it with additional watermelon puree and/or a splash of club soda or ginger beer.
  • Frozen basil watermelon cocktail - When pureeing the watermelon and basil in the first step, add the remaining cocktail ingredients to the blender along with a cup of ice. Blend until smooth. Add more ice or more liquid, if needed, to adjust the consistency.

🔪Instructions

watermelon on a cutting board cut into cubes with a large knife

Cut the watermelon into cubes, removing any seeds as you go.

a blender with watermelon and basil inside

Add the watermelon pieces to a blender or food processor with the basil.

vodka being poured into a cocktail shaker

Add 6 ounces of the watermelon puree, along with the vodka and lime juice, to the shaker.

honey being poured into a cocktail shaker

Add the honey, and stir well to combine before adding the ice.

ice being poured into a cocktail shaker

Fill the shaker at least halfway.

cocktail shaker being shaked

Shake well for 20 seconds.

martini glass with salt on the rim

If desired, brush the outside rim of a glass with lime juice and roll it in a small plate of sugar.

watermelon basil cocktail being strained into a martini glass

Give the cocktail another shake and strain it into the prepared glass. Garnish with a piece of watermelon and a basil leaf or two.

Tip: This watermelon basil cocktail is best served well chilled. Make sure you shake it well to get it as cold as possible. And if you can pop your glasses into the freezer in advance, that will help to keep the drink cold as you sip.

🍸Equipment

Blender or food processor - Necessary to create a smooth watermelon basil puree.
Cocktail shaker - This is the easiest way to shake up a cocktail before serving. Alternatively, a large mason jar with a lid will also work.
Martini glass - The glass I prefer to use for serving this cocktail. Though you can use what you have. Check out your local Goodwill if you're looking for cocktail glasses on the cheap. It's what I do.

🍯Top tip

It may seem odd, but stirring the cocktail ingredients before shaking will help to combine the honey into the liquids. Otherwise, when you add the honey to the ice, it may just stick to the ice and not mix into the drink.

💭FAQ

What alcohol goes well with watermelon?

Vodka, gin, and tequila all pair well with watermelon. For this recipe, I suggest vodka, though gin would also be good.

What flavor mixes well with watermelon?

Watermelon pairs well with many flavors, including basil, honey, and lime juice, which is why I used them in this cocktail. Other flavors to try with watermelon are mint, lemon, cucumber, coconut, salty cheeses, and spices like cayenne and chili powder.

How do you intensify watermelon flavor?

Both salt and sugar have the ability to bring out more flavor in watermelon. Add either to the rim of your cocktail glass before serving to help intensify the watermelon flavor in the drink.

🥗Pairing

Try serving these dishes with this watermelon basil cocktail:

  • two plates of pasta with peas and mint pesto with a side of peas and drink glasses
    Pasta and Peas with Mint Pistachio Pesto
  • chicken sloppy joes with pickles
    Ground Chicken Sloppy Joes
  • the sun dried tomato quiche in a pan with plates and serving utensil
    Broccoli and Stilton Quiche
  • large plate of arugula spinach salad with chicken and dressing on side
    Arugula and Spinach Salad with Grilled Chicken

🍹Related Recipes

Looking for other recipes like this? Try these:

  • two coupe glasses with cold brew martinis
    Cold Brew Martinis
  • a glass of eggnog cocktail with a cinnamon stick
    Baileys Eggnog
  • glass of elderflower gin tonic with gin bottle and flowers
    Elderflower Gin and Tonic
  • cocktail with pomegranate and rosemary
    Pomegranate Rosemary Cocktail

Grilled Spaghetti Squash with Meat Sauce

a plate of spaghetti squash topped with a meat sauce, cheese, and basil

If you've ever been disappointed by the texture and flavor of spaghetti squash, this Grilled Spaghetti Squash with Meat Sauce is for you. Tender squash noodles are gently charred on the grill and then topped with a rich tomato-based meat sauce for a satisfying and tasty meal.

a plate of spaghetti squash topped with meat sauce and basil leaves

I love winter squash. There are so many varieties and they're all unique. I appreciate how they store for a good long while and that there are limitless ways to cook them. They're one of my favorite vegetables to grow in the garden. (If my plants weren't always prone to bugs and disease, they'd be my favorite.)

But I have to admit that I've always been on the fence when it comes to spaghetti squash.

Spaghetti squash is one of those foods that is truly unsatisfying when not prepared just right. I've made several recipes and tried many techniques where the squash turns out bland or watery and it's a big disappointment. I don't know how many times I've attempted to create spaghetti noodles and ended up with sad squash shreds instead.

[feast_advanced_jump_to]

The good news is that I think I've finally figured it all out with this grilled spaghetti squash with meat sauce.

Here's why this recipe works so well:

  • Grilling the squash adds a pleasant, lightly charred flavor while also preventing a mushy texture.
  • Slicing the squash in rounds helps keep the squash's long noodle structure intact.
  • Topping the squash with a meat sauce adds substance and creates a satisfying meal without the need for cooking side dishes.

Bonus: If you eat a gluten-free diet, then this recipe is a great meal for you.

But if you're looking for other squash recipes, check out

  • Chicken and Squash Curry
  • Delicata Pizza
  • Mushroom and Pumpkin Risotto
  • Zucchini Mushroom Pasta

📋Ingredients

Here's everything you need to make grilled spaghetti squash with meat sauce.

squash, meat, tomatoes, herbs, and other ingredients for making the meal

INGREDIENT NOTES:

  • Spaghetti squash - Look for firm, heavy, yellow squashes free of bruises. You'll need about five pounds worth to make this recipe, which is about two small or one medium-sized squash. Those are baby spaghetti squash in the photo, so I used a few.
  • Ground meat - The meat sauce can be made with ground beef, turkey, chicken, or pork. Go with whatever you have or prefer to use.
  • Rosemary - Seasoning the squash with freshly chopped rosemary makes the dish even better. If you don't have fresh rosemary, finely chopped dried rosemary is fine.
  • Red wine - I always like to add a little wine to my sauces. But if that's not your thing, or wine isn't handy, feel free to leave it out.

See the recipe card below for a full list of ingredients and measurements.

🌶Substitutions and Variations

  • Spaghetti Squash - While you can often use winter squash interchangeably in recipes, this is not one of them. The goal is to get that noodle texture that's unique to spaghetti squash. I don't know of another winter squash that could serve as a substitute.
  • Herbs- In place of rosemary, you could try thyme or sage. Instead of dried oregano in the sauce, you can use a dried Italian spice blend.
  • Spicy - Add some spice to the sauce by adding in ½ teaspoon of red pepper flakes when cooking the onions.

🔪Instructions

This is a good recipe to cook with a friend. One person can keep an eye on the squash out by the grill, while the other makes the sauce. Or if it's just you, and you have one of those side burners on your grill, you could make the sauce in a pan right there.

Another idea is to either cook the squash or make the sauce in advance so that you only have one task to worry about at a time.

sliced spaghetti squash on a cutting board with a knife

Slice your spaghetti squash into ½-inch rounds.

slices of spaghetti squash on a cutting board with seeds being scooped out

Use a spoon to scoop out the seeds from the center of the slices. Preheat your grill.

onions, garlic, and rosemary chopped on a cutting board

Chop the onion. Mince the garlic and fresh rosemary.

sliced spaghetti squash being brushed with olive oil

Brush the squash with olive oil and sprinkle with salt and rosemary.

slices of grilled spaghetti squash on a baking sheet

Grill the squash over a medium-low flame, for about 20 minutes or until tender but not too soft. Flip every 5 minutes to prevent burning.

onions cooking in a pan

Meanwhile, saute the onions for 8-10 minutes in olive oil until golden.

ground meat and spices cooking in a pan for the meat sauce

Add the meat, oregano, garlic, and salt. Break up the meat with a spoon and cook for 5 or minutes until browned.

red wine being added to a pan with ground meat

Add the red wine, turn up the heat, and cook for 2 minutes.

crushed tomatoes being poured into a pan with ground meat

Pour in the crushed tomatoes.

meat sauce cooking in a pan for serving with spaghetti squash

Gently simmer until reduced by about a third and the sauce has thickened.

grilled slices of spaghetti squash on a tray with the skin being removed with a fork

Use a fork to separate the skins from the squash.

grilled spaghetti squash noodle on a plate with basil leaves

Gently break up the squash into noodles and serve topped with the meat sauce, cheese, and some torn basil leaves.

Hint: Don't overcook the spaghetti squash. Doing so will result in those mushy, watery noodles we were looking to avoid in the first place.

🌡️Top Tip

The whole goal of this recipe is to get those nice squash strands that remind us of spaghetti, hence the name. These squash strands grow in a circular pattern around the inside of the squash from the top to the bottom.

That's why it's so important to slice the squash in slices across or width-wise in order to keep the strands intact. Slicing the squash from top to bottom will essentially cut those noodles in half.

♨️Equipment

As the name of this recipe implies and the instructions will tell you, you need a grill to make grilled spaghetti squash. Either a gas or charcoal grill is fine.

That said, if you don't have a grill, you can use a grill pan instead. This is the grill pan and Dutch oven combo that I love from Misen.

And if you have neither a grill nor a grill pan, the next best way to prepare the spaghetti squash would be to roast the slices in a single layer on a baking sheet lined with a metal cooling rack. That way, air will circulate around the squash and not pool up underneath. Roast at 425 degrees F until tender.

🥡Storage

For best quality, store the squash and sauce in separate airtight containers. Reheat before serving and topping with cheese and basil. Enjoy within 4-5 days.

💭FAQ

How do you keep spaghetti squash from getting soggy?

The best way to prevent spaghetti squash from getting soggy is to avoid overcooking it. You want it to be tender, but not soft. Also, use a cooking method, like grilling, that uses dry heat, such as grilling or roasting.

What meat goes with spaghetti squash?

Any meat will go well with spaghetti squash, as the squash itself doesn't have a prominent flavor. With spaghetti squash, it's all about the texture, how you season the squash, and how you cook it.

Does spaghetti squash fill you up?

On its own, no spaghetti squash will not be filling. That's why it's a great ingredient to use as part of a larger meal, like how we pair it with a hearty meat sauce in this recipe.

Pairing

Try these recipes along with this grilled spaghetti squash:

  • mojito with blackcurrants, limes, and mint served
    Blackcurrant Mojito Cocktail
  • glasses of lavender lemonade with blueberries and lemon slices
    Blueberry Lavender Lemonade
  • glass of elderflower gin tonic with gin bottle and flowers
    Elderflower Gin and Tonic
  • glasses of rhubarb gin cocktail with a bottle of rhubarb juice
    Ginger Rhubarb Gin Cocktail

Related Recipes

Looking for more recipes like this one? Try these:

  • dish of pumpkin pasta with sage
    Roasted Pumpkin Pasta with Sage
  • a bowl or risotto with pumpkin and parmesan
    Pumpkin and Sage Risotto
  • bowls of chicken curry with noodles and peanuts
    Chicken and Squash Curry
  • large plate of arugula spinach salad with chicken and dressing on side
    Arugula and Spinach Salad with Grilled Chicken

Ground Chicken Sloppy Joes

chicken sloppy joes with pickles

These Ground Chicken Sloppy Joes are packed full of vegetables and flavor. They're a great one-pan, roughly 30-minute, weeknight dinner recipe you can feel good about.

three sloppy joes on a cutting board

If there was ever a dish to hide vegetables from picky eaters, it's these Sloppy Joes. I love this recipe because it has many vegetables - onion, bell pepper, zucchini, and celery - yet you wouldn't know it. They all cook and meld into a tasty Sloppy Joe mixture along with ground chicken and a well-seasoned tomato sauce.

The other reason this recipe works so well is it improves ground chicken. If you've ever had a disappointing chicken or turkey burger, it's probably because it was dry and didn't have flavor. With a lower fat content than beef, it's easy for poultry to become dried out when overcooked. It's especially notorious with chicken breast. But don't worry; there's no chance of making a dry chicken dinner with these Sloppy Joes.

[feast_advanced_jump_to]

The tomato sauce is key to keeping everything moist. Some raisins are even tossed in for backup. When cooked in the liquid, they plump up and become juicy.

Combining dried fruit with meat is a smart combination you can find in many cuisines-and one that I love. That's why you'll find dried apricots in my Chicken Tagine recipe, dried currants in my Cardamom Chicken and Rice, and raisins in these Stuffed Cabbage Rolls.

🐓Ingredients

A good Sloppy Joe should be slightly sweet yet a little acidic. This recipe uses cumin, chili powder, smoked paprika, soy sauce, and Worcestershire sauce for flavor, a little brown sugar for sweetness, and red wine vinegar for acidity. It's the perfect balance.

all of the ingredients needed to make these sloppy joes

Ingredient Notes

  • Vegetables: This is a very forgiving recipe. If you don't have one of the vegetables, you can easily substitute more of another in its place. Just use roughly the same amount. Or, if you have other vegetables you'd rather include, use those instead and cook a little more or less until they're tender.
  • Jalapeno: We'll use half of a jalapeno in the recipe, providing just a little spice. For more spice, use the whole thing. For no spice, leave it out altogether.
  • Smoked paprika: If you only have regular paprika, that's fine in this recipe. But get yourself some smoked! You'll thank me later. Then you can use it in this Beans and Chorizo recipe.
  • Raisins: These may seem odd, but they help to add extra moisture to the dish and keep it from drying out. If you don't believe me, give them a try. I think you'll be surprised how well they fit in.

See the recipe card below for quantities and measurements.

🦃Substitutions and Variations

  • Ground turkey: This dish would be just as great if made with ground turkey instead of ground chicken.
  • Gluten-Free Sloppy Joes: Use tamari instead of soy sauce, and a gluten-free Worcestershire sauce, and serve on your favorite gluten-free bun.
  • Spices: I can see all different kinds of spice combinations being used instead of the ones mentioned here. Maybe oregano, basil, and rosemary for an Italian version, or cinnamon, cumin, and turmeric for a more Middle Eastern flavor. Experiment with your favorites and make this recipe your own.
  • Sloppy Joe Sliders: This is a great recipe for serving small portions to a crowd at a party. Use slider buns instead of full-sized ones and provide various toppings so people can assemble their own.

This round-up on Food Network offers more creative ideas on how to transform Sloppy Joe recipes in creative ways.

🔪Instructions

How to make ground chicken Sloppy Joes in six simple steps.

chopped vegetables on a cutting board with a knife

Chop all of the vegetables into a fine dice. Be sure to remove the seeds from the jalapeno.

chopped vegetables cooking in a skillet

Cook the vegetables over medium-high heat in the olive oil for 10 minutes, until softened.

ground chicken and spices on top of cooked vegetables in a pan

Add the ground chicken, cumin, chili powder, paprika, and salt.

tomato sauce being added to the pan with chicken and vegetables to make sloppy joes

Add the soy sauce, Worcestershire sauce, brown sugar, tomatoes, and raisins.

chicken browning in skillet with vegetables

Break up the chicken with a spoon and cook for 6-8 minutes, until browned.

ground chicken sloppy joe mixture cooking in pan

Lower the heat and simmer for another 8 minutes or so until thickened. Stir in the red wine vinegar and serve warm in toasted buns with desired toppings.

Hint: If you'd like to have the Sloppy Joe mixture a little sloppier, add a splash or two of water to the pan while simmering.

📋 Top tips

  • Make sure to chop the vegetables up into small pieces, so they incorporate well into the chicken and sauce.
  • Wash your hands and cutting board well after handling the jalapeno, and avoid touching your eyes and face.

🥡Storage

Store the Sloppy Joe mixture in an airtight container in the fridge for up to three days. Reheat thoroughly before assembling and enjoying your sandwich.

❓FAQ

How do you thicken sloppy joes?

If you find your sloppy joes too sloppy, add 1 tablespoon of tomato paste to the pan and stir in to combine. Cook a couple of minutes and see if it helped. Depending on the brand, some crushed tomatoes are more watery than others, which can lead to watery sloppy joes.

Can you freeze sloppy joes?

Yes. To freeze, put the sloppy joe mixture in a container with a tight-fitting lid, label it, and put it in the freezer. To heat, defrost partially or fully in the fridge. Pour into a pan and heat on low until hot. If the mixture is too thin, add a bit of tomato paste. If it's too thick, add a few tablespoons of water until it's reached your preferred consistency. Then assemble the sloppy joes as you like.

Is ground chicken healthier than beef?

Ground chicken is lower in calories and fat than ground beef and if you're looking to reduce your red meat consumption, chicken is a good choice. However, it's up to you to decide if one food is a healthier choice for you than another.

🍟What to make with Sloppy Joes

Here are a few other recipes that would go well with these Sloppy Joes:

  • Air Fryer Eggplant Fries
  • roasted brussels sprouts in a dish
    Honey Sriracha Brussels Sprouts
  • jars of quick pickle beans with garlic and dill
    Quick Green Bean Pickles
  • a hand serving a cider cocktail
    Apple Cider Whiskey Cocktail

🍳More Chicken Recipes

Looking for other recipes with chicken? Try these:

  • pan with pasta and parmesan, garlic, and basil
    Creamy Garlic Parmesan Chicken Pasta
  • large plate of arugula spinach salad with chicken and dressing on side
    Arugula and Spinach Salad with Grilled Chicken
  • bowls of chicken curry with noodles and peanuts
    Chicken and Squash Curry
  • a pan of chicken and rice with cardamom and parsley
    Cardamom Chicken and Rice

Blueberry Lavender Lemonade

glasses of lavender lemonade with blueberries and lemon slices

Blueberry Lavender Lemonade is infused with the sweet, floral, and tart flavors of blueberries, lavender, and freshly squeezed lemon juice. Its vibrant purple-pink hue, and creaminess from coconut milk, make it a fun drink for summer.

glasses of pink blueberry lemonade with a bowl of blueberries and slices of lemon

I know making fresh lemonade may seem like a hassle. Who has time to squeeze lemons, right? Well, I figured if I was going to make lemonade, it better be a bit more special than what I could buy at the store.

With a load of freshly picked blueberries from a local farm here in Vermont, and some lavender plants flowering in the garden, I grabbed some organic lemons and well, as one does, made lemonade.

[feast_advanced_jump_to]

This lemonade is worth making. It may be the best I've ever had.

It's fruity from the blueberries. They also help to create a lemonade with a fun purple-pink hue. Often times lemonade is a little boring. And while there's nothing wrong with a simple glass of classic lemonade, this one is more complex and interesting.

There's just a hint of floral notes to it. I know everything thinks of soap when they think of using flower buds like lavender in cooking. But you really only get a slight scent of lavender instead of an unpleasant mouthful. No one wants to eat soap.

This blueberry lemonade is also creamy thanks to a bit of coconut milk mixed in with the fresh lemon juice. It creates an almost milky-like consistency that kind of reminds me of a creamsicle. I think it also helps bring all the flavors together.

Lavender lemonade is part of my quest to create unique flavor combos from fresh ingredients in my garden. If that sounds interesting, check out a few of my other garden-inspired beverages, like this lilac iced tea, a lemon balm lemonade, and a ginger rhubarb gin cocktail.

🍋Ingredients

Although this lemonade has a range of flavors, the ingredients remain simple.

lemons, ice, coconut milk, blueberries, lavender and sugar on a wood surface for making the recipe
  • Blueberries - Either fresh or frozen, it doesn't matter.
  • Lavender - Since we're using it to make a flavor extraction (think simple syrup), you can use either fresh or dried. Just make sure to use culinary-grade lavender. If using fresh, make sure it is clean and hasn't been sprayed with chemicals. Penzey's is a good source of dried lavender.
  • Sugar - Basic white sugar works fine in this recipe. If you wanted to use another kind of sweetener, such as maple syrup, or honey, I think that would work fine.
  • Lemons - You can't have lemonade without lemons. And if you're going to make it yourself, it's worth juicing your own fresh lemons instead of using bottled stuff. You only need to juice 4-5 lemons anyway, which just takes a few minutes anyway.
  • Coconut milk - Full fat or light coconut milk is great. Though full fat has more creaminess to it and that's the reason why we're using it in the first place.
  • Ice - Because a good lemonade should be ice cold.

See the recipe card below for quantities.

🍓Substitutions & Variations

  • Strawberry lemonade - Replace the blueberries with an equal amount of strawberries for an equally delicious fruity beverage.
  • Make it a cocktail - To make this a blueberry lavender lemonade cocktail, add a shot of vodka to your glass before pouring in the blueberry lemonade.
  • Blueberry lavender lemonade popsicles - This lemonade would make a great popsicle. Just pour into popsicle molds (these are my favorite) and freeze.

📋Instructions

blueberries, sugar, and lavender in a small pot

Combine the blueberries, sugar, and lavender in a small pot. Cover with 1 cup of water and bring to a simmer.

blueberry lavender mixture steeping in a small pot

Simmer for 5 minutes, then turn off the heat, mash up the blueberries, and let cool for about 30 minutes.

lemons being juiced into a bowl

Meanwhile, squeeze the lemons by hand or with your preferred juicing method. You'll need about 1 cup of juice.

lemon juice being strained into a pitcher

Strain through a fine mesh sieve and into the pitcher to remove seeds.

the blueberry lavender mixture being strained into the pitcher

Pour the blueberry lavender mixture through the strainer and into the pitcher.

the blueberry mixture being pressed on the strainer with a spoon

Use a spoon to press the solids in the strainer to extract all of the liquid.

coconut milk being poured into the pitcher

Pour in the coconut milk and additional water. Check out that color!

the pitcher being stirred to combine

Stir well to combine. Add ice. Taste and adjust to your liking, as needed.

Hint: If the coconut milk doesn't fully incorporate into the lemonade with stirring alone, use a whisk. I had some solid coconut milk bits and a whisk helped to easily incorporate them into the liquid.

🥄Equipment

A few basic tools, while not essential, will help to make this lemonade even easier.

  • A wooden citrus reamer makes it simple to squeeze all the juice from the lemons.
  • A fine mesh strainer is helpful to strain out lemon seeds and blueberry pulp.
  • A pitcher or large jar is useful to mix and store the lemonade.

🧊Storage

This blueberry lavender lemonade will keep for several days in a sealed pitcher in the fridge. If not drinking immediately, stir or whisk the lemonade again before serving in case of separation.

two glasses of blueberry lemonade with a pitcher and lemons

💭Top tip

The longer you let the blueberry lavender syrup steep and cool in the pot before straining, the more flavor you will get. Give it at least 30 minutes, though if you can let it sit for a few hours, even better. Also, be sure to really press the pulp well through the strainer to extract all of the liquid and flavor.

👨🏻‍🍳FAQ

Does blueberry lavender lemonade have caffeine?

No. This lemonade is caffeine free.

Can you eat raw lavender?

Yes, you can eat the flower buds and leaves of lavender plants, but you should look for culinary grade lavender, which is considered safe for eating and has a better, less floral taste. If planting in your garden, look for Lavandula angustifolia, also known as English or common lavender. Or source dried lavender from wherever you buy your spices or teas.

What the heck is pink lemonade?

There's no such thing as a pink lemon. So if you're buying pink lemonade in stores, it has added dye. But if you make this blueberry lemonade, you'll get a naturally colored pink lemonade without the artificial added dye.

Pairing

Try serving this lemonade with any of these recipes:

  • cheese scones on plate with chives
    Easy Cheese and Chive Scones
  • four plates with slices of cake and rhubarb on side
    Rhubarb Crumble Breakfast Cake
  • homemade chocolates with honey and coconut
    Coconut Chocolates with Honey and Almonds
  • a plate with stuffed apple cremes covered in caramel and powdered sugar
    Baked Apple Crepes with Ricotta

🍹Related Recipes

Looking for more drink ideas? Try these:

  • glasses of lilac tea with ice, pitcher, and flowers
    Lilac Tea
  • a mug of hot buttered rum with a cinnamon stick
    Hot Buttered Rum Recipe
  • irish cream being poured into a glass with ice
    Dairy Free Irish Cream
  • glasses of lemon balm lemonade drink
    Lemon Balm Lemonade Recipe

Creamy Garlic Parmesan Chicken Pasta

pan with pasta and parmesan, garlic, and basil

This mouthwatering Creamy Garlic Parmesan Chicken Pasta recipe combines tender breaded chicken, al dente pasta, and a rich creamy sauce infused with garlic and parmesan, making it the ultimate comfort food for pasta lovers. With the addition of fresh kale, you've got a complete, one-dish family dinner.

a pan of the garlic parmesan pasta with cheese and herbs

This is a fun chicken and pasta meal. You get that satisfying crispy breaded chicken goodness of chicken parm while also enjoying a creamy cheesy white sauce. There's plenty of garlic flavor and even a bunch of kale tossed into the mix that cooks down and is coated with cheese and cream. With fresh basil on top, this dish is an all-around winner.

Speaking of winning pasta dishes, I have a few other recipes you'll want to check out. This Creamy Corn Pasta is also rich and satisfying thanks to corn, bacon, and white beans. This Zucchini Mushroom Pasta is an easy meal and a good vegetarian pasta dish for summer. And this Pea Pasta with Pistachio Mint Pesto is so fresh and simple for when you're looking for something out of the ordinary.

[feast_advanced_jump_to]

🧄Key Ingredients

It's all about the simple, fresh ingredients in this creamy garlic parmesan chicken pasta.

ingredients for the chicken parm pasta spread out on a red tiled surface

You'll need:

  • Pasta, such as linguine or fettuccine
  • Chicken breasts without skin or bones
  • Breadcrumbs with plenty of texture, such as panko
  • Broth, either vegetable or chicken broth
  • Half and half to create the creaminess of the sauce
  • Parmesan cheese, preferably a fresh block for grating
  • Garlic because what's a pasta dish without it?
  • Kale for a fresh vegetable component, though spinach or chard are also good
  • Fresh basil

See the recipe card below for the quantities.

🥬Substitutions and Variations

  • For a richer dish, add an additional ½ cup of half and half and/or use light or heavy cream. I bet a few spoonfuls of cream cheese would also be a wonderful addition.
  • Try swapping in another green in place of kale, such as spinach.
  • Add some spice by including red pepper flakes when sauteeing the garlic.
  • For more flavor, use an Italian season blend in place of the oregano in the chicken breading. This Italian Herb Mix from Penzey's would be great.

🔪Instructions

kale, garlic and cheese being prepped on a cutting board with a knife

Start by chopping up the kale, slicing the garlic cloves, and shredding the parmesan cheese.

pieces of chicken being coated in flour, eggs, and breadcrumbs

Set up three dishes for breading with flour, eggs, and breadcrumbs. Dip the pieces of chicken in the flour, then the egg, then the breadcrumbs, shaking off any excess after each dip.

pieces of chicken cooking in a pan

Cook the chicken in a pan with olive oil over medium heat for 3 minutes per side. Add more oil to the pan if it goes dry.

sliced garlic cooking in a pan with olive oil

Remove the chicken, wipe the pan, and saute the sliced garlic. Then add the flour, broth, then cream, and cheese, pausing between each addition to whisk and cook for a minute or two.

kale cooking down in the pan with sauce and garlic

Add some kale to the pan and let it wilt. Continue adding as it wilts down until it's all incorporated.

all of the ingredients of the dish being tossed together in a pan with tongs

Cut the chicken up into smaller pieces and add it back to the pan with the pasta. Toss with tongs to coat in the sauce and heat everything until warm.

📋Top Tips

  • To prevent the breading from sticking to your hand when coating the chicken, use one hand for the dry ingredients (the flour and the breadcrumbs) and the other for the wet (the eggs).
  • Keep an eye on how hot your pan gets when pan-frying the chicken. It tends to get hotter as you go, so you may want to lower the heat to prevent burning. The chicken will cook quickly, so don't leave it unattended, either.
  • If you prefer the chicken to retain crispness, you may want to simply place it on top of the pasta instead of tossing it all together with everything in the sauce. It's still delicious if you, it just loses some of the crunch.

🥄Equipment

You don't need any special equipment to make this dish. That said, here are a couple of tools that I think would make cooking it easier.

  • A non-stick pan will help prevent the breading from sticking behind on the pan when you cook the chicken. Is there anything more disappointing than having your breading fall stick and burn? I'm liking this 10-inch frying pan from Oxo.
  • Tongs make it easy to toss the pasta and everything together right in the pan. They're one of the handiest and most overlooked tools in most people's kitchens.

🥡Storage

Store any leftovers in a sealed container in the fridge for up to four days. You may want to add a splash or two of water when reheating to thin out the sauce.

💭Frequently Asked Questions

Can you use garlic powder instead of garlic with this pasta?

In some cases, it's fine to use garlic powder in place of whole garlic. But this recipe isn't one of them since it's a main component for the creamy garlic chicken pasta.

Can I make this in my Instant Pot or Crockpot?

You might be able to make components of the dish using the saute function on the Instant Pot, such as browning the chicken and making the sauce. But the pressure cooking feature won't be useful here. Neither would your crockpot, as it's just not a dish that could easily convert to slow cooking and come out well.

Why isn't my creamy chicken pasta creamier?

I tried to create a recipe with a cream sauce that won't overwhelm you with fat and calories. If you want a really rich and thick sauce made with heavy cream and butter, this probably isn't the recipe for you. However, you can easily substitute heavy cream for the half and half, as I mentioned above.

Can I just use milk to make the cream sauce?

I suggest using half and half, which is made up of equal parts cream and milk. It's already a lighter option and I don't think the sauce will have enough flavor if you use just milk instead.

🍝More Pasta Dishes

  • Creamy Bacon Corn Pasta
  • large serving dish of zucchini mushroom pasta
    Zucchini Mushroom Pasta
  • two plates of pasta with peas and mint pesto with a side of peas and drink glasses
    Pasta and Peas with Mint Pistachio Pesto
  • dish of pumpkin pasta with sage
    Roasted Pumpkin Pasta with Sage

Sauteed Garlic Scapes

sauteed garlic scapes in a pan with a plate of scrambled eggs

These sauteed garlic scapes make a fast and easy condiment for enjoying this unique part of the garlic plant. Use them to top eggs, tacos, chili, nachos, grilled meats, and more!

garlic scapes, a pan of sauteed garlic scapes, and a plate of eggs topped with prepared scapes

Garlic scapes are one of those fresh culinary ingredients everyone wants to get their hands on in early summer. Luckily, if you're growing garlic in your garden (the hardneck variety, at least), you already have a source, as they grow as a curly offshoot from the tops of garlic plants.

The best part is that you can harvest the garlic scapes without harming the garlic bulb. In fact, doing so encourages the bulb to keep growing. They're basically an added bonus to growing garlic.

If you don't have a garden, scapes are often available for a few weeks at farmers markets and food co-ops, so be on the lookout. But they're not around for long.

If you're looking for more detailed info about scapes and other uses for them, check out my how to use garlic scapes post.

[feast_advanced_jump_to]

I consider garlic scapes to be the garlicky equivalent of a scallion. Just as scallions provide a fresh and less pungent onion flavor, scapes can play a similar role but for garlic. And similarly, there are many ways to use them.

One of the easiest methods is to sauté chopped garlic scapes, add a bit of flavor with soy sauce and vinegar, and use them as a flavor-packed condiment topping.

You'll love this approach for sautéed garlic scapes because:

  • they cook in just 5 minutes
  • you get plenty of fresh garlic flavor that won't overpower
  • there are limitless places to use them

If you need a few ideas on where you could use these sautéed garlic scapes, try them on my Broccoli and Stilton Quiche, Cauliflower Potato Leek Soup, Seafood Newburg Soup, or maybe this Orange Tempeh and Asparagus. There are so many dishes where they would add an extra punch of flavor.

🧄Ingredients

Combining the chopped and sautéed garlic scapes with a few additional ingredients transforms them into a delicious garlicky topping with hints of umami and vinegar.

garlic scapes on a stone background
bottles of soy sauce, rice vinegar, and sesame oil

You'll need:

  • garlic scapes
  • olive oil
  • soy sauce
  • rice wine vinegar
  • toasted sesame oil

Note: Toasted sesame oil may be overpowering for some folks. If that's you, feel free to leave it out. The scapes will be just as good.

See the recipe card below for the quantities.

🔪Instructions

You're just minutes away from enjoying garlic scape goodness on your favorite foods.

Start by chopping your clean garlic scapes into small pieces.

chopped garlic scapes cooking in a small cast iron pan

Heat a pan with olive oil. Add the scapes. Cook on low for 5 minutes, stirring often.

hands whisking together ingredients in a small bowl

Whisk together soy sauce, rice vinegar, and sesame oil. Then pour into the pan with the scapes and toss together.

the prepared garlic scapes on top of a dish of scrambled eggs

Use the sauteed garlic scapes as a topping to a variety of dishes, such as scrambled eggs.

Tip: All of the garlic scape is edible, so don't be afraid to use the whole thing. The only thing is that sometimes older scapes can get a bit tough and woody on the ends. If that seems to be the case, just cut off that portion and discard.

🌶Variations

  • Skip the chopping and sauté the garlic scapes whole. Then use them on burgers or sandwiches.
  • Make it spicy by stirring in some of your favorite chili paste, oil, or hot sauce.
  • Leave out the toasted sesame oil if you find the flavor overwhelming.

🥡Storage

You can store garlic scapes fresh in the fridge for several weeks. However, after cooking these sauteed scapes, they'll last up to four days in the refrigerator. Use them on any dish of your choosing.

garlic scapes on a stone background

💭FAQ

Which part of the garlic scape do you eat?

You can eat all of the garlic scape, including the long pointy tip. But if your scapes are older, they may have tough ends to them. Just trim these off.

Do garlic scapes soften when cooked?

Garlic scapes will soften just a little, but not much. They retain their shape and a little crunch.

Are garlic scapes better raw or cooked?

You can eat garlic scapes both raw and cooked, so it's a matter of personal preference. One great way to use them raw is pureed in a pesto. Here's a recipe for making garlic scape pesto.

Arugula and Spinach Salad with Grilled Chicken

large plate of arugula spinach salad with chicken and dressing on side

A simple arugula and spinach salad recipe topped with grilled chicken, pickled red onion, Parmesan cheese, and a tangy lemon balsamic dressing. The best part is that the salad dressing doubles as a marinade for the chicken.

plate of salad with greens, chicken, pickled onions with cheese and dressing

Summer is the ideal time of year to have salad for dinner. Dinner salads are often quick and easy recipes that don't require much cooking time. In the heat of summer, who wants to be in a hot kitchen, anyway?

This arugula and spinach salad is a good choice for late spring and early summer when greens are at their best and you're still eager to cook on the grill. If you can, try to get yourself locally grown greens. They'll have the best flavor and most nutrients because they're fresher. The USDA has this handy tool to help you easily find where to source local food in your part of the US, from farmers markets to CSAs.

Of course, you can make this salad any time of year. I see arugula and spinach all the time in the mixed baby green blends at the grocery store. Or buy separate packs and combine them yourself. And you can grill chicken just as easily with a grill pan in the middle of winter as you can with a grill outdoors.

If you're looking for more dinner salad ideas, I have just a few. (I'm going to take my own advice and make more salads this summer.)

This blackened shrimp salad has a wonderful citrus flavor and it takes no time to cook the shrimp under the broiler. While this curried chicken salad is good if you're in the mood for something different yet still healthy. And this tofu and bok choy salad packs a ton of crunch and freshness if you need a fresh veggie fix.

[feast_advanced_jump_to]

🥗Key Ingredients

ingredients for making the salad spread out
  • Red onion: for making quick pickled red onions. Red onion is great in a salad but it leaves too potent of an aftertaste for most folks. A quick pickle mellows it out while adding acidity and interest.
  • Red wine vinegar: for pickling the onion.
  • Balsamic vinegar, lemon juice, and olive oil: all part of the dressing and chicken marinade.
  • Arugula and spinach salad greens: make good counterparts. Arugula offers a pleasant peppery, nutty flavor while spinach has a sweeter taste. The two balance each other well and make a more interesting combination than using just one green alone.
  • Chicken breast: for an easy-to-grill source of protein. When it comes to chicken I often prefer thighs, but find breasts slice better for a more attractive presentation on top of a salad.
  • Parmesan cheese, dried cranberries, and almonds: are for topping the salad. I like to add ingredients to my salads that add variety and interest. Here, the cheese adds some saltiness, the cranberries sweetness, and the almonds bring crunch.

See the recipe card below for quantities.

🧀Substitutions & Variations

It's a salad, so just about everything can be substituted or varied to make it how you prefer. You can't go wrong. Here are a few ideas.

  • Vegetarian: Use tofu or tempeh in place of the chicken. Cut either into large pieces that are easy to handle on the grill, then slice up after cooking.
  • Almonds: May be subbed for your preferred nut or seed. Whatever you choose, toasting it will help bring out the flavor.
  • Parmesan: Any cheese will do. If you have something else handy, go for it. Aside from Parmesan, Feta cheese is my other go-to for salads.
  • Greens: As mentioned above, the combo of bitter nutty arugula and tender, sweet spinach is delicious and was the motivation for this recipe. But yes, you can certainly add in or substitute other greens to your liking.

🔪Instructions

This really is a simple salad to prepare!

sliced red onion in a bowl with a pot of red wine vinegar and sugar

Slice the red onion. Combine sugar, salt, and red wine vinegar in a small pot and heat until the sugar dissolves. Pour over the onion to submerge and let sit for 30 minutes.

ingredients for making the dressing and marinade in bowls

Make the dressing/marinade. In a bowl, add the oil, balsamic, lemon juice, mustard, salt, garlic, and maple syrup. Whisk to combine.

almonds toasting in small pan, bowl of onions, bowl of dressing, and chicken covered in marinade

Pour just enough of the marinade over the chicken to coat. Let sit for 30 minutes. Toast almonds in a small pan.

spinach and arugula in a bowl being tossed with dressing

Gently toss your arugula and spinach with most of the dressing.

chicken breasts grilling in a grill pan

Grill the chicken on the grill or a grill pan over medium heat. Cook until 160 F, about 5 or so minutes per side. Remove from grill and let rest for 5 minutes.

plate of the spinach arugula salad with chicken and all toppings with ingredients on side

Assemble your salad. Top plates of greens with the chicken, onions, almonds, cheese, and extra dressing.

📋Helpful Tips

  • If your chicken breasts are thick, try slicing them in half (length-wise) so that they cook quicker and more evenly.
  • It's best to dress the salad right before serving. When doing so, be gentle to prevent bruising and wilting of the greens from the acidity of the dressing.
  • Save any leftover pickled onions for topping tacos, eggs, burgers, and sandwiches.

🥡Storage

Store all of the ingredients for this chicken, arugula, and spinach salad individually in the fridge. The grilled chicken and greens are good for about 3 days. Dress the greens and combine everything just before serving.

💭FAQ

Do spinach and arugula taste the same?

Not at all. Arugula is peppery and sometimes nutty. Spinach, particularly when young, is sweet and mild. The two make a good combination in a salad because they balance each other out in terms of flavor.

Should you wash arugula before eating?

You should generally wash all greens before eating, even if they say prewashed. You never know if there are bugs or dirt.

How do you make arugula salad less bitter?

Combine arugula with greens, like spinach, that are less bitter or spicy. If you're growing your own arugula, pick it when it's young and hasn't bolted. You can also use a little sweetener, like maple syrup, in your dressing to offset the bitterness.

🍞 Pairing

These recipes would pair great with this arugula salad:

  • rosemary parmesan bread sliced on a cutting board
    Rosemary Parmesan Bread
  • smoothie in glass topped with mint and blackcurrants
    Blackcurrant Smoothie
  • bowls of potato and mushroom soup
    Potato and Mushroom Soup
  • a plate of artichoke pasta
    Artichoke Pesto Pasta

🥗 Related

Looking for more recipes like this one? Try these next:

  • a dish of beet broccoli salad with yogurt dressing
    Beet Broccoli Salad
  • salad with serving utensils and dressing
    Blackened Shrimp Salad
  • large pan of chicken thighs with apricots and barley
    Apricot and Chicken Tagine
  • a large bowl of pasta salad with basil leaves
    Pesto Pasta Salad with Sundried Tomatoes

Cherry Rhubarb Pie

two pieces of cherry pie on plates with coffee cups

Indulge in the satisfying fruit flavors of this cherry rhubarb pie, where sweet cherries and tangy rhubarb create a perfect balance of sweet and tart-a delightful alternative to the popular strawberry rhubarb combination.

cherry rhubarb pie with lattice crust on marble counter with a piece missing

Is there another pairing that defines spring as well as strawberry and rhubarb? Probably not. Yet strawberries aren't the only fruit that goes well with rhubarb. In fact, most fruits with a bit of sweetness have the potential to complement rhubarb just fine.

Personally, I love a good cherry pie and that's where my mind went. Sweet cherries, which are showing up in stores this time of year, are a great choice to partner with the tartness of rhubarb.

While we're talking rhubarb, if you're looking for more ideas for putting this springtime vegetable (yes, it's considered a vegetable) to use, go check out my rhubarb oat breakfast cake, rhubarb and apple chutney with pork chops, and ginger rhubarb and gin cocktail. I'll wait.

[feast_advanced_jump_to]

This recipe, which I've been experimenting with for the past year before finally being satisfied enough to share, is a well-balanced cherry rhubarb pie. It's not so sweet that you lose the star ingredients, but it's not too tart either. Even those who don't typically like rhubarb will enjoy this pie.

Want an easier, handheld pie-like recipe? Try these Strawberry Puff Pastry Pop Tarts.

Although you may not find as many recipes pairing cherries and rhubarb, I think it's a winning combo. Cherries, even the sweet ones, have a bit of underlying tartness that jives well with rhubarb. I also love them in my Brownies with Cherry Pie Filling, Cherry Apple Crisp, Cherry Whiskey Sour, and Cherry Tiramisu.

🍒Ingredients

With a crunchy almond crust, and a hint of bourbon in the filling, the ingredients in this cherry rhubarb pie are sure to satisfy.

ingredients for making cherry rhubarb pie on a counter
  • Almonds are ground up and baked into the crust. An excellent flavor complement to cherries and rhubarb.
  • Flour for the pie crust.
  • Butter makes the best pie crust, if you ask me. Which you did, right?
  • Cherry jam helps make a thicker filling while adding more flavor. If you don't already have some, use whatever brand you can find.
  • Sugar for sweetness. Typical granulated white sugar works fine.
  • Cornstarch for thickening the filling.
  • Rhubarb is a key ingredient here. If you're not growing your own, you should give it a try. It's easy and comes back every year. Otherwise, ask your friends for some from their patch or check the spring and early summer farmers market.
  • Sweet cherries - You should find sweet cherries popping up in the grocery store by early summer. At least, I do here in New England.
  • Lemon zest for flavor.
  • Bourbon has always been my cherry pie's secret ingredient. Now you know. If you don't have some or don't want to use it, a splash of vanilla and an equal amount of water are fine.
  • Cinnamon for just a hint of spice.
  • Egg yolk for an egg wash to brush the crust and get a nice golden color.
  • Coarse sugar (optional) to add a sprinkle of sweet crunch to the crust.

See the recipe card below for quantities.

🥧Substitutions & Variations

  • Sour cherries can work in this pie if you don't mind things on the tart side. I tested it with them and enjoyed it just fine, though it may not be for everyone. In this case, you may want to increase the sugar some more.
  • The almonds can be left out and replaced with an equal amount of additional flour.
  • The bourbon can also be left out. (It's probably not worth going and buying a bottle if you don't already have some.) Use a couple of teaspoons of vanilla extract instead and a couple of tablespoons of water to compensate.
  • Make it a gluten-free cherry rhubarb pie by using a gluten-free flour blend. I've made a few pies using this DIY blend from Minimalist Baker and they turned out well.
  • I can't not make a lattice top crust with cherry pie. It just gives it that classic look. But you do you. Feel free to cover the top with a solid sheet of dough. Just make a few holes in the middle for venting.

⏲️Instructions

If you want to do some advance prep and save time, pit the cherries, chop the rhubarb, and make the pie dough 1-2 days before you bake. Keep it all in the fridge until you're ready.

almonds in a food processor on a butcher block counter

Start by finely grinding the almonds in a food processor. Then add flour, salt, and butter. Process until a solid dough forms.

pie dough divided into two plastic bags on counter with flour

Divide the dough into two even pieces and put in plastic wrap or bags. Press into rounds. Pop them into the fridge while you make the filling.

a bowl of cherries and cherry pitter on marble counter

Pit the cherries if you haven't already.

jam and sugar cooking in a pot while stirring

Cook the jam and sugar over low heat until dissolved. Combine cornstarch and bourbon and add to the pan with cinnamon, lemon zest, and salt. Cook for a couple of minutes until thickened.

cherries and rhubarb in a pot being mixed with the filling

Add the rhubarb and cherries to the pot and stir to coat. Let cool. Preheat the oven to 425 F.

pie dough in a pie pan with a rolling pin on marble counter

Let one of the dough rounds warm up for a few minutes, then roll out 10-11 inches wide. You want the dough to be larger than your pie dish. Spread across your pie plate.

pie filling being poured from pot into the pie crust

Pour the filling into the pie plate lined with dough. Fill just enough to reach the top of the plate. Don't overfill or it will bubble over during baking.

a lattice pie dough topping being arranged over the pie

Spread the other round of dough over the top of the fruit. Cut or decorate the dough how you like and pinch the dough to seal the top and bottom pieces.

beaten egg being brushed over the top of the pie crust

Beat the egg yolk with a splash of water. Brush this over the top of the pie. Place the pie dish on a baking sheet on a rack in the middle of the oven.

completed pie on a baking sheet ready for the oven

Bake for 20 minutes, then lower the heat to 350 and bake for another 45 - 55 minutes. The crust should be golden brown, and the filling should be bubbling in the center of the pie.

Allow the pie to cool for at least an hour after taking it out of the oven. This really helps give some time for the filling to set. Top with vanilla ice cream, if you like, and serve.

Optional: When you lower the oven temp you could sprinkle the pie with some coarse sugar for a little added sweet crunch. I'm a fan of King Arthur Baking's sparkling sugar. I pick up a jar whenever I visit their store here in Vermont.

the pie fresh from the oven

📋Helpful Tips

Pie plates and tins can vary in size. The standard is considered 9 inches, but the few I own range from 9 to 10 inches wide and 1 to 2 inches deep. This is fine, but just know that you may end up with more or less filling and dough. Work with what you have and don't worry about it being perfect. I've never made a perfect pie.

Don't overfill the pie plate. When it comes to a pie with a fruit filling that will bubble up and get liquidy as it bakes, is that you just have to remember that you don't want to overfill your pie tin. Fill it only to the top or just below. Do not mound it up like an apple pie. It's ok to have a pie be a little less full if that's how it turns out, compared to one that bubbles over, drowns the top of your crust, and burns on the bottom of your oven.

Keep the pie dough as cold as possible throughout the process. Try to roll and handle it as little as possible. And if you need time in between steps, pop the pie or dough bak into the fridge to keep cool while you prep the next step.

Bake the pie on a baking sheet just in case it bubbles. I don't know about you, but I hate cleaning burnt stuff off the bottom of the oven.

🥄Equipment

  • A pie tin or plate. A 9 - 9 ½ inch pie plate will do the job. I like glass ones. That way, you can see how much the crust has browned while it bakes.
  • A rolling pin. If you don't have one handy, try a large glass bottle. I've had no problem using a wine bottle when necessary.
  • A cherry pitter. If you buy and use cherries often, a cherry pitter is a game changer. I love this Oxo Good Grips Cherry Pitter. I've also used a straw to pit cherries in a pinch, so try that if you have to.

🍴Storage

If it lasts, you can store this cherry rhubarb pie covered at room temperature for up to three days. But if it's summer when you make this, and your house is warm, keep it in the fridge.

💭FAQ

How do you keep the bottom crust of a cherry pie from getting soggy?

The almonds in the pie crust here will help add some extra crunch and structure to the bottom crunch and help prevent a soggy bottom. It's also important to keep the pie dough as cold as possible and work it as little as you can to prevent it from getting too warm. See the tip up above. If you're wondering if you should prebake your crust here, I just don't think that's necessary.

Is it better to use cornstarch or flour in a rhubarb pie?

Both can work, but I prefer cornstarch. It works quickly and you don't taste it in the pie like you often do with flour.

Why is my rhubarb pie so runny?

Hopefully, that's not the case if you follow the recipe here. That's why there's cornstarch in the filling - to help thicken things up. You also want to make sure that you've baked your pie long enough so that the filling is bubbling all the way in the middle of the pie, not just around the edges. Also, letting the pie cool completely after baking will help it to set.

☕ Pairing

This pie would go great with these beverages:

  • mug of amaretto latte with almonds and whipped cream
    Amaretto Latte
  • irish cream being poured into a glass with ice
    Dairy Free Irish Cream
  • a large glass of thai coffee with ice
    Thai Coffee
  • mojito with blackcurrants, limes, and mint served
    Blackcurrant Mojito Cocktail

🍰 Related

Looking for more recipes like this one? Try these:

  • plates of tiramisu topped with cherries
    Cherry Tiramisu
  • glasses of plum fool with whipped cream and cookies
    Plum Fool
  • a plate of pancake balls topped with powdered sugar
    Danish Aebleskiver Pancake Balls
  • cornmeal pudding dessert served at table
    Sweet Coconut Cornmeal Pudding

Broccoli and Stilton Quiche

the sun dried tomato quiche in a pan with plates and serving utensil

This creamy Broccoli and Stilton Quiche bakes right in a cast iron pan and is good any time of the day, from brunch to dinner. Enjoy the goodness of tender broccoli, the richness of Stilton cheese, and the zesty pop of sun-dried tomatoes.

sun dried tomato quiche in cast iron pan with plates, glasses, and ingredients

I can't remember the last time I made a quiche. I've had several rubbery, bland quiches at cafes, which has somewhat dampened my interest in them. Yet, as is so often the case, when I went to make one of my own, it turned out so much better. It was silky and creamy in a way that seems really impressive for something that's more or less beaten eggs and cream baked in a pie crust with some add-in ingredients for flavor.

This is the perfect breakfast dish - suitable for a lazy weekend at home, yet also nice enough for a gathering. It also works well for any meal of the day. It's just as tasty cold from the fridge as it is warm from the oven. You know, just in case you want to go back for another slice a little later on. And, spoiler alert, you will.

For a special brunch occasion, pair this quiche recipe with my Easy Cheese and Chive Scones, maybe this Cauliflower Potato Leek Soup, or these Danish Pancake Balls. For drinks, a Gin and Elderflower Tonic, a Cucumber Gin Cocktail, or this Frozen Matcha Latte.

And for another fun egg dish, try my Baked Scotch Eggs.

[feast_advanced_jump_to]

🥦Ingredients

All you need are six ingredients to make this quiche. And salt and pepper, but who's counting?

ingredients for making broccoli and stilton quiche in a cast iron pan
  • Pie dough makes a tender crust for the quiche. Use store-bought if you don't have time to make your own, otherwise, use your favorite recipe to prepare one layer of pie crust dough. You can always make a double batch (or a standard recipe that makes enough for a top and bottom crust) and freeze half for future use. If making your own, add a teaspoon of fresh thyme leaves to the dough for some extra earthy flavor.
  • Light cream or half and half makes for a rich custardy egg filling for the quiche.
  • Of course, you can't have a quiche without eggs.
  • Broccoli works well as a vegetable in this quiche because it cooks nicely within the egg mixture when chopped up small.
  • Stilton cheese is a soft and crumbly English blue cheese that creates a creamy texture when it melts into the quiche.
  • Sun-dried tomatoes add a fun bite of savory tomato flavor. If your sun-dried tomatoes are packed in olive oil, pat them dry before using. These ones from Bella Sun Luci are a good choice if you need a recommendation.

See the recipe card below for all of the specific quantities.

Let's be clear, the star of this dish is the Stilton cheese. Stilton is an English blue cheese made with locally produced and pasteurized milk from three counties in central England.

Stilton is creamy, crumbly, and savory with some salty and nutty notes. Like any good cheese, it's complex. I don't always enjoy blue cheeses, but I find Stilton to be less overwhelming than others, and it melts beautifully into the egg custard of this quiche.

Learn more about Stilton.

If you can't find Stilton, a good substitute is Gorgonzola. Although Gorgonzola is an Italian cheese, people often mistake Stilton and Gorgonzola for each other because they're just that similar.

🧀Substitutions and Variations

I'm always substituting and changing recipes. Here are a few ideas on how you could alter this Broccoli, Stilton, and Sun-Dried Tomato Quiche and make it your own.

  • Swap broccoli for asparagus. Chop it up small and use an equal amount.
  • Try another cheese. I mentioned that Gorgonzola is a good alternative to Stilton, but feel free to play around with other cheeses as well. Even a basic cheddar would be a good choice.
  • Swap out the cream for milk if you're looking to save a few calories. But honestly, I'm not sure it's worth the sacrifice in flavor and creaminess. I find that half and half is a good compromise. If you don't already have half and half, use half cream and half milk in the recipe.
  • Skip the cast-iron pan. In the recipe, I tell you to make the quiche in a cast-iron pan. But that's not essential. I think the cast iron helps ensure a well-baked crust, and it's a good option if you don't have a pie pan. But it's not necessary. If you do have a pie pan handy, feel free to use that instead.

🍳Instructions

Here's how to make this Broccoli, Stilton, and Sun-dried tomato quiche.

pricking the quiche crust with a fork

Start by pressing your pie dough into the bottom of a 9-inch cast-iron pan. Place the dough in the freezer for 10 minutes, then use a fork to prick holes throughout the dough. This helps to reduce puffing up while it bakes. Preheat oven to 425°F.

pie weights being poured into the quiche crust

Place parchment over the dough and add pie weights. Bake for 12 minutes. Lower the heat to 350°F, remove the weights and parchment, and bake for another 10 minutes. This process is called blind baking.

broccoli, stilton and sundried tomatoes chopped up and on plates

Chop the broccoli, sun-dried tomatoes, and Stilton. Set aside a small amount of tomatoes and cheese for topping.

eggs and cream being whisked for the quiche

Whisk the eggs, cream, and salt until the mixture is smooth.

Stilton cheese added to bottom of baked quiche crust

Sprinkle some of the Stilton across the bottom of the baked quiche crust.

quiche batter being poured into crust in cast iron pan

Pour in the beaten egg mixture.

sun dried tomatoes being added to quiche

Add the broccoli, more cheese, and sundried tomatoes.

uncooked stilton, sun dried tomato and broccoli quiche in cast iron pan ready for baking

Bake for 35-40 minutes at 325 degrees until mostly set and just slightly wiggly in the middle. Let cool for 15 minutes, then top with the remaining tomatoes and cheese before serving.

Hint: Don't worry if you don't have pie weights! You can use dried beans or rice as an alternative. You need just enough to mostly cover the bottom of the pan and the dough. The purpose of the weights is to prevent the dough from puffing up or shrinking during the blind baking process.

🥡Storage

One of the reasons why I think quiches in restaurants aren't always very good is that they're often not fresh. That said, store this quiche wrapped in the fridge and eat it within two days for the best taste and texture. After that, it'll be fine to eat for another day or so, but just not as good in quality.

You can also remove it from the pan, wrap it well, and freeze this quiche after baking. Eat within two months by reheating in the oven at 350 degrees F until defrosted and warmed through.

Either way, don't let the quiche sit out for more than a couple of hours on the counter at room temperature.

broccoli and stilton quiche in a pan with plates, glasses and serving spatula

📋FAQ

How do you keep the bottom crust of quiche from getting soggy?

You can prevent a soggy quiche bottom by blind-baking the crust. That's what you call it when you pre-bake a crust without the filling and that's exactly what I have you do in this recipe. Quiche filling is just too liquidy to skip the blind bake part of the recipe.

Do you grease the tin for quiche?

You don't need to grease the cast iron pan for this quiche. if you're using a pie or tart tin, you don't need to grease those either. There is enough butter in the pie dough that it'll keep things from sticking.

Should vegetables be cooked before putting in quiche?

It depends. In this recipe, the broccoli is chopped up so small that it cooks fine in the time that it takes to bake the quiche. But if you were using other vegetables, like onions and peppers, I'd suggest cooking those before adding them to the quiche.

Can I make quiche in advance?

Definitely. This quiche would be great baked a day in advance and kept wrapped in the fridge until ready to serve. You can warm it up in the oven to your liking or let it get to room temp first. Though, it's even good cold from the fridge.

Easy Cheese and Chive Scones

cheese scones on plate with chives

Level up brunch or dinner with these easy cheese and chive scones. Packed with shredded cheddar, infused with a fresh, mild onion flavor, and ready in 30 minutes, you'll love this fast and flavorful savory scone recipe.

cheese and chive scones on a plate with butter and chives

What makes this cheese and chive scone recipe so easy and fast?

  • You only need one bowl.
  • You can skip the kneading. Just mix and shape the dough.
  • You save time and don't have to cut out and shape the scones.
  • They take just 15 minutes to bake.

Yeah, that means you can have some fantastic fresh savory scones as part of your brunch or dinner in 30 minutes or less, including the time it takes to wash one bowl.

If cheesy baked goods sound good to you, try my parmesan rosemary bread and potato and broccoli knishes. Or for sweet rather than savory scones, I've got this tasty blackberry and thyme scones recipe.

But if you are a chive fan or have more than you know how to use, you may want to try my mustard-crusted salmon with chives or this green pea pasta. There's a reason I love my backyard perennial chive patch.

[feast_advanced_jump_to]

🧀 Ingredients

Cheddar and chives make these scones unique. But what also makes them special is good-quality flour. While testing this recipe, I enjoyed making my scones with Maine Grains' organic all-purpose sifted wheat flour. I like the flavor of this flour because it's lighter than typical wheat flour yet more flavorful than most standard all-purpose flours. By sifting, they remove some of the bran yet leave a large part of the kernel, nutritious germ, and oils of the flour.

Maine Grains manufactures locally grown, traditional stone-milled grains. Their grains are fresh, flavorful, and full of nutrients. Located in a repurposed jailhouse in Skowhegan, they're doing great work leading re-localization efforts on grain production and milling. Although I'm in Vermont, I can find several of their flours at my local Hannaford supermarket.

ingredients for cheese scones on a plate with chives and butter to the side
  • All-purpose flour
  • Baking powder and baking soda to help the scones rise.
  • Kosher salt and black pepper for flavor and seasoning. I really like the hint of pepper you get in every bite.
  • Unsalted butter is a must. You can't have scones without butter and I think it's always better to add your own salt instead of buying salted butter.
  • Cheddar cheese will melt beautifully into the scones as they bake. We all know cheese makes everything better. I love Cabot's Vermont Sharp shredded cheddar cheese.
  • Fresh chives add all the character and mild onion flavor that make these scones tasty.
  • Buttermilk helps keep the dough soft and adds a little tang. No buttermilk? No problem. Use your preferred milk with a teaspoon of vinegar and sit for 5 minutes.
  • An egg to brush the tops of the scones and create a nice golden brown color

See the recipe card below for the complete list of ingredients and measurements.

⏲️ Instructions

dry ingredients for scones in bowls for mixing

Preheat the oven to 400 degrees and put a pizza stone or pan on a rack in the middle of the oven to heat. Add the flour, baking powder, baking soda, salt, and pepper in a bowl and whisk to combine.

butter on a small cutting board with a knife cut into small cubes

Cut the cold butter into small cubes.

a hand holding some of the dough being mixed together

Use your hands to gently work the butter into the dry ingredients until you have coarse crumbs and the texture of sand.

shredded cheese added to the scone dough

Stir in the buttermilk and cheese.

chives chopped on a cutting board

Finely chop the chives and add them to the cheese scone dough. Use your hands to incorporate and work the dough until it comes together.

scone dough being pressed into a a round on a piece of parchment

Dump the dough onto a piece of parchment, press it together, and shape it into a disk. If the dough is sticky, sprinkle with additional flour.

scones being brushed with a beaten egg

Cut the dough into 8 wedges, then brush with the beaten egg. Sprinkle with additional salt and pepper, if you like.

the scones fully baked on a sheet of parchment with chives and flour bag to the side

Transfer the parchment with dough to the preheated oven, and bake for 15 minutes until golden brown and a tester knife comes out dry.

Note: Preheating your stone or pan in the oven helps to speed up the recipe and also adds extra crunch to the bottom of the scones. All you have to do is transfer the parchment you shaped the scones on to the oven, which means less time cleaning up the counter, too.

📖 Substitutions & Variations

You can mix up this easy cheese scone recipe in so many ways.

  • Try cheese and herb scones by swapping the chives for fresh herbs, using about ½ as much. Try rosemary, thyme, sage, basil, or parsley.
  • To make them whole wheat scones, use 1 ½ cups whole wheat flour and ½ cup all-purpose flour. You may need to add slightly more liquid to compensate.
  • Vary the cheese and experiment with other kinds like parmesan, gouda, or Colby.

🥡 Storage

closeup of chive and cheese scones with fresh chives on side

I'm not going to lie. These cheese and chive scones are really at their best right out of the oven. Okay, maybe give them 5 minutes to cool. When still warm, they're perfect.

But if you'd like to save them for another day, store them at room temperature for up to two days and toast them before eating. Alternatively, you can store cooled and well-wrapped in the freezer for up to a couple of months and defrost and heat as needed.

💭 Top tips

  • The key to a light, rather than dense, scone is to not overwork the dough. That's why I suggest using your hands to work the dough together, only mixing as much as needed to combine the ingredients, and simply pressing the dough together.
  • Another important tip is to use cold butter. Cold butter that melts in the oven as the scones bake, creates little pockets of air and more flaky, tenderness. And the less you work the dough, the more that butter will stay cold until baking.

📋 FAQ

Is buttermilk or cream better for scones?

When you make scones with buttermilk and also include baking soda, as in this recipe, the two ingredients have a chemical reaction that helps the scones to rise during the baking process. Cream would not work the same because it's not acidic.

What is the secret to a good scone?

Work the dough as little as possible. When you knead and work the dough, you're developing the gluten. Scones only need the briefest of working to form together and they're more crumbly and airy in nature, unlike most breads.

What should scone dough look like?

Scone dough should be soft and closer to the wet side than dry. If too dry, the scones will be dense and won't rise. So be careful not to add too much flour when you shape the dough.

🍲Pairing

  • bowls of potato and mushroom soup
    Potato and Mushroom Soup
  • glasses of elderberry cordial
    Elderberry Cordial Recipe
  • Zucchini Curry
  • a glass mug of citrus tea being poured from a tea pot
    Honey Citrus Mint Tea

🍳 Related Recipes

Looking for other recipes like this? Try these:

  • Beetroot and Feta Tartlets
  • scones on a cooling rack with blackberries
    Blackberry Scones
  • potato knishes baked on baking sheet
    Potato, Leek, and Broccoli Knishes
  • two plates of pasta with peas and mint pesto with a side of peas and drink glasses
    Pasta and Peas with Mint Pistachio Pesto

Cauliflower Potato Leek Soup

leek potato cauliflower soup in bowl

This cauliflower potato leek soup is a satisfying and hearty dish that won't weigh you down. The cauliflower creates a rich, creamy texture and eliminates the need for heavy cream or cheese.

cauliflower leek potato soup in bowl with spoon and napkin

I love potato and leek soup because it's easy to make and takes only a handful of simple, whole ingredients. While this version has an extra step - roasting cauliflower - it's worth the effort for the extra nutrients, vegetables, and heartiness.

While the recipe does contain butter, you can easily substitute it with an alternative and make it completely dairy-free and vegan.

I make some kind of soup just about every week and if you enjoy soup as much as I do, check out some of my other recipes, such as this tasty seafood newburg soup, a filling lentil and rice soup, and another variation on the classic leek potato soup, a celery and leek soup. Or if you like mushrooms, you'll want to try this Potato and Mushroom Soup.

[feast_advanced_jump_to]

🥔Ingredients

This soup takes just eight ingredients. No fancy spices or anything hard to find.

ingredients for making the cauliflower leek soup laid out on cutting board
  • Cauliflower: Pick a large head that's creamy white, without blemishes
  • Leeks: Look for leeks that are firm, with dark green tops and white bottoms
  • Butter: Make it dairy-free and use more olive oil, if needed
  • Garlic: For flavor
  • Thyme: Fresh is best, but dried will work fine, too
  • Potatoes: Russet or Yukon Gold
  • Broth: You can use either vegetable or chicken. I look for low sodium because I like to salt the food while cooking.
  • Optional toppings: Such as crumbled bacon, cheese, or croutons. More ideas below.

See the recipe card below for the full quantities. ⬇️

🔪Instructions

Let's make some soup.

cauliflower chopped up and on a baking sheet ready for roasting

Preheat the oven to 425 F. Roughly chop the cauliflower. Spread it on a baking sheet and toss with the oil and ½ teaspoon of salt. Roast for about 18 minutes.

leeks chopped, potatoes being peeled on cutting board with knife and peeler

Meanwhile, slice the white and light green parts of the leek, and peel and chop the potatoes. Mince the garlic and remove thyme leaves from the stems.

sliced leeks in a bowl of water with some being held in a hand

Give the leeks a good rinse and drain to remove any dirt or sand.

leeks being sauteed in a dutch oven with butter

In a Dutch oven, melt the butter. Add the leeks and saute until soft and creamy, about 10 minutes. Add the minced garlic, thyme, and ½ teaspoon of salt about halfway through.

potatoes and broth added to the soup pot

Add the potatoes and broth. Bring to a boil and simmer for about 10 minutes.

cauliflower added to the pot

Stir in the roasted cauliflower and add a few grinds of fresh black pepper.

soup being pureed with an immersion blender

Off heat, use an immersion blender to carefully puree the soup until creamy. If it's too thick, feel free to thin it out with some extra broth or milk.

soup served in bowl with spoon on side

Serve with your choice of toppings, such as bacon and additional thyme leaves.

Roasting the cauliflower may seem like an unnecessary step, but I think it really adds even more flavor. And if you can get it in the oven right off the bat, it'll be ready to go by the time the soup is pureed. So you're not really adding much extra time in the scheme of things.

But if you're in a rush and don't want to turn the oven on, fine. Just add it in with the potatoes. You'll still get the creamy texture in the end.

🌿 Garnish ideas

  • Chop a few slices of bacon and cook in a pan until crispy while the soup simmers. Then crumble over the finished soup.
  • Set aside some of the roasted cauliflower and use it as a topping.
  • Toss some cubed stale bread with a bit of oil and spices, then cook them in the oven alongside the cauliflower until browned and crispy for speedy croutons.
  • Shredded cheddar cheese will melt beautifully on top.
  • Stir in a a spoonfull or two of Greek yogurt. It'll look great and add more creaminess.
  • If you have extra thyme, a few small sprigs look great on top of the soup.

🥄Substitutions and Variations

A few ways to customize this cauliflower potato leek soup.

  • Dairy-free and vegan - Simply swap the butter for olive oil.
  • Dried thyme - Yes, dried thyme will work in place of fresh, though it likely won't add as much flavor. Use about a ⅓ as much.
  • Not roasting the cauliflower - If you can't be bothered to roast the cauliflower, add it to the pot when you add the potatoes and cook until tender.
  • Chunky version - You can actually skip the pureeing altogether if you don't want the soup creamy and just mash it up a bit with a potato masher. Though you won't get the benefit of the cauliflower's creaminess. I bet it would still be delicious, though.

🍲Equipment

There are two pieces of equipment that I think will make this soup easier, if not better.

First is a Dutch oven. I say it all the time, but a Dutch oven is a great investment. You don't need the high-end (and yeah, overpriced) version; there are decent ones out there for about $50, and they'll last you for years. The heavy bottom helps prevent burning and retains heat well, not to mention they're great for going from the stovetop into the oven.

The second item is an immersion blender. Sure, you could do this with a regular blender, but ladling soup into the blender is tedious, messy, and a bit dangerous if the soup is very hot. With an immersion blender, you can puree the soup right in the pot without having to wash a whole blender after. I recommend these hand blenders from Braun.

🥡Storage

Store leftover cauliflower potato leek soup in a container in the fridge for up to 4 days. I tend to store most of my leftovers in deli takeout containers like these.

🧂FAQ

Why is my potato leek soup gummy?

Make sure to cook the potatoes all the way through before pureeing. Also, don't go overboard pureeing the soup. It doesn't have to be perfectly smooth. If it seems too thick, thin it out with more broth.

Why is my leek and potato soup bland?

If you follow this recipe, it shouldn't be! But I have had bland leek and potato soups in restaurants, so I understand your concern. I think sometimes people just throw everything in a pot and boil it without taking the time to layer flavor by sauteing vegetables and seasoning first.

There aren't many ingredients here, so don't skip the salt, garlic, or thyme, as they add much to the flavor. Of course, taste your soup before serving and add more of those seasonings, if needed. And the worst case, if it's still bland, add a splash of acid, like vinegar, to boost the soup's flavor. Those toppings add flavor too, so definitely add a few of them if you feel something is lacking.

Is it OK to reheat leek and potato soup?

Of course! Do so in a small pot over low heat or loosely covered in the microwave until hot.

🍕 Pairing

These recipes would go great with this soup:

  • pieces of squash tartlets with apple
    Squash Tartlets
  • a delicata pizza on parchment paper
    Delicata Pizza with Ricotta and Bacon
  • a dish of beet broccoli salad with yogurt dressing
    Beet Broccoli Salad
  • a bowl of cream cheese with dill, bagels, and crackers
    Dill Cream Cheese Spread

🍲 Related

Looking for more soup recipes like this one? Try these next:

  • bowls of lentil and rice soup
    Lentil and Rice Soup
  • a bowl of soup with celery and leeks, and potatoes
    Creamy Celery Leek Soup with Croutons
  • bowls of seafood soup
    Creamy Seafood Newburg Soup
  • bowls of potato and mushroom soup
    Potato and Mushroom Soup

Ginger Rhubarb Gin Cocktail

glasses of rhubarb gin cocktail with a bottle of rhubarb juice

Looking for a refreshing and unique cocktail to try this spring? Look no further than this ginger rhubarb gin cocktail recipe. This drink is the perfect combination of sweet, sour, and spicy, making it the ideal cocktail for a warm spring or summer day.

two glasses filled with rhubarb cocktail and a bottle of rhubarb juice with limes and mint

I love it when rhubarb starts popping back up in my garden this time of year. It's a fun ingredient to experiment with, and I've tried it in everything from this rhubarb breakfast cake to rhubarb apple chutney for pork chops.

Do you have a favorite use for rhubarb? You can never go wrong with the classic combination of strawberries and rhubarb. But if you have a creative rhubarb recipe that you enjoy, I'd love to hear about it in the comments.

[feast_advanced_jump_to]

For other creative cocktail ideas, try my Pomegranate Rosemary Cocktail, Watermelon Basil Cocktail, Cherry Whiskey Sour, and Blackcurrant Mojito. But if you're not looking for alcohol, try my Blueberry Lavender Lemonade or Cranberry Orange Mocktail.

🍹Ingredients

To make this drink, you'll need just a few key ingredients.

ingredients for making a ginger rhubarb cocktail spread out on a tile background
  • Gin - Use your favorite variety, and you can't go wrong. Pictured here is the budget-friendly New Amsterdam, which has a smooth, citrusy, easy-drinking flavor. I think it works well in this cocktail. But in most instances, I enjoy Bar Hill gin, made here in Vermont, which has more fresh botanical forward notes. For another good gin cocktail recipe, try my Smoked Negroni.
  • Fresh ginger - We will make a simple syrup and use ginger to flavor it.
  • Rhubarb-Look for fresh rhubarb at your local farmers market in the spring and summer months. It's also available seasonally in most larger grocery stores. If you're lucky like me, it'll appear back in your garden each spring.
  • Limes - We'll use lime juice in the cocktail and some lime slices to garnish.
  • Sugar - For making the simple syrup.
  • Ginger beer or seltzer - To top off the cocktail. The ginger here is not essential, but I like to use it for a bit more punch to the drink. You can use a hard ginger beer (my favorite is the Extra Ginger from local Halyard Brewing, a nonalcoholic ginger beer (my favorite is Fever Tree), or a ginger-flavored seltzer, like the lime mule from Polar. If you just want to make this cocktail and don't have any of these on hand, plain seltzer is absolutely fine.
  • Mint - As a garnish (optional). Another handy perennial to have in your garden.

See the recipe card below for quantities.

📋Instructions

Once you have your ingredients, it's time to start mixing up this ginger rhubarb gin cocktail.

The two main steps that require a little prep time (and can be done hours or even a few days in advance) involve making rhubarb juice and a ginger simple syrup.

Many recipes will tell you to make a rhubarb simple syrup for a cocktail like this. It would be very easy to combine rhubarb and ginger to make syrup in one step. But I think by doing this, you lose a lot of the rhubarb flavor. Or you have to use so much syrup to get the flavor that you end up with a super sweet cocktail.

Instead, we're going to simmer the rhubarb in water, then strain out the solids. That way, we can use more of this liquid (rhubarb juice) and get a clear taste of the rhubarb. Meanwhile, we'll make a quick ginger simple syrup. Another benefit of this approach is that you can use the leftover ginger syrup to sweeten other drinks, such as iced tea or coffee.

chopped rhubarb in a pan with water

Begin by washing and chopping your rhubarb into small pieces, then placing them in a pot with water. Bring to a boil, then simmer for 10 minutes. Put in the fridge to cool.

ginger in pan with water and sugar with rhubarb and limes to the side

Meanwhile, in another small pot, combine sliced ginger with an equal amount of sugar and water. Bring to a simmer, turn off the heat, and let the ginger infuse for 10 minutes. Put in the fridge to cool.

cooked rhubarb being strained into a bowl

Strain the rhubarb and liquid through a fine mesh sieve. Discard the solids.

rhubarb-juice-strained

Store the rhubarb juice in a jar in the fridge until ready to use.

an upclose of a small bunch of mint with a lime for the garnish

Make the garnishes. Take a slice of lime and cut part way to the middle. Curve the lime in your hand and use a cocktail pick to secure some mint into the center of the curved lime.

a piece of rhubarb being stripped with a peeler to make thin ribbons for garnish

Use a peeler to slice thin ribbons of rhubarb for the garnish in the glass.

a glass with ice and strips of rhubarb

Wrap the rhubarb strips around your glass and use ice to help hold them in place.

rhubarb gin cocktail being stirred in a large jar with ice

In a large glass, stir together the gin, rhubarb juice, ginger simple syrup, and lime juice with some ice.

cocktail being strained into a glass with rhubarb and ice

Strain the cocktail into your glass and top it off with ginger beer or seltzer.

glass with rhubarb cocktail and mint lime garnish

Top with the lime and mint garnish and serve.

Hint: Make the rhubarb juice and ginger simple syrup in advance, so you have them ready for a quick cocktail at any time. Also, no need to put effort into these garnishes if you're not looking to impress. Just toss a lime wedge and a few mint leaves in the glass, and that'll do fine.

🍋Substitutions

One of the best things about this ginger rhubarb gin cocktail is that it's highly customizable.

  • Lime - instead of limes and lime juice, you can swap this for a lemon and lemon juice
  • Ginger beer - alcoholic or non-alcoholic ginger beer, as mentioned above, both work fine, as does seltzer if that's all you have

📖Variations

  • Sweeter - Use a 2:1 ratio of sugar to water when making the simple syrup
  • Spicier - Double the ginger when making the simple syrup
  • Herbier - Try a gin with a strong juniper flavor, such as Bar Hill
rhubarb ginger gin cocktail in a glass with mint and limes and rhubarb to the side

🥃Storage

The ginger simple syrup will keep for up to a month in a well-sealed container in the fridge. The rhubarb juice, on the other hand, will probably only last a week in the fridge. Though you could freeze it and use it within a few months.

💭FAQ

What flavor combinations go with rhubarb?

Citrus is a perfect complement to rhubarb, which is why I've incorporated lime juice into this recipe. Strawberries are an obvious pairing, as they balance the tartness of the rhubarb with sweetness. Ginger is an ideal addition as it provides a slight spice to the simple syrup without over-sweetening the drink. Too often, people rely solely on sweetness to mask the rhubarb's tanginess, but using ginger instead creates a more nuanced and well-rounded flavor profile.

Does ginger ale go well with rhubarb and gin?

Yes, that's a great idea. You can use it in place of ginger beer. But look for a ginger ale that isn't too sweet. Many of them are loaded with sugar, and it's just not necessary.

Wait, what's rhubarb gin?

There are gins out that come already flavored with rhubarb. That's cool, I bet they're tasty, but who needs a whole bottle? That's why I like that this recipe can use whatever gin you already have on hand or already like to buy. There are also recipes out there to make your own rhubarb gin by steeping rhubarb with gin. But that takes time and more effort if you ask me.

🍹Pairing

Any of these recipes would go great with this rhubarb cocktail:

  • strawberry homemade pop tarts on tray
    Strawberry Puff Pastry Pop Tarts
  • salmon over peas and potatoes
    Salmon with Pea Purée
  • a pan of chicken and rice with cardamom and parsley
    Cardamom Chicken and Rice
  • a plate with stuffed apple cremes covered in caramel and powdered sugar
    Baked Apple Crepes with Ricotta

🍹Related Recipes

Looking for other drink recipes like this one? Try these next:

  • glass of elderflower gin tonic with gin bottle and flowers
    Elderflower Gin and Tonic
  • glasses of lilac tea with ice, pitcher, and flowers
    Lilac Tea
  • a hand serving a cider cocktail
    Apple Cider Whiskey Cocktail
  • glasses of earl grey tea cocktail with a bottle of gin
    Earl Grey Cocktail

Roasted Carrots and Asparagus

plate of roasted asparagus and carrots with breadcrumbs and parsley

Roasted carrots and asparagus are a tasty side dish that will complement just about any meal. Even better, they're low in calories, high in nutrients, and when roasted, develop a caramelized, slightly crispy, exterior with an amazing flavor and texture.

plate of roasted carrots and asparagus with flowers

Roasted asparagus and carrots make a great flavor combo. The sweetness of the roasted carrots is balanced by the grassy flavor of the asparagus, creating a dish with a fantastic balance of sweet and savory.

Roasting also brings out the natural sugars in the vegetables that creates a beautiful caramelization on their surface, giving the dish a slightly crispy texture that is hard to resist. 

In this recipe, we'll prep the ingredients, roast the vegetables together on a sheet pan, and then toss them with some garlic and lemon breadcrumbs for an easy side that's ready in no time.

While carrots and asparagus give all the spring vibes, you can't go wrong pairing this side with any main dish that can use the addition of fresh vegetables. Try it with my chicken tagine, these pork chops, or maybe this grilled bourbon chicken dish.

[feast_advanced_jump_to]

🥕Ingredients

Carrots, perhaps one of the most common vegetables, are known for their orange color and sweet, slightly earthy flavor. They're packed with nutrients, including vitamin A, which is what makes them so good for our eyesight. Though they're also a good source of vitamin C, potassium, and fiber. I grow them in my garden every year without fail.

Asparagus, on the other hand, is a classic spring vegetable with a green, spear-like shape and a bitter flavor and tender texture. It is a good source of vitamins K and C, as well as folate. And yes, asparagus likely will make your pee smell funky. But who cares?

asparagus, carrots, lemon and other ingredients for the recipe
  • carrots
  • asparagus
  • olive oil
  • balsamic vinegar
  • kosher salt
  • breadcrumbs
  • garlic powder
  • lemon zest
  • parsley (optional)

See the recipe card below for quantities.

🔪Instructions

It doesn't take much prep time to put this recipe together.

asparagus and carrots cut up and spread out on a cutting board

Preheat oven to 400 degrees. Trim the ends of the asparagus, peel the carrots, and cut them lengthwise so they're all about the same size.

asparagus and carrots on a baking sheet lined with parchment

Line a baking sheet with parchment and spread the cut vegetables out into a single layer. Drizzle the balsamic vinegar, 1 tablespoon of olive oil, and ¼ teaspoon of salt.

a lemon being zested into a bowl

Place the baking sheet on a rack in the middle of the oven and roast for 15 minutes. Meanwhile, put the breadcrumbs in a small bowl and zest the lemon into them.

breadcrumb mixture being sprinkled over the roasted vegetables

After 15 minutes, remove the baking sheet from the oven, toss the vegetables around and sprinkle over the breadcrumbs.

Add in the garlic powder and remaining salt and olive oil. Stir to combine.

an up close look at the breadcrumbs over the vegetables

Return the pan to the oven and continue cooking another 3-6 minutes until cooked to your liking.

Note: While some browning and crisping on the vegetables is just the way it should be, you don't want the breadcrumbs to burn, so keep an eye on them in those last few minutes. You can always put the pan back in the oven if you want some more browning.

the roasted vegetables on a plate ready to serve with breadcrumbs and parsley on the side

Season the roasted vegetables with additional salt and freshly ground black pepper, to your preference. If you have it handy, sprinkle over some chopped parsley.

🥘Substitutions

There are a few ways you could adapt this recipe.

  • Leeks - Try adding thinly sliced leeks in place of or in addition to the asparagus and carrots for a fresh mild onion flavor. Roasted leeks have a fantastic flavor that would work well here.
  • Breadcrumbs - Of course, you can use gluten-free breadcrumbs, but you could also try using grated parmesan cheese instead.
  • Baby carrots - If you only have baby carrots, that's fine. Cut them into halves or quarters and the asparagus into similar-sized pieces. They probably won't need as long to cook, so start checking on the vegetables at 15 minutes instead of 20.

🧀Variations

  • Cheesy - Top the dish off with parmesan, feta, or maybe some goat cheese.
  • Smoky/Spicy- Try adding some extra spices to the breadcrumbs, such as chipotle powder, cumin, or smoked paprika.

If you're looking for sweeter carrot recipes, check out my Maple Glazed Carrots. Or for an actual sweet treat, try the Date Carrot Cake.

🥡Storage

Personally, I don't find cooked asparagus to keep well in the fridge. I recommend eating this up within a couple of days.

👨🏻‍🍳Top tip

Make sure the vegetables are all around the same size for even cooking. If you don't have the time to cut things up, look for asparagus and carrots that are already similar in thickness.

💭FAQ

Can you roast carrots and asparagus together?

Hopefully, this recipe proves that you absolutely can. Although they may not be a common pairing, as long as you keep them about the same thickness, they should roast well together at an even rate.

Do carrots and asparagus go well together?

Yes! Carrots have a bit of natural sweetness that especially comes out when roasted while asparagus has an earthy, slightly bitter taste. Together, they're the perfect balance of flavors.

Any main dish asparagus recipe ideas?

Definitely. Check out my Orange Tempeh and Asparagus.

🥩 Pairing

  • bowls of chicken curry with noodles and peanuts
    Chicken and Squash Curry
  • Red Wine Beef Stew
  • chicken meatball on a fork with noodles
    Chicken Swedish Meatballs
  • bowl of rhubarb chutney with apple slices
    Easy Rhubarb and Apple Chutney

🥕 Related Recipes

  • a dish of carrots on a blue plate with a side of honey
    Hot Honey Carrots
  • a small plate of glazed carrots with parsley
    Maple Glazed Carrots
  • cake with icing on a cutting board
    Date Carrot Cake
  • carrot drink in glass with straw
    Carrot Juice Cocktail

Baileys Eggnog

a glass of eggnog cocktail with a cinnamon stick

Try this single-serving Baileys Eggnog recipe for an incredibly quick and easy holiday cocktail with just four ingredients. Perfect for the holiday season or when you're in the mood for a bit of indulgence.

a martini glass filled with an eggnog cocktail and grated nutmeg falling down into the glass

As a kid, I knew the holiday season had arrived when a carton of eggnog appeared in my grandparents' fridge. My grandfather loved the stuff. I was all too happy to enjoy a glass of the creamy eggy beverage, but it wasn't until I was old enough to add a splash of brandy that I came to appreciate eggnog all the more. It's like alcohol and eggnog were made for each other. In fact, if you look at the origins of the drink, they were.

[feast_advanced_jump_to]

The problem is, I hate to buy a whole carton because I'm the only one who drinks eggnog in our house. While it's easy enough to make a homemade version, most recipes will have you whipping up a half gallon to serve a dozen of your friends.

An easy way to make eggnog in a flash is simply shaking up eggs with cream, milk, and sugar in a cocktail shaker. This approach is traditionally used for making an eggnog cocktail and includes a spirit such as bourbon, brandy, or rum. The result tastes a lot like eggnog (I mean, it is eggnog) without having to buy or make a whole carton.

glasses of eggnog on a tray with lights and decorations for the holidays

In this recipe, I changed the basic cocktail by making a Baileys Eggnog using Irish cream instead of other spirits. Irish cream includes whiskey and real cream, which means you already have your spirit and cream ready to go. I like adding a little cream to the cocktail to give it that fresh dairy taste. Along with the egg, an optional splash of maple syrup, and nutmeg, the result creates an extra smooth drink that's easy to sip without an overwhelming taste of alcohol.

Speaking of things that go well together, the holidays were made for cocktails, weren't they? If you're looking for other unique beverages for the holidays, or the long winter season, check out my Hot Buttered Rum and Pomegranate Rosemary Cocktail recipes. Or for alcohol-free options, try some Thai Coffee, a warm glass of Honey Citrus Mint Tea, or a festive Gingerbread Mocktail to help warm you up from the cold.

Ingredients

The nice thing about making a glass of Bailey's eggnog is that you probably already have everything you need.

placing a cinnamon stick as garnish in eggnog cocktail
  • Baileys - Baileys has all kinds of flavors out these days and feel free to experiment. I've only made this cocktail with the original Irish variety to keep the classic eggnog flavor. And of course, you can use any Irish cream. It doesn't have to be Baileys. If you want to try making yourself some dairy-free Irish cream, I've got a recipe for that, too.
  • Light Cream or Half and Half - I always have half and half on hand, so that's what I use. Half and half is commonly sold in the US for coffee and is made with equal parts cream and milk.
  • Eggs - This recipe, like many eggnog recipes and other cocktail recipes out there, includes raw eggs. I know some people have strong feelings about that and that's fine. Don't make this recipe if you have concerns. There are several cooked eggnog recipes you can try. Alton Brown's is my favorite. While there is a slight chance of bacteria, if you follow some basic best practices, you shouldn't have a problem. And as far as the texture, the drink is smooth and creamy, and you don't get any sense of raw egg. More on this below.
  • Maple Syrup - An optional addition for a bit of sweetness. I think it helps create an eggnog that's close in taste to what you can buy in the carton, which is typically sweet.
  • Nutmeg - One of the best parts of eggnog is that bit of spice, which commonly comes from nutmeg. And you can't beat freshly grated nutmeg. If you only have preground, that's fine. Just do yourself a favor and get a few whole nutmeg when you can.
  • Cinnamon stick - This is just for a festive garnish. You can certainly skip it. But again, it helps add a bit of spice scent to the drink as you sip.

See the recipe card below for quantities.

Instructions

This cocktail will take you just a few minutes to prepare. If you can shake, you can make your own Baileys eggnog.

bailey's being poured into a cocktail shaker
  1. Step 1: Measure the Irish cream and pour it into a cocktail shaker.
cream being poured into a cocktail shaker
  1. Step 2: Then add the cream or half and half.
egg yolk falling into shaker
  1. Step 3: Add in a whole egg.
cocktail shaker being shook
  1. Step 4: Put the top on and give it a good shake.
ice being poured into a shaker
  1. Step 5: Add some ice halfway up the shaker.
shaking a cocktail shaker
  1. Step 6: Shake and try not to spill, like me.
eggnog cocktail being strained into a martini glass
  1. Step 7: Strain the cocktail into a martini glass.
a cinnamon stick being added to an eggnog cocktail
  1. Step 8: And give it another good 15-second shake. Garnish with a cinnamon stick and serve.

Substitutions

Cream - You can use whole milk or your preferred milk instead of the cream or half-and-half. But honestly, it won't be as good. A certain degree of fat in the drink adds to its thick creaminess. A less-fat alternative will result in a thinner, watery cocktail.
Baileys - Any Irish cream will work in this recipe. It doesn't have to be Baileys.

Variations

  • Without alcohol, Omit the Baileys and replace it with an equal amount of cream for a standard eggnog drink.
  • With brandy - Brandy goes great with eggnog, and if you don't mind increasing the alcohol level, try adding in a ½ ounce of brandy to the other ingredients.

Equipment

Shaker - If you like to make cocktails, you already have a decent shaker and strainer in your bar kit. If not, it's worth the investment. But if you don't have either, a large mason jar with a lid and a kitchen sieve will work fine.

Top tips

  • Shake, shake, shake. For the best consistency, don't skimp on the shaking. Follow the recipe and shake before and after adding ice to your shaker to best incorporate the egg and create a creamy, delicious beverage.
  • The cocktail should be served immediately, as it tastes best when ice cold.

FAQ

Will drinking raw eggs make me sick?

I'm no health or food safety expert and I can't make any guarantees. I drank many of these as I tested my recipe and I always felt fine after. But that's me. Use your best judgment, follow suggestions for drinks with raw eggs, and if you have concerns, find another recipe.

Can I substitute something else for the raw egg?

While there are good substitutes for egg whites in cocktails, such as the aquafaba from canned chickpeas, I don't think that will work well in this particular recipe. You need the egg yolk for that eggy taste and the egg white for a bit of foam. It is eggnog after all. I haven't researched or tested egg yolk alternatives that I can recommend, but if you have one, feel free to share it in the comments below.

What alcohol goes best with eggnog?

While brandy is most traditional, I'd say it's a matter of personal preference. Since this recipe uses Baileys as part of the process of making the eggnog, it's a critical component. As mentioned above, you could also add in brandy if you wanted.

Food safety

If you haven't read the above explanation, this drink includes raw eggs. Here are some best practices when it comes to using eggs in cocktails to reduce your risk of bacteria.

Pairing

Any of these recipes would go well with this eggnog cocktail.

  • Leftover Turkey Enchiladas
  • a small plate of glazed carrots with parsley
    Maple Glazed Carrots
  • a plate of cream puffs with orange pastry cream
    Christmas Cream Puffs (With Orange & Pine)
  • a tray of sausage stuffed yorkshire puddings
    Stuffed Yorkshire Pudding

Related Recipes

If you're looking for more tasty drink recipes, try these:

  • glasses of mocktail with gingerbread
    Gingerbread Mocktail
  • two coupe glasses with cold brew martinis
    Cold Brew Martinis
  • glasses of rhubarb gin cocktail with a bottle of rhubarb juice
    Ginger Rhubarb Gin Cocktail
  • irish cream being poured into a glass with ice
    Dairy Free Irish Cream

Zucchini Curry

An easy zucchini curry dish with potatoes, chickpeas, onions, garlic, and ginger. Add this one to your summer meal rotation when you have fresh vegetables to put to use.

bowls of zucchini curry and rice with cilantro and small bowl of rice to the side

It may be the end of summer, but my zucchini plants are still going strong. So much so, that I pulled an eight-pounder off the volunteer plant growing in my compost bin. I guess we forgot to check in there the past week or so. Oops! Looks like I'm baking a dozen zucchini bread.

The key to making zucchini enjoyable is all about adding flavor. Because it has little, ok let's be honest - none - of its own. But just because zucchini has no flavor doesn't mean you shouldn't bother with it. You just have to add your own. And that's why zucchini curry came to mind. Is there anything more flavorful than a blend of spices that go into curry powder?

[feast_advanced_jump_to]

I often make curries when I have an assortment of vegetables to use up and need a quick dinner. They're easy to substitute in different ingredients once you have a good base recipe.

I like to include a few different vegetables, like potatoes, that have a bit of bite to them, and then some that soften up and meld into the sauce, like zucchini or eggplant. Others with a bit of crunch, like cauliflower or green beans, are also good. I'm pretty sure when it comes to curry, anything goes.

But if you're in need of more zucchini recipes, check out my simple stuffed zucchini, zucchini mushroom pasta, and ratatouille recipes. Just like this one, they're all about flavor.

🥔 Ingredients

Here's what you'll need to make this zucchini curry:

ingredients spread out on blue background for making zucchini curry
  • Coconut oil - for a hint of coconut flavor. Use whatever oil you have if not on hand.
  • Onion - flavor building 101.
  • Garlic - are you even cooking if you're not using garlic?
  • Ginger - fresh ginger adds that punch of flavor to this dish.
  • Curry powder - use your favorite blend, if you have one. I like this one from Penzey's.
  • Coconut milk - The stuff in cans, not the carton. Light or regular is good.
  • Broth - whichever you like, though aim for something lower in sodium if you can.
  • Potatoes - a thin-skinned variety you don't have to peel is perfect.
  • Soy sauce - I tend to buy a lower-sodium tamari. But use what you have.
  • Maple syrup - I like curry with a touch of sweetness to balance the spices.
  • Zucchini - smaller is better, but a big one works just fine.
  • Chickpeas - either canned or freshly cooked.
  • Cilantro - for a bit of fresh herb flavor. If you're not a fan, substitute parsley instead.

🥔 Substitutions

As I said, I love how easy it is to substitute vegetables in a curry. Here are a few ideas.

  • Potatoes: Try sweet potatoes or winter squash instead.
  • Zucchini: If zucchini isn't your thing, that's fine. Try an equal amount of green beans, broccoli, cauliflower, peas, carrots, eggplant, or any combo of vegetables you enjoy.
  • Chickpeas: Replace the chickpeas with an equal amount of chopped chicken or tofu.

🌶 Variations

  • Spicy: Unless your curry powder is spicy, this is a mild dish. If you want to make it spicy, though, add a little red pepper to the pot with the garlic and ginger or a few squirts of sriracha at the end of cooking.
  • Winter version: If you don't have zucchini or summer squash in winter, try using winter squash instead. It'll just take a little longer to cook. Or try this other curry recipe with delicata squash, chicken, and noodles.

See the recipe card below for the complete list of ingredients and quantities.

🔪 Instructions

Good news, if you already have some cooked rice on hand, this is a one-pot dish. Alternatively, serve this zucchini curry over noodles if you prefer that instead. Of course, you can always start some rice while you cook the curry or just serve it on its own, as it's a substantial meal as is.

a large zucchini with chopped up pieces and a chef's knife

Prep the ingredients. Roughly chop the onion and garlic. Grate the ginger. Cut the potatoes and zucchini into bite-sized chunks. Chop up the cilantro.

cooked onions with garlic and ginger in a pot

Melt the coconut oil in a large pot, then add the onion. Cook until softened, about 5 minutes.

onion cooking in a pot with coconut oil

Add the ginger and garlic and cook for another minute while stirring. Be careful not to let it burn.

curry powder being added to the pot of onions

Sprinkle in the curry powder and add a splash of coconut milk. Stir and simmer for 2 minutes.

a pot of potatoes and onions with broth

Pour in the broth, maple syrup, and soy sauce. Then, add the potatoes. Bring to a boil and cook for about 8 minutes or until the potatoes are just barely tender.

a pot with potatoes, chickpeas, zucchini, and onions cooking in coconut milk and broth

Now add in the zucchini, coconut milk, and chickpeas. Return to a simmer and cook until the potatoes and zucchini are cooked to your liking and the sauce has reduced some, about 20 minutes.

dishes of zucchini curry, cilantro and rice

Serve your curry topped with cilantro and with a side of rice or noodles.

🥘 Equipment

Dutch oven or other heavy-bottomed pot: Helpful to prevent burning and for more even cooking. I cook so many of my meals in them that they're an essential part of my kitchen.

🥡 Storage

Store leftover zucchini curry in an airtight container in the fridge for up to four days.

🌟 Helpful tips

  • The thing about curry is that it tastes even better the next day. Make enough for leftovers or if you have the time, make this a day or so ahead.
  • Curry is at its best when it has been well-salted, as it helps bring out the flavor of the spices. Before serving, give it a taste and add salt if it tasting a little flat or bland. This will depend on the saltiness of your broth and your soy sauce.

🙋FAQ

Is zucchini good in curry?

I think zucchini is excellent in curry, otherwise, I wouldn't share this recipe. Not only is there a ton of flavor here to boost the flavorless vegetable, but that soft texture zucchini gets when cooked actually beautifully melds into the curry sauce. I think incorporating other vegetables with a little chewiness (like potatoes) helps to balance that as well.

Can you use courgette in curry?

Courgette is the same thing as zucchini, just a different name. So the answer is yes. Why? See the question above.

How to cut zucchini for curry?

I like to use bite-sized slices and try to make sure the potatoes are about the same size as well. I tend to halve my zucchini lengthwise, and if it's big, cut the two halves in half again to make quarters. Then I slice up the quarters to get the bite-sized pieces. But this is cooking, it doesn't have to be perfect and you should always tweak recipes to your preferences.

Do you leave the skin on zucchini?

Yes, the skin of zucchini is edible and thin. There's no need to peel it.

🍸 Pairing

Try pairing these with this zucchini curry:

  • glasses of elderberry cordial
    Elderberry Cordial Recipe
  • dish of roasted onions with balsamic glaze
    Roasted Balsamic Onions
  • watermelon basil vodka cocktail in a martini glass with basil and watermelon garnish
    Watermelon Basil Cocktail
  • jars of quick pickle beans with garlic and dill
    Quick Green Bean Pickles

🍲 Related

Looking for more tasty recipes like this one? Try these next:

  • an egg salad sandwich on a plate
    Egg Salad with Dill Pickles
  • plate of chorizo and peans over mashed potatoes
    Beans and Chorizo with Spinach
  • plate of roasted pumpkin wedges
    Maple Roasted Pumpkin
  • a plate of kale and lentil salad with barley and eggs
    Kale Salad with Lentils

Bok Choy with Tofu Salad

a large plate of bok choy, tofu, and radishes with dressing

This bok choy with tofu salad is a stir-fry-inspired recipe that's quick to assemble with minimal cooking. It's a great vegan dish full of flavor for a warm summer evening.

a plate of salad with tofu and bok choy

When the weather heats up in summer, I like to find ways to turn salads into meals. That way, I can spend less time in a hot kitchen and more time outside, enjoying our all-too-brief Vermont summers.

[feast_advanced_jump_to]

But to keep salads interesting, you've got to have variation and creativity. Salads such as my Broiled Shrimp and Citrus Salad, Coronation Chicken Salad, Arugula and Spinach Salad with Grilled Chicken, Sweet Potato and Beet Salad, and this Pesto Pasta Salad with Sundried Tomatoes are good examples. They're all a bit different.

So, when I saw the first bok choy of the season at my local food co-op, I knew it would work well as a base for an easy salad reminiscent of an Asian-inspired stir-fry.

Bok choy is a type of Chinese cabbage. It's also known as pok choi or pak choi. But no matter what you call it, you won't find it in the shape of a typical round cabbage head. Instead, it has a white or cream-colored stalk with a cluster of stems and leaves emerging from the base.

I often enjoy making a bok choy stir fry because the leaves cook up in just a few minutes. But I've found that when you chop it up, it also works well as a base for a salad. The leaves are tender, while the stems have a bit of crunch, similar to romaine lettuce but with more character.

ingredients for making bok choy with tofu salad

🥬 Key Ingredients

  • extra firm tofu
  • olive oil
  • Bok choy: Unlike some other greens, bok choy tends to be a little sweet, with baby bok choy being even sweeter. That means it's enjoyable to eat raw in a salad without the worry of the unpleasant bitterness of other greens.
  • radishes
  • broccoli
  • dried cranberries
  • sesame seeds
ingredients for the bok choy salad dressing

For the dressing:

  • toasted sesame oil
  • maple syrup
  • fresh ginger
  • soy sauce (use tamari if you're gluten-free)

See the recipe card below for the complete list of ingredients and quantities.

🔪 Instructions

cubed tofu coated in cornstarch and ginger
tofu browning in pan for bok choy salad

Drain the water from the tofu. Cut the block into ½-inch-thick slices. If you have the time, place the slices between a couple of layers of paper towels and let them drain for 30 minutes to remove excess water. Whether you've pressed it or not, cut the tofu into cubes.

Stir together the cornstarch, ground ginger, and salt in a large bowl. Add the tofu and toss to coat in the mixture. Heat a non-stick pan over medium heat with a couple of teaspoons of olive oil. Cook the tofu for about 2-3 minutes or until browned, then toss it around and repeat to cook the other sides.

chopped vegetables for the tofu salad
dressing for the bok choy with tofu salad

Wash the produce. Then thinly slice the radishes, cut the broccoli into small pieces, and roughly chop the bok choy.

Now make the dressing. Pour the sesame oil, maple syrup, lemon juice, ginger, soy sauce, black pepper, and olive oil into a jar. Put on the lid and shake well to combine.

sesame seeds being toasted in a pan
plate of salad in process of assembling

Finally, toast the sesame seeds in the empty tofu pan over low heat for 4-5 minutes, shaking the pan often to prevent burning. Then you're ready to assemble the salad. Start with a base of bok choy, then layer on the broccoli, radishes, dried cranberries, tofu, sesame seeds, and dressing.

Tofu Tip: I used to cook my tofu in a cast-iron skillet. But no matter how much oil I used, it always seemed to stick. Then one day, I tried using my non-stick skillet, which I only use for a handful of purposes. Not only did the tofu not stick, but it also came out perfectly golden brown and crispy. I've never looked back, and cooking tofu has never been easier. Regardless of what a recipe says, this is how I typically cook it for most tofu recipes.

I know, non-stick pans have a bad rap, and there's good reason. However, there are better and safer non-stick options available these days. The Food Network has some good recommendations.

a plate of bok choy salad

🍛 Variations

  • Rice - Toss in a cup or so of cooked rice to add more substance to the salad
  • Stir Fried - Not loving this dish as a salad? Turn it into a bok choy tofu stir fry. Stir-fry the bok choy stems, radishes, and broccoli over high heat with a splash of olive oil until just tender. Make the dressing, omitting the olive oil, and then pour it into the pan with the vegetables, along with the bok choy leaves. Cook for another minute or two. Serve over rice, top with the fried tofu, sesame seeds, and cranberries, and you've turned this into a stir-fry recipe.
  • Bok Choy: If bok choy doesn't interest you or you want to change things up, try other greens such as spinach. Napa cabbage would also be a good fit, as seen in my Roasted Napa Cabbage recipe. Kale would also work, but you will want to give it a gentle massage to soften the leaves, as in my Kale Salad with Lentils.
  • Tofu: If you're not a vegetarian or vegan, or simply don't care for tofu, I think this salad would be great with sliced grilled chicken breast or thighs.

🥡 Storage

When it comes to salad leftovers, I like to store the ingredients separately, then assemble the salad and toss it with the dressing right before eating. However, you can pack this up in advance for a meal on the go without a problem. Any extra dressing can be stored in the fridge for several days.

🍹 Pairing

  • glass of elderflower gin tonic with gin bottle and flowers
    Elderflower Gin and Tonic
  • slices of toast with halloumi, jam, and pears
    Halloumi Toast with Jam and Honey Butter
  • watermelon basil vodka cocktail in a martini glass with basil and watermelon garnish
    Watermelon Basil Cocktail
  • smoothie in glass topped with mint and blackcurrants
    Blackcurrant Smoothie

🥗 Related recipes

Want more salad inspiration? Check out these recipes next:

  • Sautéed Radishes with Wild Rice and Feta
  • plates of chicken salad
    Coronation Chicken Salad


Elderflower Gin and Tonic

glass of elderflower gin tonic with gin bottle and flowers

If spring were a cocktail, it would be this elderflower gin and tonic, a refreshing mix of gin, elderflower liqueur, maple syrup, tonic, and lemon. Easy to make and even easier to sip while you enjoy spending time back out in the sun.

elderflower cocktail in middle of table with flowers and gin bottle

The trees are finally blooming in my little Vermont neighborhood, and I'm ready to get back to eating fresh foods from our garden. Recipes like my rhubarb oat breakfast cake, green pea pasta, and chamomile cookies are high on the list.

Honestly, I'm always a bit surprised that anything can survive the harsh winters here, so I'm excited to see fresh herbs and flowers popping back up, and I can't wait to find a use for them in the kitchen. Last summer, we added a few elderberry trees to our growing collection of fruit plants, and I'm happy to see they've sprouted plenty of healthy green leaves this spring.

[feast_advanced_jump_to]

🌸What is Elderflower?

Elderflowers and elderberries are part of the same plant. Both the flowers and the berries are useful in cooking and for medicinal purposes.

Maybe you've taken elderberry syrup or another elderberry product for its ability to help prevent and combat colds. The berries are super high in antioxidants. However, they are also great for making things like jam and pie. Just make sure to cook them before eating!

The flowers of the elderberry plant, on the other hand, are just as useful. Elderflower liqueur is made with these flowers, and it's excellent in cocktails. Elderflower tastes a bit more floral than the berries, and I find there's also a hint of sweetness and citrus.

Unfortunately, I won't be able to make my own elderflower liqueur quite yet. The new plants typically don't produce many flowers or fruit in their first full year, and cutting off what flowers we do get means fewer berries later on.

Fortunately, elderflower liqueur is readily available. St Germain is a popular French elderflower liqueur brand, but it's not the only one. I recently picked up a bottle of St. Elder, an American-made natural elderflower liqueur, and it's also delicious.

Other spring gin cocktail recipes you might like to try are my Ginger Rhubarb Gin or this Earl Grey Cocktail. And during the warm summer weather, try a Cherry Whiskey Sour, Elderberry Cordial, or Cucumber Gin Cocktail.

📋Ingredients

elderflower tonic cocktail with bottle of gin and lemon slices

This simple cocktail is essentially an elderflower gin and tonic. It's a refreshing, easy-to-drink cocktail that brings back the happy feeling you get when you see the first signs of life sprout back in the sunny days of spring. I've added some maple syrup and a splash of lemon juice to complement the sweet, citrus flavors of the elderflower liqueur and gin.

  • Elderflower liqueur, such as St. Elder or St. Germain, for the fresh floral notes that make this cocktail extra interesting.
  • A dry gin with fresh citrus and botanical notes. One Vermont gin you should give a try is from the St. Johnsbury Distillery. This craft distiller, located in northern Vermont, ferments, distills, bottles, and barrels all of its products on-site from scratch. I also just noticed they have an elderflower rum that I think would be perfect in place of the elderflower liqueur. For another tasty gin cocktail, try my Smoked Negroni.
  • Lemon juice, freshly squeezed.
  • Maple syrup from Vermont, of course. I love making drinks with Baird Farm syrups.
  • Tonic water to top off the drink and add some fizz.
  • Lemon slices and peel to garnish as desired.

See the recipe card below for the complete list of ingredients and quantities.

🍋Substitutions & Variations

  • Make it a mocktail. If alcohol isn't an option for you, leave out the gin and liqueur, and try using an elderflower tonic water instead. Fever-Tree elderflower tonic water is wonderful. Keep the lemon juice and maple syrup as they are.
  • Sub the tonic water - If you're not a fan of tonic water, use seltzer or club soda instead. I often use seltzer made in my Soda Stream for drinks like this.
  • Use lime in place of lemon - Lime juice and a lime wedge are a great variation to this gin and elderflower tonic.
  • Add some ginger. Ginger is another good flavor to pair with elderflower and gin. Try using ginger tonic water or add a couple of slices of fresh ginger as a garnish.

🍸Instructions

Making this gin and elderflower tonic cocktail is really just a matter of combining ingredients in a glass with ice and stirring. You can't go wrong. But here's the breakdown.

pouring gin into a cocktail mixer glass with ice

Add 1 ounce of gin to a cocktail mixing glass with ice.

pouring elderflower liqueur into cocktail mixing glass

Add 1 ounce of elderflower liqueur.

lemon juice being poured into a cocktail mixing glass with ice

Pour in the maple syrup and lemon juice.

cocktail mixing glass being stirred

Stir the glass to combine.

elderflower cocktail being strained into a glass with ice

Strain into a fresh glass with ice.

tonic water being poured into the cocktail

Top off with tonic water or seltzer.

lemon peel garnish being placed on top of elderflower cocktail

Garnish with rolled lemon peel.

elderflower cocktail being served

Serve and enjoy.

Tip: It's essential to pour the drink into a glass filled with fresh ice to prevent it from becoming diluted by the melted ice used during stirring.

🗨️FAQs

What kind of gin goes with elderflower tonic?

A clean-tasting gin without additives, like a London Dry, is a good choice. I enjoyed it with St. Johnsbury Distillery's gin. I've also enjoyed it with a gin with more botanical flavors (such as Bar Hill gin), as these complement the elderflower flavor rather well.

What goes well with elderflower?

Elderflower has a citrusy and floral flavor that goes well with many fruits (like pears, peaches, apples, and berries), honey, and herbs such as rosemary, lavender or mint.

What else can I do with elderflower liqueur?

Aside from other gin cocktails, you could also pair it with vodka, champagne, and white wine. Or add a splash of elderflower liqueur to a fruit salad or other desserts where you want to add a fresh, lightly floral taste.

✨Try this

To make this an extra elderflower-forward cocktail, try using Fever Tree's elderflower tonic water in place of regular tonic water. I mentioned it as a mocktail substitution, but I think it also works perfectly in the cocktail.

📋Pairing

Try pairing this cocktail with one of these other recipes:

  • an egg salad sandwich on a plate
    Egg Salad with Dill Pickles
  • a bowl of cream cheese with dill, bagels, and crackers
    Dill Cream Cheese Spread
  • a stack of banana buckwheat pancakes topped with blueberries
    Banana Buckwheat Pancakes with Blueberries
  • cake with icing on a cutting board
    Date Carrot Cake

📋Recipe

🍹More Drinks REcips

Looking for more drink recipes like this one? Try these next:

  • glasses of earl grey tea cocktail with a bottle of gin
    Earl Grey Cocktail
  • Easy and refreshing cucumber gin cocktail with fresh lime and thyme, perfect for summer entertaining.
    Cucumber Gin Cocktail
  • glasses of rhubarb gin cocktail with a bottle of rhubarb juice
    Ginger Rhubarb Gin Cocktail
  • cocktail with pomegranate and rosemary
    Pomegranate Rosemary Cocktail

Date Carrot Cake

cake with icing on a cutting board

A naturally sweetened date carrot cake topped with cream cheese icing. Great as a breakfast, snack, or dessert.

I love a good carrot cake, and it's been a while since I made one. So, when I looked up some recipes last week, I was surprised by how much sugar is in most carrot cakes. The first recipe I found used three cups. I thought that seemed like a lot until the next recipe I looked at included nearly six!

date carrot cake stacked with icing and walnuts

Look, I'm no health nut looking to drain the joy out of life and tell you to eat carrot sticks dipped in yogurt instead of cake. No. Eat cake. Maybe not every day, and maybe not one with six cups of sugar.

[feast_advanced_jump_to]

These sickly, sweet cake recipes inspired me to create a carrot cake recipe without sugar. Well, what I mean is a carrot cake without refined white sugar. Instead, I wanted to make a cake sweetened with the Medjool dates I kept seeing in the store and a little Vermont maple syrup since it's maple sugaring season in Vermont.

While, to some extent, sugar is sugar, more natural forms of sweeteners, such as dates and maple syrup, at least come with a few health benefits and lower glycemic indexes than refined white sugar, meaning they won't make your blood sugar won't spike if enjoyed in moderation. Learn more about Medjool dates.

For another recipe with dates, try my cinnamon overnight oats with dates.

sliced date carrot cake with icing ready for serving

And after a little experimenting, I think I got it.

I'll be the first to admit that this isn't the traditional carrot cake. But I guess that's already obvious. This cake has a looser, crumbly texture and may lean more towards the likes of banana bread than carrot cake.

I also left out the tooth-achingly sweet cream cheese frosting. But no fear. Instead, I made the world's easiest maple cream cheese icing, which does the job without all the extra sugar and butter of the usual frosting.

Since this teeters between cake and bread, it's great for breakfast, an afternoon snack, or dessert. In other words, any time of day.

🥕 Ingredients

Here's everything you need to make this easy date carrot cake.

all of the ingredients for date carrot cake on counter
  • flour
  • baking powder
  • baking soda
  • kosher salt
  • cinnamon
  • ginger
  • nutmeg
  • vegetable oil
  • pineapple
  • eggs
  • Medjool dates
  • carrots
  • walnuts
  • maple syrup
  • cream cheese

Medjool dates are large, soft dates with a creamy texture and caramel flavor. Though the outside of these dates is wrinkled and looks dry, they're a fresh fruit found in most produce departments. They break down easily in a blender (making them perfect for sweetening a smoothie) and are often used in unbaked desserts. Here are a few more ideas on how to use them.

See the recipe card below for all of the specific ingredient quantities.

🥣Instructions

To get this date carrot cake started, whisk together the dry ingredients in one large bowl.

mixing ingredients for the date carrot cake

In a second bowl, stir together the wet ingredients, including the pineapple, eggs, and oil. To incorporate the dates into the cake, you'll first need to puree them in a blender or food processor with a little water until they form a smooth paste. Then stir into the wet mixture.

Grate a couple of carrots before adding them in, along with the walnuts.

cake batter being added to the pan

Then, pour it all into a greased bread loaf pan. You could use a cake pan, though you'll likely want to lower the cooking time. I haven't tested it in anything but a bread loaf pan.

Bake the cake for 40-45 minutes at 350 degrees F until a toothpick stuck into the center comes out clean. Next, remove the cake from the oven and let it cool completely before icing.

date carrot cake cooling on rack

While the cake cools, prepare the icing.

Hint: While this icing is just two ingredients, it does take a precise mixing to avoid clumps. First, put the cream cheese in a small bowl and heat it in the microwave for 10 seconds to soften. Whisk the cream cheese until smooth, then add in the maple syrup a tablespoon at a time, whisking until incorporated after each addition.

Not heating the cream cheese or adding the maple syrup all at once will likely result in lumpy icing with a weird texture. If it doesn't look right, it's easy enough to try it again.

maple cream cheese icing being whisked in a bowl

Once the date carrot cake is cool, drizzle over the icing and enjoy.

🍍Substitutions

Walnuts- Instead of walnuts, pecans would be a good substitute

Pineapple - If you have crushed pineapple instead of chunks, that's fine. Personally, I like the chunks of pineapple within the cake.

Dairy-free - The only dairy in this cake is in the icing. Luckily, there are some good dairy-free cream cheeses out there and I think they'd work just as well.

🥡 Storage

Store the cake in the fridge, covered, for up to three days. You don't want to leave this sitting out with the cream cheese icing on it.

⏲️Top tip

The thing I always look out for when making a cake or quick bread like this is that it's properly baked. Bake it too long, and it'll be dry. But it might be raw in some areas if it's not baked long enough. So, in addition to testing for doneness with a toothpick, you can also:

1) See if the cake/bread springs back a little when pressing the top.
2) Look for some separation from the pan around the edges.

🍰More cake recipes

  • Lemon Rosemary Olive Oil Cake
  • Mulled Wine Cake
  • Rhubarb Oat Breakfast Cake
  • Caramel Pear and Cardamom Cake

Beetroot and Feta Tartlets

This tasty beetroot and feta tartlet recipe uses puff pastry and is flavored with thyme, onions, and honey. It makes a great appetizer or light meal.

beetroot feta tartlets on plates with salad

I made these beet and feta tartlets for a holiday get-together a few years ago and loved the combination of sweet, earthy beets, salty feta cheese, savory onions, and thyme.

[feast_advanced_jump_to]

Instead of waiting for another special occasion to make the recipe, I adapted it and turned it into dinner. With a salad, it's a meal. Anything becomes a meal when you add a salad on the side, right?

If you feel you need something more substantial, though, you could pair this beet tart with my Broiled Shrimp and Citrus Salad for some protein or maybe this Coronation Chicken Salad. On the other hand, other savory appetizers that can be made into a meal include my Kale and Swiss Chard Galette or Butternut and Sage Crostini. If it's beets you love, try this Sweet Potato and Beet Salad or Beet Broccoli Salad.

🧀 Ingredients

Here's everything you'll need to make these beet and feta tartlets.

ingredients for making the beetroot tart

What I like about this recipe is that there is a ton of flavor but not a ton of ingredients. However, you'll want to be sure to use quality feta. I love Maplebrook Farm feta from right here in Vermont. It's creamy, flavorful, and melts beautifully.

Most beet tart recipes use goat's cheese instead of feta. But personally, I prefer feta for its salty, briny flavor. Too often, I find that goat's cheese can overpower the other flavors in a dish.

And we wouldn't want to overpower the beets. Of course, good-quality beets are key. We're making beetroot and feta tartlets, after all. Look for beets that are firm and small to medium in size. Larger beets tend to be less tender and flavorful. But hey, if that's all you've got, go for it. For more beet recipes, check out my Mashed Beets, Sweet Potato and Beet Salad, and Beet and Broccoli Salad.

In addition to feta and beetroot, you'll need:

  • puff pastry
  • onions
  • walnuts
  • honey
  • dried thyme
  • balsamic vinegar

See the recipe card below for a complete list of ingredients and measurements.

🔪 Instructions

Start off this recipe by thinly slicing the onions and cooking them in olive oil. These aren't full-on caramelized onions, but they're pretty close. That means they will need as much time as possible to cook to reach that near jam-like consistency. I could eat them on plain toast, they're that good.

cooking onions to almost caramelized consistency

Next, peel and cut up those beets because we will give them a quick steam. Your hands may turn red while peeling, but you'll live.

peeled and chopped beets for the beetroot and feta tartlets

Many recipes suggest roasting the beets before you put them on the tart. While I love roasted beets, roasting takes a bit of time. And isn't it odd to roast the beets a second time while they cook on the tart? I don't know about you, but I have other things to do than double-roast my beets.

So we'll put the beets in a steamer basket and let them steam for about 15 minutes until tender. They'll finish cooking right on top of the tart.

Tip: Use a sharp knife when slicing beets. It makes the job much easier.

Meanwhile, cut up your feta. I like to do small cubes about the same size as the beets. Give the walnuts a quick chop while you're at it. About now, you'll want to stir those onions, add some salt, and put the cover on to keep cooking. Toward the end, you'll flavor them with a splash of balsamic vinegar.

puff pastry cut into squares to make the beetroot and feta tartlets

After the onions have cooked for about 30 minutes and the beets have steamed for 15, you're about ready to assemble the tarts.

Cut the puff pastry into squares. A typical box has two sheets, and I get six squares from each sheet. I don't bother to roll these out at all. Brush the squares with some melted butter, and then start topping.

onions spread out on the tartlets
beets added to the tarts
feta added to the tarts
beetroot and feta tartlets on a pan ready for baking

Layer on the onions, then the beets, then the feta, and finally the walnuts, thyme, honey, and pepper. They're now ready for the oven.

the baked beet and feta tarts fresh out of the oven

After 15 minutes in a 400-degree oven, they're ready to eat. Enjoy!

Looking for other recipes with cheese on bread? Try my Halloumi Toast and Squash Tartlets.

🌿 Substitutions

  • Puff pastry: Instead of puff pastry, you could use a basic pie dough rolled into a similar shape and size, but I don't suggest using phyllo dough.
  • Feta: Use goat cheese instead of feta if that's your kind of thing
  • Instead of thyme: Try dried dill, cilantro, mint, or basil to change the flavor.

🥡 Storage

Leftover beetroot and feta tartlets can be stored in the fridge for up to three days. Reheat in the oven until hot before serving.

🤔 FAQs

How do I make these beet tarts into an appetizer?

The recipe aims for 12 squares, with 2 per person as a meal-sized portion. To make them more appetizer-friendly, simply cut the squares in half diagonally for 24 pieces.

Can I make these tartlets ahead?

Yes! You can prepare everything a day or two before the baking step. But I'd wait to bake until you're about ready to serve.

Can't I just cut the tart up after baking?

You could. But I don't suggest you do. I've tried that approach, and the beets and other toppings fell off in the process. It also didn't look as nice.

What the heck is beetroot?

It's the same as what we call a beet in America. Beetroot is the name more commonly used in England, which is where I like to imagine living. The Lake District, Cotswolds, or Cornwall would all do in case anyone reading wants to invite me for an extended vacation. Happy to cook for you in exchange.

🍲 Pairing

  • leek potato cauliflower soup in bowl
    Cauliflower Potato Leek Soup
  • bowls of lentil and rice soup
    Lentil and Rice Soup
  • bowl of butternut chicken soup
    Butternut Squash Chicken Soup
  • plates of chicken salad
    Coronation Chicken Salad

🥪 Related Recipes

  • pieces of squash tartlets with apple
    Squash Tartlets
  • a delicata pizza on parchment paper
    Delicata Pizza with Ricotta and Bacon
  • cheese scones on plate with chives
    Easy Cheese and Chive Scones
  • a tray of sausage stuffed yorkshire puddings
    Stuffed Yorkshire Pudding

Creamy Bacon Corn Pasta

An easy and creamy bacon corn pasta recipe made with white beans, parmesan, and corn. It's a delightful and quick weeknight dinner made with common pantry ingredients.

bowl of creamy corn pasta topped with bacon and cheese

At the end of nearly every summer, my wife and I buy a bushel of corn from a local Vermont farm. Have you ever bought anything by the bushel before? It's fun and you can often get a good deal by buying a greater quantity.

A bushel ends up being about 50 or so ears of corn. The folks at Grabowski Farm load up a sack for us at the farmers market and I drag it over to the car to bring home.

[feast_advanced_jump_to]

No, we don't have a big barbecue with 50 friends. Instead, we blanch the cobs in boiling water, slice off the corn kernels, divide them into two cup portions and freeze in air-tight bags.

It may sound like a lot of work, but it only takes us a couple of hours or so and it's entirely worth the effort knowing that we have such good corn tucked away for months to come. We freeze other vegetables and fruits throughout the year and stock the chest freezer for these dreary winter months.

I'm convinced that the chest freezer is one of the best investments we ever made. If you garden or want to enjoy fresh local produce year-round, it's worth getting yourself one. Freezing is quicker and easier than canning and pickling.

Somehow, I've never posted a corn recipe on the blog. Not sure how that's possible. Though, we most often use corn for simple side dishes, add it to cornbread or make corn chowder. Nothing interesting enough to write about, really.

I love corn chowder, but all the cream and milk is a bit much to have it part of our regular meal rotation. For this recipe, I wanted to take some of the flavors of chowder and see if they would work with pasta.

I wasn't expecting much, but it was so good I made it again just a few days later. It's creamy without all the dairy (aside from a little Parmesan) and it's such a simple and filling meal.

🌽 Ingredients

Although this creamy corn pasta is mostly made with pantry staples, it feels richer and even a bit fancier than the effort and ingredients that go into making it.

the ingredients for this creamy corn pasta recipe

Here's what you'll need:

  • bacon
  • pasta
  • onion
  • garlic
  • dried thyme
  • dried oregano
  • red pepper flakes
  • white beans
  • fresh or frozen corn
  • vegetable broth
  • Parmesan cheese
  • fresh parsley

A noodle like fettuccine or linguine works well here, but use whatever you prefer. Canned beans are fine, or if you have the extra time, you can certainly cook dried beans in advance.

See the recipe card below for the full list of ingredients and quantities.

🍲 How to make Bacon Corn Pasta

The first step is to chop and cook the bacon. As it cooks, it releases fat, which we'll use in place of oil or butter while also benefitting from its savory flavor. Meanwhile, start a pot of salted water to boil, then cook the pasta according to the package directions.

bacon cooking in pot for creamy corn pasta

Once the bacon is crispy, remove it from the pan with a slotted spoon, leaving the fat behind. Add the onions, garlic, and spices. Saute these for 7 minutes or so until tender. Then pour in the broth.

onions cooking in a pot
broth being added to the onions

Bring the liquid to a simmer and stir in the beans and corn.

beans and corn in a pot with broth

Hint: For extra creaminess, (kind of the whole appeal of this creamy corn pasta recipe) I like to grab a potato masher and mash up the beans and corn a little. I think it helps add some extra substance to the sauce.

Allow everything to simmer for 5 minutes or until everything is heated through and the liquid has reduced. Then stir in the Parmesan, pasta and parsley.

a large pot of the creamy corn pasta ready to eat

Use tongs to toss everything together and let cook another couple of minutes to coat the pasta in the sauce. When done, serve topped with the bacon and additional parsley and cheese.

🍝 Substitutions & Variations

  • White beans - I use Great Northern Beans, a type of large white bean, in this recipe. They break down easily and help add to the creaminess of the dish. Though you could also try chickpeas and navy beans.
  • Pasta - As I mentioned, you can use whatever kind of pasta you prefer, but I think it's best with a flat noodle that the light sauce can easily coat.
  • Red pepper flakes - I only suggest a ⅛ teaspoon of pepper flakes, which I find adds just a hint of spice. Add more to make it spicier or leave them out all together.
  • Herbs - For a more summery flavor profile, swap the parsley in this creamy corn pasta with basil. Cilantro and dill could also work well.

If you try any of these variations, leave a comment below to let others know how it turned out.

🥡 Storage

Store any leftovers in an airtight container in the fridge for up to three days. The creamy corn pasta will thicken up and get less creamy in the fridge, so add a little water to thin out the sauce when reheating. Better yet, if you know you'll have leftovers, save a cup of the pasta cooking water and use that for reheating.

🍜 More pasta recipes to try

  • Zucchini Mushroom Pasta
  • Creamy Garlic Parmesan Chicken Pasta
  • Pumpkin Pasta with Sage and Sausage
  • Green Pea Pasta with Mint

Honey Citrus Mint Tea

a glass mug of citrus tea being poured from a tea pot

Cozy up with a cup of honey citrus mint tea-a soothing blend of fresh citrus, cooling mint, and a bit of honey for sweetness. It's a bright and warm tea that's great for cold winter days.

citrus tea being poured into a glass mug

Tea is one of many things that helps me get through long Vermont winters. It might sound boring, but a warm mug of flavorful tea on a grey winter's day is a welcome comfort in the bitter cold.

My wife and I enjoy trying out the different tea blends from my local tea shop, Loose Loona. But with mint, lemon balm, chamomile, and several other herbs and flowers in the garden, I like to dry some of them for winter to make our own creations. This tea is one of them.

Although simple, it's inspired by a popular Starbucks beverage, formerly and unofficially called the Medicine Ball. It's officially on the menu these days, though. I don't often order tea out because making a decent cup at home is so easy.

🫖 Why I love this tea

  1. It's better than Starbucks. With better ingredients, you can make this tea at home and save yourself some money. Theirs is made with lemonade, while this recipe uses fresh lemon juice. My version is lower in sugar and calories, too.
  2. It's a welcome burst of freshness. It's bright and a bit punchy, and I bet it would feel good if you're congested. That's probably why people call it the medicine ball at Starbucks.
  3. It's so freakin easy to make. Honestly, it's tea with citrus and honey. Anyone can make this.

Want more drink recipes? Of course you do. Try these:

  • Mint Julep Mocktail
  • Lilac Tea
  • Frozen Matcha Latte
  • Hot Buttered Rum
  • Blueberry Lavender Lemonade
[feast_advanced_jump_to]

🍯 Ingredients

Here's everything you need to make mint tea with honey and citrus.

tea, honey, oranges, and lemons for making the tea
  • Dried mint or mint tea: You can use either dried mint leaves or a mint tea blend. If you grow mint in your garden, it's excellent for making tea. Leave the sprigs in a warm spot for a few days or hang them somewhere dark until completely dry. Then, roughly crumble them and store them in an airtight jar. Mint tea blends are good here, too. I often use a Moroccan mint tea that combines green tea with mint.
  • Honey: Opt for local honey when possible. It's said to have the most benefits.
  • Orange: You'll need one orange for this tea. Since we're using the zest, I prefer to use organic.
  • Lemon: You'll need two lemons-one for juicing and one for slicing. Look for firm, but not too firm, and heavyish lemons, as they'll contain the most juice.

Check out the recipe card below for the complete list of ingredients and quantities.

🧋 Substitutions & Variations

Make your cup of tea however you see fit. Here are a few ideas to change it up:

  • Iced: This tea is excellent iced. After stirring in the honey, allow it to cool briefly, then pour it over ice in a glass. Or store it in the fridge to chill before serving.
  • Make it with green tea: When I don't have dried mint handy, I like to make this with a blend of green and mint tea I get at my local co-op.
  • Swap the orange and lemon. Use orange juice and lemon zest.
  • Hot Toddy: This tea is ideal for a hot toddy. Just stir in a splash of whiskey before serving.
  • Add some spice. Add a couple of slices of fresh ginger root to your glass.
  • How to make with fresh mint: Use 5-6 large leaves per serving.

🔪 Instructions

Making this tea is easy. Here's how:

orange being zested with sliced lemons on a cutting board
  1. Step 1: Zest one orange and juice one lemon. Then, slice the orange and the second lemon into rounds.
orange zest being added to mint tea
  1. Step 2: Combine the orange zest and mint in a tea infuser or tea pot.
hot water being poured into a tea pot
  1. Step 3: Pour over hot water.
honey dripping into a mug
  1. Step 4: Add honey and lemon juice to your mugs.
cittrus mint tea being poured into a glass
  1. Step 5: Pour the tea and stir to dissolve the honey.
citrus tea in a mug with orange garnish
  1. Step 6: Garnish with orange and lemon slices and serve.

✨ Helpful Tips

  • Let your boiling water briefly cool before pouring over the mint.
  • Don't steep for more than 7 minutes or the tea will be bitter.
  • Add more honey if you like a sweeter tea.

🙋🏻‍♂️ FAQ

What is honey citrus mint tea good for?

It's good for enjoying on a cold day when you need something fresh and bright to warm you up. Is it some miracle cure for the cold? Of course not. But citrus and honey are never a bad idea when you're not feeling so good.

Is honey citrus mint tea the medicine ball?

Starbucks used to make a tea drink called the medicine ball with a combination of chamomile and mint tea with lemonade and honey. Is this recipe the same thing? No. But it's close. You could always mix some dried chamomile in with your dried mint before steeping if you want to get closer to Starbuck's drink.

Is honey citrus mint tea healthy?

It's tea with lemon juice and mint, along with some honey. I consider that healthy, but healthy is a vague term. See the nutritional information on the recipe card for the details and decide if it sounds healthy to you.

🍪 Pairing

These sweet treats would pair beautifully with this tea:

  • a plate of chamomile cookies with flowers on side
    Chamomile Cookies
  • a serving plate full of muffins with apples
    Apple Rhubarb Muffins
  • scones on a cooling rack with blackberries
    Blackberry Scones
  • three fig bars with crumbs and figs
    Homemade Fig Bars Recipe

☕ Related Recipes

Looking for other recipes like this tea? Try these next:

  • glasses of earl grey tea cocktail with a bottle of gin
    Earl Grey Cocktail
  • glasses of elderberry cordial
    Elderberry Cordial Recipe
  • a glass of frozen matcha latte on a countertop with straw
    Frozen Matcha Latte
  • glasses of lilac tea with ice, pitcher, and flowers
    Lilac Tea

Limoncello Biscotti

biscotti on a plate with lemons and icing

These crunchy limoncello biscotti, made with limoncello and fresh lemon zest, are a satisfying combination of sweet and tart. Adding hazelnuts gives them extra crunch, making these Italian cookies the perfect snack for an afternoon coffee or tea.

a plate of biscotti on a cutting board with lemons and icing

Biscotti is my kind of cookie. Is there another that crunches so beautifully? I don't think so. Another that pairs so perfectly with a cup of hot tea or latte? Definitely not. I'm not a fan of soft, cakey cookies. Every cookie should have at least a little crunch if you ask me.

It's the double baking that gives the cookies that extra crunch. First, they're baked as a large piece of dough, then sliced into individual biscotti, and then given a second bake.

The word biscotto originated from the Medieval Latin word "biscoctus," meaning "twice cooked." However, today in Italy, biscotti refers to any cookie or biscuit.

😍 Why you'll love these biscotti

  1. If you love lemon, these are the biscotti for you. They have the prominent and refreshing taste of lemons, and the limoncello icing takes them to the next level.
  2. These biscotti are great for sharing. Their longer shelf life makes these good for traveling, shipping, and making ahead.
  3. You can customize the recipe to make other flavored biscotti. Try it with other liqueurs, such as amaretto, frangelico, Chambord, or cointreau.
[feast_advanced_jump_to]

Looking for more lemon flavored recipes? Then check out:

  • Lemon Balm Lemonade
  • Lemon Rosemary Olive Oil Cake
  • Blueberry Lavender Lemonade

For another perfectly crispy and tasty cookies, try my Salted Maple Oatmeal Cookies.

🍋 Ingredients

Everything you need to make these limoncello biscotti.

all of the ingredients for making limoncello biscotti

Key Ingredients

  • Limoncello: Limoncello is an Italian liqueur made with a neutral-tasting alcohol, such as vodka, infused with lemon zest for an intense but pleasant, lemony flavor. You can find limoncello at your local liquor store. There's no need for anything high-end for this recipe, but if you plan to drink it as well, get something decent. Or you can try making some of your own. Homemade limoncello is a great gift and would go great with a plate of these limoncello biscotti during the holidays.
  • Lemon zest: For some extra lemon zing in the cookies.
  • Hazelnuts: These add a nutty crunch to the cookies, and hazelnut is another classic Italian ingredient that pairs really nicely with lemon.
  • Powdered sugar: This is used to make the limoncello icing. Omit if you don't want icing.

See the recipe card below for the complete list of ingredients and quantities.

Hesitant about using limoncello? Don't worry, the flavor in the biscotti doesn't taste like alcohol. However, you should probably enjoy the taste of lemon. And if you want a little more punch, you can make the optional limoncello icing for the complete limoncello experience. 

🍒 Substitutions & Variations

  • Alcohol-free version: If you don't want to use limoncello in your biscotti, you can substitute an equal amount of lemon juice for both the biscotti and the icing. They will have a milder flavor, so add some extra lemon zest to compensate.
  • With other nuts: Almonds and pistachios would also work well. Or you can omit nuts altogether.
  • Add dried fruit: Toss up to ½ cup of dried fruit, such as cherries or cranberries, into the batter with the hazelnuts.
  • Experiment with other flavored liqueurs: Replace the limoncello with another liqueur of your choosing. Omit the lemon zest and choose a complimentary nut or dried fruit.

📋 Instructions

Here's how to make these biscotti.

butter and sugar in a mixer
  1. Step 1: Mix the butter and sugar until well combined.
batter in a mixer
  1. Step 2: Add the eggs, one at a time, until incorporated. The batter should be lightly and fluffy. Scrape down the bowl with a spatula as needed.
limoncello being poured into mixer
  1. Step 3: Add the limoncello, lemon zest, salt, and baking soda.
flour being poured into biscotti batter
  1. Step 4: Slowly add the flour to the mixer at low speed, allowing the flour to be mixed in before adding more.
hazelnuts being poured into mixer
  1. Step 5: Add the hazelnuts and stir the dough until incorporated.
dough being shaped into biscotti for baking
  1. Step 6: Dump the dough onto a floured surface, divide it into two pieces, and shape each into an 8x4 inch rectangle.
tray of unbaked biscotti
  1. Step 7: Place the two pieces of dough on a parchment-lined baking sheet and bake for 25 - 30 minutes until firm to the touch and lightly golden.
baked biscotti being sliced
  1. Step 8: Let the biscotti cool for about 10 minutes, then use a serrated knife (like a bread knife) to slice the dough into ½-inch pieces.
a baking sheet full of limoncello biscotti
  1. Step 9: Return the biscotti to the oven to bake for another 25 - 30 minutes.
icing being drizzled over biscotti
  1. Step 10: Dip the biscotti in the icing or drizzle over top.

🔪 Top tips

  • The dough is going to be soft at first. You want to add enough flour to keep it soft, but not sticky. So if it's sticky when shaping the dough, pat it with a little more flour until it's smooth and easy to handle.
  • When cutting the biscotti dough after the first bake, cut the cookies at a slight angle to create larger pieces with the classic look and shape.

🫙 Storage

Store completely cooled biscotti in an airtight container at room temperature. They will keep for about two weeks. Biscotti without icing will keep for an extra week.

🙋🏽‍♀️ FAQ

What kind of alcohol is in limoncello?

Limoncello, originating from southern Italy, is made from a neutral grain alcohol or high-proof vodka infused with lemon zest that is then sweetened. The tangy, strongly lemon flavored infusion is great enjoyed chilled as an after dinner drink or for flavoring desserts.

What is limoncello biscotto?

Limoncello biscotti is a type of crunchy Italian cookie that is flavored with the Italian digestif known as limoncello.

Are you supposed to dip your biscotti in coffee?

You should enjoy your biscotti however you like. That said, biscotti is great for dipping in coffee or tea because it is extra firm and crispy and holds up well for dipping.

Should I chill biscotti before baking?

I've never found a need to chill biscotti dough before baking. The dough does not tend to spread like other cookies.

Should limoncello be kept in the fridge?

Limoncello does not require refridgeration, however, it is best enjoyed cold, so storing it in the fridge or freezer makes sense if you're planning to drink it soon.

🫖 Pairing

  • a glass mug of citrus tea being poured from a tea pot
    Honey Citrus Mint Tea
  • glasses of lavender lemonade with blueberries and lemon slices
    Blueberry Lavender Lemonade
  • a large glass of thai coffee with ice
    Thai Coffee
  • glasses of mocktail with gingerbread
    Gingerbread Mocktail

🍪 Related Recipes

  • a plate of chamomile cookies with flowers on side
    Chamomile Cookies
  • raspberry jam with rugelach cookies
    Raspberry Rugelach
  • cookies on a blue and green background
    Ginger Cookies With Fresh Ginger
  • three fig bars with crumbs and figs
    Homemade Fig Bars Recipe

Instant Pot Red Cabbage with Apples

a serving dish on a wooden table filled with cabbage, apples, and walnuts

Tangy, lightly sweet, and ready in under 30 minutes, this Instant Pot Red Cabbage with Apples is a vibrant side that pairs with everything from weeknight dinners to holiday feasts.

a serving dish filled with cooked red cabbage, apples, and walnuts

For the longest time, I made braised cabbage on the stove, often with a splash of hard cider and a few juniper berries for added flavor. It was simple enough, but I wanted to make it even easier by using my Instant Pot.

Cooking the cabbage in a pressure cooker takes just minutes, without requiring any attention. Then, after the cabbage is done, I use the Instant Pot to give the apples a quick sauté until they are golden and tender. I top it off with chopped walnuts, and it's ready to go.

[feast_advanced_jump_to]

This version has become a go-to side dish through the fall and winter - quick, colorful, and perfect alongside just about anything.

😍 Why You'll Love this red cabbage recipe

  1. The Instant Pot does all the work for you.
  2. It's bright and festive for everything from weeknights to holidays.
  3. It's savory yet has a touch of sweetness.

I think vegetable side dishes shouldn't be an afterthought. If you feel the same, you'll also want to try my recipes for Roasted Carrots and Asparagus, Maple Glazed Carrots, and Honey Sriracha Brussels Sprouts. Or for other great cabbage dishes, try my Roasted Napa Cabbage and Stuffed Cabbage Rolls (Polish Golumpki).

🍏 Ingredients

ingredients for making the cabbage on a dark wooden table

Key Ingredients

  • Red cabbage: Although red cabbage cooks just like green cabbage, it contains more vitamins, and its vibrant color enhances the dish's visual appeal. Look for a cabbage that weighs around 1.5 to 2 pounds or use just a portion of a larger one.
  • Apples: I prefer using a firm, semi-sweet apple for this recipe that will retain its shape during cooking. You only need a couple of apples, but you can also leave them out and enjoy the cabbage on its own.
  • Onion: A sliced onion adds savory, aromatic flavor to the dish.
  • Juniper berries: Juniper berries are a traditional pairing with cabbage in German cuisine. Their piney, citrus flavor balances the earthy sweetness. Be sure to crush them with the side of a knife to help release their flavor. If you don't have juniper berries handy, try substituting a cinnamon stick, allspice berries, or whole cloves.
  • Apple cider vinegar: Cooking the red cabbage with a bit of vinegar not only adds flavor, but it also helps it retain its vibrant color during cooking. White vinegar or wine vinegar may also be used.
  • Walnuts: I like to finish off the dish with chopped walnuts for a little crunch. Feel free to leave out.

Check out the recipe card below for the complete list of ingredients and quantities.

🥬 Substitutions & Variations

  • Green cabbage: Instead of red cabbage, you can use green cabbage. Green cabbage will taste the same, but the dish won't be as visually appealing.
  • Nuts: Try chopped cashews, almonds, peanuts, or sunflower seeds in place of walnuts.
  • With herbs: For an even more flavorful dish, add chopped rosemary or thyme to the cabbage during cooking. You can also finish the dish off with a little chopped parsley.
  • With beer or cider: Instead of broth, try using hard cider for a fruity depth that complements the apples, or a beer for a deeper, malty flavor. Make sure they are beverages you enjoy the taste of and would actually drink.

🔪 Instructions

thecore of a red cabbage being cut out with a knife
  1. Step 1: Halve the cabbage and cut out the core.
the core of red cabbage being removed
  1. Step 2: Pull out the core of the cabbage.
red cabbage being sliced on a cutting board
  1. Step 3: Cut each half in half again, then roughly slice. Chunks of cabbage are fine. Then slice the onion.
onions, cabbage, and broth being added to instant pot
  1. Step 4: Put the cabbage and onion in the instant pot. Add the broth, vinegar, salt, and juniper berries. Place the lid on the pot and set it to 8 minutes in manual mode.
apples being peeled and sliced
  1. Step 5: While the cabbage cooks, peel and slice the apple.
red cabbage being transferred to serving dish
  1. Step 6: When the cabbage is done, remove it from the pot and place it in a serving dish.
apples being sauteed in instant pot
  1. Step 7: Set the Instant Pot to saute and add the butter. When melted, add the apple and cook for 3-4 minutes until softened.
walnuts being poured over a dish of cabbage and apples
  1. Step 8: Place the cooked apples on top of the cabbage. Top with the walnuts and serve.

🙋🏻‍♂️ FAQ

Do I need an Instant Pot to make this recipe?

The short answer is no. You can follow the same basic directions using any brand of modern electric pressure cooker. Just use the equivalent settings.

Can I make this red cabbage on the stove, instead?

Yes. Just braise the cabbage, onion, broth, vinegar, and spices in a covered pot on the stove for about 30 minutes or until tender, then sauté the apples in a separate pan and combine as described.

How do you cook red cabbage in a pressure cooker?

🍲Equipment

Instant Pot: In case it's not obvious, this recipe was specifically created and tested for use with an Instant Pot pressure cooker. I haven't tried it with other pressure cookers, so I can't say for sure, but I imagine the cooking time and method would be similar.

🥡 Storage

Fridge: Store leftover cabbage and apples in a sealed container in the refrigerator for up to four days. I don't recommend freezing leftovers of this dish.
Reheat: In a pan over low heat on the stove or in the microwave until warm.

🥗 What to serve with Red cabbage

  • chicken meatball on a fork with noodles
    Chicken Swedish Meatballs
  • bowl of cranberry sauce with orange
    Cranberry Sauce with Mandarin Orange
  • plate of grilled chicken with bourbon BBQ sauce
    Grilled Bourbon Chicken
  • a hand serving a cider cocktail
    Apple Cider Whiskey Cocktail

🥕 More vegetable side dishes

If you like this recipe, try these next:

  • a dish of carrots on a blue plate with a side of honey
    Hot Honey Carrots
  • a plate of colorful roasted leeks and potatoes
    Roasted Potatoes and Leeks
  • dish of roasted onions with balsamic glaze
    Roasted Balsamic Onions
  • a bowl of mashed beets with butter and thyme
    Mashed Beets

Pomegranate Rosemary Cocktail

cocktail with pomegranate and rosemary

This pomegranate rosemary cocktail, made with fresh pomegranate juice, gin, and rosemary simple syrup, has a festive spirit and a unique blend of fruity, sweet, and herbal flavors.

glass of pomegranate gin cocktail with rosemary sprig and arils

Did you know those red jewels you see when you open a pomegranate are not just seeds? Although everyone refers to them as seeds, they are actually tiny pouches of pulp. The pouches are called arils, and the seeds are inside them, surrounded by the juicy pulp.

Pomegranate juice is made by pressing or blending the arils of the pomegranate. The result is a beautiful blend of sweet and tart flavors, serving as a delicious base for cocktails.

[feast_advanced_jump_to]

😍 Why you'll love this cocktail

  1. It makes a festive beverage for the holiday season. The bright red of the cocktail and the green rosemary garnish couldn't be more fitting.
  2. Making a batch of these cocktails in advance for a get-together is easy. See my note below on how to do it.
  3. You'll have plenty of leftover rosemary simple syrup. Use it to make more cocktails or to flavor coffee, hot chocolate, or tea. Or add it to other cocktails like this Smoked Negroni.

I love creating drinks and food that are unique to each season throughout the year, but the holiday season is one of the most enjoyable times to share with friends and family. For more festive holiday recipes, check out these:

 🎄 More Festive Recipes

  • Hot Buttered Rum
  • Apple Cider Bourbon Cocktail
  • Cranberry White Chocolate Tart
  • Red Wine Cupcakes
  • Christmas Cream Puffs

🌿 Ingredients

Here's what you'll need to make this cocktail:

bottles of ingredients for the cocktail
  • Pomegranate juice: This bold and tart ruby red juice can be acquired from fresh pomegranate, or you can buy a bottle of the juice and skip dealing with the whole fruit. (Here's one easy way to obtain the juice from the pomegranate without event cutting one open!) You can find pomegranate juice in the produce department of most grocery stores, and you can often find arils nearby in containers. I've also seen bottles of shelf-stable juice located with the other juices in the grocery store.
  • Sugar and rosemary: For making an easy rosemary simple syrup.
  • Fresh Rosemary: Additional rosemary sprigs to garnish the cocktail.
  • Gin: The piney juniper notes of gin pair well with the rosemary and pomegranate. One of my favorite gins is from Barr Hill that's made here in Vermont.
  • Orange Liqueur: Such as or Triple Sec.
  • Pomegranate (optional): If you want to make your own juice or add a few of the arils to your cocktail, pick up a pomegranate when in season in late fall and early winter. See the note and photos below for tips on how to cut easily cut open a pomegranate.

See the recipe card below for the complete list of ingredients and quantities.

🔪 How to cut a pomegranate

I admit I did not know how to cut open a pomegranate until recently. The couple of times I had tried in the past were a mess, and my counter looked like a murder scene-that juice sure stains. I finally learned the easiest way to cut one open. Here's how.

a pomegranate on a cutting board with the top sliced off
  1. Step 1: Thinly slice off the top of the pomegranate to expose the top of the arils.
a pomegranate cut into sections
  1. Step 2: Run your knife through the gap between each section of the arils.
pulling a pomegranate apart into sections
  1. Step 3: Use your hands to gently pull apart each of the sections you loosened with your knife.
pieces of pomegranate on a cutting board
  1. Step 4: Scoop out the arils from each section.

Pomegranate arils are a colorful addition to foods this time of year, especially desserts. You can add them to oatmeal or yogurt, toss them into a salad, or use them as a garnish for soups or vegetable dishes.

🫐 Substitutions & Variations

  • Make it fizzy: For a pomegranate gin fizz cocktail, top the cocktail off with a bit of club soda or other bubbly water.
  • Cranberry juice: A comparable replacement for pomegranate juice if that's not easy to find at your local store. Try to find some without added sugar. In other words, it's not a cranberry cocktail because that's not a cocktail; it's just added sugar.
  • Vodka: Instead of gin, try vodka. The result should still be enjoyable, if not a little less flavorful.
  • Thyme: Substitute thyme for rosemary to create another unique herby cocktail. It works beautifully in my Cucumber Gin Cocktail.

🧊 Instructions

small pot with rosemary and sugar
  1. Step 1: Add 1 cup of water, 1 cup of sugar, and the rosemary sprigs to a small pot. Stir to dissolve the sugar as the water heats and simmer for 10 minutes. Turn off the heat and allow to cool before removing the rosemary.
ice being poured into a cocktail shaker
  1. Step 2: Add ice to a cocktail shaker.
gin being poured into a cocktail shaker
  1. Step 3: Add the gin, pomegranate juice, orange liqueur, and rosemary simple syrup to the shaker.
cocktail shaker being shaken
  1. Step 4: Shake well for about 15 seconds.
cocktail being strained into a glass
  1. Step 5: Strain the pomegranate cocktail into a glass.
a sprig of rosemary being added to the drink
  1. Step 6: Add a heaping scoop of ice to the glass and garnish with a spring of rosemary and pomegranate arils, if using.

✨ Top Tips

  1. You need fresh rosemary for this cocktail. Do not attempt to replace it with dried.
  2. Make the simple syrup in advance. You need to give it time to cool and steep.
  3. The pomegranate seeds make a fun addition to the cocktail. But keep in mind that they won't float. You can rest them atop the ice at first, and they can be enjoyed at the end of the drink as a fun bonus.

🥛 Equipment

Cocktail shaker: Handy for shaking up cocktails like this one.

🌿 How to store rosemary simple syrup

The rosemary simple syrup can be stored in an airtight container in the fridge for up to a month. It can also be used to make additional cocktails and to flavor coffee, tea, lemonade, or hot chocolate. Add it to this cold brew martini and an apple cider whiskey cocktail.

🙋🏻‍♂️ FAQ

What pairs well with pomegranate juice?

Pomegranate pairs well with citrus, apple, rosemary, thyme, cumin, cinnamon, oregano, ginger, honey, and vanilla, to name just a few.

Is pomegranate good for cocktails?

Pomegranate is great for cocktails. Its sweet and mildly tart flavor pairs wonderfully with several liquors and added flavorings.

What alcohol goes well with rosemary?

Rosemary pairs well with many kinds of alcohol, including gin, whiskey, and vodka.

🍕 Pairing

Any of these recipes would go great with this cocktail.

  • raspberry jam with rugelach cookies
    Raspberry Rugelach
  • a delicata pizza on parchment paper
    Delicata Pizza with Ricotta and Bacon
  • cornmeal pudding dessert served at table
    Sweet Coconut Cornmeal Pudding
  • pieces of squash tartlets with apple
    Squash Tartlets

🍷 Related Recipes

For more drink recipes, try these next:

  • glasses of mocktail with gingerbread
    Gingerbread Mocktail
  • two coupe glasses with cold brew martinis
    Cold Brew Martinis
  • glasses of elderberry cordial
    Elderberry Cordial Recipe
  • a glass with a foamy pink cocktail topped with cherries and limes
    Cherry Whiskey Sour

Pumpkin and Sage Risotto

a bowl or risotto with pumpkin and parmesan

This pumpkin and sage risotto is rich and creamy, infused with the comforting flavors of pumpkin, mushrooms, and sage. It's a dish that feels sophisticated yet is simple enough to prepare any night of the week.

bowl of risotto with butter and cheese

Risotto: the dish that sounds fancy, feels luxurious, and carries a reputation for being a challenge. For the longest time, I avoided making it, assuming it required the skills of an Italian chef. Then, I decided to finally give it a try-and discovered that risotto isn't nearly as intimidating as it seems.

With a bit of stirring and a handful of pantry staples, you can create a meal that feels like a special occasion, even on a weeknight. And when you add pumpkin and sage, you get a bowl of creamy, cozy, fall-flavored perfection.

If you've been hesitant to try risotto, let this recipe be your reason to give it a try. It's easier than you think, endlessly versatile, and guaranteed to impress-yourself included. So grab your ladle, pour yourself a glass of wine (saving some for the pot, of course), and let's get started.

[feast_advanced_jump_to]

🥰 Why you'll love this recipe

  1. It's warm and comforting.
  2. Pumpkin puree makes the risotto extra creamy.
  3. Sage and mushrooms add satisfying herby and earthy flavors.

Looking for more pumpkin and winter squash recipes? Try these next:

  • Pumpkin Couscous Salad
  • Maple Roasted Pumpkin
  • Roasted Pumpkin Pasta with Sage
  • Squash Tartlets

🌿 Ingredients

Change your risotto ingredients with the seasons. Fresh peas and asparagus are ideal for spring, while sun-dried tomatoes, corn, and basil make a great combination for summer. As the weather cools, pumpkin, sage, and mushrooms, as featured in this recipe, are perfect for the fall and winter seasons.

ingredients for making risotto on a wooden background

Key Ingredients

  • Pumpkin puree: Either freshly roasted and pureed or canned. If using canned, be sure to get pure pumpkin puree and not pumpkin pie mix.
  • Fresh sage leaves: The earthy, herby, slightly woody notes of sage complement the sweetness of pumpkin and winter squash so well.
  • Mushrooms: You'll need about 12 ounces of mushrooms of any variety you prefer.
  • Arborio rice: The go-to rice for making risotto. It's a short, plump grain of rice that contains a lot of starch. Starch is necessary because it breaks down and creates the essential creaminess of the risotto. Arborio rice is commonly found in grocery stores.
  • White wine: Any white wine is fine here. Just something to add a hint of sharpness and brightness to the final dish.
  • Parmesan cheese: A classic risotto ingredient that helps add creaminess.
  • Broth: Your favorite vegetable or chicken broth is perfect. I most often use Better Than Bouillon concentrates, which have excellent flavor.
  • Nutmeg: Adds a hint of extra flavor that keeps people guessing.

See the recipe card below for the complete list of ingredients and quantities.

🌾 Substitutions & Variations

  • Instead of mushrooms: Try roasted cauliflower, chickpeas, and/or sundried tomatoes.
  • In place of pumpkin puree, try butternut squash or any other winter squash puree.
  • Don't want to use wine? Replace it with a mild hard cider or vegetable broth and a splash of lemon juice.
  • Add some protein by stirring in chickpeas, shredded chicken, or turkey. You could also use the risotto as a base for serving seafood, pork, or steak.
  • Top with chopped nuts for added crunch, such as toasted walnuts or pecans.
  • To make risotto with other varieties of rice and grains, here are some ideas.

🥄 Instructions

How to make this pumpkin sage risotto.

pumpkin being whisked into a pot of broth
  1. Step 1: Whisk the pumpkin puree into a pot of broth. Bring this to a low simmer.
onions and mushrooms being sliced on a cutting board
  1. Step 2: Chop the onions, garlic, and sage. Wipe any dirt off of the mushrooms and thinly slice them.
onions sauteeing in a pot
  1. Step 3: Melt the butter and add the onions. Cook about 5 minutes over medium heat until softened and golden.
mushrooms being added to a pot
  1. Step 4: Add the mushrooms, garlic, and sage to the pot. Stir to coat, then cook for an additional 5 minutes.
rice being added to mushrooms and onions
  1. Step 5: Stir in the rice and toast for about a minute.
white wine being poured into pot
  1. Step 6: Pour in the white wine and cook for 2 minutes, or until the liquid is absorbed.
broth being ladled into the pot of risotto
  1. Step 7: Start adding a couple of ladlefuls of broth to the pot and stir as it is absorbed by the rice. Keep the heat between medium and low.
stirring broth into risotto
  1. Step 8: When it is mostly absorbed, stir in another half ladle of broth and continue to stir. Continue to repeat the process of adding broth and periodically stirring.
pumpkin risotto in pot with wooden spoon
  1. Step 9: After 15 - 20 minutes of stirring and adding broth, taste the risotto to check for doneness. Cook it until al dente, leaving a little chew to the rice.
parmesan cheese being poured into risotto
  1. Step 10: Stir in the parmesan cheese. Top with additional sage and butter, and serve.

🌟 Helpful Tips

  • Refrain from rinsing the arborio rice. When you rinse rice, you're washing away the starch, which is needed here to create the creaminess of the risotto.
  • Don't wander away from the stove once you start adding rice and broth to the pan. You really do need to keep stirring about every 30 seconds or so. Otherwise, the liquid can dry up quickly, and the rice will stick to the bottom of the pan.
  • The broth will be absorbed by the rice more quickly at first and will start to take longer as it cooks.
  • Adding hot or warm broth to the pan helps to reduce the cooking time, so don't skip the step of heating up the broth and pumpkin puree.

🍲 Equipment

Cook the risotto in a heavy-bottomed pot, such as a Dutch oven. A thin pot may cause the risotto to stick and burn if it gets too hot and the pan dries out.

🥡 Storage

Leftover risotto can be stored in an airtight container in the fridge for up to four days. When reheating, add a splash of broth or water to prevent it from drying out over time. Risotto may also be frozen for up to three months.

🙋🏻‍♂️ FAQ

What to pair with pumpkin risotto?

Pair this risotto with roasted chicken, turkey, pork, or vegetables such as Brussels sprouts or asparagus. However, it makes a filling meal on its own.

Why is risotto so creamy?

Risotto gets much of its creaminess from the starch of Arborio rice.

Do you really need to stir risotto constantly?

Risotto needs consistent stirring, but not constant. Gently stir the risotto about every 30 seconds, especially when the pan looks dry and after adding broth.

🥩 Pairing

Any of these dishes would go well with this risotto.

  • plate of grilled herb pork chops
    Grilled Pork Chops with Herbs
  • large plate of arugula spinach salad with chicken and dressing on side
    Arugula and Spinach Salad with Grilled Chicken
  • plate of grilled chicken with bourbon BBQ sauce
    Grilled Bourbon Chicken
  • roasted brussels sprouts in a dish
    Honey Sriracha Brussels Sprouts

🎃 Related Recipes

Looking for more pumpkin and winter squash recipes? Try these:

  • plate of roasted pumpkin wedges
    Maple Roasted Pumpkin
  • bowl of butternut chicken soup
    Butternut Squash Chicken Soup
  • a plate of crostini topped with butternut squash, sage, and ricotta
    Butternut Squash Crostini Appetizer
  • a delicata pizza on parchment paper
    Delicata Pizza with Ricotta and Bacon

Leftover Turkey Enchiladas

Reinvent your Thanksgiving dinner with these easy leftover turkey enchiladas featuring turkey, pumpkin puree, and cranberry sauce. They're also delicious any time of year for a comforting dish with a bit of Thanksgiving inspiration.

turkey and pumpkin enchiladas with cheese in a dish being served

We all know that the best part of Thanksgiving is after the family has gone, the dishes are washed, and you can finally lounge around in sweatpants and dive into the leftovers.

The first round or two is nice, but after that, we need something more than sandwiches. Soups are an excellent choice because they're easy to incorporate a variety of leftovers, and those extra items that maybe you bought too many of and need to use up - like onions, sweet potatoes, and herbs.

[feast_advanced_jump_to]

Even when I'm not cooking the Thanksgiving dinner, I tend to make a few of the traditional dishes after the holiday so I can have some of what I like and then enjoy the leftovers. I like to be creative and reinvent leftovers into different meals.

It's like a puzzle seeing how to combine leftovers to form something new and interesting and not just a rehash of the same flavors and textures. Mini turkey pot pies and stuffing fritters are a couple of my biggest leftover successes. Though one year a frittata with one too many ingredients turned out to be a big fail. So it's not always a win.

This year, since I wasn't cooking the holiday dinner, I roasted up some turkey thighs simply for the purpose of having leftovers. I love cranberry sauce, so I made some of that, too. And guess what? These leftover turkey enchiladas are a winner. I wouldn't be sharing them if not, right? (No seriously, I wouldn't.)

They're filled with turkey meat and cranberry sauce, along with plenty of cheddar cheese. They're wrapped up in Vermont Tortilla Company corn tortillas and then covered in a spicy-sweet pumpkin sauce.

What I like about these enchiladas is that they taste like something completely new. While they only incorporate two leftovers - turkey and cranberry sauce - they have a Thanksgiving feeling to them while still feeling like you're enjoying something fresh.

Even if it's not Thanksgiving, I think these enchiladas are delicious any time of year. Improvise with the leftovers you do have and make them your own!

🍗 Key Ingredients

all of the ingredients for the leftover turkey enchiladas

To make these tasty leftover turkey enchiladas, you'll need:

  • leftover turkey meat
  • cranberry sauce
  • shredded cheddar cheese
  • pumpkin puree
  • corn tortillas
  • broth
  • an onion
  • cream
  • fresh sage
  • spices

I love to use Vermont Tortilla Company organic corn tortillas. They're made here in Vermont and include just three ingredients, including locally sourced organic corn. I was excited to learn about a small business making tortillas in our rural New England state and was hooked ever since I found them at my local food co-op a few years ago.

What's even cooler, is that they use a traditional ancient process called nixtamalization where the corn is soaked in a lime solution that removes the skin of the kernel. The result is a softer and more nutritious dough than most other corn tortillas in the United States.

🌯 Instructions

cranberry sauce, shredded cheese and leftover turkey for the enchiladas

Start by tossing the turkey, cheese, and cranberry sauce together in a bowl.

the pumpkin enchilada sauce in a small pan

Then prepare the pumpkin enchilada sauce. Cook the onions, garlic, pepper, and ginger in olive oil until tender. Mix in the broth, pumpkin, nutmeg, cinnamon and after a couple of minutes. After simmering for a few minutes, add in some cream.

a baking dish with pumpkin enchilada sauce

Spread some of this sauce across the bottom of a baking dish.

turkey enchilada filling being spread across tortillas

Assemble the enchiladas by spooning filling onto each tortilla.

turkey pumpkin enchiladas in a baking dish

Roll up the tortillas and place the assembled enchiladas into your baking dish on top of the sauce.

enchiladas with pumpkin sauce being spread over top

Spread the remaining pumpkin enchilada sauce across the top of the turkey enchiladas.

cheese being sprinkled over the top of the turkey enchiladas

Sprinkle the remaining cheese over the enchiladas.

baked turkey and pumpkin enchiladas ready for serving

Bake the enchiladas in a 350-degree oven for about 30 minutes until the cheese is melted and everything is heated through. Top with some chopped parsley and serve!

🐓 Substitutions

Here are a few substitutions to change up this leftover turkey enchilada recipe. Let me know in the comments below if you give any of these a try.

  • Pumpkin- Instead of pumpkin puree, try sweet potato puree or any winter squash puree will work, such as butternut squash.
  • Turkey- These would also be great with chicken instead of turkey
  • Herbs and Spices - Use your favorite herbs and spices instead of the ones I suggest to change up the flavors here. Rosemary and thyme could be good in place of the sage. Instead of cinnamon and nutmeg, try cumin and chili powder. Or maybe some curry powder. You've got options.
  • Cranberry sauce - I know that not everyone loves cranberries as much as me. So if its not your thing, or it's the middle of summer and cranberry sauce isn't realistic right now, then just leave it out.

📖 Variations

  • Spicier - Add another tablespoon or two of adobo peppers and sauce. You could also serve the enchiladas topped with some sliced jalapeno.
  • Vegetarian - Replace the turkey with black beans.
  • Make it a meal - serve with rice and vegetable side.

🥡 Storage

Store these enchiladas covered in the fridge for 2-3 days. You can also store a dish full of them, unbaked, in the freezer for up to 3 months. Just add 10 minutes or so to your baking time.

🍳 Other Recipes to Try

  • Pumpkin Pasta with Sage and Sausage
  • Homemade Cranberry Sauce with Orange
  • Chili Rellenos Casserole
  • « Previous Page
  • 1
  • 2
  • 3
  • 4
  • Next Page »
man eating pizza in italy

Hey, I'm Steve

Here you'll discover delicious recipes featuring fresh, whole foods inspired by my garden and local New England farms and producers.

About Me

Spring Eats

  • slices of rhubarb quick bread with butter
    Rhubarb Banana Bread
  • a stack of grilled cheese sandwiches with goat cheese
    Goat Cheese Grilled Cheese
  • strawberry homemade pop tarts on tray
    Strawberry Puff Pastry Pop Tarts
  • a plate of artichoke pasta
    Artichoke Pesto Pasta
  • jars of date overnight oats
    Cinnamon Overnight Oats with Dates
  • cheese scones on plate with chives
    Easy Cheese and Chive Scones
  • a large plate of bok choy, tofu, and radishes with dressing
    Bok Choy with Tofu Salad
  • a plate of chamomile cookies with flowers on side
    Chamomile Cookies
  • a glass of frozen matcha latte on a countertop with straw
    Frozen Matcha Latte
  • a bowl of soup with celery and leeks, and potatoes
    Creamy Celery Leek Soup with Croutons
  • salmon over peas and potatoes
    Salmon with Pea Purée
  • two plates of pasta with peas and mint pesto with a side of peas and drink glasses
    Pasta and Peas with Mint Pistachio Pesto

Footer

  • About
  • Recipe Index
  • Privacy Policy
  • ↑ back to top

Copyright © 2026 What Steve Eats